- in ပြတင်းပေါက် by admin
15 Ways to Speed Up a Slow Windows 10 PC

If your PC running Windows 10 is becoming slow or constantly lags, you’re at the right place as today we will fix the issue altogether. Although Windows 10 is one of the best-operating systems out there, with time it has become slow and now your PC lags a lot, worse of all it freezes suddenly. You will notice that when you installed a new copy of Windows, the system was a lot faster as compared to the current state.
Now the lagging or slow PC issue is generally caused by performance issues under Windows 10, but sometimes it can also be caused by bad memory (RAM), damaged hard disk, virus or malware etc. So without wasting any time let’s see how to actually Seed Up a Slow Windows 10 PC with the help of below-listed methods.
15 Ways to Speed Up a Slow Windows 10 PC
တစ်စုံတစ်ခု မှားယွင်းသွားပါက ပြန်လည်ရယူသည့်အမှတ်ကို ဖန်တီးရန် သေချာပါစေ။
Method 1: Disable Animation and adjust for best performance
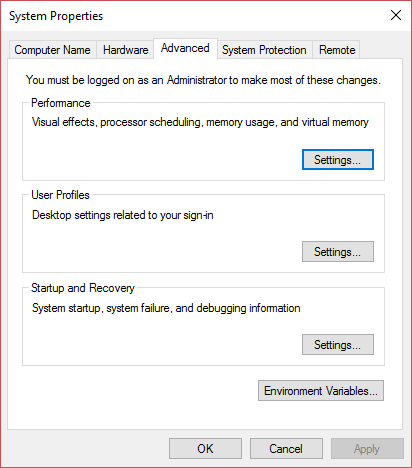
1. Windows Key + R ကို နှိပ်ပြီး ရိုက်ထည့်ပါ။ sysdm.cpl System Properties ကိုဖွင့်ရန် Enter ကိုနှိပ်ပါ။

၂ အဆင့်မြင့် tab ထို့နောက်ကိုနှိပ်ပါ သတ်မှတ်ချက်များ အောက် performance ။
3. Visual Effects အောက်တွင် အမှန်ခြစ် အမှတ်အသား “အကောင်းဆုံးစွမ်းဆောင်မှုများအတွက် Adjust” would automatically ကာတွန်းအားလုံးကို ပိတ်ပါ။
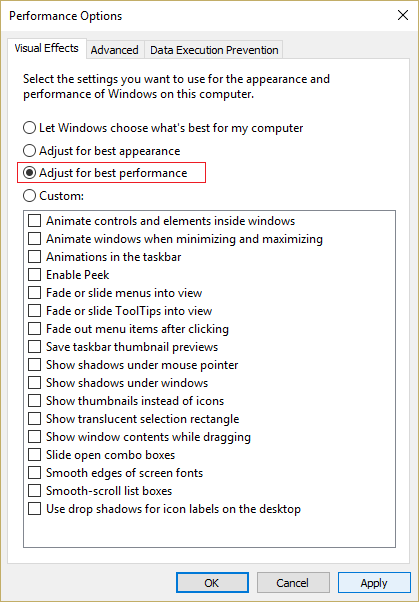
4. Apply ကိုနှိပ်ပြီး OK ကိုနှိပ်ပါ။
5. အပြောင်းအလဲများကို သိမ်းဆည်းရန်နှင့် သင်လုပ်ဆောင်နိုင်သည်ကို ကြည့်ရှုရန် သင့် PC ကို ပြန်လည်စတင်ပါ။ နှေးကွေးသော Windows 10 PC ကို အရှိန်မြှင့်ပါ။
Method 2: Disable Unnecessary Startup Programs
1. Press Ctrl + Shift + Esc keys together to open Task Manager and then switch to စတင်တည်ထောင်သည်။
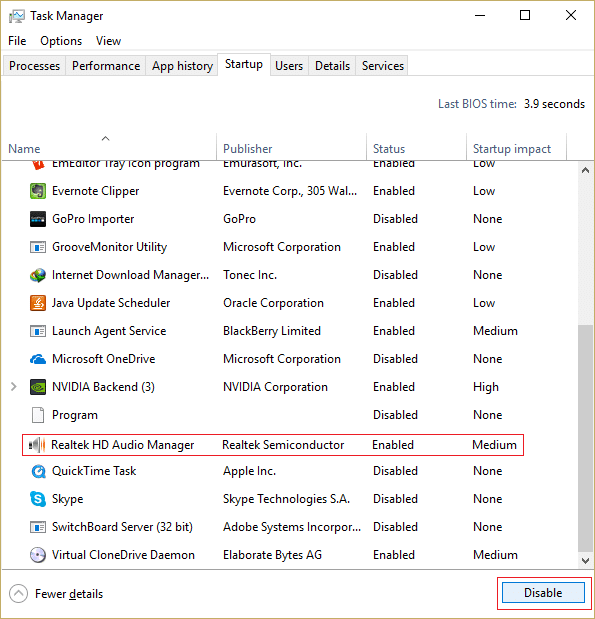
2. From the list, select the programs you don’t use and then click on the Disable button.
3. Do this for every unnecessary program, as you will only be able to disable one program at a time.

4. Close Task Manager and reboot your PC to save changes.
နည်းလမ်း 3- CCleaner နှင့် Malwarebytes ကိုဖွင့်ပါ။
1 ။ Download လုပ်ပြီးအင်စတောလုပ်ပါ CCleaner ကို & Malwarebytes
2. Malwarebytes ကိုဖွင့်ပါ။ အန္တရာယ်ရှိသောဖိုင်များအတွက် သင့်စနစ်အား စကင်န်ဖတ်ခွင့်ပြုပါ။ Malware ကို တွေ့ရှိပါက ၎င်းတို့ကို အလိုအလျောက် ဖယ်ရှားပါမည်။

3. ယခု CCleaner ကိုဖွင့်ပြီး ရွေးချယ်ပါ။ စိတ်ကြိုက်သန့်ရှင်း.
4. စိတ်ကြိုက်သန့်ရှင်းမှုအောက်တွင်၊ ကိုရွေးချယ်ပါ။ Windows တက်ဘ် နှင့် checkmark defaults ကိုနှိပ်ပါ။ သုံးသပ်ကြည့်ရှု.

5. Analyze ပြီးသည်နှင့်၊ သင်သည် ဖျက်ပစ်မည့်ဖိုင်များကို ဖယ်ရှားရန် သေချာပါစေ။

၆။ နောက်ဆုံး၊ ကိုနှိပ်ပါ သန့်ရှင်းရေးစက်ကိုဖွင့် ခလုတ်ကိုနှိပ်ပြီး CCleaner ၏သင်တန်းကိုလည်ပတ်စေပါ။
7. သင့်စနစ်အား ပိုမိုသန့်ရှင်းစေရန်၊ Registry tab ကိုရွေးပါ။နှင့် အောက်ပါတို့ကို စစ်ဆေးကြောင်း သေချာပါစေ။

8 ။ အဆိုပါပေါ်တွင်ကလစ်နှိပ်ပါ ပြဿနာများအတွက် စကင်န်ဖတ်ပါ။ ခလုတ်ကိုနှိပ်ပြီး CCleaner ကိုစကင်န်ဖတ်ခွင့်ပြုပါ၊ ထို့နောက်ကိုနှိပ်ပါ။ ရွေးချယ်ထားသော ပြဿနာများကို ဖြေရှင်းပါ။ ခလုတ်ကို။

9. CCleaner က "မှတ်ပုံတင်ခြင်းသို့ အရန်ကူးယူမှုများ ပြုလုပ်လိုပါသလား။" Yes ကိုရွေးပါ.
10. သင်၏ အရန်သိမ်းခြင်း ပြီးသည်နှင့်၊ ပေါ်တွင် နှိပ်ပါ။ ရွေးချယ်ထားသော ပြဿနာအားလုံးကို ဖြေရှင်းပါ။ ခလုတ်ကို။
11. ပြောင်းလဲမှုများကို သိမ်းဆည်းရန် သင့် PC ကို ပြန်လည်စတင်ပါ။
နည်းလမ်း 4- Disk Cleanup ကို Run ပြီး Error Checking လုပ်ပါ။
1. Go to This PC or My PC and right-click on the C: drive to select Properties ကို။
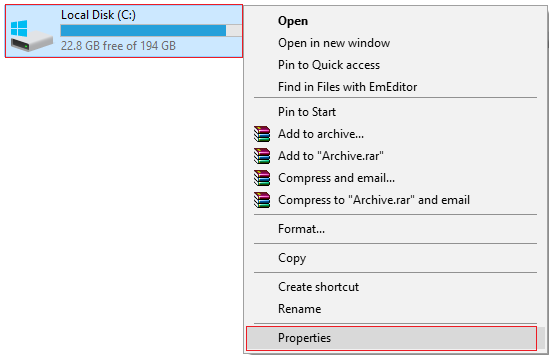
2. ယခုမှ My Properties အပေါ်ကိုနှိပ်ပါ disk Cleanup under capacity.
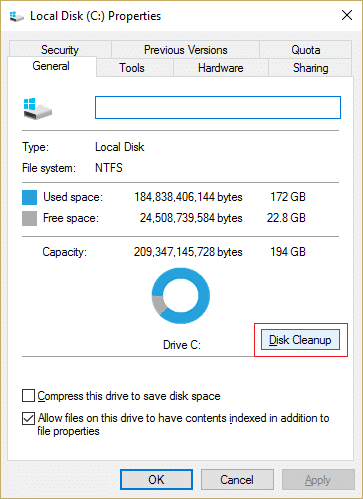
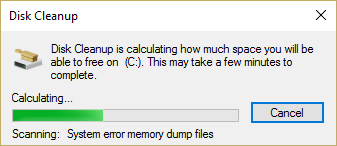
3. It will take some time to calculate how much space Disk Cleanup will free.
4. ယခုနှိပ်ပါ။ စနစ်ကဖိုင်တွေကို clean up in the bottom under Description.
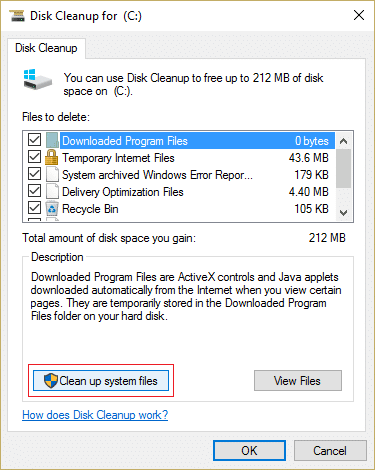
5. In the next window, make sure to select everything under ဖျက်ပစ်ရန်ဖိုင်များ and then click OK to run Disk Cleanup. မှတ်စု: We are looking for “Previous Windows Installation(s)"နှင့်"ယာယီ Windows တပ်ဆင်ခြင်း ဖိုင်များ” if available, make sure they are checked.
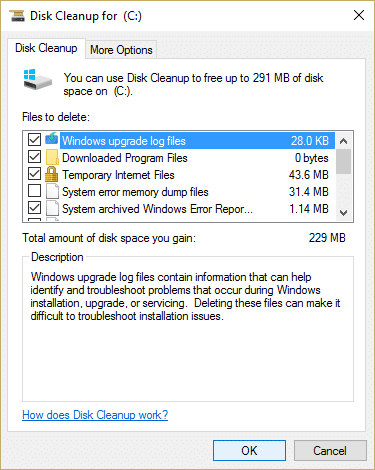
6. Wait for Disk Cleanup to complete and see if you can Speed Up a Slow Windows 10 PC, မဟုတ်ရင် ဆက်သွားပါ။
7 ။ ဖွင့်လှစ် command Prompt ကို. အသုံးပြုသူသည် ရှာဖွေခြင်းဖြင့် ဤအဆင့်ကို လုပ်ဆောင်နိုင်သည်။ 'cmd' ပြီးနောက် Enter ကိုနှိပ်ပါ။

8. In the cmd window type the following command and hit Enter:
chkdsk ကို C: / f / r / x ကို

မှတ်စု: အထက်ဖော်ပြပါ command တွင် C: သည် disk ကိုစစ်ဆေးလိုသော drive ဖြစ်သည်၊ /f သည် drive နှင့်ဆက်စပ်သောအမှားအယွင်းများကိုပြုပြင်ရန်ခွင့်ပြုချက် chkdsk ၏အလံကိုကိုယ်စားပြုသည်၊ /r သည် chkdsk သည်မကောင်းတဲ့ကဏ္ဍများကိုရှာဖွေပြီးပြန်လည်ရယူခြင်းနှင့် /x လုပ်ငန်းစဉ်မစတင်မီ drive ကိုဖြုတ်ပစ်ရန် check disk အား ညွှန်ကြားသည်။
9. နောက် system reboot တွင် scan ကို အချိန်ဇယားဆွဲခိုင်းလိမ့်မည်၊ Y အမျိုးအစား Enter ကိုနှိပ်ပါ။
Please keep in mind that CHKDSK process can take up a lot of time as it has to perform many system-level functions, so be patient while it fixes system errors and once the process is finished it will show you the results.
နည်းလမ်း 5- အမြန်စတင်ခြင်းအား ပိတ်ပါ။
1. Window Key + R ကိုနှိပ်ပြီး control လို့ရိုက်ပြီး Enter ကိုနှိပ်ပါ။ ထိန်းချုပ်ရာနေရာ။

2 ။ အပေါ်ကိုကလစ်နှိပ်ပါ Hardware နဲ့အသံ ထို့နောက်ကိုနှိပ်ပါ Power Options ကို.
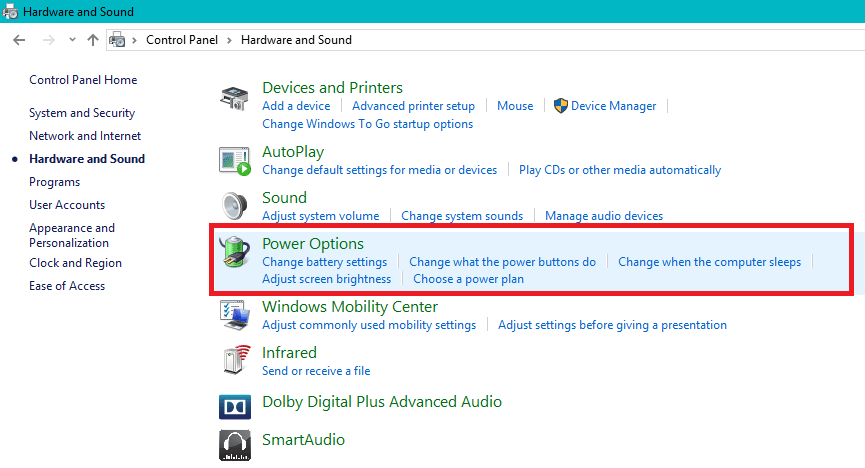
3. Then from the left window pane select "ပါဝါခလုတ်အဘယ်သို့ပြုမည်အရာကိုရွေးချယ်ပါ။"

၂ "လက်ရှိတွင်မရနိုင်ပါဖြစ်ကြောင်း setting များကိုပြောင်းလဲပါ။"

5. “အမှန်ခြစ်ဖြုတ်ပါအစာရှောင်ခြင်း startup ကိုဖွင့်” ပြီးလျှင် Save changes ကိုနှိပ်ပါ။
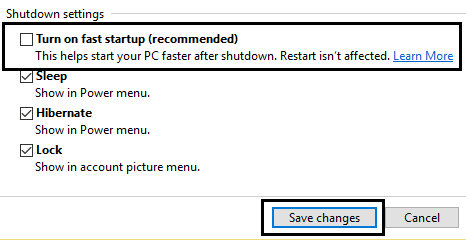
6. အပြောင်းအလဲများကို သိမ်းဆည်းရန်နှင့် သင်လုပ်ဆောင်နိုင်သည်ကို ကြည့်ရှုရန် သင့် PC ကို ပြန်လည်စတင်ပါ။ နှေးကွေးသော Windows 10 PC ကို အရှိန်မြှင့်ပါ။
နည်းလမ်း ၁ - Update Drivers
1. Windows Key + R ကို နှိပ်ပြီး ရိုက်ထည့်ပါ။ devmgmt.msc Device Manager ကိုဖွင့်ရန် Enter ကိုနှိပ်ပါ။

2. Next, make sure to Right-click နှိပ်ပြီး on any device with a yellow exclamation mark next to it.
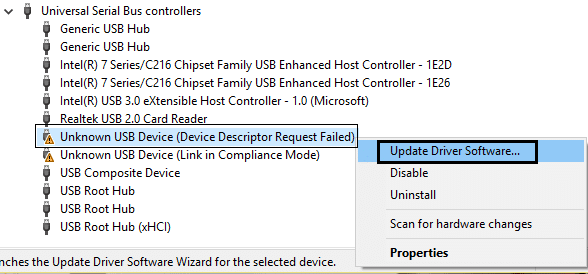
3 ။ ကို Select လုပ်ပါ ယာဉ်မောင်းကိုအပ်ဒိတ်လုပ် ပြီးတော့အပေါ်ကိုကလစ်နှိပ်ပါ မွမ်းမံထားသောယာဉ်မောင်းဆော့ဖ်ဝဲကိုအလိုအလျောက်ရှာဖွေပါ

4. After the update, restart your PC and see if you’re able to fix the issue.
5. If not, then again right-click and select ယာဉ်မောင်းကိုအပ်ဒိတ်လုပ်။
6. This time, select “ကားမောင်းသူ software ကိုအဘို့အကြှနျုပျ၏ကွန်ပျူတာ Browse ။"

7. ထို့နောက် “ကိုနှိပ်ပါကျွန်ုပ်၏ကွန်ပြူတာတွင် ရရှိနိုင်သော ဒရိုက်ဗာများစာရင်းမှ ကျွန်ုပ်ကို ရွေးပါရစေ။"

8. စာရင်းထဲမှ သင့်လျော်သော ယာဉ်မောင်းကို ရွေးချယ်ပြီး Next ကို နှိပ်ပါ။
မှတ်စု: It’s recommended you try the above process with each listed device driver.
9. သင့် PC ကို reboot လုပ်ပြီး သင်လုပ်နိုင်လားဆိုတာ ကြည့်လိုက်ပါ။ နှေးကွေးသော Windows 10 PC ကို အရှိန်မြှင့်ပါ။
Method 7: Run System Maintenance
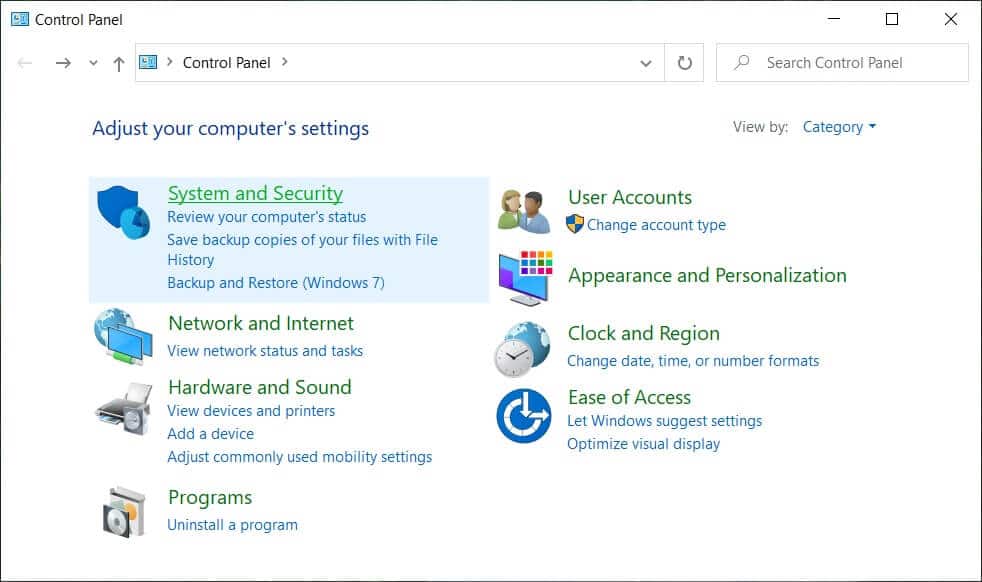
1. ကိုရှာဖွေပါ။ ထိန်းချုပ်ရာနေရာ from the Start Menu search bar and click on it to open the Control Panel.

၂ စနစ်နှင့်လုံခြုံရေး။
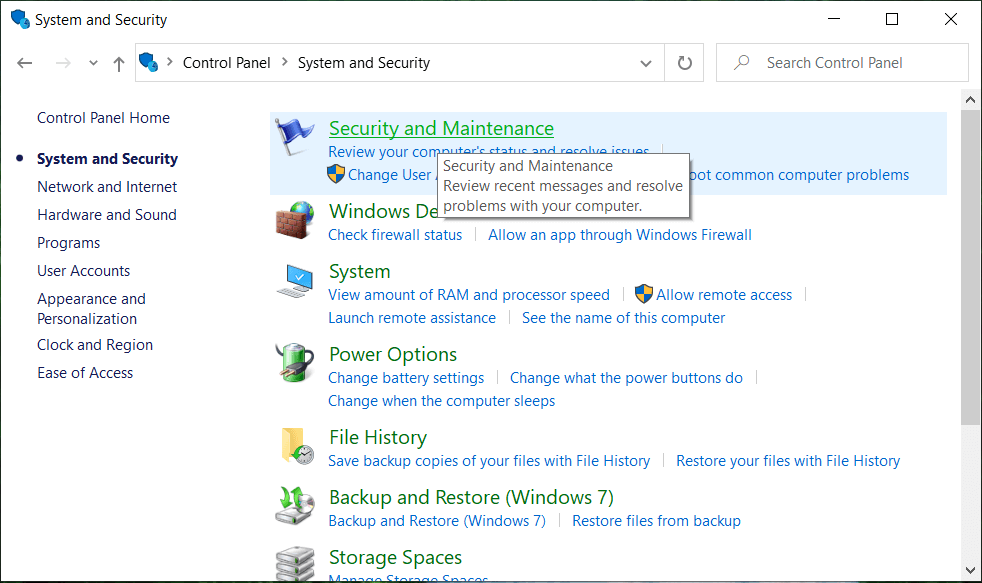
၂၊ နောက်ကိုနှိပ်ပါ လုံခြုံရေးနှင့် ပြုပြင်ထိန်းသိမ်းရေး။
4. Expand Maintenance and under Automatic Maintenance click on “ပြုပြင်ထိန်းသိမ်းမှုစတင်ပါ။"။
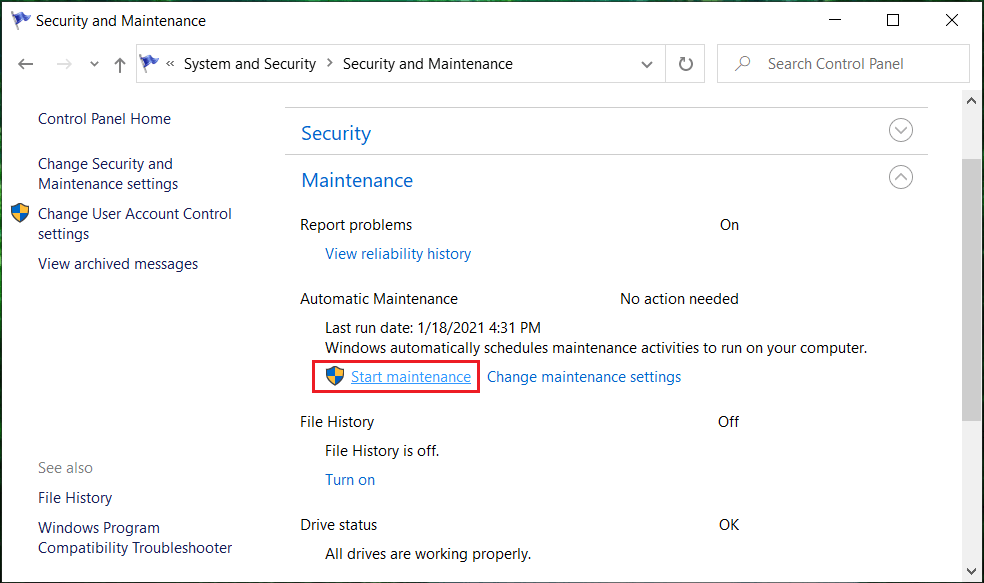
5. Let System Maintenace runs and sees if you’re able to နှေးကွေးသော Windows 10 PC ကို အရှိန်မြှင့်ပါ။မဟုတ်ရင် ဆက်လုပ်ပါ။
Method 8: Defragment Your Hard Disk
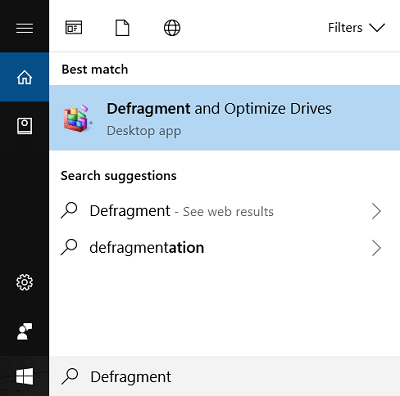
1 ။ ပုံစံ Defrag Windows Search box မှာ ကလစ်နှိပ်ပါ။ Defragment နဲ့ Drives တွေကိုပိုကောင်းအောင်လုပ်ပါ။
2 ။ ယင်းကို Select လုပ်ပါ drives တွေကို one by one and click ခွဲခြမ်းစိတ်ဖြာ။
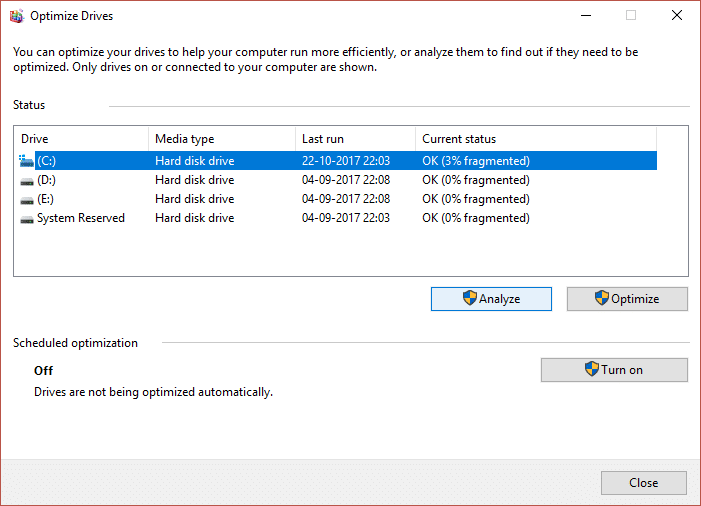
3. Similarly, for all the listed drives click ပိုကောင်းအောင် လုပ်ပါ။
မှတ်စု: ၎င်းသည် ၎င်း၏သက်တမ်းကို လျှော့ချနိုင်သောကြောင့် SSD Drive ကို Defrag မလုပ်ပါနှင့်။
4. အပြောင်းအလဲများကို သိမ်းဆည်းရန်နှင့် သင်လုပ်ဆောင်နိုင်သည်ကို ကြည့်ရှုရန် သင့် PC ကို ပြန်လည်စတင်ပါ။ နှေးကွေးသော Windows 10 PC ကို အရှိန်မြှင့်ပါ။မဟုတ်ရင် ဆက်လုပ်ပါ။
နည်းလမ်း 9- System Maintenance Troubleshooter ကိုဖွင့်ပါ။
1. ကိုရှာဖွေပါ။ ထိန်းချုပ်ရာနေရာ from the Start Menu search bar and click on it to open the Control Panel.
2. Troubleshoot ကိုရှာပြီး ကလစ်နှိပ်ပါ။ ပြသာနာရှာဖွေရှင်းပေးခြင်း။

3. နောက်တစ်ခု၊ ဘယ်ဘက်အကန့်ရှိ view all ကိုနှိပ်ပါ။
4. ကိုနှိပ်ပြီး run ပါ။ စနစ်ထိန်းသိမ်းခြင်းအတွက် ပြဿနာဖြေရှင်းသူ.

5. The Troubleshooter may be able to Speed Up a Slow Windows 10 PC.
Method 10: Disable Unwanted Extensions (Web Browser)
Extensions are a handy feature in chrome to extend its functionality, but you should know that these extensions take up system resources while they run in the background. In short, even though the particular extension is not in use, it will still use your system resources. So it’s a good idea to remove all the unwanted/junk extensions you might have installed earlier.
1. Google Chrome ကိုဖွင့်ပြီး ရိုက်ထည့်ပါ။ chrome: // extensions တွေကို လိပ်စာထဲမှာ Enter ခေါက်ပါ။
2. ယခု ဦးစွာ မလိုအပ်သော extension များအားလုံးကို disable လုပ်ပြီးနောက် delete icon ကိုနှိပ်ခြင်းဖြင့် ၎င်းတို့ကို ဖျက်လိုက်ပါ။
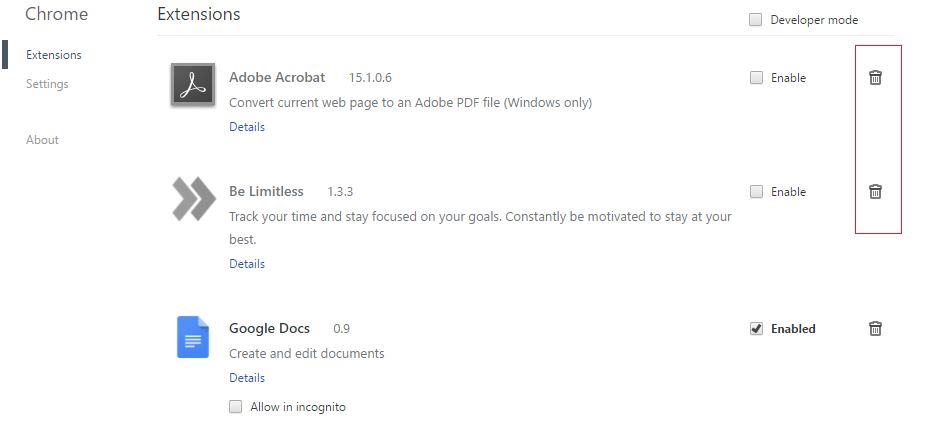
3. Restart Chrome and see if this help in making your PC faster.
Method 11: Change PageFile Size
1 ။ ပုံစံ စွမ်းဆောင်ရည် in the Windows Search box and then click on “Windows ၏အသွင်အပြင်နှင့်လုပ်ဆောင်ချက်ကိုချိန်ညှိပါ။"
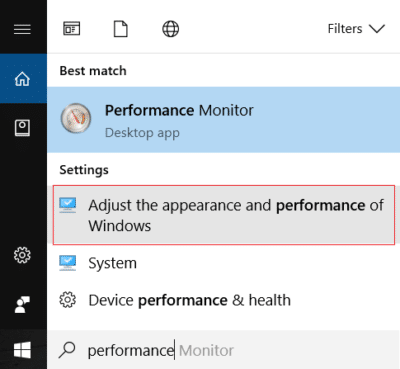
2. Switch to the Advanced tab and then click the ပွောငျးလဲ အောက်မှာ button ကို Virtual Memory။

3. အမှန်ခြစ်ဖြုတ်ပါ။ "ယာဉ်မောင်းအားလုံးအတွက် စာမျက်နှာ ဖိုင်အရွယ်အစားကို အလိုအလျောက် စီမံခန့်ခွဲပါ။။ "
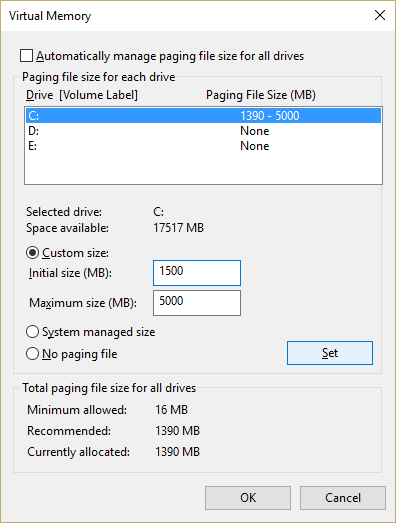
4. Highlight the drive on which Windows 10 is installed and then select the စိတ်ကြိုက်အရွယ်အစား။
၄ Recommended values for fields: Initial size (MB) and Maximum size (MB).
6. Click OK, then click Apply followed by OK
7.Restart your PC and see if you’re able to နှေးကွေးသော Windows 10 PC ကို အရှိန်မြှင့်ပါ။
Method 12: Disable Windows 10 Tips
1. Settings ကိုဖွင့်ရန် Window Key + I ကို နှိပ်ပြီး ၎င်းကို နှိပ်ပါ။ System ကို။

2. ဘယ်ဘက် မီနူးမှ ရွေးပါ။ အကြောင်းကြားချက်များနှင့် လုပ်ဆောင်ချက်များ။
3. ပိတ်ပါ "အတွက် ခလုတ်Get tips, tricks, and suggestions as you use Windows ။ "
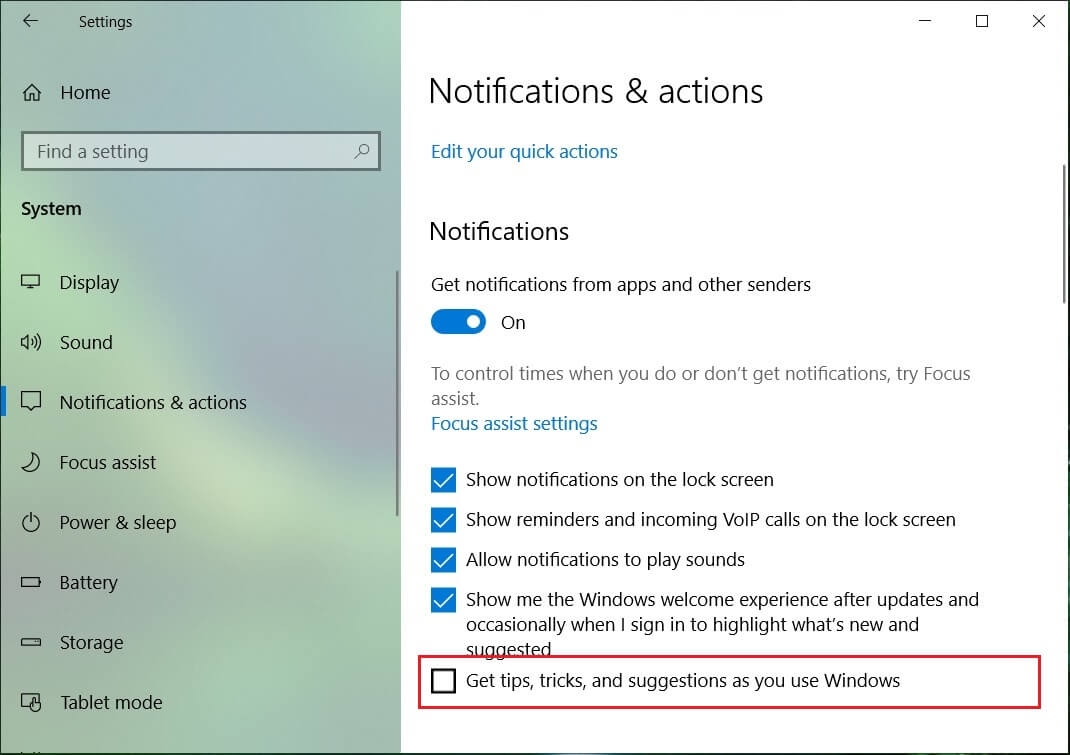
4. သင့် PC ကို ပြန်လည်စတင်ပါ။
Method 13: Set your Power Plan to High Performance
၂ ပါဝါအိုင်ကွန် ထို့နောက် ရွေးသည်။ Power Options ကို။

2 ။ အပေါ်ကိုကလစ်နှိပ်ပါ Show additionals plans နှင့်ကို select မြင့်မားသောစွမ်းဆောင်ရည်။
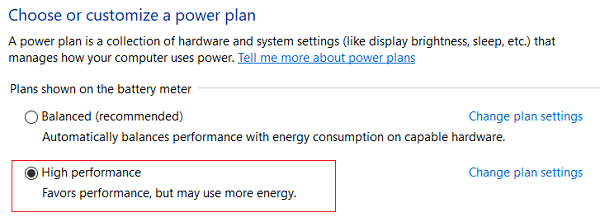
3. Close Settings and restart your PC.
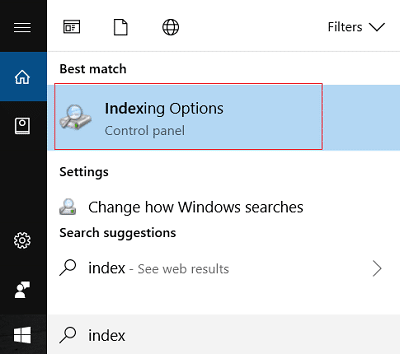
နည်းလမ်း 14- Search Indexing ကို ပိတ်ပါ။
1 ။ ပုံစံ အညွှန်းကိန်း in Windows Search then clicks on Indexing Options ကို။
2 ။ အပေါ်ကိုကလစ်နှိပ်ပါ modify နှင့်အပေါ်ကိုကလစ်နှိပ်ပါ Show all locations.
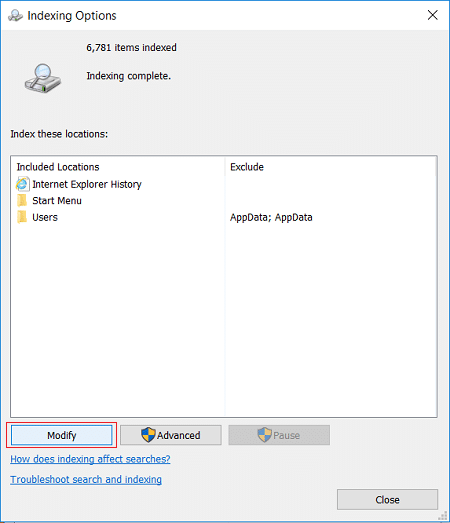
3 ။ သေချာအောင်လုပ်ပါ uncheck all of your disk drives and click OK.

4. Then click Close and reboot your PC. Also, see if you’re able to နှေးကွေးသော Windows 10 PC ကို အရှိန်မြှင့်ပါ။မဟုတ်ရင် ဆက်လုပ်ပါ။
Method 15: Add more RAM and SSD
If your PC is still running slow and have tried all other options, you may need to consider adding more RAM. Please remove the old RAM and then install the new RAM’s to increase your system performance.
But if you are still facing the occasional lags or system freezes, then you may also consider adding an external SSD to speed up your PC.
အကြံပြုထားသည်:
ဒါပဲ မင်းအောင်မြင်သွားပြီ Seed Up a Slow Windows 10 PC ဒါပေမယ့် ဒီပို့စ်နဲ့ပတ်သတ်ပြီး မေးစရာတွေရှိသေးရင် comment ရဲ့ကဏ္ဍမှာ မေးနိုင်ပါတယ်။