- in ပြတင်းပေါက် by admin
Windows 3 တွင် ဗီဒီယိုမှ အသံကို ဖယ်ရှားရန် နည်းလမ်း 10 ခု

If you are looking to remove audio from a video that you recently shot or downloaded, you are at the right place on the internet. There can be a number of reasons why one would want to get rid of the audio portion of a video, for example, too much-unwanted noise or distracting voices in the background, prevent viewers from knowing certain sensitive information, to replace the soundtrack with a new one, etc. Removing audio from a video is actually quite an easy task. Earlier, Windows users had a built-in application called ‘movie Maker’ for this very task, however, the application was discontinued by Microsoft in the year 2017.
The Windows Movie Maker was replaced by a Video Editor built into the Photos application with several extra features. Apart from the native editor, there are also a plethora of third-party video editing programs that can be used if users need to perform any advanced editing. Although, these applications can be quite intimidating at first, especially for average users. In this article, we have put together 3 different ways via which you can remove the audio portion of a video on Windows 10.
Windows 3 တွင် ဗီဒီယိုမှ အသံကို ဖယ်ရှားရန် နည်းလမ်း 10 ခု
We will be starting off by explaining how to remove audio from video using the native video editor on Windows 10 followed by the VLC media player and specialized video editing programs like Adobe Premiere Pro or its alternatives. Also, the procedure of deleting audio on third-party editing programs is more or less the same. Simply unlink the audio from the video, select the audio part, and hit the delete key or mute the audio.
Method 1: Use the Native Video Editor
As mentioned earlier, the Windows Movie Maker was replaced by a Video Editor in the Photos application. Although, the process of removing audio on both applications remains the same. Users simply need to lower the audio volume of the video down to zero, i.e., mute it and export/save the file anew.
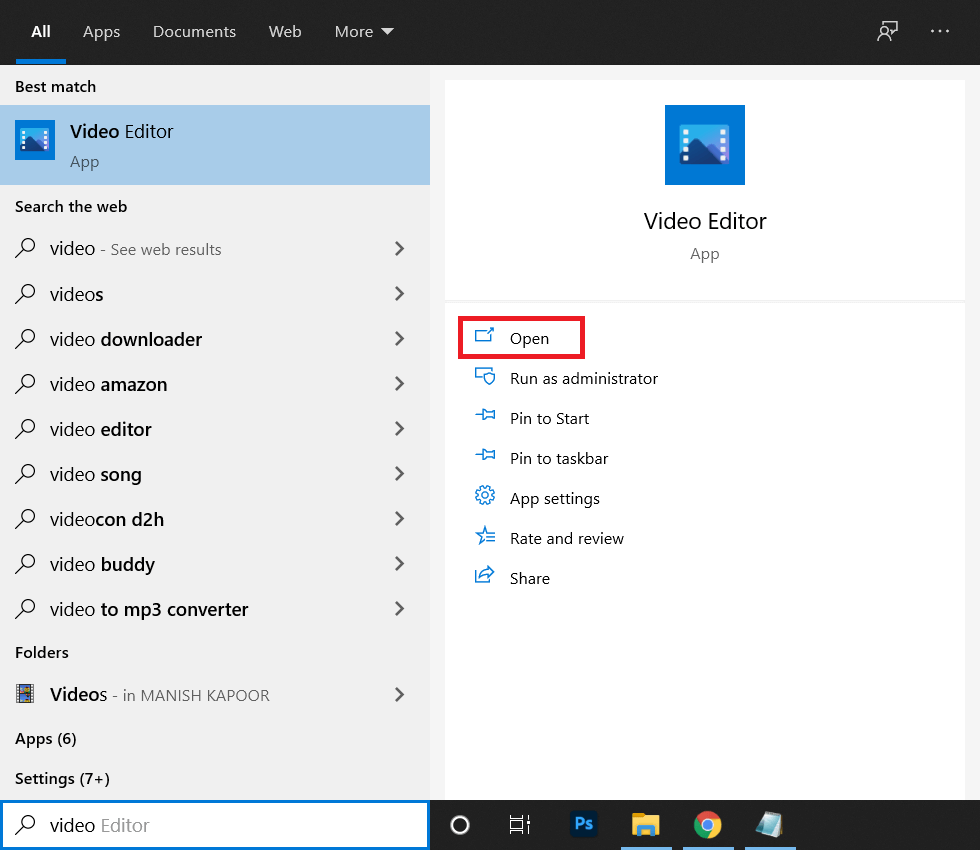
1 ။ စာနယ်ဇင်းပု Windows ကီး + S to activate the Cortana Search bar, type Video Editor နှင့်ဝင်တိုက် ဝင်ရောက် to open the application when results arrive.
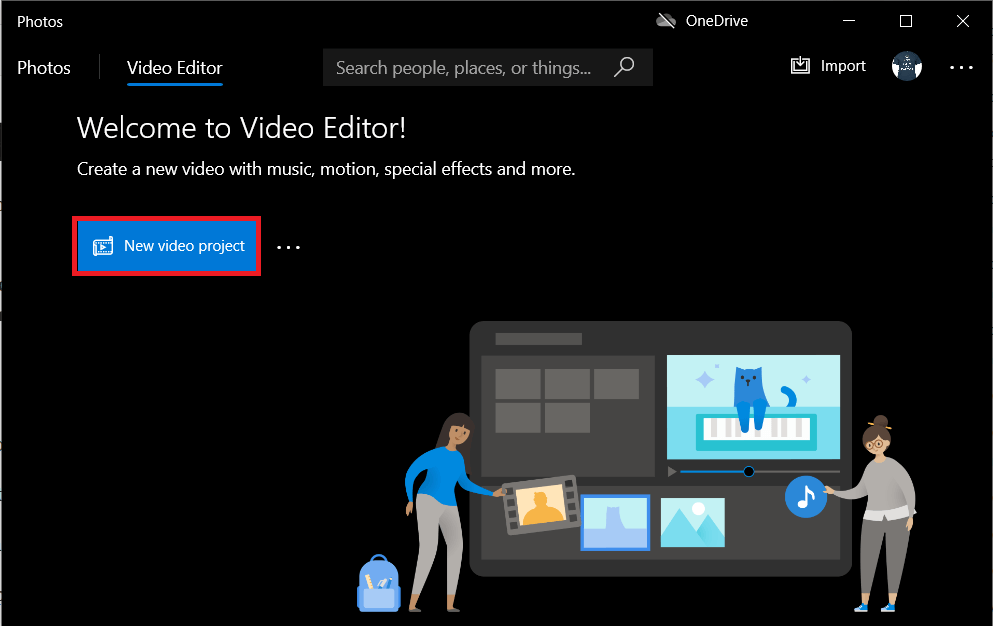
2 ။ အဆိုပါပေါ်တွင်ကလစ်နှိပ်ပါ ဗီဒီယို ပရောဂျက်အသစ် button. A pop-up allowing you to name the project will appear, type in an appropriate name or click on Skip to continue.
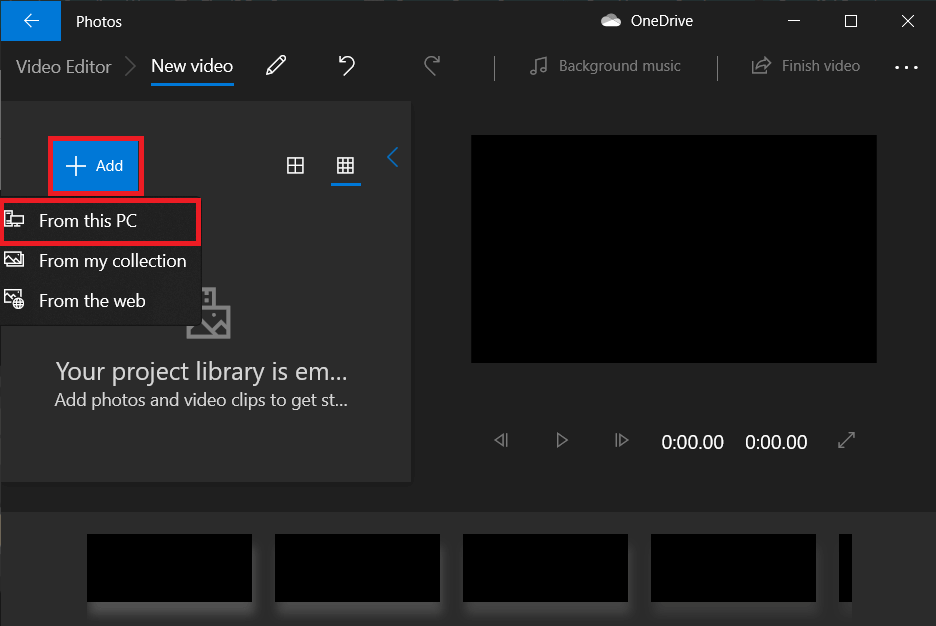
3 ။ အဆိုပါပေါ်တွင်ကလစ်နှိပ်ပါ + ပေါင်း ထဲမှာခလုတ် Project library pane and select From this PC. In the next window, locate the video file you wish to remove audio from, select it and click on Open. An option to import videos from the web is also available.
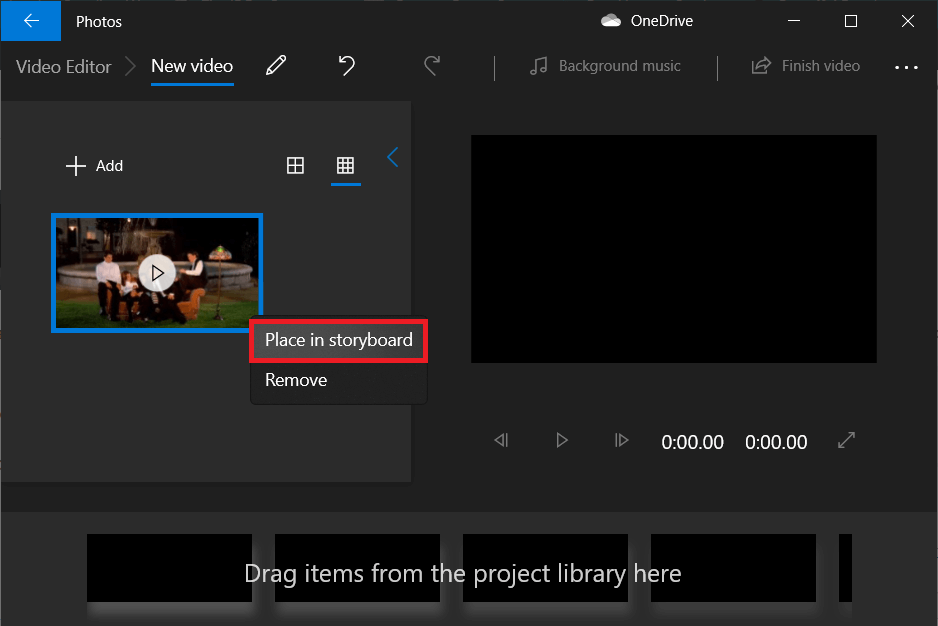
4. right-click နှိပ်ပြီး on the imported file and select Storyboard တွင် နေရာချပါ။. You can also simply click and drag it ထိုအပေါ် ကွက်ကို အပိုင်း။
5 ။ အဆိုပါပေါ်တွင်ကလစ်နှိပ်ပါ Volume icon in the Storyboard and lower it down to zero.
မှတ်စု: To further edit the video, Right-click နှိပ်ပြီး on the thumbnail and select the Edit option ကို။
![]()
6. ပြီးသည်နှင့် ကလစ်နှိပ်ပါ။ ဗီဒီယိုကို အပြီးသတ်ပါ။ ညာဘက်အပေါ်ထောင့်မှ
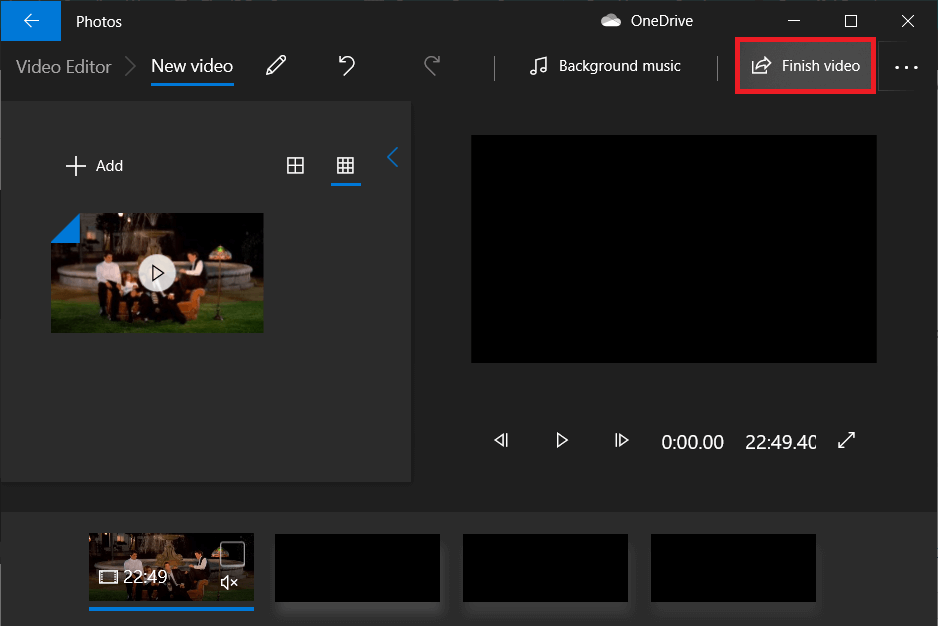
7. Set the desired video quality and hit ထုတ်ကုန်.
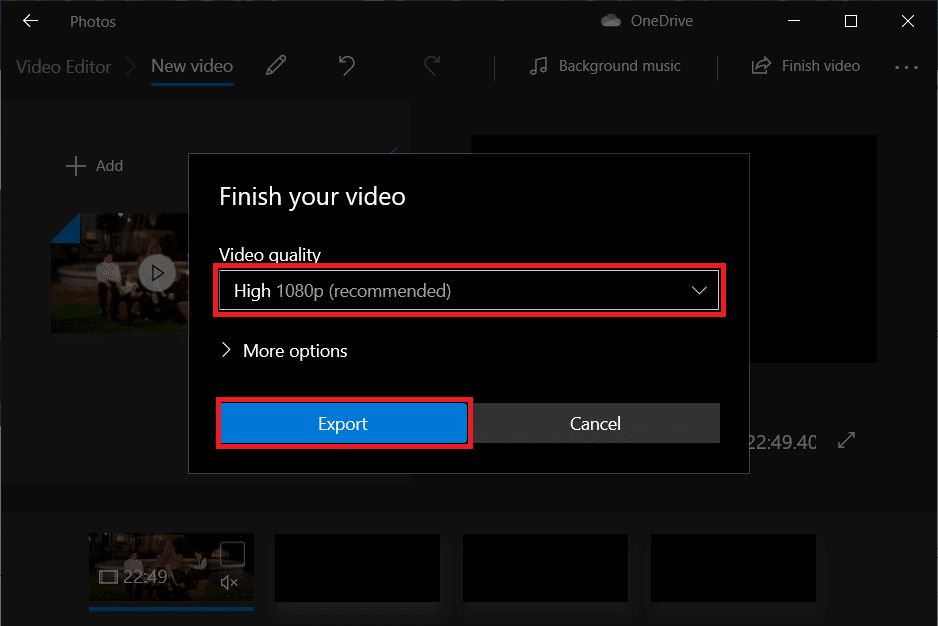
8 ။ a ကိုရွေးပါ စိတ်ကြိုက်တည်နေရာ for the exported file, name it as you please, and press ဝင်ရောက်.
Depending on the video quality you choose and the length of the video, exporting may take anywhere from a couple of minutes to an hour or two.
Method 2: Remove Audio from Video Using VLC Media Player
One of the first applications users install on a new system is the VLC media player. The application has been downloaded way over 3 billion times and rightfully so. The media player supports a wide range of file formats and associated options along with a bunch of lesser-known features. The ability to remove audio from video is one of them.
1. If you do not have the application already installed, head over to VLC Website and download the installation file. Open the file and follow the on-screen prompts to install it.
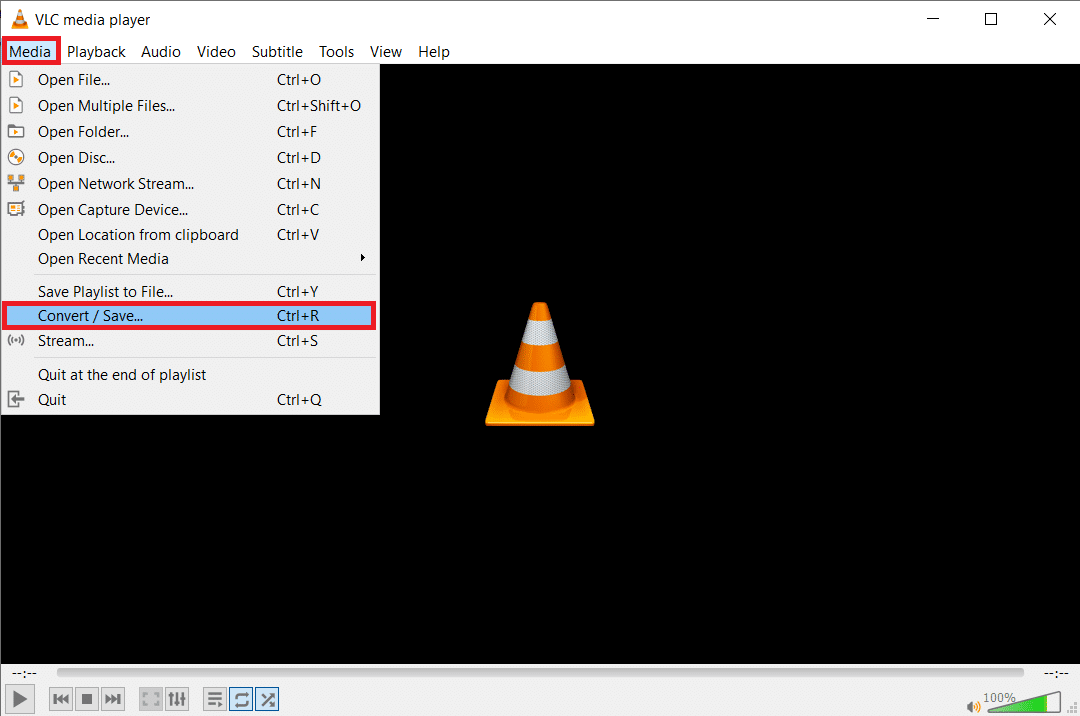
2 ။ အဆိုပါဖွင့်ပါ VLC media player နှင့်အပေါ်ကိုကလစ်နှိပ်ပါ မီဒီယာ at the top-left corner. From the ensuing list, choose the ‘Convert / Save…’ option ကို။
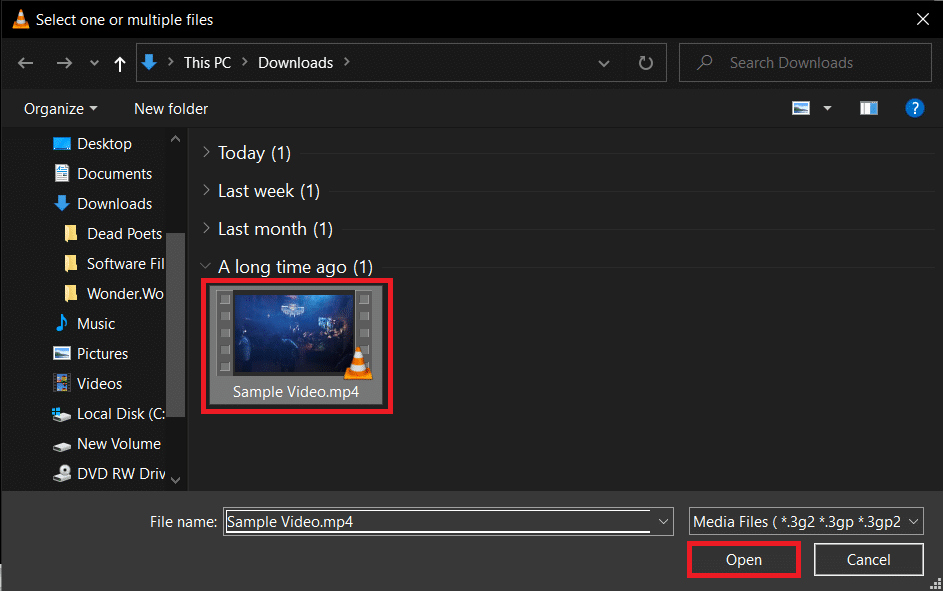
3. In the Open Media window, click on + ထည့်ပါ...
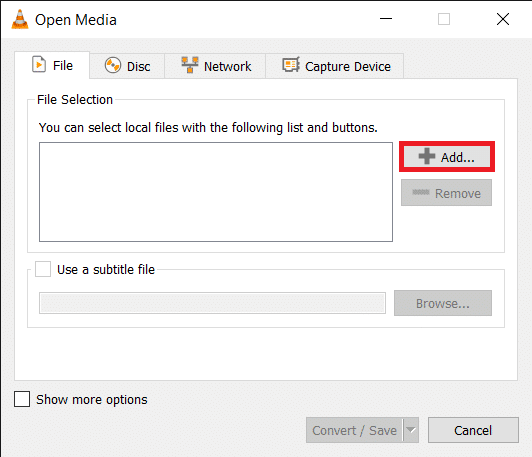
4. Navigate to the video destination, left-click on it to selectနှင့်စာနယ်ဇင်း ဝင်ရောက်. Once selected, the file path will be displayed in the File Selection box.
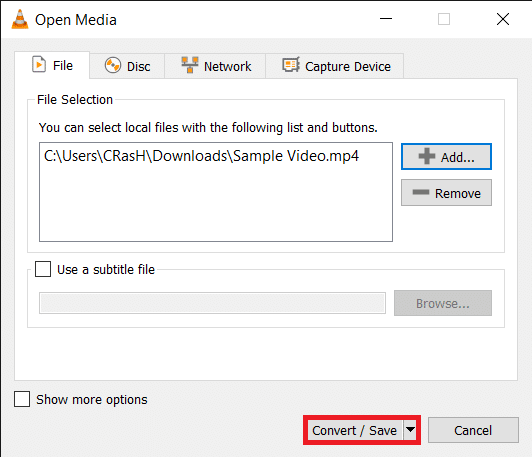
5 ။ အပေါ်ကိုကလစ်နှိပ်ပါ convert / ကြော်ငြာကို Save လုပ်ရန် ဆက်လက်။
6. Select your desired output profile. A number of options are available along with profiles specific to YouTube, Android, and iPhone.
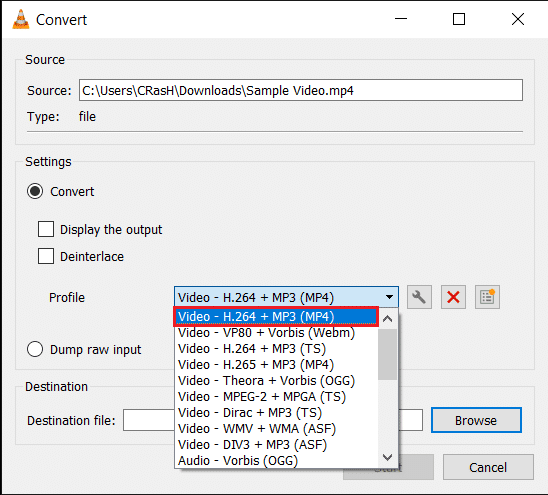
7. Next, click on the tiny tool တစ်ခု အိုင်ကွန် သို့ edit the selected conversion profile.
![]()
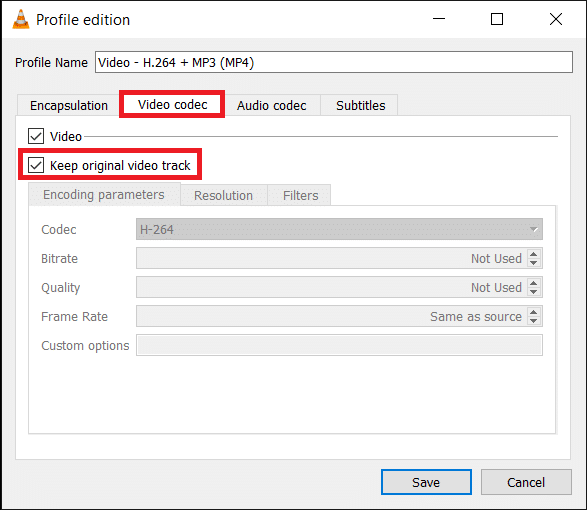
8 ။ ယင်းတွင် encapsulation တွေကိုသေချာ tab ကို, select the appropriate format (usually MP4/MOV).

9. Tick the box next to Keep original video track under the Video codec tab.
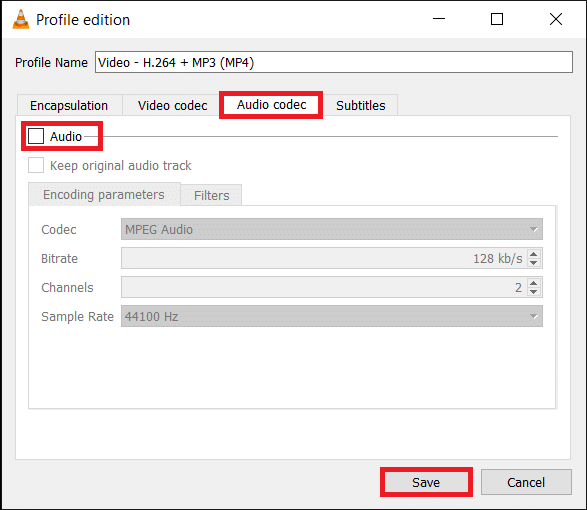
10. ကိုရွှေ့ပါ။ အသံ codec tab နှင့် ပွတ်သပ် ဘေးက box ကို audio။ အပေါ်ကိုကလစ်နှိပ်ပါ ကြော်ငြာကို Save လုပ်ရန်.
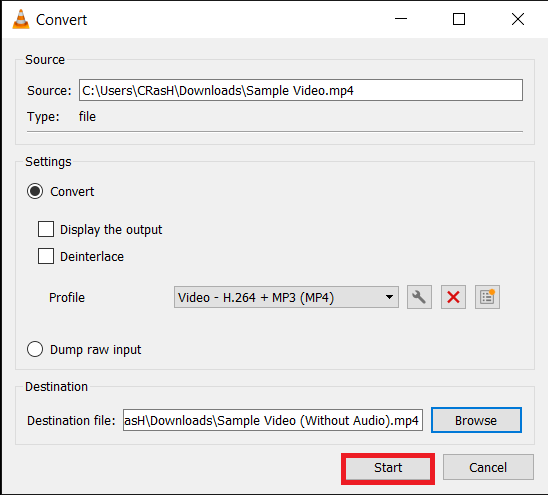
11. You will be brought back to the Convert window. Now click on the Browse ကို ခလုတ်နဲ့ set an appropriate destination for the converted file.

၁ စတင် button to initiate the conversion. The conversion will carry on in the background meanwhile you can continue using the application.
This is how you can remove audio from video in Windows 10 using VLC Media Player, but if you want to use advanced editing tools like Premiere Pro then continue to the next method.
ဒါ့အပြင်ဖတ်ရန်: ဝဘ်ဆိုဒ်များမှ ထည့်သွင်းထားသော ဗီဒီယိုများကို ဒေါင်းလုဒ်လုပ်နည်း
Method 3: Use Adobe Premiere Pro
Applications like Adobe Premiere Pro and Final Cut Pro are two of the most advanced video-editing programs on the market (the latter is only available for macOS). Wondershare Filmora နှင့် PowerDirector are two very good alternatives to them. Download and install any of these applications and merely unlink the audio from the video. Delete the portion you do not need and export the remaining file.
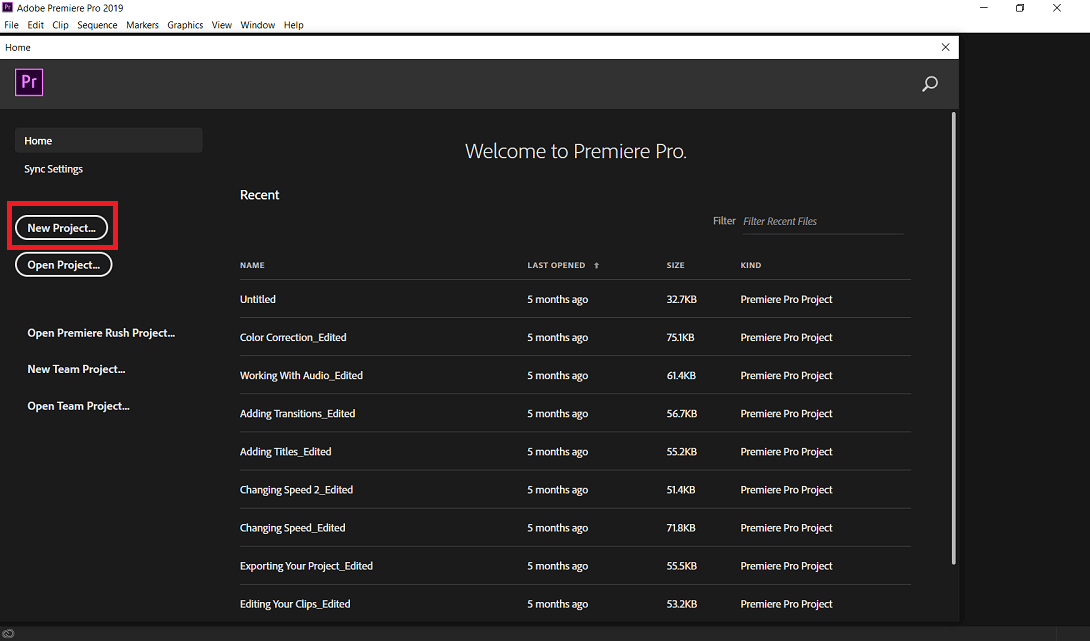
1 ။ launch Adobe Premiere Pro ကို နှင့်အပေါ်ကိုကလစ်နှိပ်ပါ နယူးစီမံကိန်း (File > New).
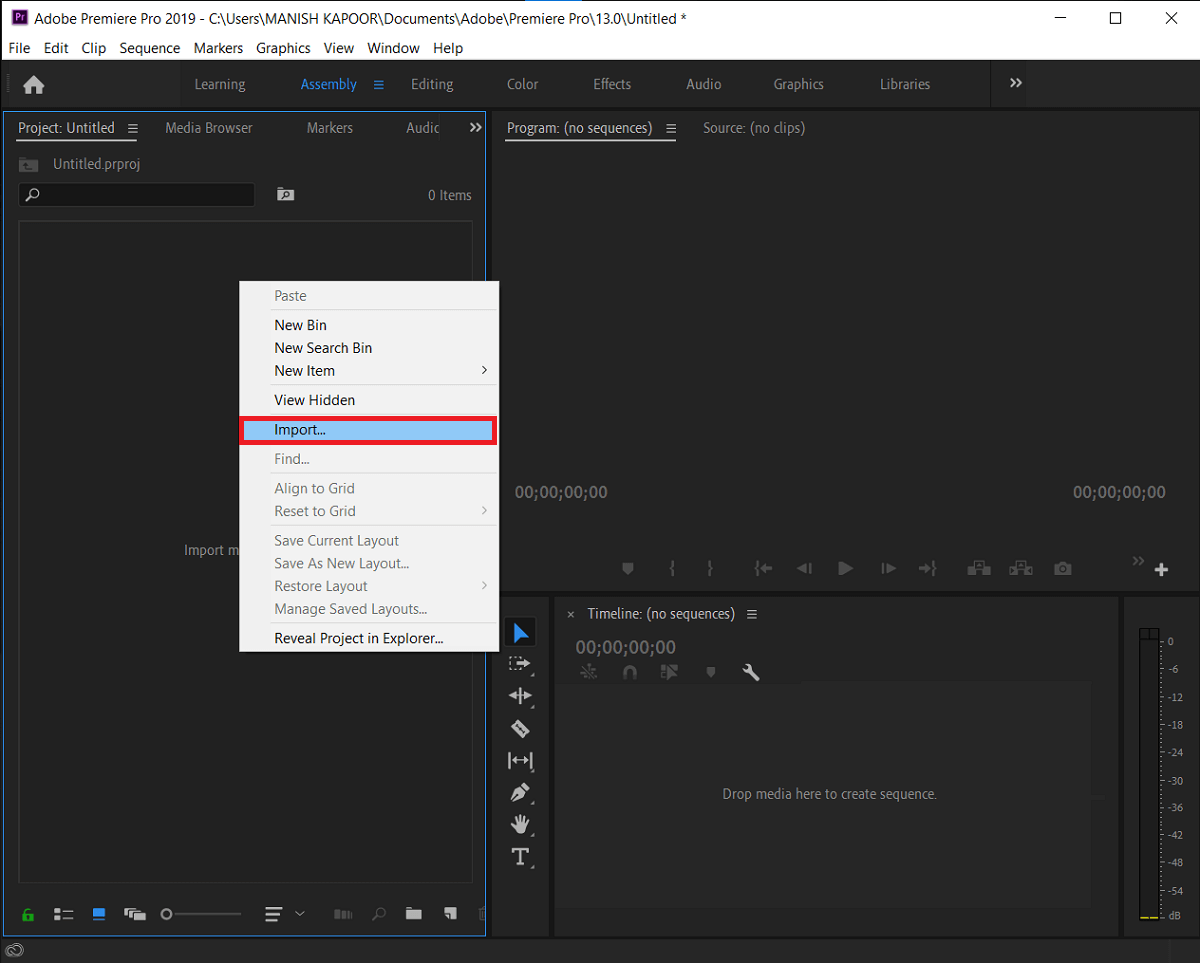
2. right-click နှိပ်ပြီး on the Project pane and select Import (Ctrl + I)။ သင်တို့သည်လည်းလုပ်နိုင် simply drag the media file into the application.
3. Once imported, click and drag the file on the timeline or Right-click နှိပ်ပြီး ပေါ်မှာရွေးပါ New Sequence clip မှ

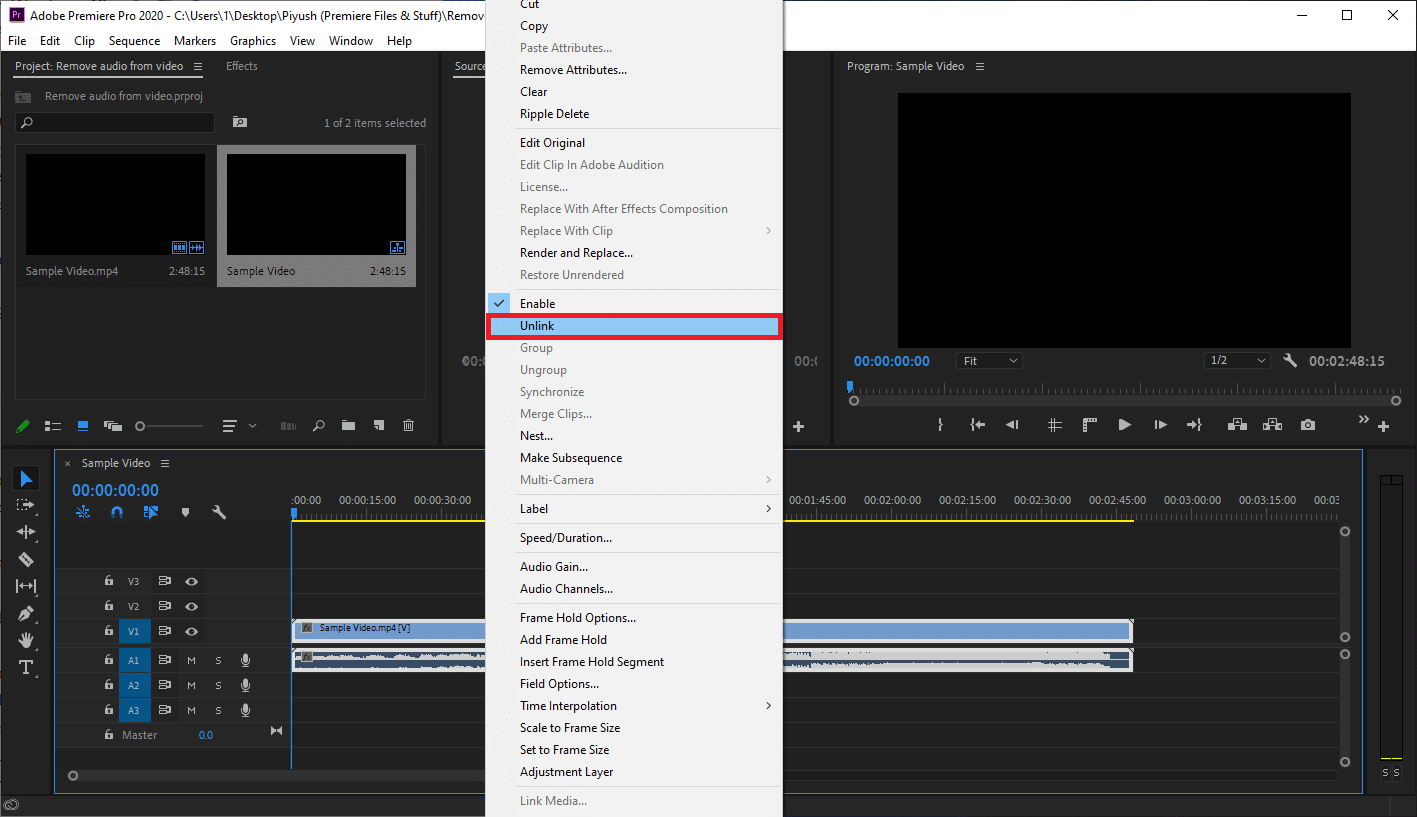
၄ ။ Right-click နှိပ်ပြီး on the video clip in the timeline and select Unlink (Ctrl + L) from the ensuing options menu. As obvious, the audio and video parts are now unlinked.
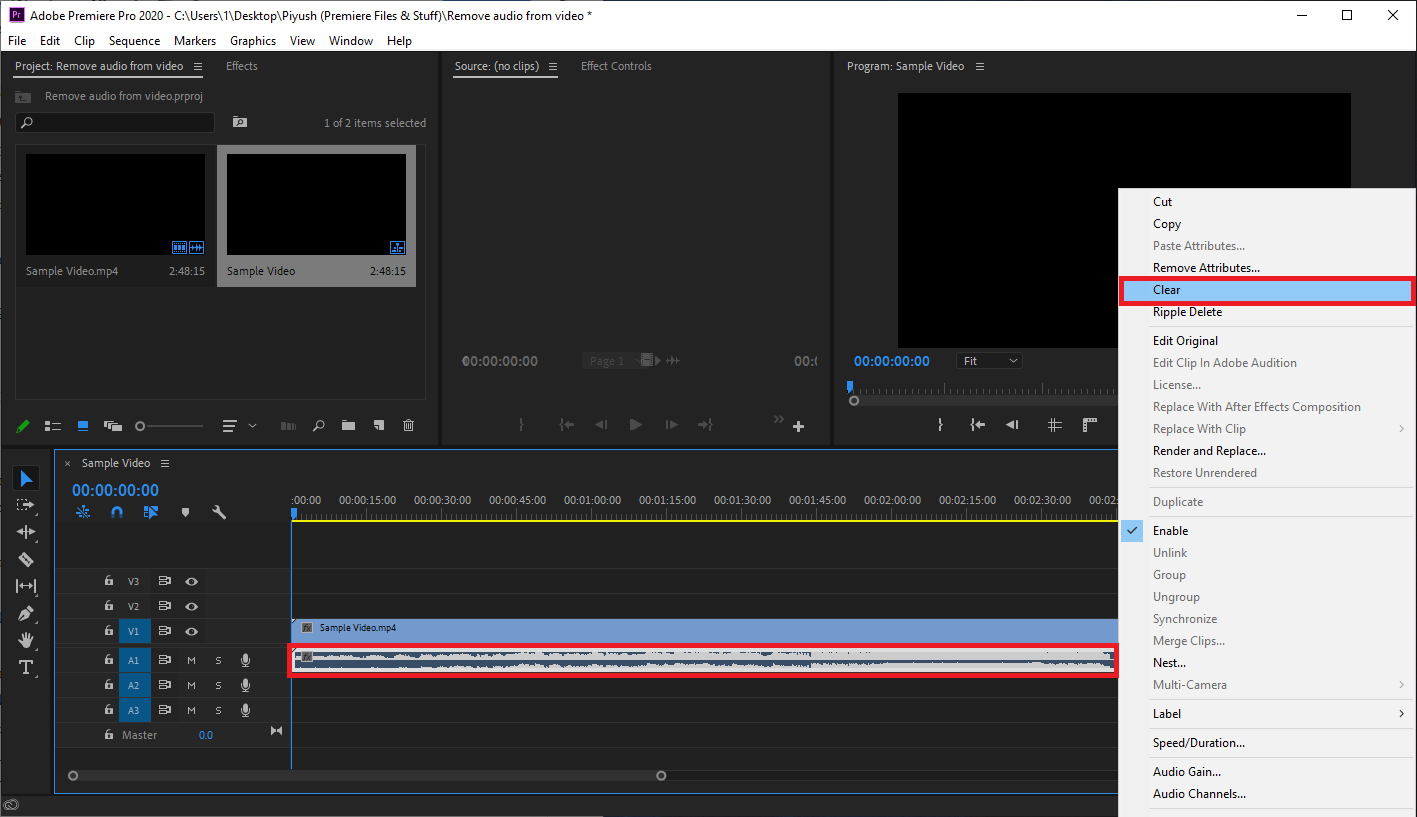
5. Simply select the audio portion and press the ဖျက်ပစ်ပါ key to get rid of it.
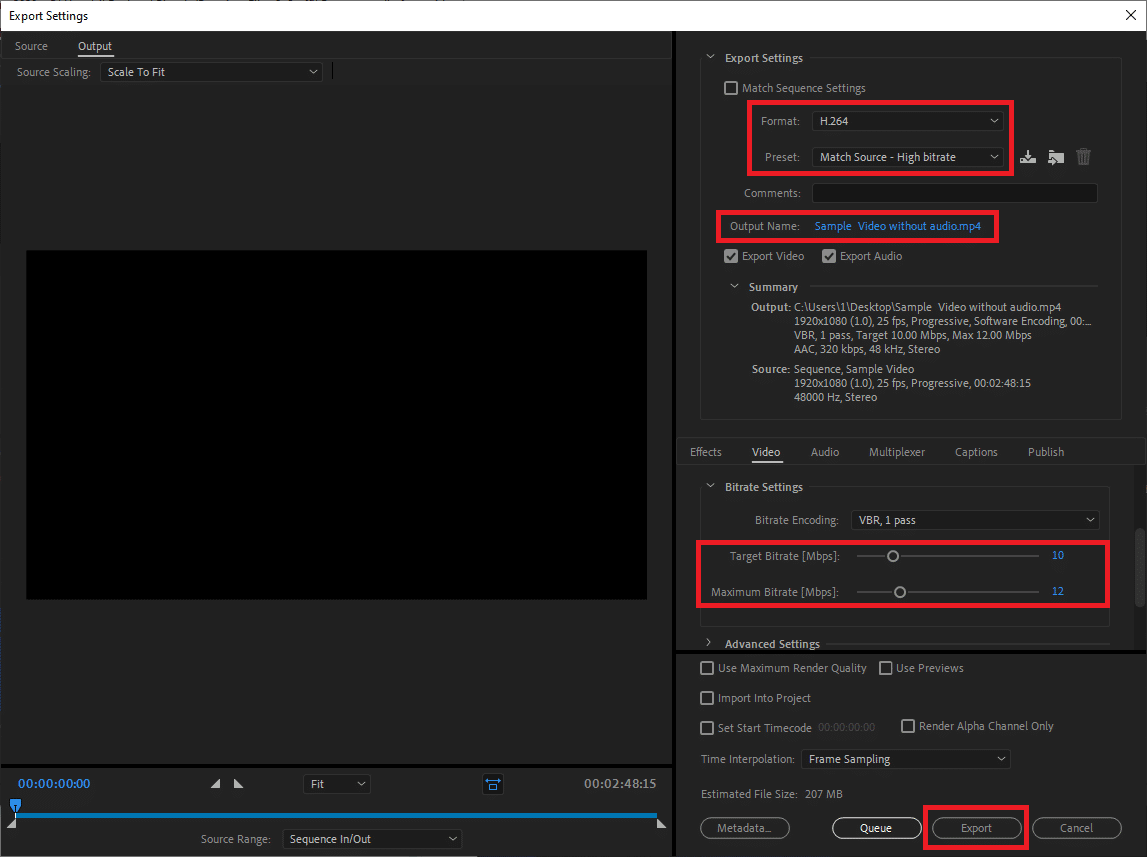
6. Next, simultaneously press the Ctrl and M keys to bring forth the Export dialog box.
7. Under Export Settings, set the format as H.264 နှင့် preset as High Bitrate. If you would like to rename the file, click on the highlighted output name. Adjust the Target and Maximum Bitrate sliders on the Video tab to modify the output file size (Check Estimated File Size at the bottom). Bear in mind that the lower the bitrate, the lower the video quality, and vice versa. Once you are happy with the export settings, click on the ထုတ်ကုန် ခလုတ်ကို။
Apart from dedicated editing applications to remove audio from video, online services such as AudioRemover နှင့် ဗီဒီယို can also be used. Although, these online services have a limit on the maximum file size that can be uploaded and worked upon.
အကြံပြုထားသည်:
ဤလမ်းညွှန်ချက်သည် အထောက်အကူဖြစ်ပြီး သင်လုပ်ဆောင်နိုင်မည်ဟု ကျွန်ုပ်တို့ မျှော်လင့်ပါသည်။ remove audio from the video in Windows 10. In our opinion, the native Video Editor on Windows 10 and the VLC media player are very efficient for removing audio but users can try their hands at advanced programs such as Premiere Pro too. If you would like to read more such tutorials covering the basics of video editing, let us know in the comments below.