- in Windows 10 by admin
How To Enable Or Disable The Transparency Effects in Windows 10
Som tilfellet var med Windows 8, gir Windows 10 litt personalisering i form av et åpent alternativ for oppgavelinjen på skrivebordet. Dette vil tillate skrivebordsbakgrunnen å være synlig gjennom en gjennomsiktig oppgavelinje.
Notice I said translucent and not transparent. This is because the visual effect is transparent in name only. Translucent would be the more accurate term but Windows, as well as Apple, have seen fit to refer to the option as transparent, and so shall we.
Not only will you be able to add the transparency personalization to the taskbar, but to the Start Menu and Action Center as well. The process is quick and easy and does not require much know-how on the inner workings of Windows to pull it off.
In addition to the transparency option, we’ll also show you how you can increase (or decrease) the amount of transparency in the taskbar. This can be useful for those who prefer a bit of background in the taskbar for visual aid purposes.
How To Enable Or Disable The Transparency Effects In Windows 10
The following steps will help you to enable, or disable, the Taskbar, Start Menu, and Action Center transparency personalization in Windows 10.
- Navigate to the Start Menu and select innstillinger. To do this you can either left-click the Windows icon in the lower right part of your desktop and click the cog-like icon.
- You could also choose to right-click the Windows icon and select innstillinger fra menyen.

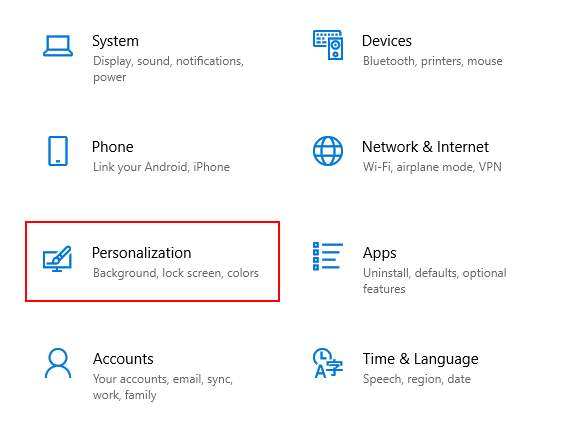
- Velg Tilpassing fra Windows-innstillinger vinduet.
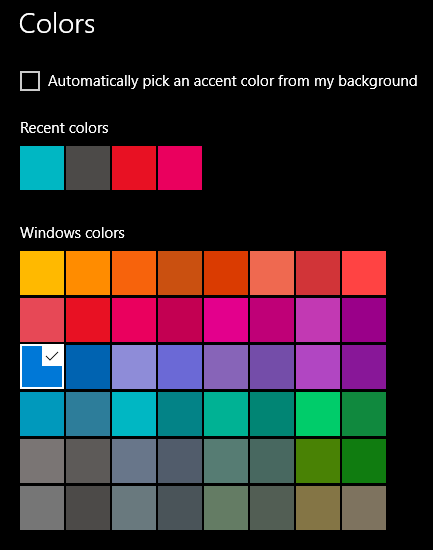
- From the left side menu, select Farger.
- In the main window, scroll down until you see Gjennomsiktighetseffekter.
The effects provided will appear similar to, although far less intense than the Aero visual effects presented to us in Windows Vista.
While set to OFF, the background for your taskbar, Start Menu, and Action Center will use the colors selected from the same menu. To find them, you only need to scroll further down.
The effects, whether enabled or disabled, will take place immediately without the need to save any changes.
Increasing Taskbar Transparency Via Registry Editor
The transparent option provided above only provides a very minuscule amount of translucency to the taskbar. In order to provide a more translucent visual effect, you’ll need to go a bit deeper into Windows 10’s registry editor.
There may be other programs available to help you do this but the registry is the most straightforward approach.
Moving forward you’ll need to practice extreme caution when it comes to making changes to your Windows registry. Never make registry changes suggested by websites that you don’t trust.
Even for those you do trust, set a restore point within Windows 10 so that if anything is messed up by the changes, your system backup is intact.
- Once a restore point has been made, enter regedit into the search bar found on the taskbar, and select the Registry Editor when the option appears.
- You could also use the Run function, typing in the same thing – regedit – and hitting Enter. Doing it the first way will allow you to run as an Administrator by right-clicking the list result and selecting it from the window.
- From the Windows Registry Editor, you can scour through the hierarchical list on the left side of the window OR click the index bar at the top, highlight and remove what is already there, and replace it with the following:
HKEY_LOCAL_MACHINESOFTWAREMicrosoftWindowsCurrentVersionExplorerAvansert

- Press Enter.
- In the right side window, right-click in an empty space and select Ny, deretter DWORD (32-bit) Verdi.
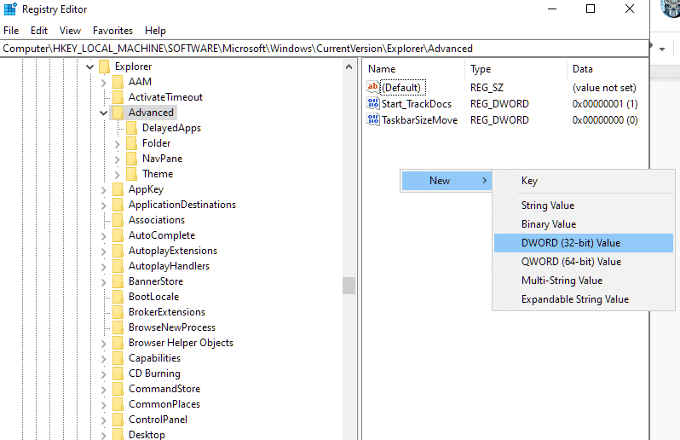
- Change “New Value #1” into Bruk OLED Oppgavelinje Gjennomsiktighet. This must be typed exactly as shown including capital letters.
- Double-click the entry to open up the value window and set the value data to 1.
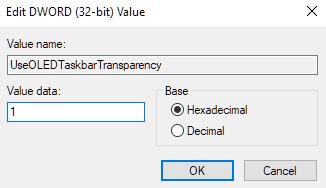
- Klikk OK and then exit the Registry Editor.
For the changes to take effect, navigate back to the Personalization window in Settings and enable the Transparency options. If the option was already enabled, disable and then re-enable for the changes to take effect.
To remove the result, if perhaps you do not like the change, you can head back into the Registry Editor, navigate to the UseOLEDTaskbarTransparency entry, and change the value from “1” back to 0.
The changes should be very slight. To create a fully translucent taskbar may require the help of third-party tools. Tools such as TranslucentTB and TaskbarTools will accommodate you with whatever translucency value you want your taskbar to contain visually.
However, we prefer the use of Classic Shell.
Using Classic Shell To Enable Full Taskbar Translucency
For more control over the translucency of your taskbar, Classic Shell is a free third-party tool that can get the job done. It has hundreds of useful customization options for the Windows operating system.
You can not only switch between transparent and opaqueness for your taskbar, but also the exact percentage of both.
- Download the tool, launch the Classic Start Menu module included in the package, and click on Windows 10 Settings. You’ll have several options for enabling or disabling taskbar transparency, the ability to set a custom color value, and a percentage value for Taskbar Opacity.
- Before you can adjust the value, first you’ll have to check the Tilpass oppgavelinjen og velg Gjennomsiktig.
- Now you should be able to adjust the percentage to however you see fit.