Napraw wysokie użycie procesora przez instalatora modułów systemu Windows
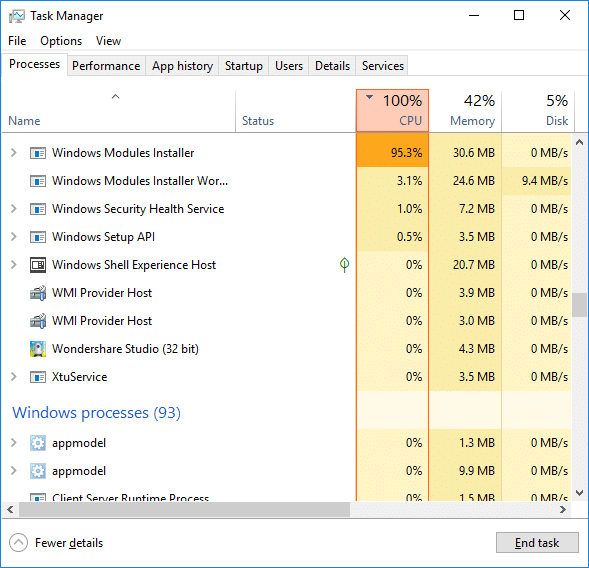
If you are facing the High CPU Usage by Windows Modules Installer Worker, then don’t worry as thousands of other users are also facing the similar problem and therefore, there are many working fixes which we will be discussing today in this article. To verify if you are facing this issue open Task Manager (Ctrl + Shift + Esc) and you will find that the Windows Modules Installer Worker is consuming High CPU or Disk Usage.

Pro Tip: You may leave your PC overnight or for a few hours to see the issue rectify itself once the Windows is finished downloading and installing updates.
What is Windows Modules Installer worker (WMIW)?
Windows Modules Installer worker (WMIW) is a service which takes cares of automatically installing Windows Update. According to its service description, WMIW is a system process that enables automatic installation, modification, and removal of Windows updates and optional components.
This process is responsible for finding new Windows Update automatically and installing them. As you might be aware that Windows 10 automatically install newer builds (i.e. 1803 etc.) via Windows Updates, so this process is responsible for installing these updates in the background.
Although this process is called Windows Modules Installer worker (WMIW) and you will see the same name in the Processes tab in the Task Manager, but if you switch to Details tab, then you will find the name of the file as TiWorker.exe.
Why Is Windows Modules Installer worker Using So Much CPU?
As Windows Modules Installer worker (TiWorker.exe) runs continuously in the background, sometimes it might utilize high CPU or disk usage when installing or uninstalling Windows Updates. But if its constantly using high CPU then the Windows Modules Installer worker may have become unresponsive while checking new updates. As a result, you may be experiencing lags, or your system might hang or freeze completely.
The first thing users do when they experience freezing, or lagging issues on their system is to restart their PC, but I assure you that this strategy won’t work in this case. This is because the issue will not resolve by itself until and unless you fix the underlying cause.
Napraw wysokie użycie procesora przez instalatora modułów systemu Windows
Pamiętaj, aby utworzyć punkt przywracania na wypadek, gdyby coś poszło nie tak.
Windows Modules Installer Worker (WMIW) is an important service, and it should not be disabled. WMIW or TiWorker.exe is not a virus or malware, and you cannot just delete this service from your PC. So without wasting any time let’s see How to Fix Windows Modules Installer Worker High CPU Usage korzystając z poniższego przewodnika rozwiązywania problemów.
Metoda 1: Uruchom narzędzie do rozwiązywania problemów z usługą Windows Update
1. Naciśnij klawisz Windows + I, aby otworzyć Ustawienia następnie kliknij Ikona aktualizacji i zabezpieczeń.
![]()
2. Z menu po lewej stronie wybierz Rozwiązywanie pod „Rozpocznij pracę" Kliknij Windows Update.
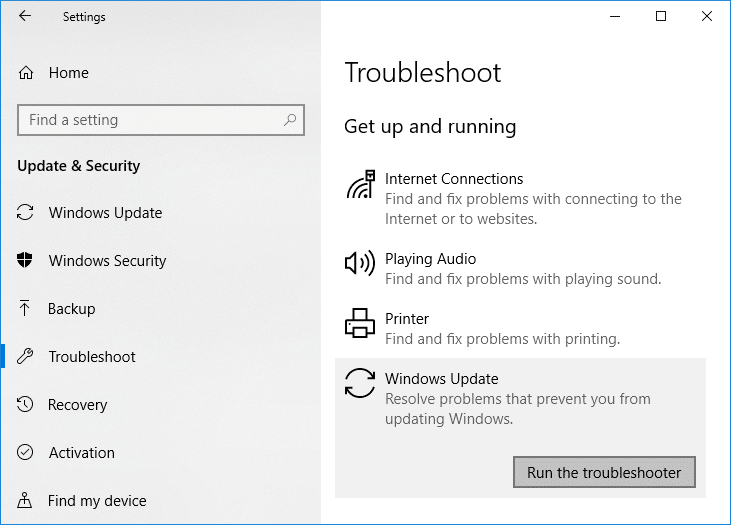
3. Teraz kliknij „Uruchom narzędzie do rozwiązywania problemów” w obszarze Windows Update.
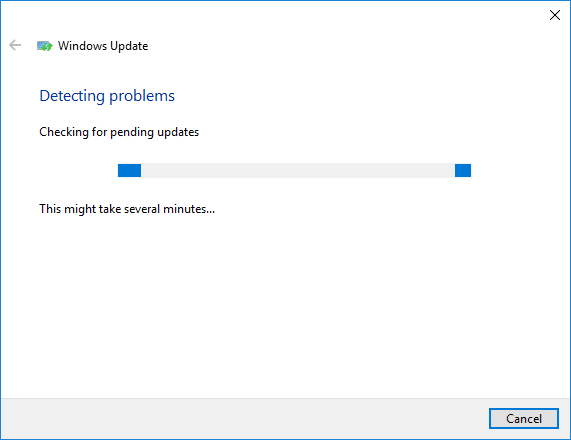
4. Let the troubleshooter run, and it will automatically fix any issues found with Windows Update taking forever.
Method 2: Manually Check for Windows Updates
1. Naciśnij klawisz Windows + I, a następnie wybierz Aktualizacja i bezpieczeństwo.
2. Po lewej stronie następuje kliknięcie menu Windows Update.
3. Teraz kliknij „Sprawdź aktualizacje”, aby sprawdzić dostępne aktualizacje.

4. Jeśli oczekują jakieś aktualizacje, kliknij Pobierz i zainstaluj aktualizacje.

5. Po pobraniu aktualizacji zainstaluj je, a system Windows stanie się aktualny.
Method 3: Configure Windows Update to Manual
Ostrzeżenie: This method will switch Windows Update from automatically installing the new updates to the manual. This means you have to manually check for Windows Update (weekly or monthly) to keep your PC secure. But follow this method, and you can again set the Updates to Automatic once the issue is resolved.
1. Naciśnij klawisz Windows + R, a następnie wpisz services.msc i naciśnij Enter.

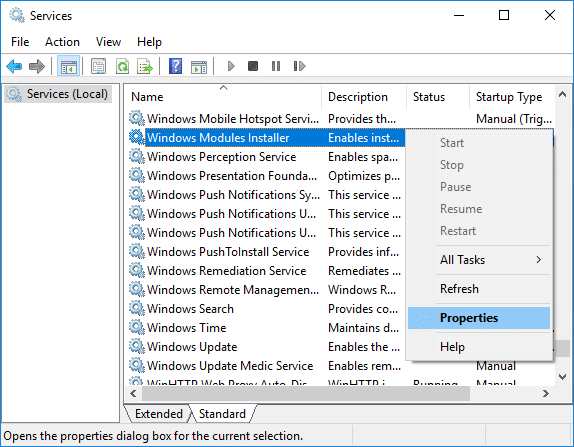
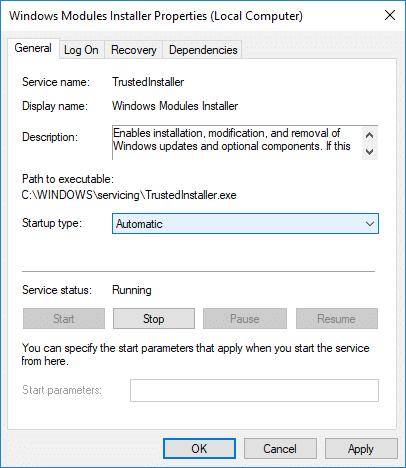
2. Przewiń w dół i znajdź Moduły Instalator Windows usługa na liście.
3. Kliknij prawym przyciskiem myszy Usługa instalatora modułów systemu Windows nastepnie: Nieruchomości.
4. Teraz kliknij Stop następnie od Typ uruchomienia drop-down select Instrukcja.
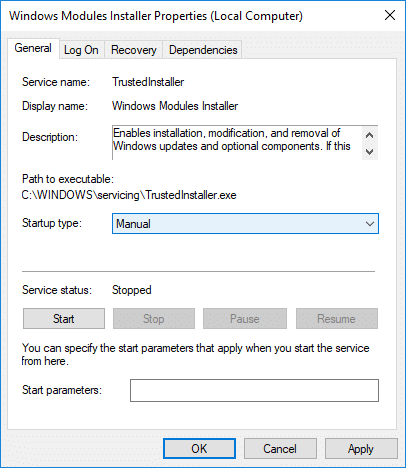
5. Kliknij Zastosuj, a następnie OK.
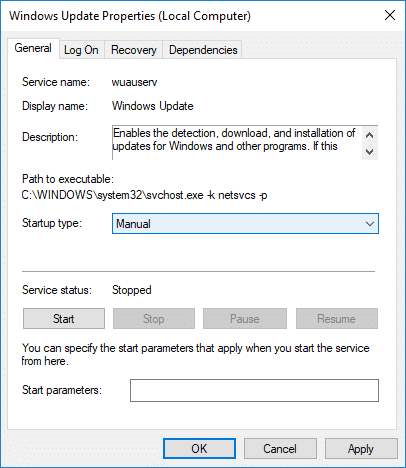
6. Similarly, follow the same step for the Windows Update service.
7. Uruchom ponownie komputer, aby zapisać zmiany.
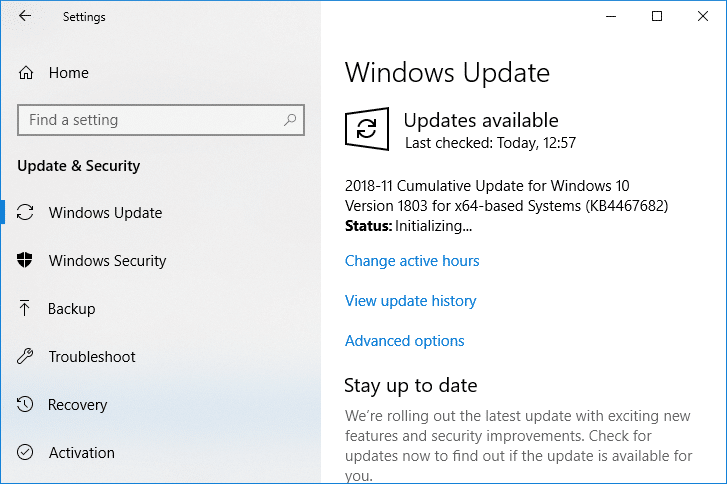
8. Znowu sprawdzić Windows Updates Manually i zainstaluj wszelkie oczekujące aktualizacje.
9. Once is done, again go back to services.msc window and open the Windows Modules Installer & Windows Update Properties okno.
10. Ustaw Typ uruchomienia do automatycznie i kliknij Start. Then click Apply followed by OK.
11. Uruchom ponownie komputer, aby zapisać zmiany.
Metoda 4: Uruchom narzędzie do rozwiązywania problemów z konserwacją systemu
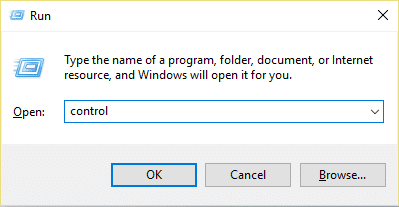
1. Naciśnij Klawisz Windows + R, następnie wpisz control i naciśnij Enter, aby otworzyć Panel sterowania.
2. Wyszukaj opcję Rozwiązywanie problemów i kliknij Rozwiązywanie problemów.

3. Następnie kliknij Wyświetl wszystkie w lewym okienku.
4. Kliknij na “System Maintenance” uruchomić System Maintenance Troubleshooter.

5. Narzędzie do rozwiązywania problemów może to zrobić Fix Windows Modules Installer Worker High CPU Usage, but if it didn’t, then you need to run System Performance Troubleshooter.
6. Otwórz wiersz polecenia. Użytkownik może wykonać ten krok, wyszukując „cmd” A następnie naciśnij klawisz Enter.

7. Wpisz następujące polecenie w cmd i naciśnij Enter:
msdt.exe / id PerformanceDiagnostic
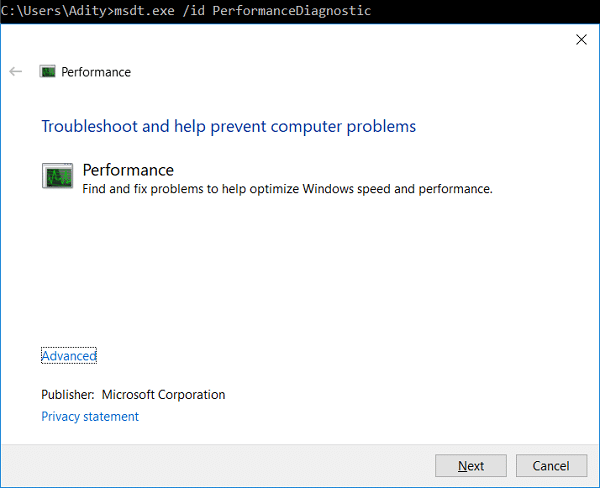
8. Follow the on-screen instruction to run the troubleshooter and fix any issues find the System.
9. Finally, exit the cmd and reboot your PC.
Method 5: Disable Automatic Maintenance
Sometimes Automatic Maintenance can conflict with the Windows Modules Installer Worker service, so try to disable Automatic Maintenance using this guide and see if this fixes your issue.
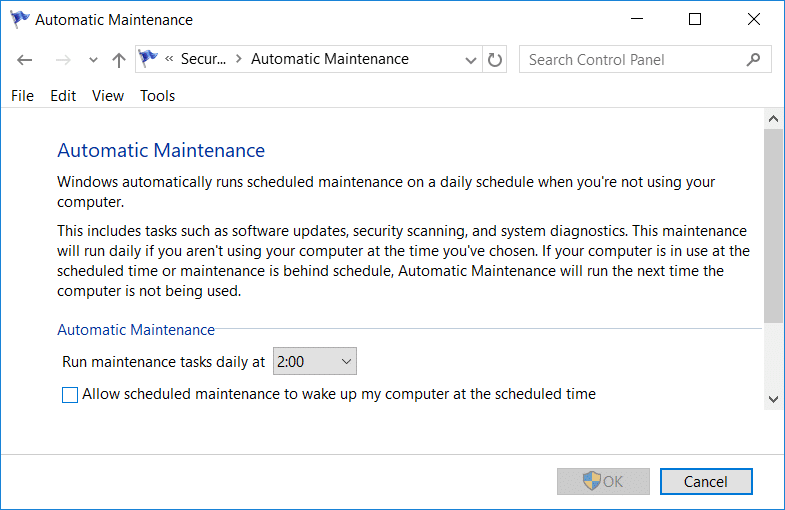
Although disabling Automatic Maintenance is not a good idea, but there might be some case where you need to actually disable it, for example, if your PC freezes during automatic maintenance or Windows Modules Installer Worker High CPU Usage issue then you should disable maintenance to troubleshoot the issue.
Metoda 6: Uruchom Kontroler plików systemowych i DISM
1. Otwórz wiersz polecenia. Użytkownik może wykonać ten krok, wyszukując „cmd” A następnie naciśnij klawisz Enter.
2. Teraz wpisz następujące polecenie w cmd i naciśnij Enter:
Sfc /scannow sfc /scannow /offbootdir=c: /offwindir=c:windows (Jeśli powyższe nie powiedzie się, spróbuj tego)

3. Poczekaj na zakończenie powyższego procesu i po jego zakończeniu uruchom ponownie komputer.
4. Ponownie otwórz cmd i wpisz następujące polecenie i po każdym naciśnij klawisz Enter:
Dism /Online /Cleanup-Image /CheckHealth Dism /Online /Cleanup-Image /ScanHealth Dism /Online /Cleanup-Image /RestoreHealth

5. Pozwól uruchomić polecenie DISM i poczekać na jego zakończenie.
6. Jeśli powyższe polecenie nie działa, wypróbuj poniższe:
Dism /Image:C:offline /Cleanup-Image /RestoreHealth /Source:c:testmountwindows Dism /Online /Cleanup-Image /RestoreHealth /Source:c:testmountwindows /LimitAccess
Uwaga: Zamień C:RepairSourceWindows na źródło naprawy (dysk instalacyjny systemu Windows lub dysk odzyskiwania).
7. Uruchom ponownie komputer, aby zapisać zmiany i sprawdź, czy możesz Fix Windows Modules Installer Worker High CPU Usage.
Metoda 7: Wykonaj czysty rozruch
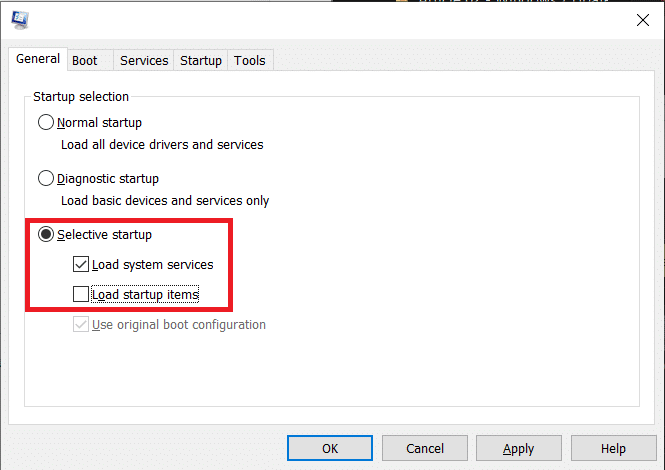
Sometimes 3rd party software can conflict with Windows and can cause the issue. To Fix Windows Modules Installer Worker High CPU Usage issue, musisz wykonać czysty rozruch komputera i krok po kroku zdiagnozować problem.
Method 8: Set your WiFi as Metered Connection
Uwaga: This will stop Windows Automatic Update, and you will need to manually check for Updates.
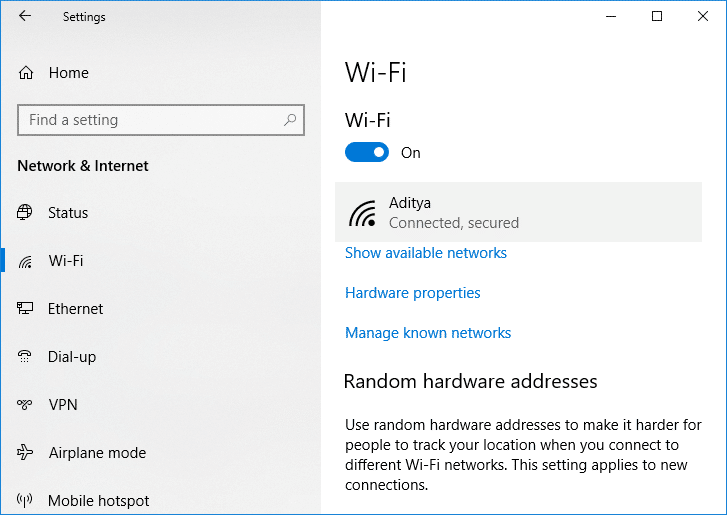
1. Naciśnij klawisz Windows + I, aby otworzyć Ustawienia następnie kliknij Sieć i Internet.

2. Z menu po lewej stronie wybierz Wi-Fi.
3. Under Wi-Fi, kliknij on your currently connected network (WiFi).
4. Scroll down to Metered connection and włącz przełącznik pod „Ustaw jako odmierzone połączenie".
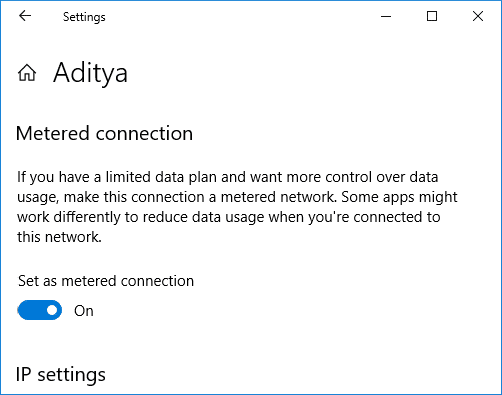
5. Close Settings and reboot your PC to save changes.
Polecamy:
To wszystko, udało ci się Napraw wysokie użycie procesora przez instalatora modułów systemu Windows ale jeśli nadal masz jakieś pytania dotyczące tego samouczka, możesz je zadać w sekcji komentarzy.
