Fix Windows Modules Installer Worker High CPU Usage
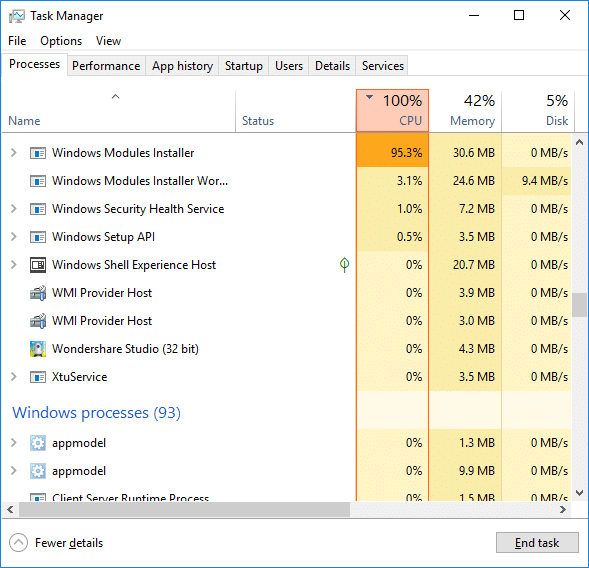
If you are facing the High CPU Usage by Windows Modules Installer Worker, then don’t worry as thousands of other users are also facing the similar problem and therefore, there are many working fixes which we will be discussing today in this article. To verify if you are facing this issue open Task Manager (Ctrl + Shift + Esc) and you will find that the Windows Modules Installer Worker is consuming High CPU or Disk Usage.

پلوه ورکړئ: You may leave your PC overnight or for a few hours to see the issue rectify itself once the Windows is finished downloading and installing updates.
What is Windows Modules Installer worker (WMIW)?
Windows Modules Installer worker (WMIW) is a service which takes cares of automatically installing Windows Update. According to its service description, WMIW is a system process that enables automatic installation, modification, and removal of Windows updates and optional components.
This process is responsible for finding new Windows Update automatically and installing them. As you might be aware that Windows 10 automatically install newer builds (i.e. 1803 etc.) via Windows Updates, so this process is responsible for installing these updates in the background.
Although this process is called Windows Modules Installer worker (WMIW) and you will see the same name in the Processes tab in the Task Manager, but if you switch to Details tab, then you will find the name of the file as TiWorker.exe.
Why Is Windows Modules Installer worker Using So Much CPU?
As Windows Modules Installer worker (TiWorker.exe) runs continuously in the background, sometimes it might utilize high CPU or disk usage when installing or uninstalling Windows Updates. But if its constantly using high CPU then the Windows Modules Installer worker may have become unresponsive while checking new updates. As a result, you may be experiencing lags, or your system might hang or freeze completely.
The first thing users do when they experience freezing, or lagging issues on their system is to restart their PC, but I assure you that this strategy won’t work in this case. This is because the issue will not resolve by itself until and unless you fix the underlying cause.
Fix Windows Modules Installer Worker High CPU Usage
ډاډ ترلاسه کړئ چې د بیا رغونې نقطه رامینځته کړئ یوازې په هغه صورت کې چې یو څه غلط شي.
Windows Modules Installer Worker (WMIW) is an important service, and it should not be disabled. WMIW or TiWorker.exe is not a virus or malware, and you cannot just delete this service from your PC. So without wasting any time let’s see How to Fix Windows Modules Installer Worker High CPU Usage د لاندې لیست شوي ستونزې حل کولو لارښود په مرسته.
1 میتود: د وینډوز تازه کولو ستونزه حل کوونکی چل کړئ
1. د خلاصولو لپاره د وینډوز کیلي + I فشار ورکړئ امستنې بیا کلیک وکړئ د تازه کولو او امنیت نښه.
![]()
2. د کیڼ لاس مینو څخه، غوره کړئ ستونزه حل کول لاندې "پورته او چلول" کلیک وکړه وینډوز اوسمهال.
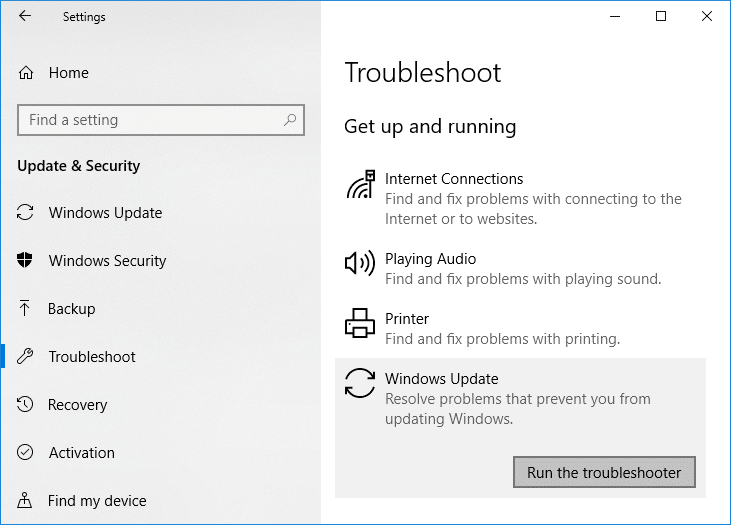
3. اوس په "کلیک وکړئد ستونزې حل کوونکی چل کړئ"د وینډوز تازه معلومات لاندې.
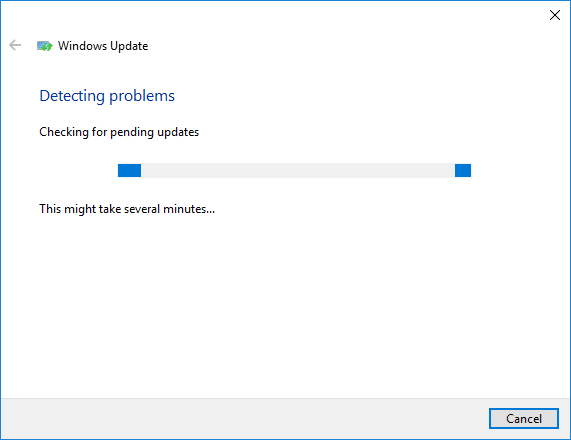
4. Let the troubleshooter run, and it will automatically fix any issues found with Windows Update taking forever.
Method 2: Manually Check for Windows Updates
1. د وینډوز کیلي فشار ورکړئ + I بیا غوره کړئ اوسمهالول.
2. د کیڼ اړخ څخه، مینو کې کلیک وکړئ وینډوز اوسمهال.
3. اوس په "د اوسمهالونو لپاره ګوريد هر ډول موجود تازه معلوماتو لپاره د چک کولو لپاره تڼۍ.

4. که کوم تازه معلومات پاتې وي، نو کلیک وکړئ تازه معلومات ډاونلوډ او نصب کړئ.

5. یوځل چې تازه معلومات ډاونلوډ شي، نصب کړئ، او ستاسو وینډوز به تازه شي.
Method 3: Configure Windows Update to Manual
احتیاط: This method will switch Windows Update from automatically installing the new updates to the manual. This means you have to manually check for Windows Update (weekly or monthly) to keep your PC secure. But follow this method, and you can again set the Updates to Automatic once the issue is resolved.
1. د وینډوز کیلي + R فشار ورکړئ بیا ټایپ کړئ خدمات .msc او داخل کړئ.

2. Scroll down and find د ماډل ماډل لګونکی په لیست کې خدمت.
3. ښي کلیک وکړئ د وینډوز ماډل انسټالر خدمت او غوره ځانتياوې.
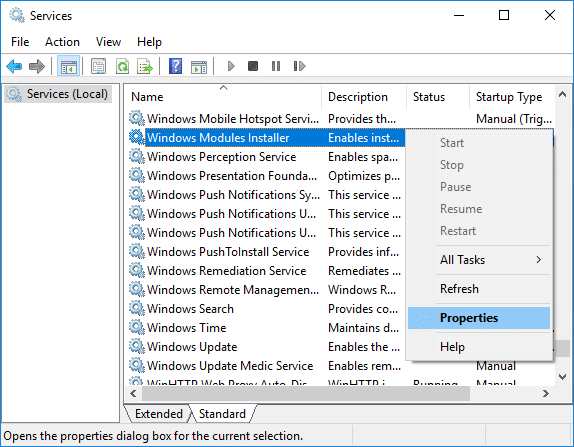
4. اوس کلیک وکړئ درېدل then from the د پیل ډول ډول drop-down select لارښود.
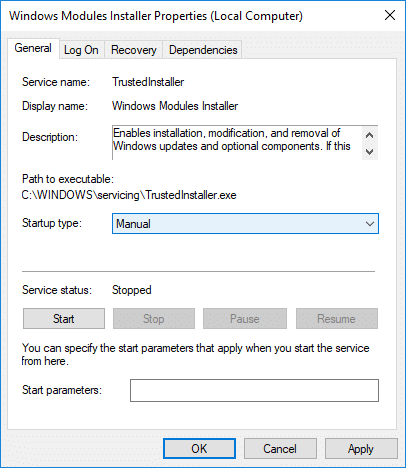
5. په پلي کولو کلیک وکړئ، ورپسې هوکی.
6. Similarly, follow the same step for the Windows Update service.
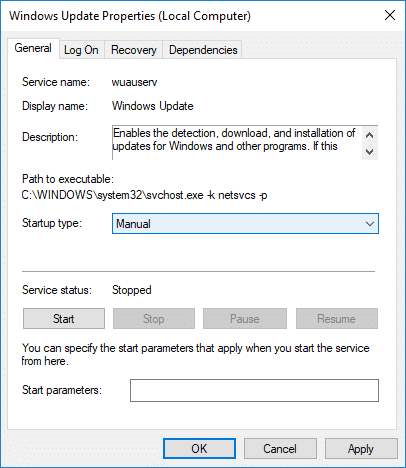
7. د بدلونونو خوندي کولو لپاره خپل کمپیوټر ریبوټ کړئ.
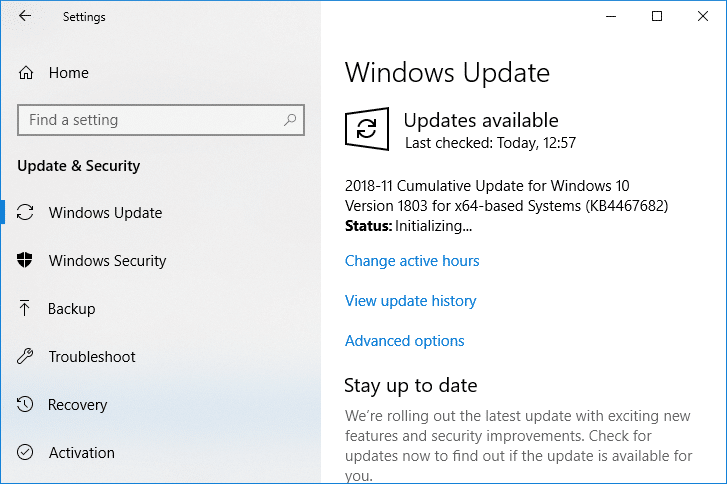
8. بیا لپاره وګورئ Windows Updates Manually او کوم پاتې تازه معلومات نصب کړئ.
9. Once is done, again go back to services.msc window and open the Windows Modules Installer & Windows Update Properties کړکۍ
10. تنظیم کړئ د پیل ډول ډول ته اتوماتیک او ځای کیکاږۍ د پیل. Then click Apply followed by OK.
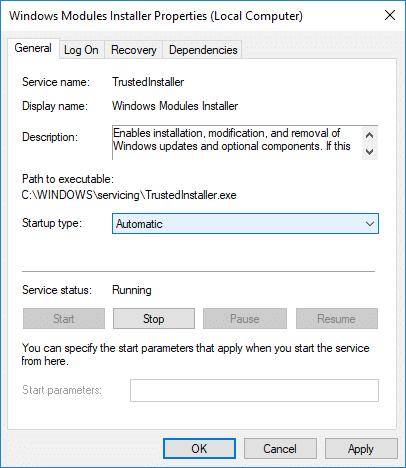
11. د بدلونونو خوندي کولو لپاره خپل کمپیوټر ریبوټ کړئ.
طريقه 4: د سيسټم د ساتلو ستونزه حل کوونکی چلول
1. د وینډوز کیلي + R فشار ورکړئ بیا کنټرول ټایپ کړئ او د خلاصولو لپاره Enter کلیک وکړئ د تضمین اداره.
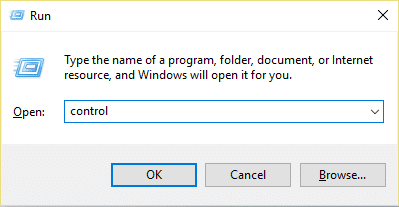
2. د ستونزو حل لټون او کلیک وکړئ خرابوالی.

3. بیا ، کلیک وکړئ د ټولو ښکاره کړی په ښي خوا کې.
4. کلیک وکړه “System Maintenance” د چلولو لپاره System Maintenance Troubleshooter.

5. د ستونزو حل کوونکی کولی شي Fix Windows Modules Installer Worker High CPU Usage, but if it didn’t, then you need to run System Performance Troubleshooter.
6. د کمانډ پرامپټ خلاص کړئ. کارونکي کولی شي دا مرحله د لټون په واسطه ترسره کړي 'سي ايم ډي' او بیا Enter ولیکئ.

7. لاندې کمانډ په cmd کې ټایپ کړئ او Enter کلیک وکړئ:
msdt.exe / id performanceDiagnostic
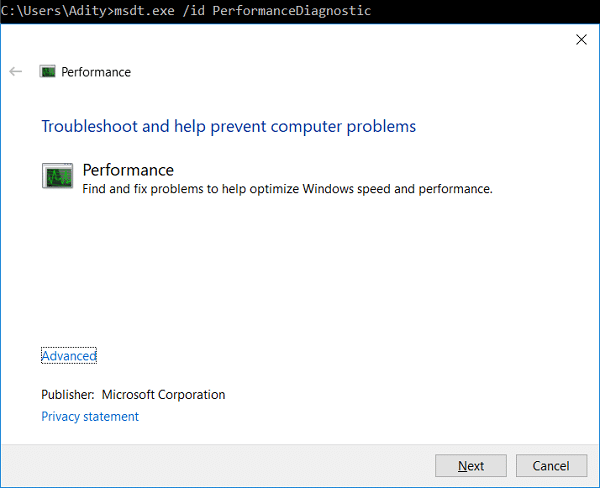
8. Follow the on-screen instruction to run the troubleshooter and fix any issues find the System.
9. Finally, exit the cmd and reboot your PC.
Method 5: Disable Automatic Maintenance
Sometimes Automatic Maintenance can conflict with the Windows Modules Installer Worker service, so try to disable Automatic Maintenance using this guide and see if this fixes your issue.
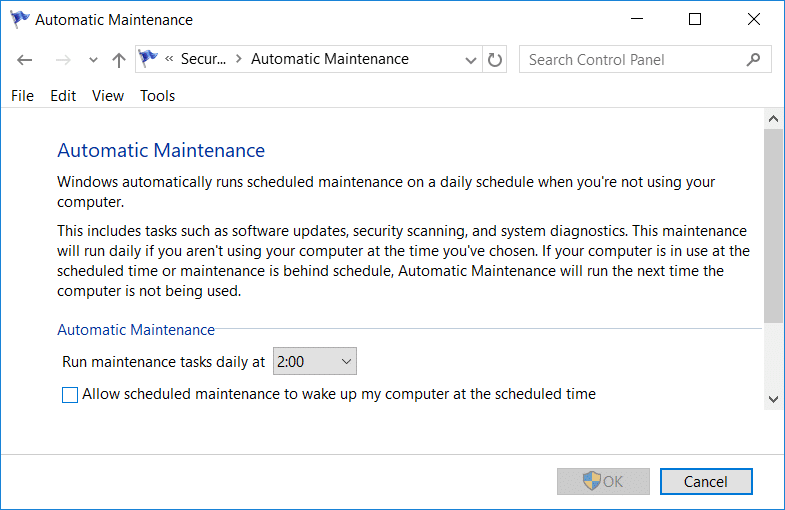
Although disabling Automatic Maintenance is not a good idea, but there might be some case where you need to actually disable it, for example, if your PC freezes during automatic maintenance or Windows Modules Installer Worker High CPU Usage issue then you should disable maintenance to troubleshoot the issue.
Method 6: Run System File Checker and DISM
1. د کمانډ پرامپټ خلاص کړئ. کارونکي کولی شي دا مرحله د لټون په واسطه ترسره کړي 'سي ايم ډي' او بیا Enter ولیکئ.
2. اوس په cmd کې لاندې ټایپ کړئ او انټر کېکاږئ:
Sfc /scannow sfc /scannow /offbootdir=c: /offwindir=c:windows (که پورته ناکامه شي نو دا هڅه وکړئ)

3. د پورتنۍ پروسې پای ته رسیدو ته انتظار وکړئ او یوځل چې بشپړ شي ، خپل کمپیوټر بیا پیل کړئ.
4. یو ځل بیا cmd خلاص کړئ او لاندې کمانډ ټایپ کړئ او د هر یو وروسته انټر کلیک وکړئ:
ډیسم/آنلاین/کلین اپ-انځور/چیک روغتیا ډیسم/آنلاین/کلین اپ-انځور/سکین روغتیا ډیسم/آنلاین/کلین اپ-انځور/بیارغونې روغتیا

5. د DISM کمانډ چلولو ته پریږدئ او د پای ته رسیدو لپاره یې انتظار وکړئ.
6. که پورتنۍ کمانډ کار نه کوي، نو لاندې هڅه وکړئ:
Dism/Image:C:offline/Cleanup-Image/RestoreHealth/Source:c:testmountwindows Dism/Online/Cleanup-Image/RestoreHealth/Source:c:testmountwindows/LimitAccess
نوټ: C:RepairSourceWindows د خپل ترمیم سرچینې سره بدل کړئ (د وینډوز نصب یا ریکوری ډیسک).
7. د بدلونونو خوندي کولو لپاره خپل کمپیوټر ریبوټ کړئ او وګورئ چې تاسو کولی شئ Fix Windows Modules Installer Worker High CPU Usage.
میتود 7: یو پاک بوټ ترسره کړئ
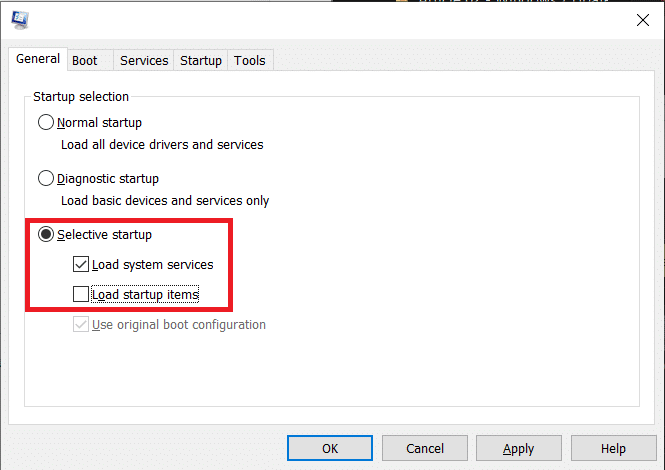
Sometimes 3rd party software can conflict with Windows and can cause the issue. To Fix Windows Modules Installer Worker High CPU Usage issue، تاسو اړتیا لرئ په خپل کمپیوټر کې پاک بوټ ترسره کړئ او مرحله په ګام مسله تشخیص کړئ.
Method 8: Set your WiFi as Metered Connection
نوټ: This will stop Windows Automatic Update, and you will need to manually check for Updates.
1. د خلاصولو لپاره د وینډوز کیلي + I فشار ورکړئ امستنې بیا کلیک وکړئ شبکه او انټرنیټ.

2. د کیڼ لاس مینو څخه، غوره کړئ وائی فای
3. Under Wi-Fi, ټک on your currently connected network (WiFi).
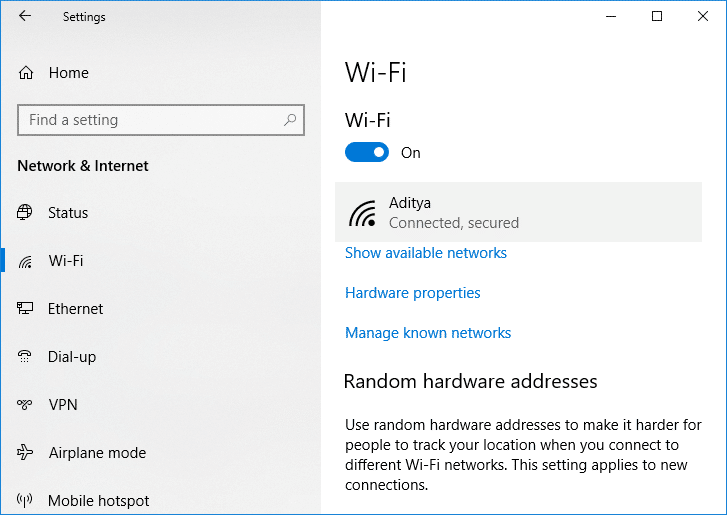
4. Scroll down to Metered connection and ټګل فعال کړئ لاندې "د متقاعد پیوستون په توګه وټاکئ".
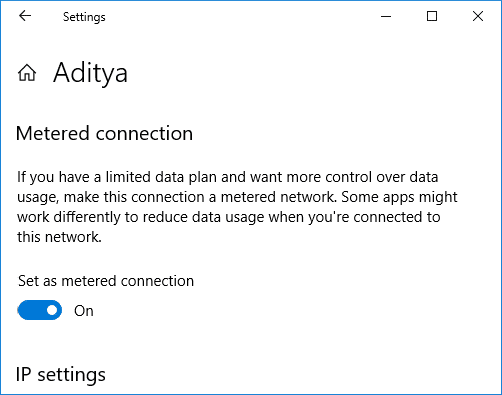
5. Close Settings and reboot your PC to save changes.
سپارښتنه:
دا دی، تاسو په بریالیتوب سره یاست Fix Windows Modules Installer Worker High CPU Usage مګر که تاسو لاهم د دې ټیوټوریل په اړه کومه پوښتنه لرئ نو د تبصرې په برخه کې یې وپوښتئ.
