Rebuild Font Cache in Windows 10

Font Cache works the same way as Icon Cache, and Windows operating system creates a cache for fonts to load them faster and to display them to the interface of the app, Explorer etc. If for some reason the font cache is corrupted then the fonts may not appear properly, or it starts displaying invalid font characters in Windows 10. To resolve this issue, you need to rebuild the font cache, and in this post, we will see how to do that.
The font cache file is stored in the Windows folders: C:WindowsServiceProfilesLocalServiceAppDataLocalFontCache, If you are trying to access this folder then you won’t be able to do that directly as Windows protect this folder. Font’s are cached in more than one files in the above folder. Anyway, without wasting any time, let’s see How to Rebuild Font Cache in Windows 10 with the help of the below-listed tutorial.
Rebuild Font Cache in Windows 10
ډاډ ترلاسه کړئ چې د بیا رغونې نقطه رامینځته کړئ یوازې په هغه صورت کې چې یو څه غلط شي.
طریقه 1: په لاسي ډول په وینډوز 10 کې د فونټ کیچ بیا جوړ کړئ
1. د وینډوز کیلي + R فشار ورکړئ بیا ټایپ کړئ خدمات .msc او داخل کړئ.

2. Scroll down till you find “Windows Font Cache service” in the services window.
نوټ: Press W key on the keyboard to locate the Windows Font Cache service.
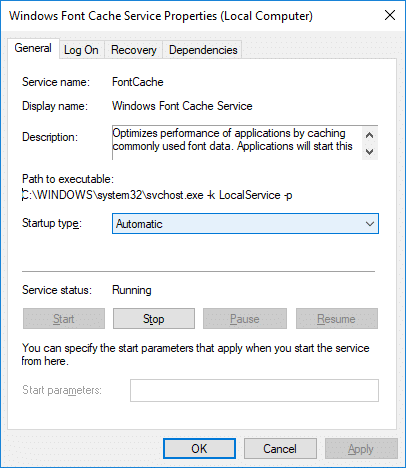
3. Right-click on Window Font Cache Service بیا غوره کوي ځانتياوې.
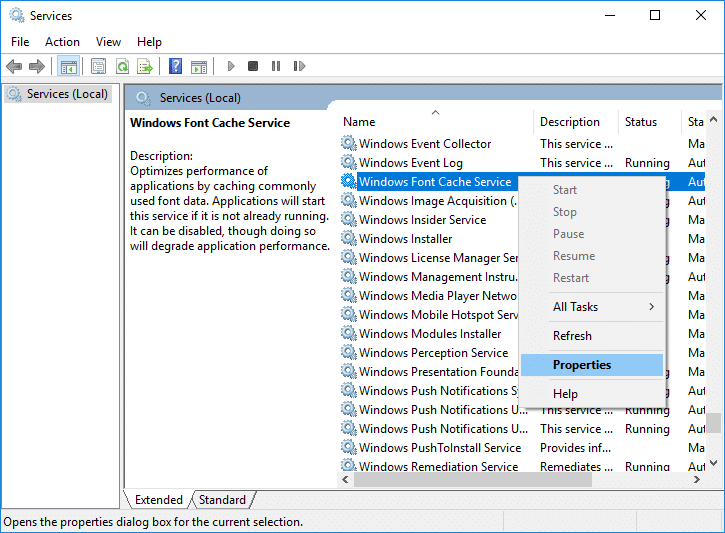
4. Make sure to click on درېدل بیا یې تنظیم کړئ د پیل ډول ډول as معیوبیت
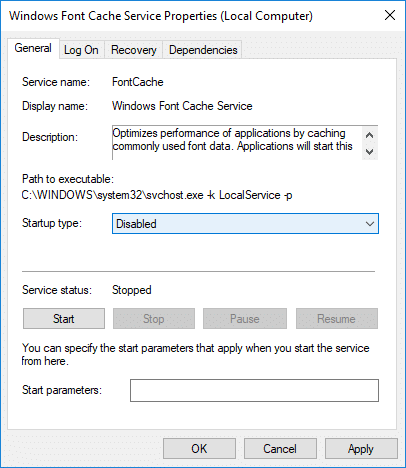
5. په پلي کولو کلیک وکړئ، ورپسې هوکی.
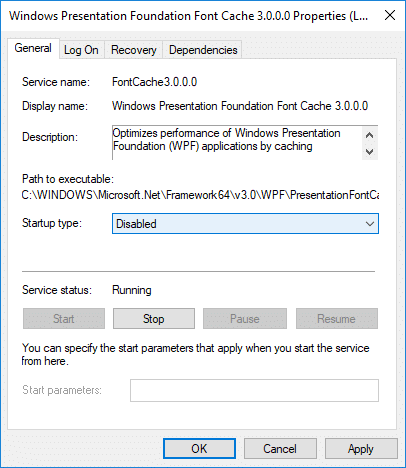
6. Do the same (Follow the steps 3 to 5) for Windows Presentation Foundation Font Cache 3.0.0.0.
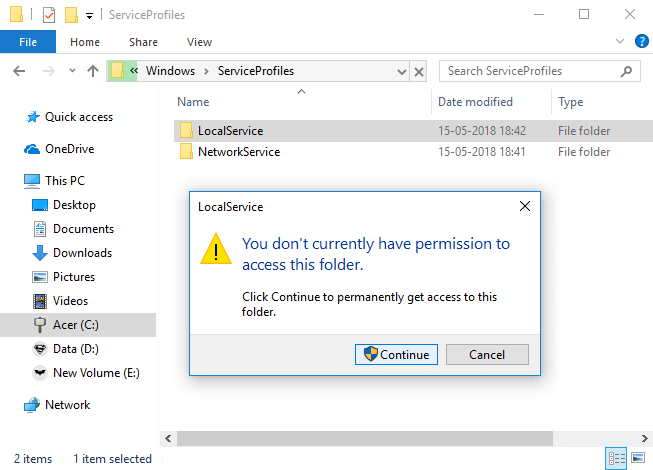
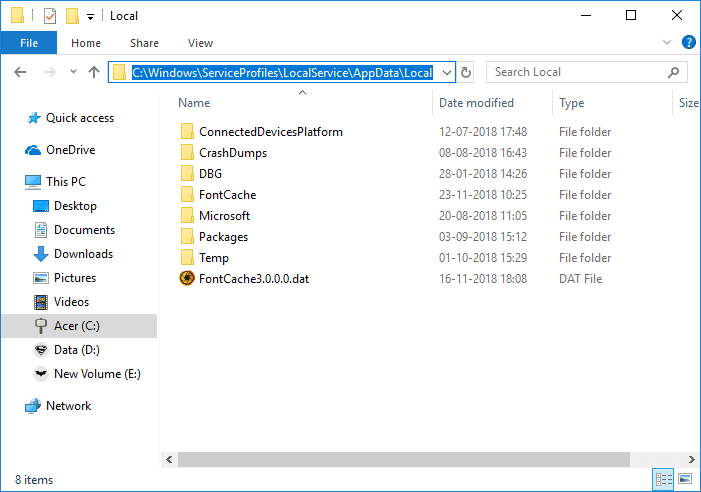
7. Now navigate to the following folder by going to one folder at a time:
C:WindowsServiceProfilesLocalServiceAppDataLocal
نوټ: Do not copy and paste the above path as certain directories are protected by Windows. You need to manually double-click on each of the above folders and click ته دوام ورکړي to access the above folders.
8. Now once inside the Local folder, delete all the files with the name FontCache and .dat as the extension.
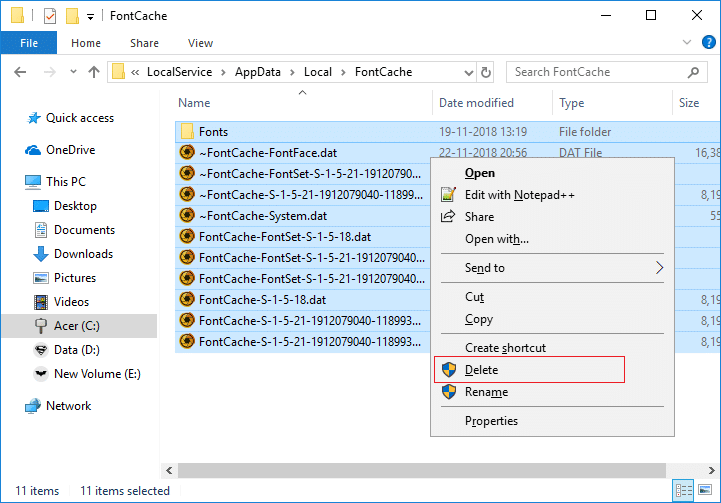
9. Next, double-click on the FontCache پوښۍ او delete all of its content.
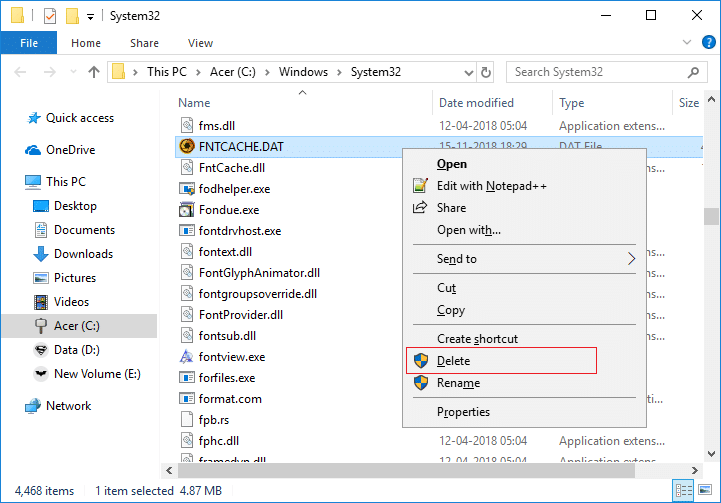
10. You need to also delete the file FNTCACHE.DAT له لاندې لارښود څخه:
C: WindowsSystem32
11. Once done, reboot your PC to save changes.
12. After the reboot, make sure to start the following services and set their startup type as Automatic:
Windows Font Cache Service
د وینډوز پریزنټشن فاونډیشن فونټ کیچ 3.0.0.0
13. This will successfully Rebuild Font Cache in Windows 10.
If you still see the invalid characters after restarting, you need to repair your Windows 10 using DISM.
Method 2: Rebuild Font Cache in Windows 10 using the BAT file
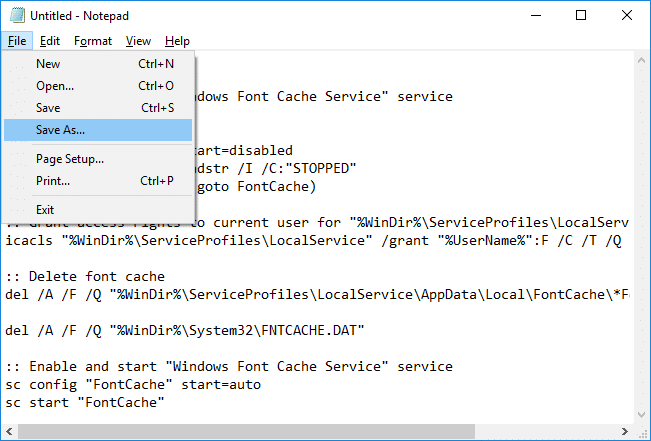
1.Open Notepad then copy & paste the following:
@echo off

:: Stop and disable "Windows Font Cache Service" service
:FontCache
sc stop "FontCache"
sc config "FontCache" start=disabled
sc query FontCache | findstr /I /C:"STOPPED"
if not %errorlevel%==0 (goto FontCache)

:: Grant access rights to current user for "%WinDir%ServiceProfilesLocalService" folder and contents
icacls "%WinDir%ServiceProfilesLocalService" /grant "%UserName%":F /C /T /Q

:: Delete font cache
del /A /F /Q "%WinDir%ServiceProfilesLocalServiceAppDataLocalFontCache*FontCache*"

del /A /F /Q "%WinDir%System32FNTCACHE.DAT"

:: Enable and start "Windows Font Cache Service" service
sc config "FontCache" start=auto
sc start "FontCache"
2.Now from Notepad menu click on د دوتنې بیا بیا ټک وکړئ په توګه خوندي کړئ.
3. From Save as type drop-down select “ټولې فایلونه” then under File name type Rebuild_FontCache.bat (. د بیټ توسیع خورا مهم دی).
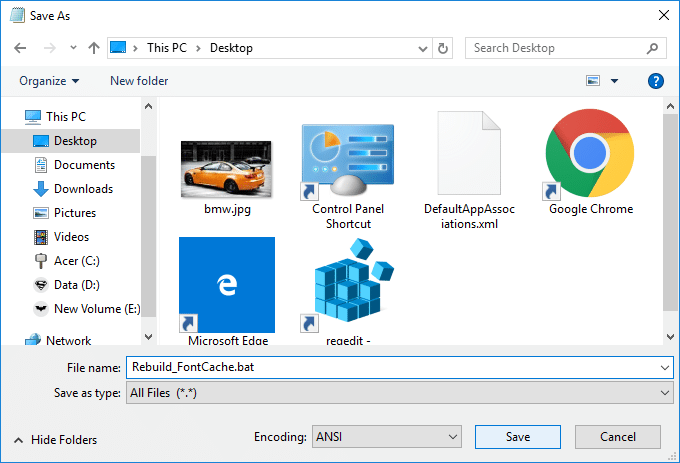
4. Make sure to navigate to desktop then click on خوندي کړئ.
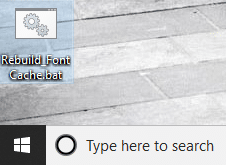
5. دوه ځله کلیک وکړئ Rebuild_FontCache.bat to run it and once done reboot your PC to save changes.
سپارښتنه:
دا دی، تاسو په بریالیتوب سره زده کړل How to Rebuild Font Cache in Windows 10 مګر که تاسو لاهم د دې ټیوټوریل په اړه کومه پوښتنه لرئ نو د تبصرې په برخه کې یې وپوښتئ.