په وینډوز 10 کې په شالید کې د ایپس چلولو مخه ونیسئ

Your Windows OS lets some apps and processes run in the background, without you even touching the app. Your عملیاتي سیسټم does this to improve system performance. There are many such apps, and they run without your knowledge. While this feature of your OS might be handy for your system performance and keeps your apps up to date, but there may be some apps that you don’t really need. And these apps sit in the background, eating up all your device battery and other system resources. Also, disabling these background apps can even make the system work faster. Now that’s something you really need. Disabling an app from running in the background will mean that after you close the app, all the processes related to it will be terminated until you relaunch it. Here are a few ways that you can use to stop a few or all of the apps from running in the background.
په وینډوز 10 کې په شالید کې د ایپس چلولو مخه ونیسئ
ډاډ ترلاسه کړئ چې د بیا رغونې نقطه رامینځته کړئ یوازې په هغه صورت کې چې یو څه غلط شي.
#1. If You Want to Stop Specific Background Apps
Disabling background apps can save you a lot of battery and might enhance your system speed. This gives you enough reason to disable background apps. The catch here is that you can’t just blindly disable every app from running in the background. Some apps need to keep running in the background to perform their functions. For example, an app that notifies you about your new messages or emails will not send notifications if you disable it from the background. So you have to be sure that the app’s or your system’s working or functionality is not hampered by doing so.
Now, suppose you have a few particular apps that you want to disable from the background while keeping the rest untouched, you can do so using privacy settings. Follow the given steps:
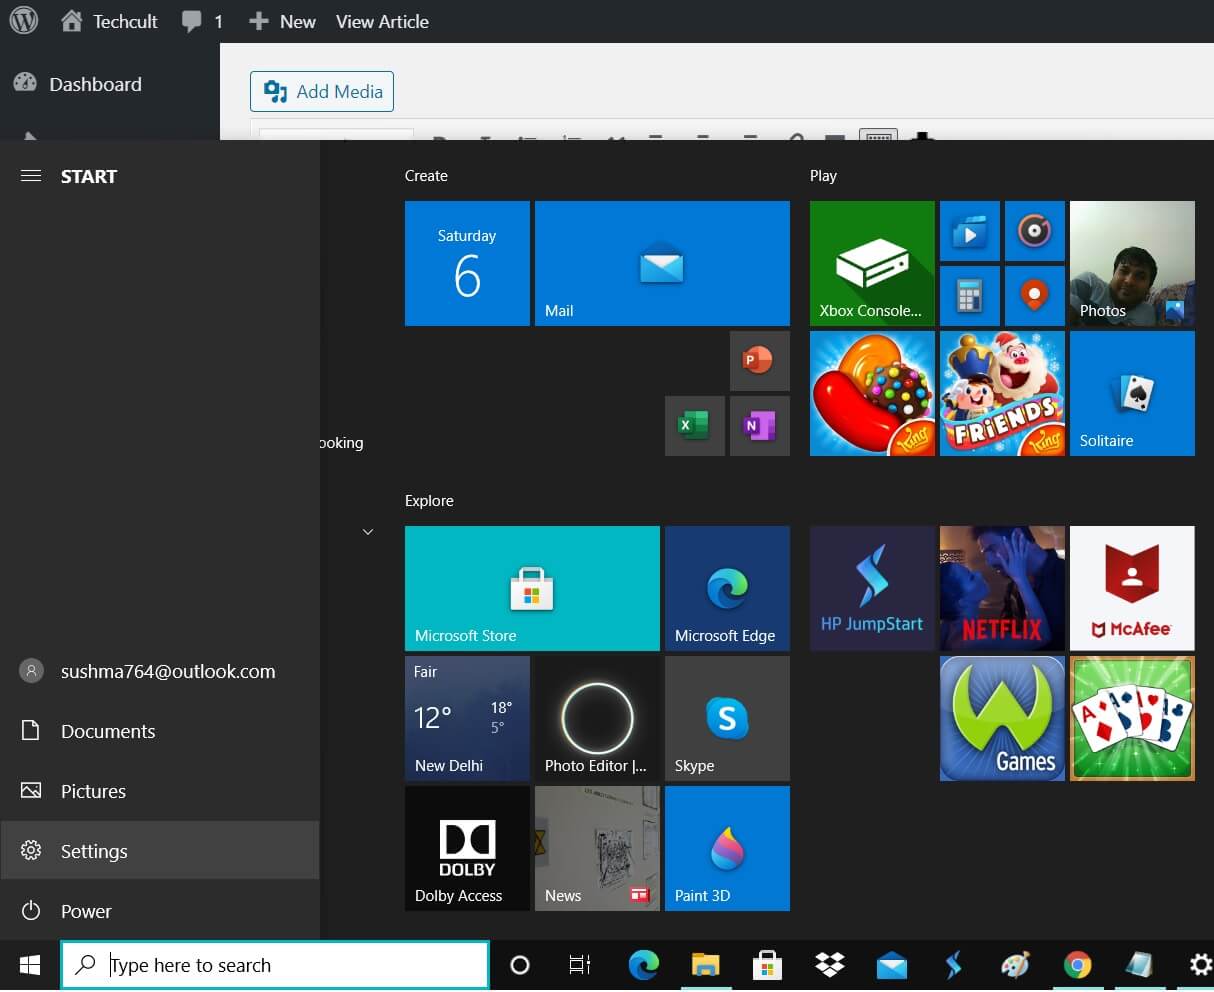
1. په کلیک وکړئ د پیل ستاسو په ټاسک بار کې نښه.
2. بیا په کلیک وکړئ د ګیر نښه پورته د خلاصولو لپاره امستنې.
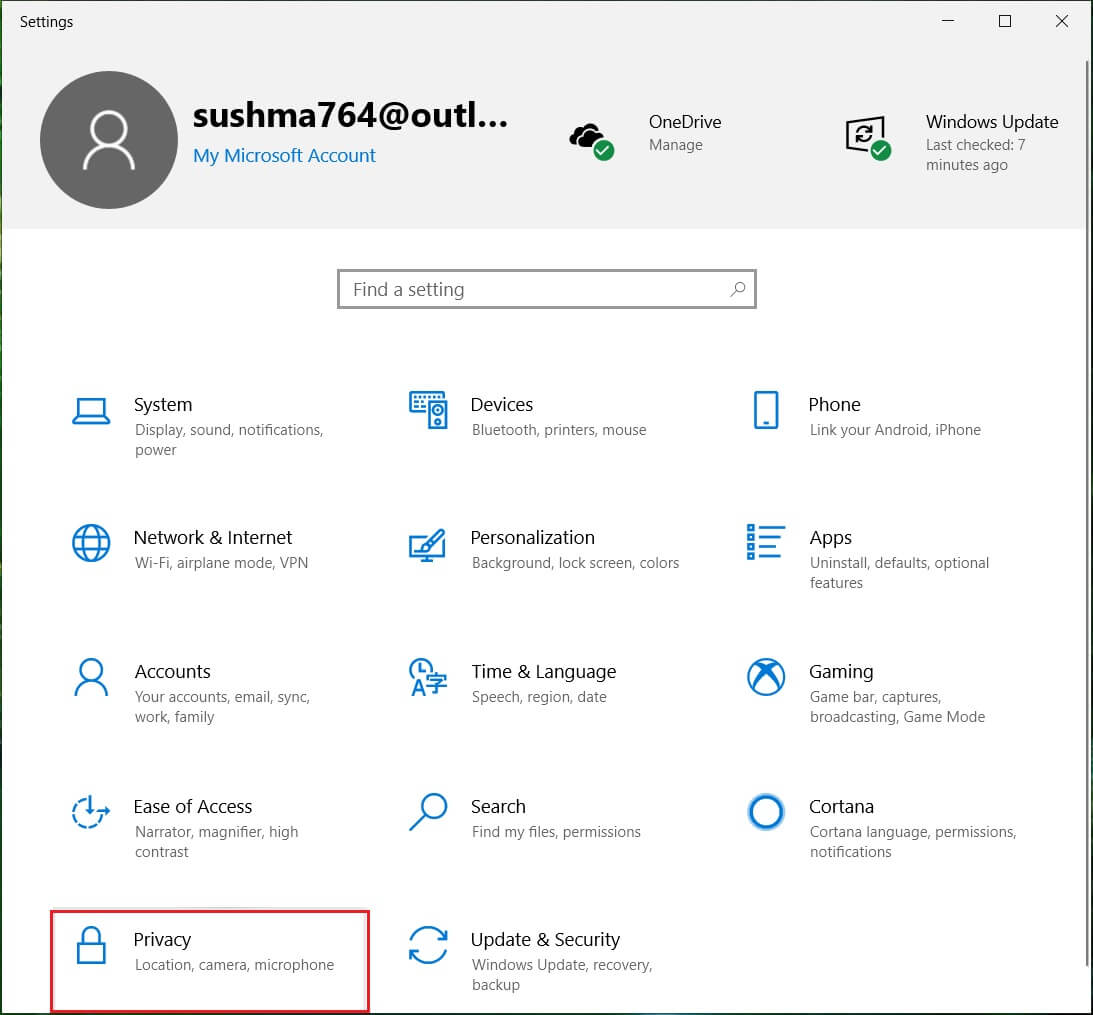
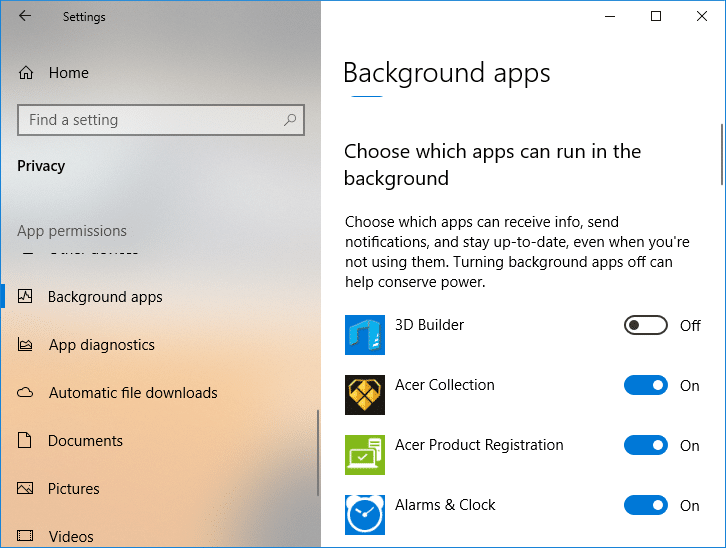
3. From the settings window, click on the د پټنتيا انځورن.
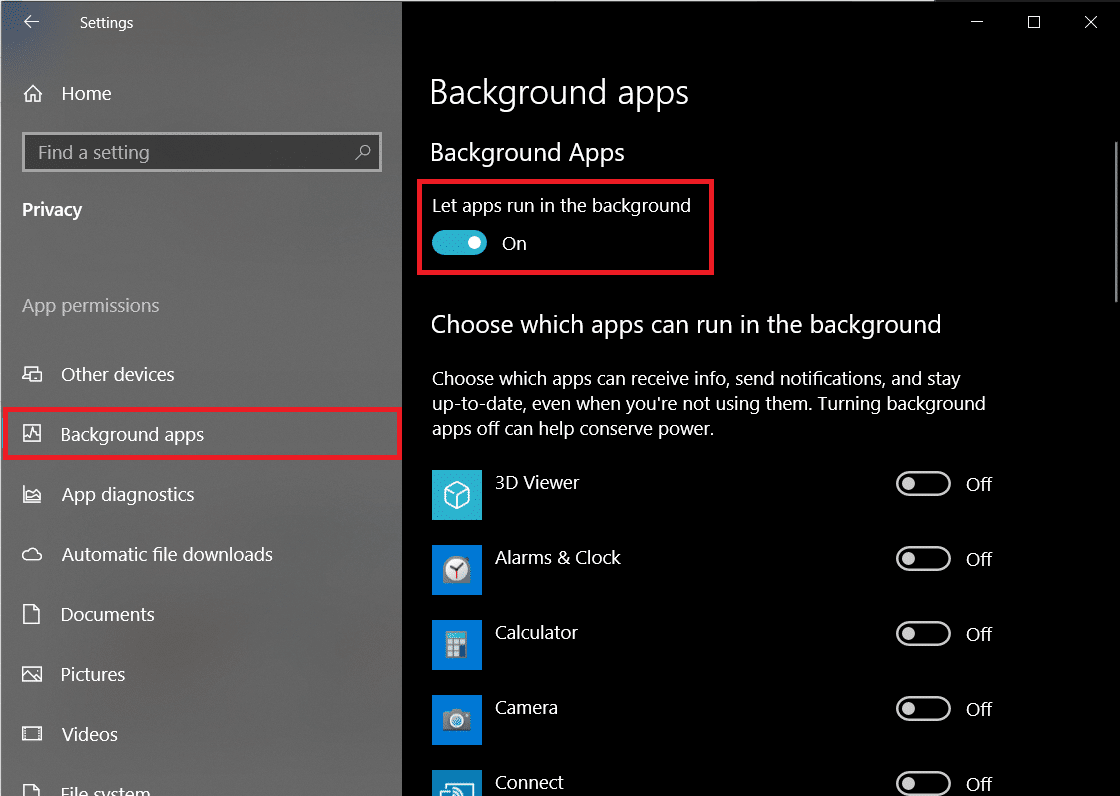
4. وټاکئ 'شالید اطلاقاتد کیڼ اړخ څخه.
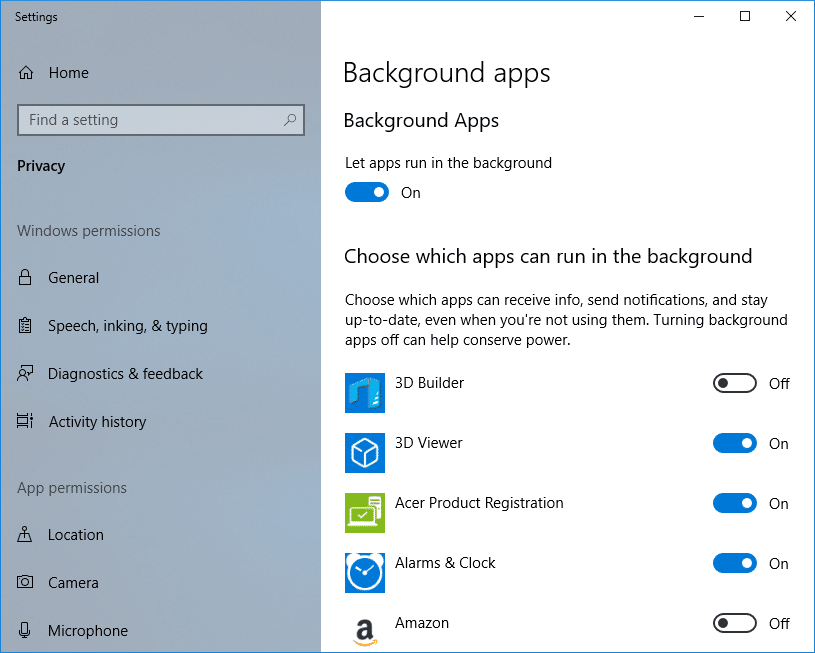
5. You will see ‘اجازه راکړئ چې په شالید کې ځغلول’ toggle, make sure to switch it on.
6. Now, in the ‘Choose which apps can run in the background’ list, turn off the toggle switch for the app that you want to restrict.
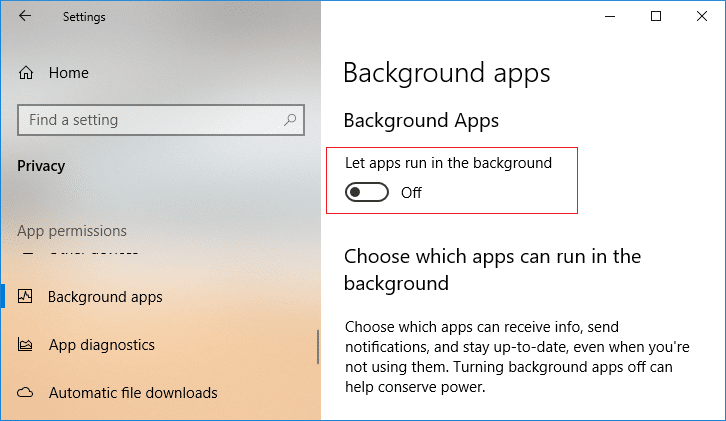
7. However, if for some reason, you want to restrict every app from running in the background, بندول 'اجازه راکړئ چې په شالید کې ځغلول'.
This is how you stop apps from running in the background on Windows 10 but if you are looking for another method, then don’t worry, just follow the next one.
#2. If You Want to Stop All Background Apps
What do you do when your system is running out of battery? Turn on battery saver, right? Battery saver saves the battery from draining out quickly by disabling apps from running in the background (unless specifically allowed). You can utilize this feature of battery saver to stop all background apps easily. Also, enabling the background apps again will not be tough too.
Though the battery saver mode turns on automatically when your battery falls below a specified percentage, which by default is 20%, you can decide to turn it on manually whenever you want. To turn on battery saver mode,
1. په کلیک وکړئ د بیټرۍ نښه on your taskbar and then select ‘د بیټرۍ سیور'.
2. For a more recent version of Windows 10, you have an option to set the battery life vs best performance trade-off. To enable battery saver mode, click on the battery icon on your taskbar and drag the ‘د بریښنا حالت’ slider to its extreme left.
![]()
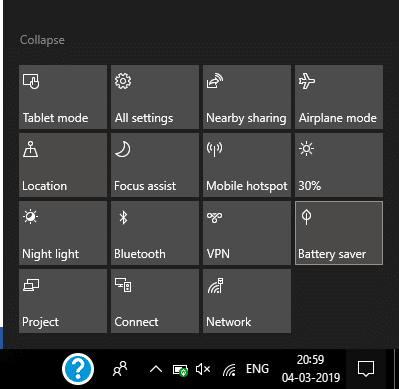
3. Another way to enable battery saver mode is from notifications icon on the taskbar. In the Action Center (Windows Key + A), you can directly click on the ‘د بیټرۍ سیورتڼۍ.
Another way of enabling battery saver is from settings.
- Open settings and go to ‘سيستم'.
- وټاکئ د بیټرۍ د ښي لور څخه.
- Turn on ‘Battery saver status until next charge’ toggle switch to enable battery saver mode.

پدی لار، all background apps will be restricted.
#3. Disable Desktop Apps from Running in Background
The above methods do not work for Desktop apps (those downloaded from the Internet or with some media and launched using .EXE or .DLL files). Desktop apps won’t appear in your ‘Choose which apps can run in the background’ list and are not affected by the ‘Let apps run in the background’ setting. To allow or block desktop apps, you will have to use the settings in those applications. You will have to close those apps when you aren’t using them and also ensure to close them from your system tray. You can do so by
1. Click on the upward arrow in your notification area.
2. Right-click on any system tray icon and exit it.
![]()
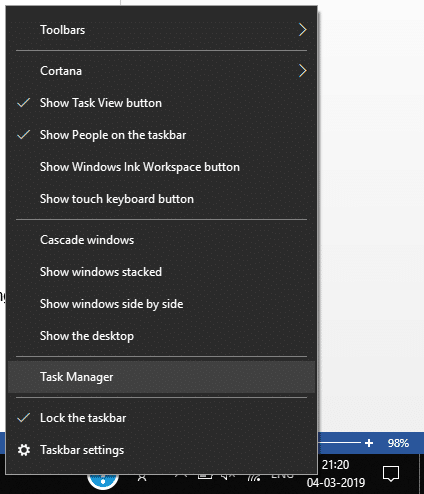
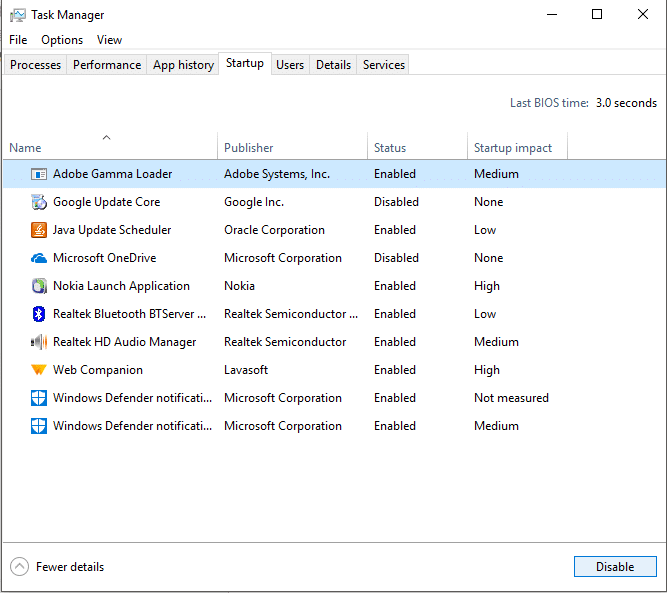
Some apps are automatically loaded when you sign in. To stop any app from doing so,
1. Right-click on your taskbar then selects ‘د کاري مدیرد مینو څخه.
2. ته لاړشئشروع کول'ټب.
3. Select the app you want to stop from automatically starting and click on ‘نافعال'.
These are ways you can use to disable some or all of the apps running in the background to enhance battery life and system speed.
سپارښتنه:
زه امید لرم چې دا مقاله ګټوره وه او اوس تاسو کولی شئ په اسانۍ سره په وینډوز 10 کې په شالید کې د ایپس چلولو مخه ونیسئ، مګر که تاسو لاهم د دې ټیوټوریل په اړه کومه پوښتنه لرئ نو د تبصرې برخه کې یې د پوښتنې کولو لپاره وړیا احساس وکړئ.