- in Windows by Administrador
Fix Computer does not start until restarted multiple times

Fix Computer does not start until restarted multiple times: There seems to be a new issue with PC users, which is when they first turn ON their PC the power comes ON, fans start to spin but everything suddenly stops and PC never gets a display, in short, PC automatically turned OFF without any warning. Now if the user, powers off the PC and then turned it back ON, the computer boots normally without any additional issues. Basically, Computer does not start until restarted multiple times which is very annoying for basic Windows users.
Sometimes you need to boot up to 4-5 time before you could see the display or even boot your PC, but there is no guarantee that it will boot. Now living in this uncertainty, that you may or may not be able to use your PC next day is not such a good thing, so you need to address this problem immediately.
Now there are only a few issues which can cause this problem, so you can definitely troubleshoot this issue easily. The problem sometimes can be related to software like the main culprit seems to be Fast Startup in many cases and disabling it seems to fix the issue. But if this doesn’t fix the issue then you can be sure that the issue is related to hardware. In hardware, this can be a memory issue, faulty power supply, BIOS Settings or CMOS battery dried up, etc. So without wasting any time let’s see how to Fix Computer does not start until restarted multiple times with the help of the below-listed guide.
Fix Computer does not start until restarted multiple times
Certifique-se de criar um ponto de restauração, caso algo dê errado.
Observação: Some of the methods require expert supervision as you can seriously damage your PC while performing the steps, so if you don’t know what you’re doing then take your laptop/PC to a service repair center. If your PC is under warranty then opening the case can temper/void the warranty.
Método 1: Desligue a inicialização rápida
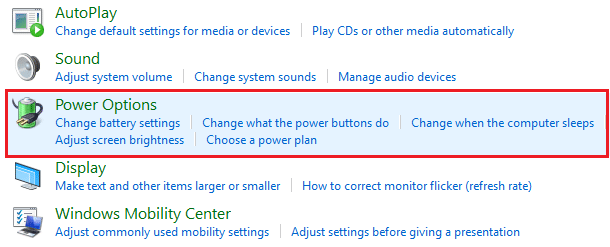
1.Pressione a tecla Windows + R, digite control e pressione Enter para abrir Painel De Controle.

2.Clique em Hardware e som então clique em Opções de energia.
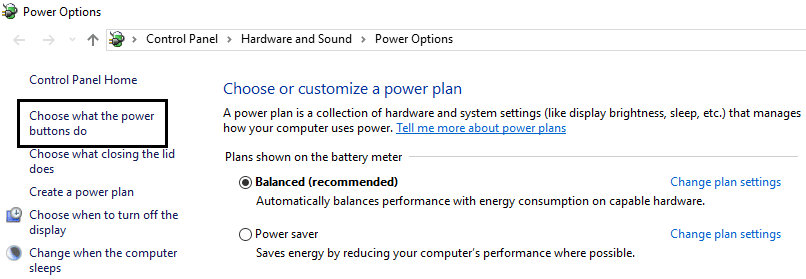
3.Em seguida, no painel esquerdo da janela, selecione “Escolha o que os botões de energia fazem."
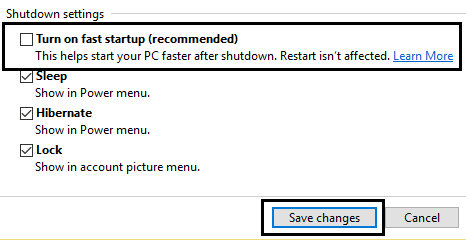
4.Agora clique em “Altere as configurações que estão atualmente indisponíveis."

5. Desmarque “Ativar inicialização rápida”E clique em Salvar alterações.
Método 2: execute o reparo automático
1.Insira o DVD de instalação inicializável do Windows 10 e reinicie o seu PC.
2.Quando solicitado pressione qualquer tecla para inicializar a partir de CD ou DVD, pressione qualquer tecla para continuar.

3.Selecione suas preferências de idioma e clique em Avançar. Clique em Reparar seu computador no canto inferior esquerdo.

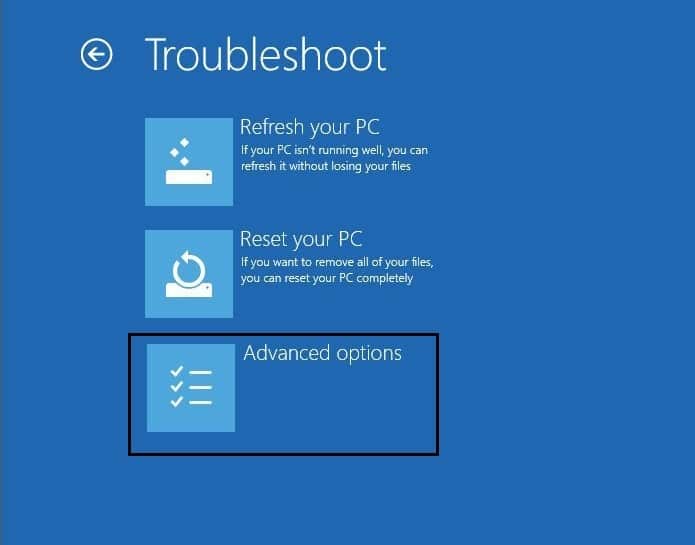
4.Na tela de escolha de uma opção, clique em Resolução de problemas.

5.Na tela Solução de problemas, clique em Opção avançada.
6.Na tela de opções avançadas, clique em Reparo Automático ou Reparo de Inicialização.
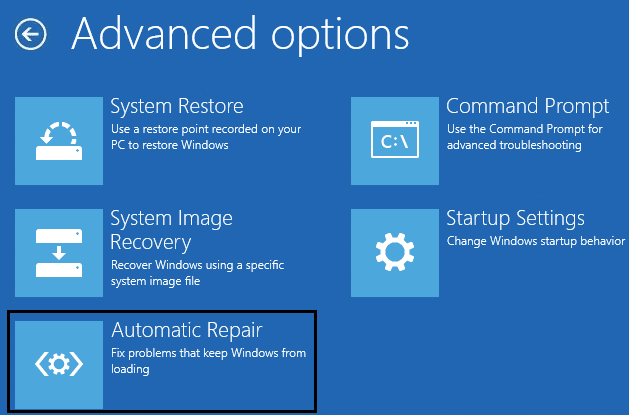
7.Espere até o Reparos automáticos/de inicialização do Windows completa.
8.Reinicie e você conseguiu Fix Computer does not start until restarted multiple times issue, se não, continue.
Leia também: Como consertar o Reparo Automático não conseguiu reparar o seu PC.
Método 3: redefinir o BIOS para as configurações padrão
1. Desligue seu laptop, ligue-o e simultaneamente pressione F2, DEL ou F12 (dependendo do seu fabricante) para entrar em Configuração da BIOS.

2.Now you’ll need to find the reset option to carregue a configuração padrão e pode ser nomeado como Redefinir para o padrão, Carregar padrões de fábrica, Limpar configurações do BIOS, Carregar padrões de configuração ou algo semelhante.

3.Select it with your arrow keys, press Enter, and confirm the operation. Your BIOS agora usará seu configurações padrão.
4.Once you’re logged into Windows see if you’re able to Fix Computer does not start until restarted multiple times issue.
Method 4: Check if hard disk is failing
In many cases, the issue occurs because of the failing hard disk and to check if this is the problem here you need to disconnect the hard disk from your PC and connect it to another PC and try to boot from it. If you can boot from the hard disk without any issue on the other PC then you can be sure that the issue is not related to it.
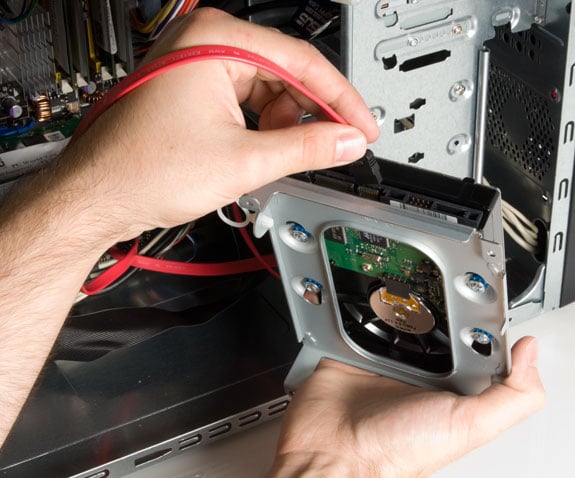
Another way to test your hard disk is download and burn the SeaTools for DOS on a CD then run the test to check if your hard disk is failing or not. You will need to set the first boot to CD/DVD from BIOS in order for this to work.
Método 5: Verifique a fonte de alimentação
A faulty or failing Power Supply is generally the cause for PC not starting at the first boot. Because if the power consumption of hard disk is not met, it won’t get enough power to run and subsequently you may need to restart the PC several times before it can take the adequate power from PSU. In this case, you may need to replace the power supply with a new one or you could borrow a spare power supply to test if this is the case here.
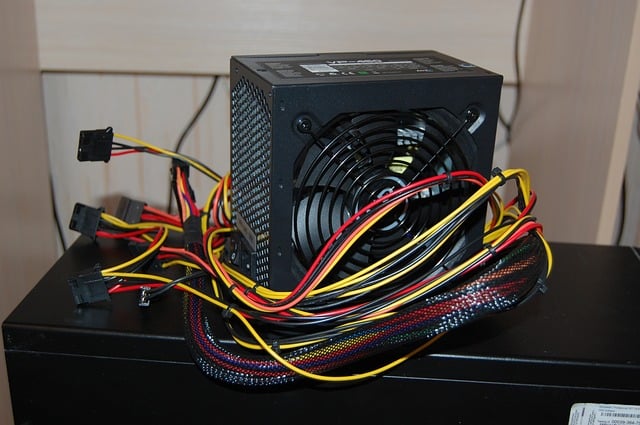
If you have recently installed a new hardware such as video card then chances are the PSU is not able to deliver the necessary power needed by the graphic card. Just temporary remove the hardware and see if this fixes the issue. If the issue is resolved then in order to use the graphic card you may need to purchase a higher voltage Power Supply Unit.
Method 6: Replace CMOS battery
If CMOS battery has dried up or no longer deliver powers then your PC won’t start and after few days it will eventually start hanging up. In order to fix the issue, it’s advised to replace your CMOS battery.
Método 7: Redefinição ATX
Observação: Esse processo geralmente se aplica a laptops; portanto, se você tiver um computador, deixe esse método.
1.Power off your laptop then remove the power cord, leave it for few minutes.
2. Agora remova a bateria por trás e pressione e segure o botão liga / desliga por 15 a 20 segundos.
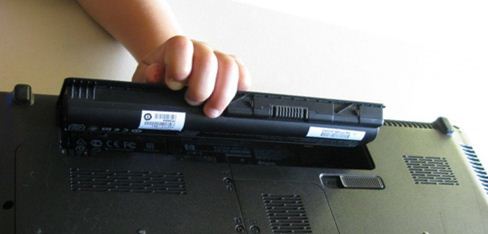
Observação: Não conecte o cabo de alimentação ainda, nós lhe diremos quando fazer isso.
3.Now plug in seu cabo de alimentação (a bateria não deve ser inserida) e tente inicializar seu laptop.
4.If it’s boot properly then again turn off your laptop. Put in the battery and again start your laptop.
If the problem is still there again turn off your laptop, remove power cord & battery. Press & hold the power button for 15-20 seconds and then insert the battery. Power on the laptop and this should fix the issue.
Now if any of the above methods weren’t helpful then it means the problem is with your motherboard and unfortunately, you need to replace it in order to fix the issue.
Recomendado:
É isso que você conseguiu com sucesso Fix Computer does not start until restarted multiple times issue mas se você ainda tiver alguma dúvida sobre este guia, sinta-se à vontade para perguntar na seção de comentários.