- in Windows by Administrador
Fix Windows Modules Installer Worker High CPU Usage
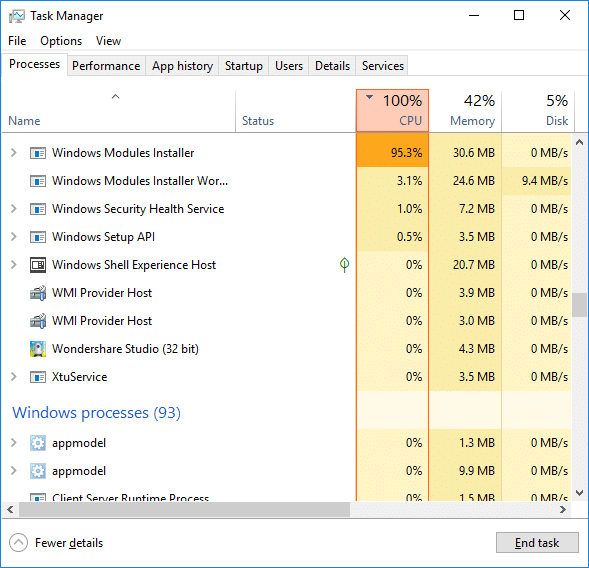
If you are facing the High CPU Usage by Windows Modules Installer Worker, then don’t worry as thousands of other users are also facing the similar problem and therefore, there are many working fixes which we will be discussing today in this article. To verify if you are facing this issue open Task Manager (Ctrl + Shift + Esc) and you will find that the Windows Modules Installer Worker is consuming High CPU or Disk Usage.

Dica Pro: You may leave your PC overnight or for a few hours to see the issue rectify itself once the Windows is finished downloading and installing updates.
What is Windows Modules Installer worker (WMIW)?
Windows Modules Installer worker (WMIW) is a service which takes cares of automatically installing Windows Update. According to its service description, WMIW is a system process that enables automatic installation, modification, and removal of Windows updates and optional components.
This process is responsible for finding new Windows Update automatically and installing them. As you might be aware that Windows 10 automatically install newer builds (i.e. 1803 etc.) via Windows Updates, so this process is responsible for installing these updates in the background.
Although this process is called Windows Modules Installer worker (WMIW) and you will see the same name in the Processes tab in the Task Manager, but if you switch to Details tab, then you will find the name of the file as TiWorker.exe.
Why Is Windows Modules Installer worker Using So Much CPU?
As Windows Modules Installer worker (TiWorker.exe) runs continuously in the background, sometimes it might utilize high CPU or disk usage when installing or uninstalling Windows Updates. But if its constantly using high CPU then the Windows Modules Installer worker may have become unresponsive while checking new updates. As a result, you may be experiencing lags, or your system might hang or freeze completely.
The first thing users do when they experience freezing, or lagging issues on their system is to restart their PC, but I assure you that this strategy won’t work in this case. This is because the issue will not resolve by itself until and unless you fix the underlying cause.
Fix Windows Modules Installer Worker High CPU Usage
Certifique-se de criar um ponto de restauração caso algo dê errado.
Windows Modules Installer Worker (WMIW) is an important service, and it should not be disabled. WMIW or TiWorker.exe is not a virus or malware, and you cannot just delete this service from your PC. So without wasting any time let’s see How to Fix Windows Modules Installer Worker High CPU Usage com a ajuda do guia de solução de problemas listado abaixo.
Método 1: execute o solucionador de problemas do Windows Update
1. Pressione a tecla Windows + I para abrir Configurações então clique em Ícone de atualização e segurança.
![]()
2. No menu esquerdo, selecione Resolução de problemas debaixo "Levante-se e corra” click on Windows Update.
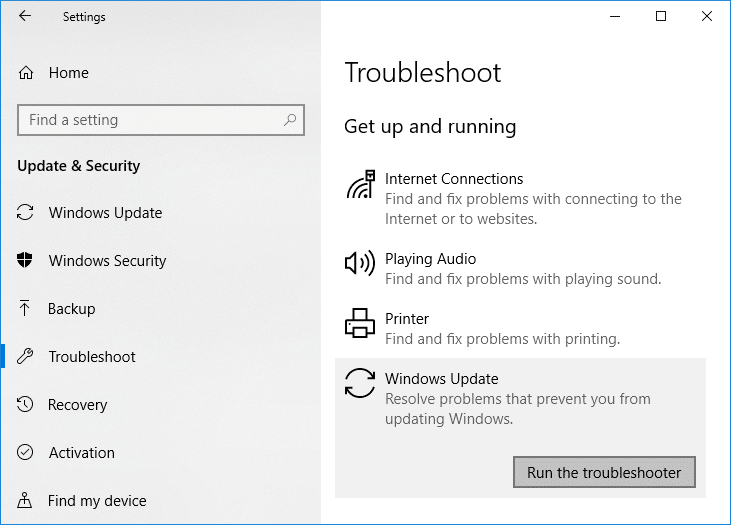
3. Agora clique em “Executar a resolução de problemas”No Windows Update.
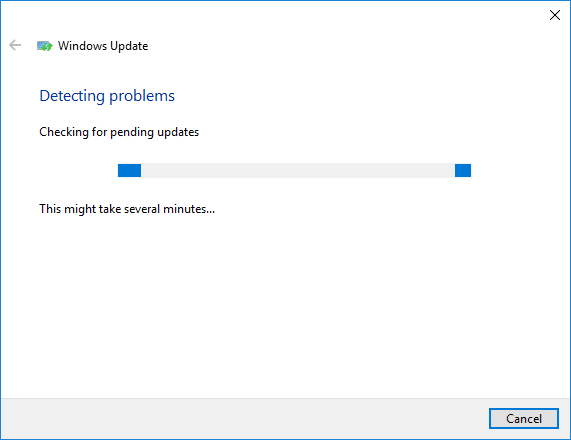
4. Let the troubleshooter run, and it will automatically fix any issues found with Windows Update taking forever.
Method 2: Manually Check for Windows Updates
1. Pressione a tecla Windows + I e selecione Atualização e segurança.
2. Do lado esquerdo, o menu clica em Windows Update.
3. Agora clique no botão “Verificar atualizações”Para verificar se há atualizações disponíveis.

4. Se alguma atualização estiver pendente, clique em Baixe e instale atualizações.

5. Assim que as atualizações forem baixadas, instale-as e seu Windows ficará atualizado.
Method 3: Configure Windows Update to Manual
Cuidado: This method will switch Windows Update from automatically installing the new updates to the manual. This means you have to manually check for Windows Update (weekly or monthly) to keep your PC secure. But follow this method, and you can again set the Updates to Automatic once the issue is resolved.
1.Pressione a tecla Windows + R e digite services.msc e pressione Enter.

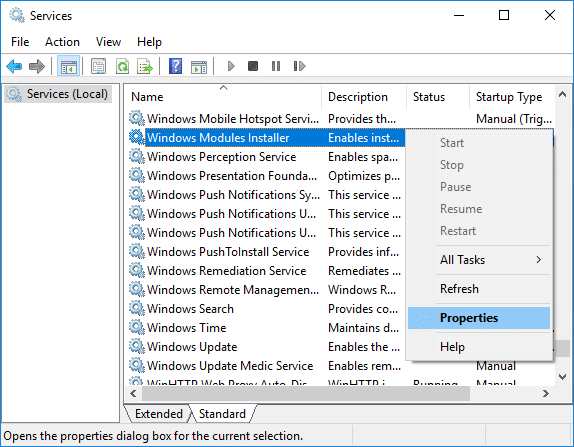
2. Role para baixo e encontre Módulos do Windows Installer serviço na lista.
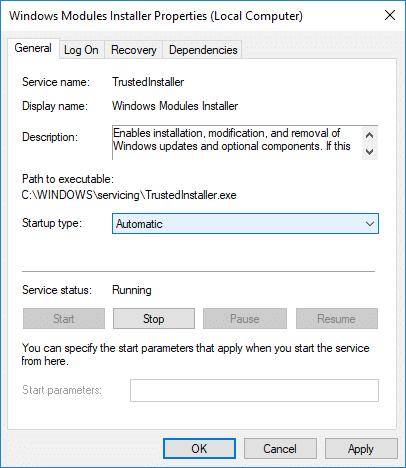
3. Clique com o botão direito do mouse em Serviço Instalador de Módulos do Windows e selecione Propriedades.
4. Agora clique em Dê um basta then from the tipo de inicialização drop-down select Manual.
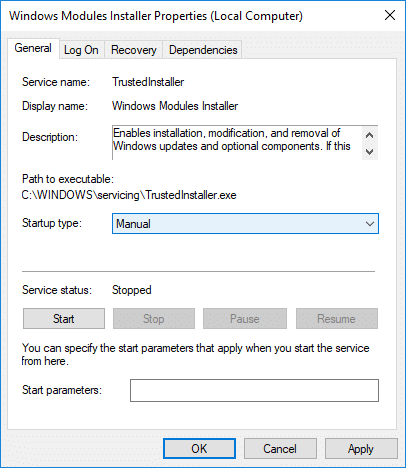
5. Clique em Aplicar, seguido de OK.
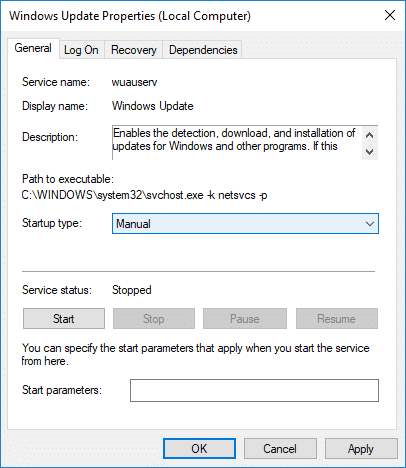
6. Similarly, follow the same step for the Windows Update service.
7. Reinicie o seu PC para salvar as alterações.
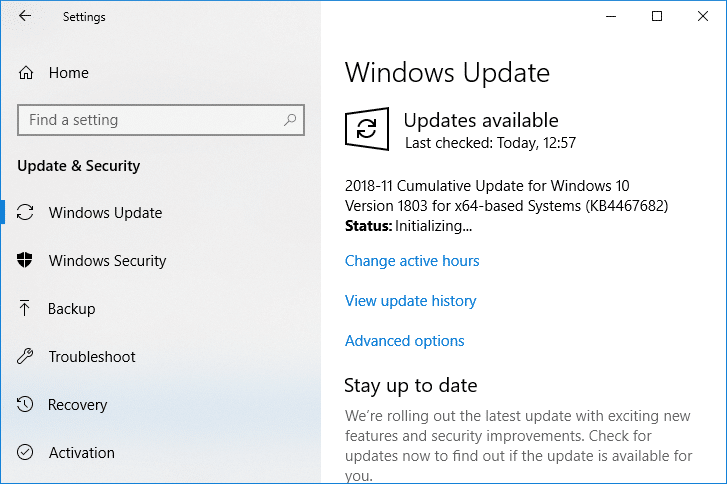
8. Novamente verificar se há Windows Updates Manually e instale todas as atualizações pendentes.
9. Once is done, again go back to services.msc window and open the Windows Modules Installer & Windows Update Properties janela.
10. Colocou o tipo de inicialização para Automático e clique Início. Then click Apply followed by OK.
11. Reinicie o seu PC para salvar as alterações.
Método 4: execute o solucionador de problemas de manutenção do sistema
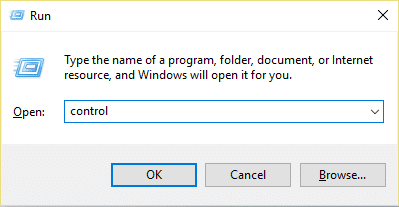
1. Pressione a tecla Windows + R, digite control e pressione Enter para abrir Painel De Controle.
2. Pesquise Solução de problemas e clique em Solução de problemas.

3. Em seguida, clique em Ver tudo no painel esquerdo.
4. Clique em “System Maintenance” para executar o System Maintenance Troubleshooter.

5. O solucionador de problemas pode ser capaz de Fix Windows Modules Installer Worker High CPU Usage, but if it didn’t, then you need to run System Performance Troubleshooter.
6. Abra o prompt de comando. O usuário pode realizar esta etapa pesquisando por 'cmd' E depois pressione Enter.

7. Digite o seguinte comando em cmd e pressione Enter:
msdt.exe / id PerformanceDiagnostic
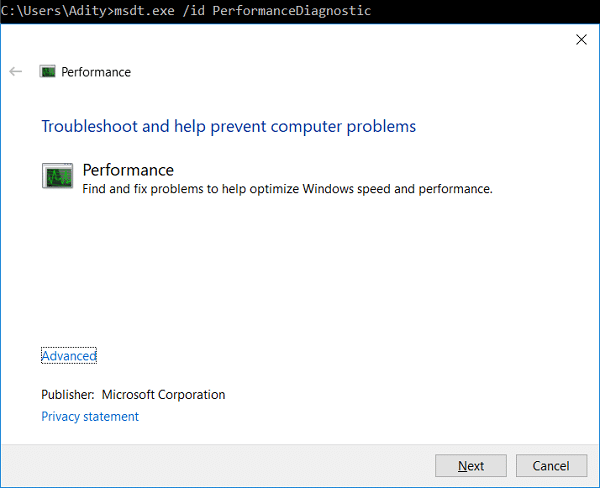
8. Follow the on-screen instruction to run the troubleshooter and fix any issues find the System.
9. Finally, exit the cmd and reboot your PC.
Method 5: Disable Automatic Maintenance
Sometimes Automatic Maintenance can conflict with the Windows Modules Installer Worker service, so try to disable Automatic Maintenance using this guide and see if this fixes your issue.
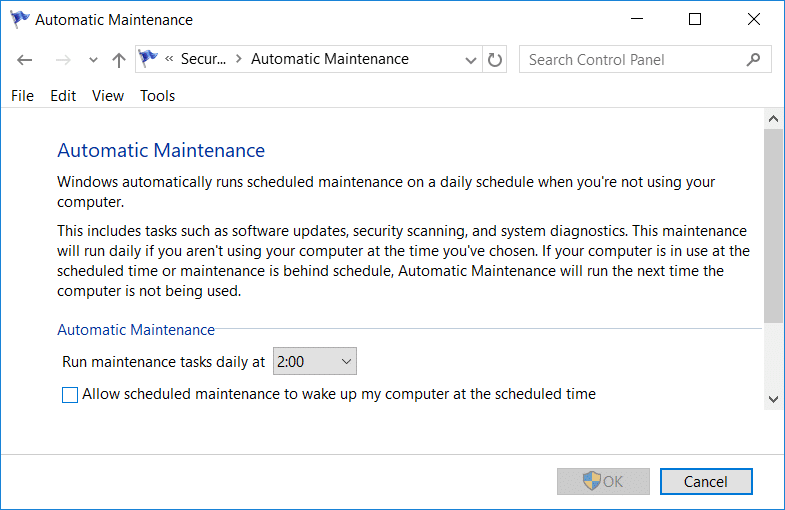
Although disabling Automatic Maintenance is not a good idea, but there might be some case where you need to actually disable it, for example, if your PC freezes during automatic maintenance or Windows Modules Installer Worker High CPU Usage issue then you should disable maintenance to troubleshoot the issue.
Método 6: execute o verificador de arquivos do sistema e DISM
1. Abra o prompt de comando. O usuário pode realizar esta etapa pesquisando por 'cmd' E depois pressione Enter.
2.Agora digite o seguinte no cmd e pressione Enter:
Sfc /scannow sfc /scannow /offbootdir=c: /offwindir=c:windows (se o procedimento acima falhar, tente este)

3. Aguarde a conclusão do processo acima e, quando terminar, reinicie o PC.
4. Abra novamente o cmd e digite o seguinte comando e pressione Enter após cada um:
Dism /Online /Imagem de limpeza /CheckHealth Dism /Online /Imagem de limpeza /ScanHealth Dism /Online /Imagem de limpeza /RestoreHealth

5. Deixe o comando DISM ser executado e espere que ele termine.
6. Se o comando acima não funcionar, tente o seguinte:
Dism /Image:C:offline /Cleanup-Image /RestoreHealth /Fonte:c:testmountwindows Dism /Online /Cleanup-Image /RestoreHealth /Fonte:c:testmountwindows /LimitAccess
Observação: Substitua C:RepairSourceWindows pela sua fonte de reparo (instalação do Windows ou disco de recuperação).
7. Reinicie o seu PC para salvar as alterações e veja se você consegue Fix Windows Modules Installer Worker High CPU Usage.
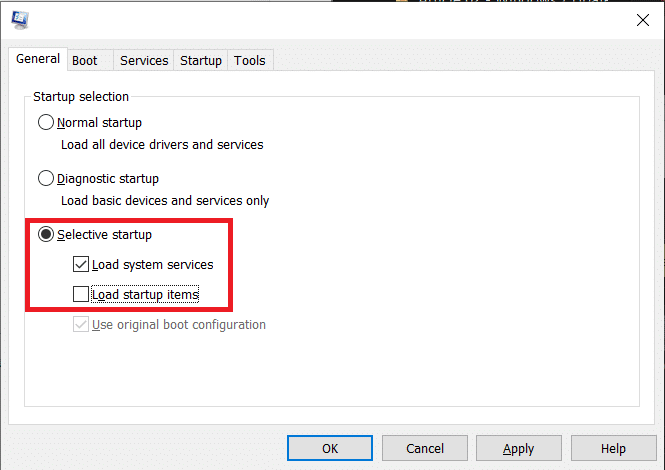
Método 7: Execute uma inicialização limpa
Sometimes 3rd party software can conflict with Windows and can cause the issue. To Fix Windows Modules Installer Worker High CPU Usage issue, você precisa realizar uma inicialização limpa em seu PC e diagnosticar o problema passo a passo.
Method 8: Set your WiFi as Metered Connection
Observação: This will stop Windows Automatic Update, and you will need to manually check for Updates.
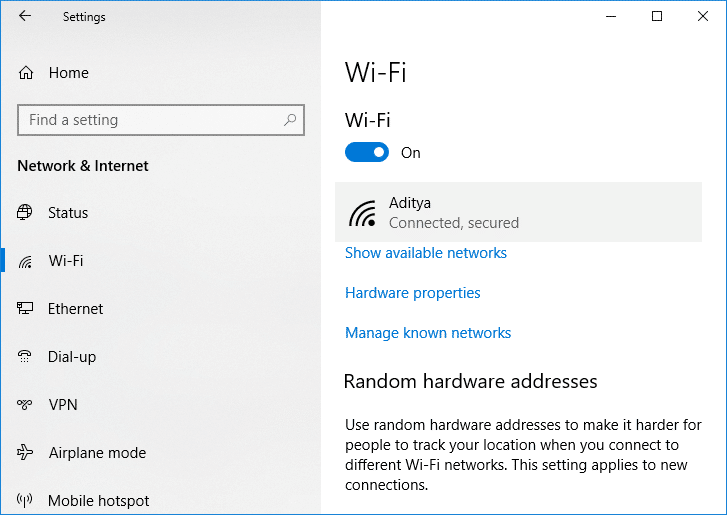
1. Pressione a tecla Windows + I para abrir Configurações então clique em Rede e Internet.

2. No menu esquerdo, selecione Wi-Fi gratuito.
3. Under Wi-Fi, clique on your currently connected network (WiFi).
4. Scroll down to Metered connection and ativar a alternância debaixo "Definir como conexão medida".
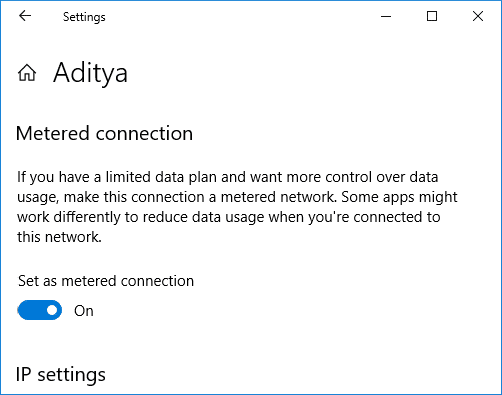
5. Close Settings and reboot your PC to save changes.
Recomendado:
É isso, você conseguiu Fix Windows Modules Installer Worker High CPU Usage mas se você ainda tiver alguma dúvida sobre este tutorial, sinta-se à vontade para perguntar na seção de comentários.
