With an earlier version of Windows, users could only track their Wireless (Wi-Fi) or Ethernet Adapter data usage. Still, with the Windows 10 April 2018 Update version 1803, you can now set a data limit for Ethernet, Wi-Fi, and mobile networks. Although you could set Ethernet or Wi-Fi connections as metered, you couldn’t restrict the data usage by any of these networks.
This feature works best for those who use a limited data broadband plan; in such cases keeping track of your data usage becomes difficult, and this is where the new feature of Windows 10 comes into action. Once you reach your data limit, Windows will notify you regarding the same. You can also restrict the network’s background data usage, and once you reach within the 10% of the data limit, background data usage will be restricted. Anyway, without wasting any time, let’s see How to set Data Limit for WiFi and Ethernet in Windows 10 with the help of the below-listed tutorial.
How to set Data Limit for WiFi and Ethernet in Windows 10
Asigurați-vă că ați creat un punct de restaurare în cazul în care ceva nu merge bine.
Method 1: Set Data Limit for WiFi and Ethernet in Windows 10 Settings
1. Apăsați tasta Windows + I pentru a deschide setări cont apoi faceți clic pe Network & Internet icon.

2. Now, from the left-hand menu, select Utilizarea de date.
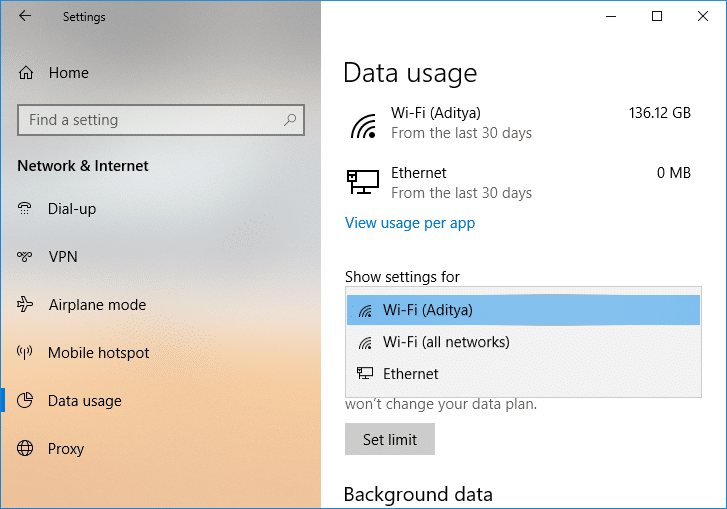
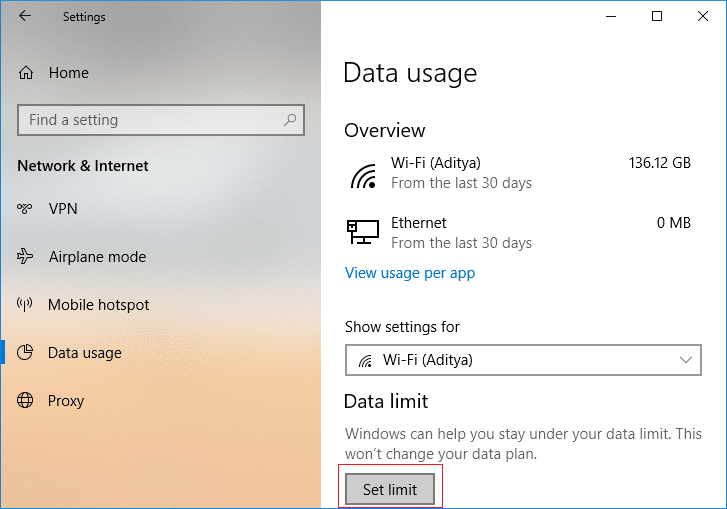
3. In the right-hand side window, from the “Show settings for” dropdown select the network connection you want to set a data limit for and then click on “Set limit"Buton.
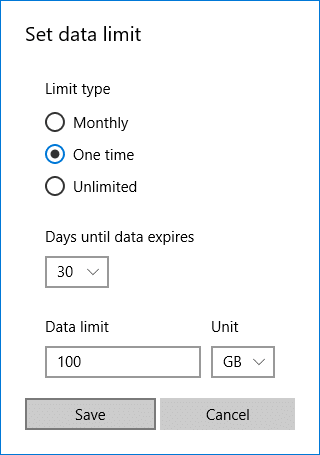
4. Următor →, specify the limit type, monthly reset date, data limit, etc. apoi apasa Salvare.

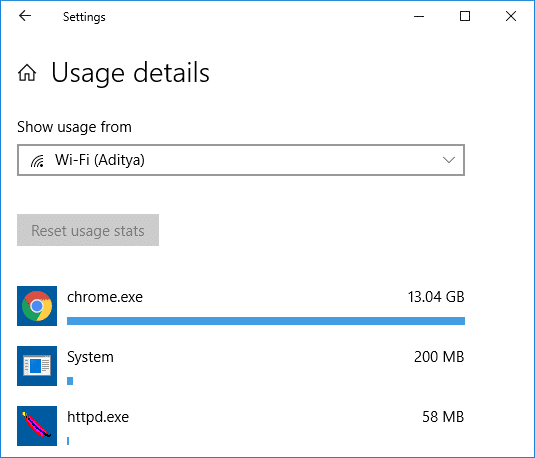
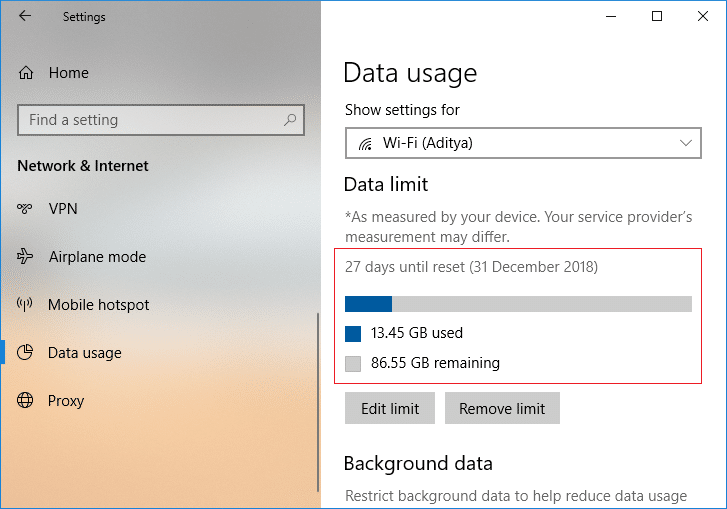
Notă: Once you click Save, it will detail how much your data has been consumed till now as the data has already been tracked.
Method 2: Set Background Data Limit for WiFi and Ethernet in Windows 10 Settings
1. Apăsați tasta Windows + I pentru a deschide setări cont apoi faceți clic pe Network & Internet icon.
2. Now, from the left-hand menu, select Utilizarea de date.
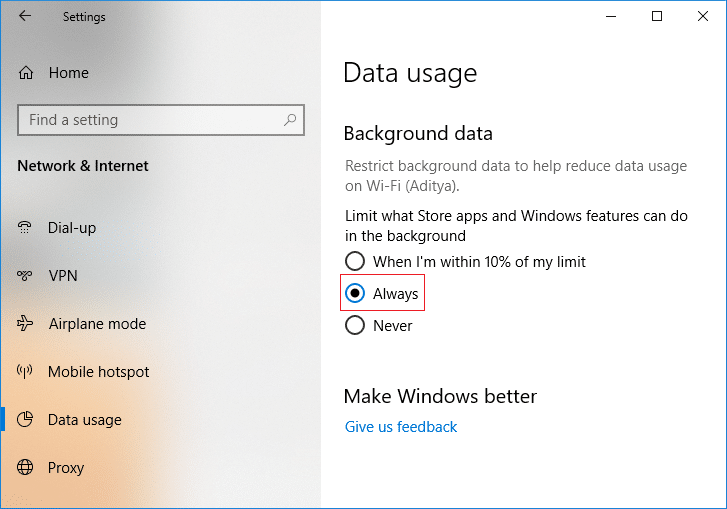
3. Următor →, select the network connection for which you want to set the data limit from the “Show settings for” drop-down then under Date de fundal either select “Totdeauna "Sau"Niciodată".
Method 3: Edit Data Limit for WiFi and Ethernet in Windows 10 Settings
1. Apăsați tasta Windows + I pentru a deschide reglajs then click on the Network & Internet icon.
2. Now, from the left-hand menu, select Utilizarea de date.
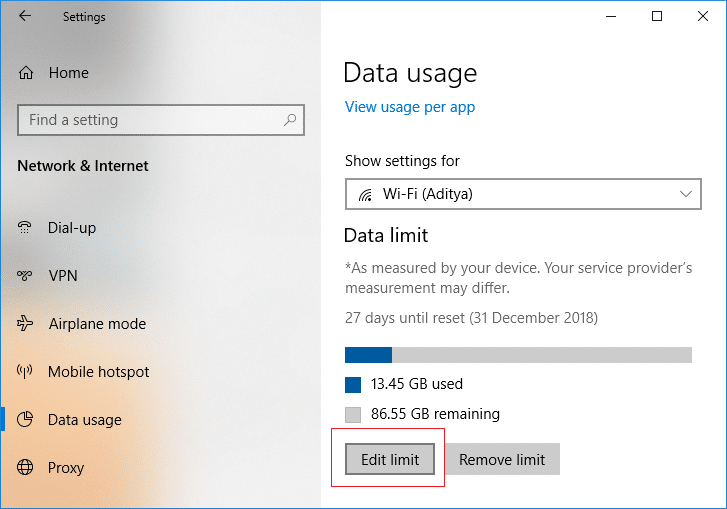
3. In the right-hand side window, from the “Show settings for” dropdown select the network connection you want to edit the data limit for and then to click on “Editare limită"Buton.
4. Din nou specify the data limit you want to set for this network connection and then faceți clic pe Salvare.
Method 4: Remove Data Limit for WiFi and Ethernet in Windows 10 Settings
1. Apăsați tasta Windows + I pentru a deschide setări cont apoi faceți clic pe Network & Internet icon.
2. Now, from the left-hand menu, select Utilizarea de date.
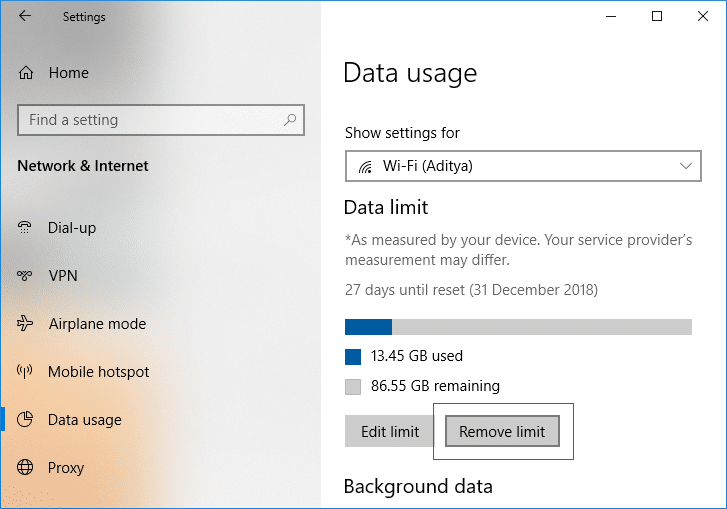
3. Următor →, select the network connection for which you want to remove the data limit from the “Show settings for” drop-down then click on “Eliminați limita"Buton.
4. Again click on Elimină pentru a vă confirma acțiunile.
5. Once finished, you can close the Settings window.
Recomandat:
Asta ai invatat cu succes How to set Data Limit for WiFi and Ethernet in Windows 10 dar dacă mai aveți întrebări cu privire la această postare, nu ezitați să le întrebați în secțiunea de comentarii.
")
