Synchronize Windows 10 Clock with an Internet Time Server

Synchronize Windows 10 Clock with an Internet Time Server: If you have set the Clock in Windows 10 to automatically set time then you may be aware that the current time is synchronized with an Internet Time Server in order to update time. This means that the clock on your PC’s Taskbar or Windows Settings is updated at regular intervals to match the time on the time server which ensures that your clock has accurate time. You need to be connected to the internet for time to automatically synchronize with an Internet time server without which the time won’t be updated.
Now Windows 10 uses the Network Time Protocol (NTP) to connect with the Internet time servers in order to synchronize Windows Clock. If the time in Windows Clock is not accurate then you could face network issues, corrupted files, and incorrect timestamps in documents & important files. With Windows 10 you could easily change the time servers or can even add a custom time server when necessary.
So now you know it’s important for your Windows to display the correct time in order to ensure proper functioning of your PC. Without which certain applications and Windows services will start experiencing issues. So without wasting any time let’s see How to Synchronize Windows 10 Clock with an Internet Time Server with the help of the below-listed tutorial.
How to Synchronize Windows 10 Clock with an Internet Time Server
Asigurați-vă că ați creat un punct de restaurare în cazul în care ceva nu merge bine.
Method 1: Synchronize Windows 10 Clock with an Internet Time Server in Internet Time Settings
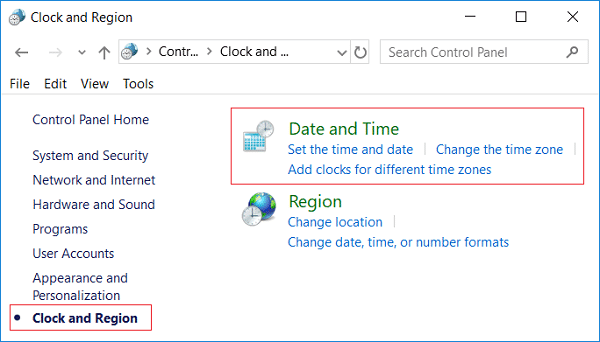
1.Tip Control in Windows 10 Search then click on Panou de control din rezultatul căutării.

2. Acum faceți clic pe „Ceas, limbă și regiune" apoi apasa "Data și ora".
3.Under Date and Time window click “Schimbați data și ora".
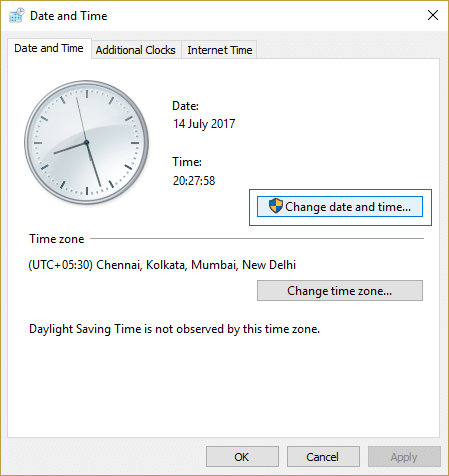
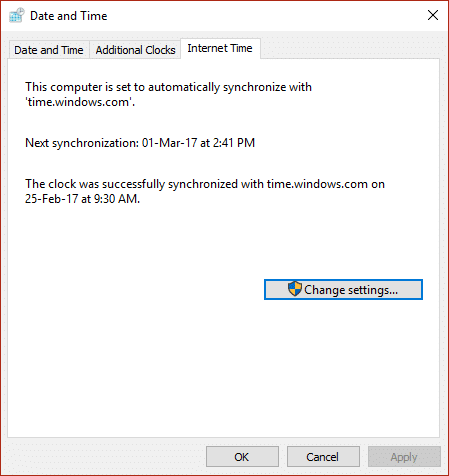
4.Switch to Internet Time then click on “Schimbă setările".
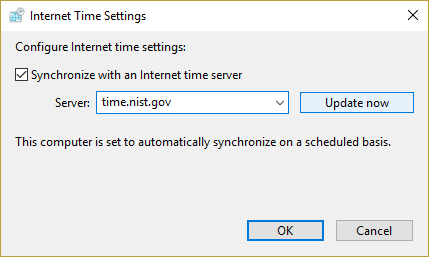
5. Asigurați-vă că bifați „Sincronizați cu un server de timp Internet” box, then select a time server from the Server drop-down and click Update Now.
6.Click Ok then click Apply followed by OK again.
7.If the time is not updated then choose a different Internet time server and again click Update now.

8.Reporniți computerul pentru a salva modificările.
Method 2: Synchronize Windows 10 Clock with an Internet Time Server in Command Prompt
1.Apăsați tasta Windows + X apoi selectați Comandă Prompt (Admin).

2. Tastați următoarea comandă în cmd și apăsați Enter:
w32tm / resync
net time /domain
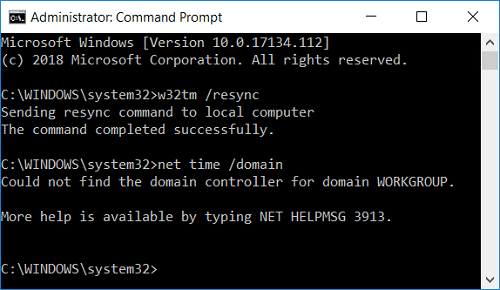
3.Dacă primești un The service has not been started. (0x80070426) error, atunci trebuie start Windows Time service.
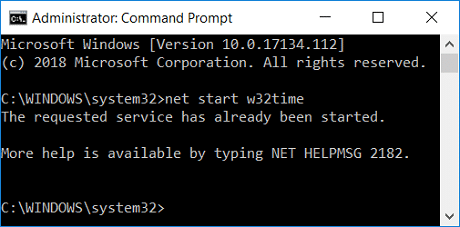
4.Type the following command to start Windows Time service then again try to synchronize Windows Clock:
net începe w32time
5.Close Command Prompt and restart your PC.
Method 3: Change the Internet Time Synchronization Update Interval
1.Apăsați tasta Windows + R apoi tastați regedit și apăsați Enter pentru a deschide Editorul Registrului.

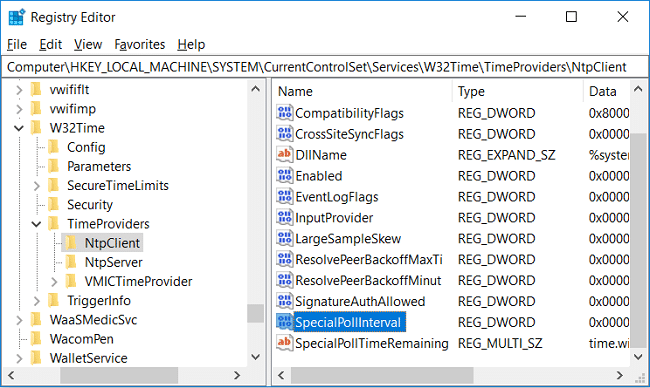
2. Navigați la următoarea cheie de registry:
ComputerHKEY_LOCAL_MACHINESYSTEMCurrentControlSetServicesW32TimeTimeProvidersNtpClient
3.Select NtpcClient then in right window pane double-click on Special PollInterval pentru a-i schimba valoarea.
4.Acum selectați Decimal from the Base then in the Value date change the value to 86400.
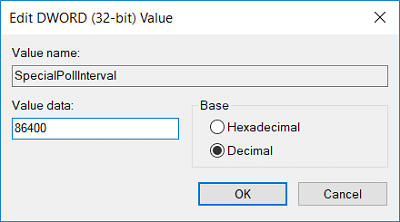
Notă: 86400 seconds (60 seconds X 60 minutes X 24 hours X 1 day) which means that the time will be updated every day. The default time is every 604800 seconds (7 days). Just make sure not use the time interval less than 14400 seconds (4 hours) as your computer’s IP will get banned from the time server.
5.Click Ok then close Registry Editor.
6.Reporniți computerul pentru a salva modificările.
Method 4: Add a new Internet time server on Windows 10
1.Type control in Windows 10 Search then click on Panou de control din rezultatul căutării.
2. Acum faceți clic pe „Ceas, limbă și regiune" apoi apasa "Data și ora".
3.Under Date and Time window click “Schimbați data și ora".
4.Comutați la Ora de Internet apoi faceți clic pe „Schimbă setările".
5. Bifați „Sincronizați cu un server de timp Internet” box then under Server type the address of the time server and click Actualizează acum.
Notă: Refer here for a list of the Simple Network Time Protocol (SNTP) time servers that are available on the Internet.
6.Click Ok then click Apply followed by OK again.
7.Reporniți computerul pentru a salva modificările.
Method 5: Add a new Internet time server on Windows 10 using Registry
1.Apăsați tasta Windows + R apoi tastați regedit și apăsați Enter pentru a deschide Editor de registri.
2. Navigați la următoarea cheie de registry:
HKEY_LOCAL_MACHINESOFTWAREMicrosoftWindowsCurrentVersionDateTimeServers
3.Clic dreapta pe Servere Apoi selectați Nou > Valoare șir.
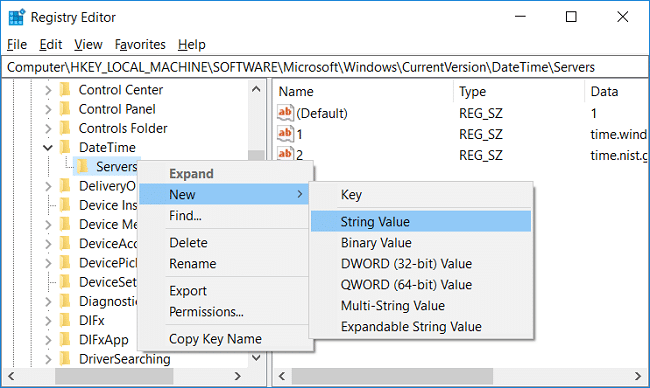
4.Type a number according to the position of the new server, for example, if there are already 2 entries then you have to name this new string as 3.
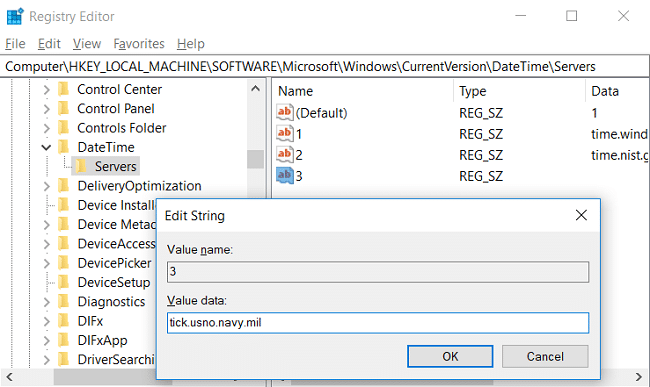
5.Now double-click on this newly created String Value to change its value.
6. În continuare, type the address of the time server then click OK. For example, if you want to use Google Public NTP server then enter time.google.com.
Notă: Refer here for a list of the Simple Network Time Protocol (SNTP) time servers that are available on the Internet.
7.Reporniți computerul pentru a salva modificările.
If you’re still facing in synchronizing Windows 10 Clock then fix them using the below-listed steps:
Notă: This will remove all your custom servers from Registry.
1.Apăsați tasta Windows + X apoi selectați Command Prompt (Admin).

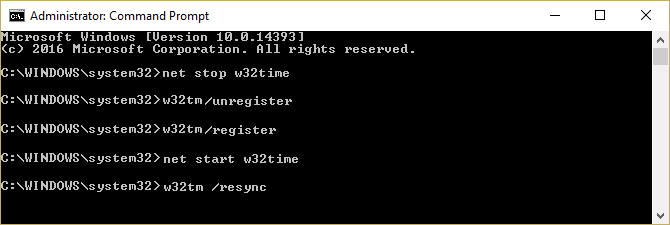
2. Tastați următoarea comandă în cmd și apăsați Enter:
netstop w32time
w32tm / anulați înregistrarea
w32tm / registru
net începe w32time
w32tm /resync /nowait
3.Reporniți computerul pentru a salva modificările.
Recomandat:
Asta ai invatat cu succes How to Synchronize Windows 10 Clock with an Internet Time Server but if you still have any queries regarding this tutorial then feel free to ask them in the comment’s section.