- in Android by Администратор
Как включить Always On Display в Android

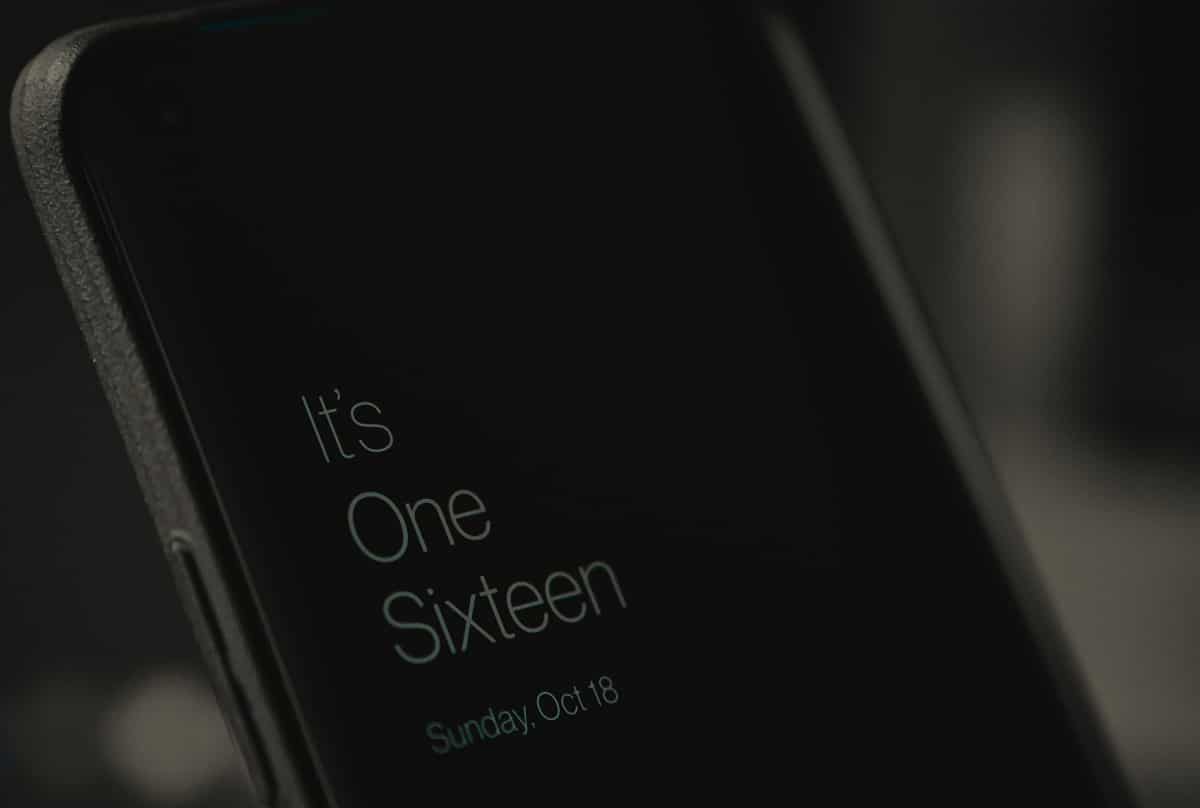
Always On Display Android
Android devices keep coming with new features that we never thought were needed until they were released. Continuing this tradition, Android introduced the Всегда-на особенность. Хотя изначально он был выпущен для устройств Samsung, но теперь он доступен и на большинстве смартфонов Android. Эта функция позволяет вам всегда держать экран включенным для просмотра времени и других важных уведомлений. Экран Always On имеет черный фон и очень тусклый, что позволяет свести к минимуму расход заряда батареи. Прочтите наше краткое руководство и узнайте, как включить Always on Display Android.
Как включить Always On Display в Android
Just like most users, you must also feel that the Always On feature and is a convenient and handy feature. Therefore, follow the methods explained in this article to Enable Always on Display on Android devices.
Method 1: Use in-built Always On Display feature
Хотя эта функция доступна не на всех устройствах Android, вы сможете включить функцию «Всегда на дисплее» на своем устройстве с Android версии 8 или выше. Просто выполните следующие действия:
См. также:
Как исправить неработающие уведомления Twitter (на Android и iOS)
Как исправить, что голосовая почта не работает на Android
Как исправить, что Android Auto не работает
Как удалить предустановленные приложения на Android (простой способ)
Как сбросить настройки Google Chrome на Android
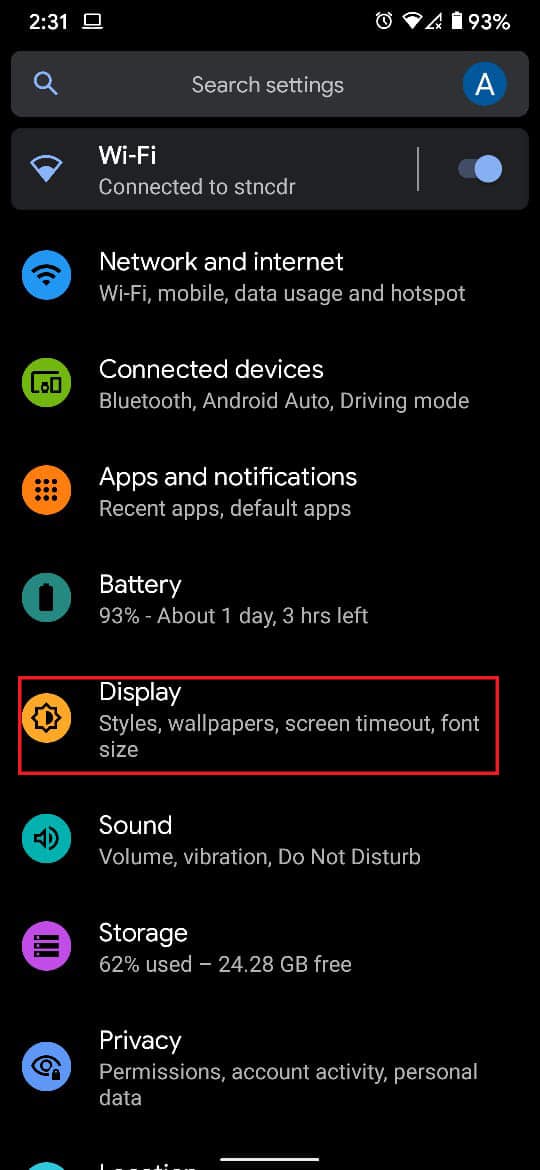
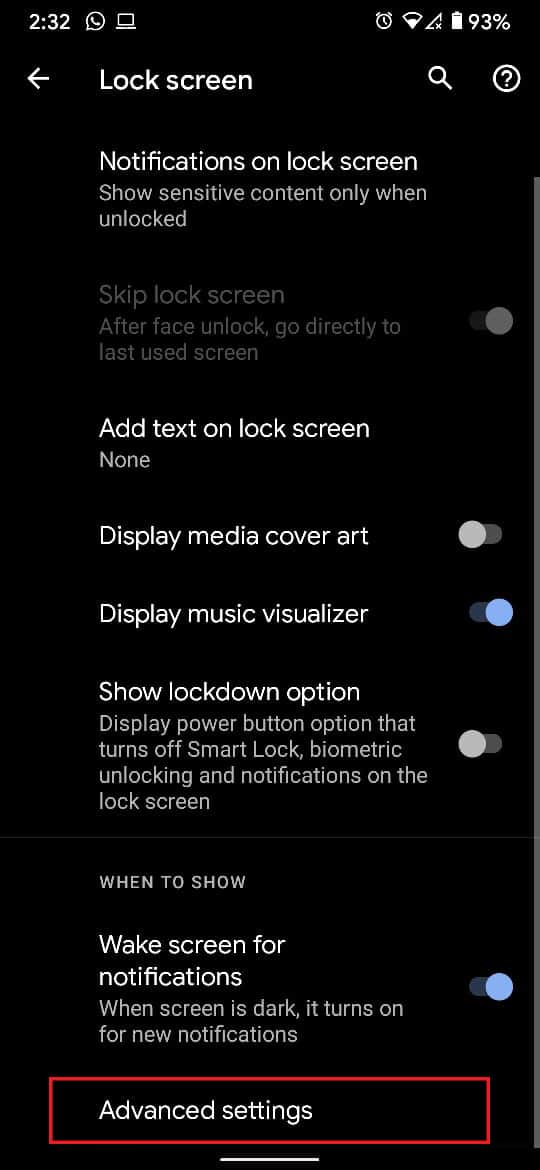
1. Откройте устройство Настройки и нажмите Дисплей вариант, как показано.
3. Нажать на Фильтр to view all display settings.
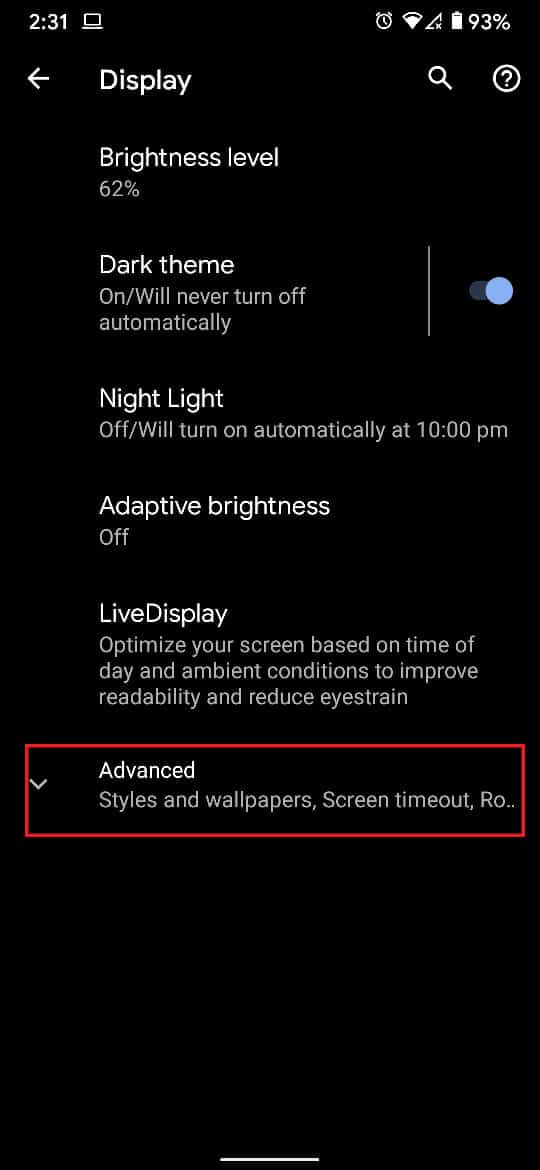
4. Scroll down and tap the option titled Экран блокировки, как показано ниже.
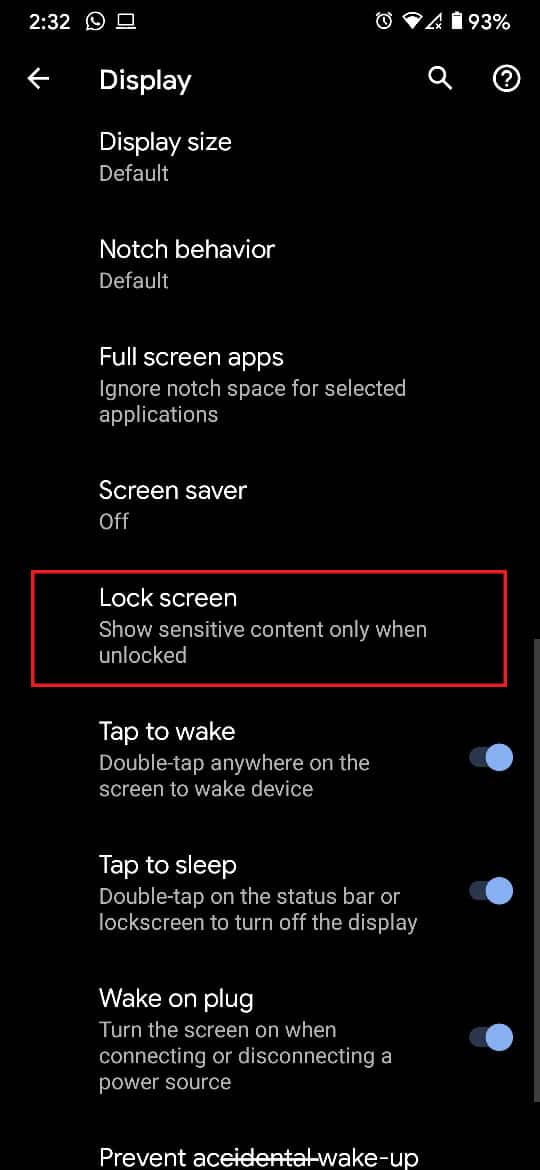
5. в Когда показывать раздел, нажмите на Дополнительные параметры.
6. Turn the toggle ON for the Внешний дисплей функцию.
Примечание: On other Android devices like Samsung and LG, the ambient display feature is visible as Always on display.
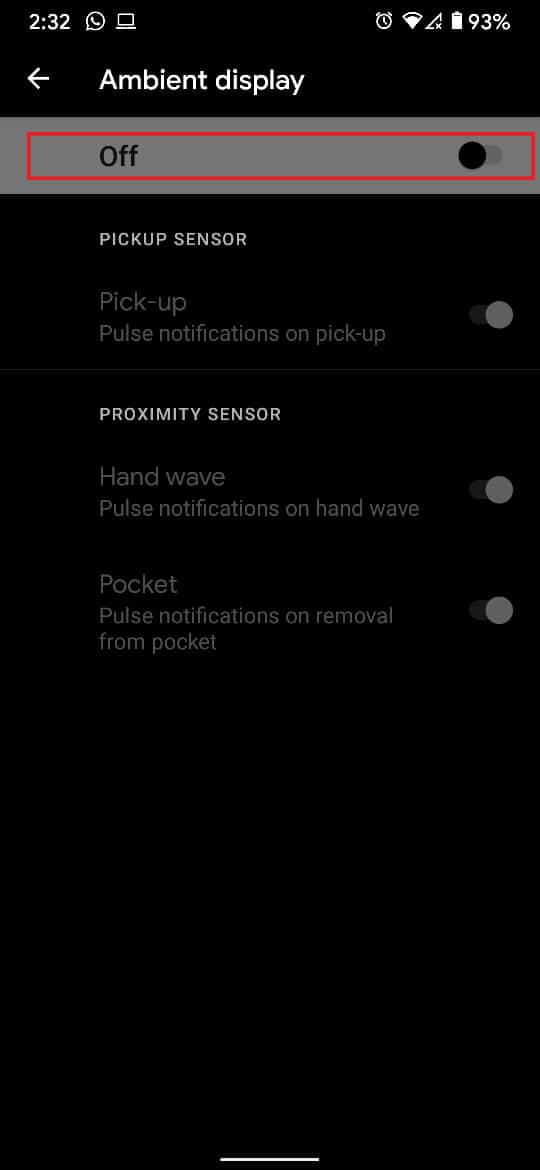
If you are unable to view the Always-on feature, then enable all тумблеры на Внешний дисплей screen. Next, flip the phone around a few times to enable Always on display.
Читайте также: Как отключить Google Assistant на экране блокировки
Способ 2. Используйте стороннее приложение Always On Display.
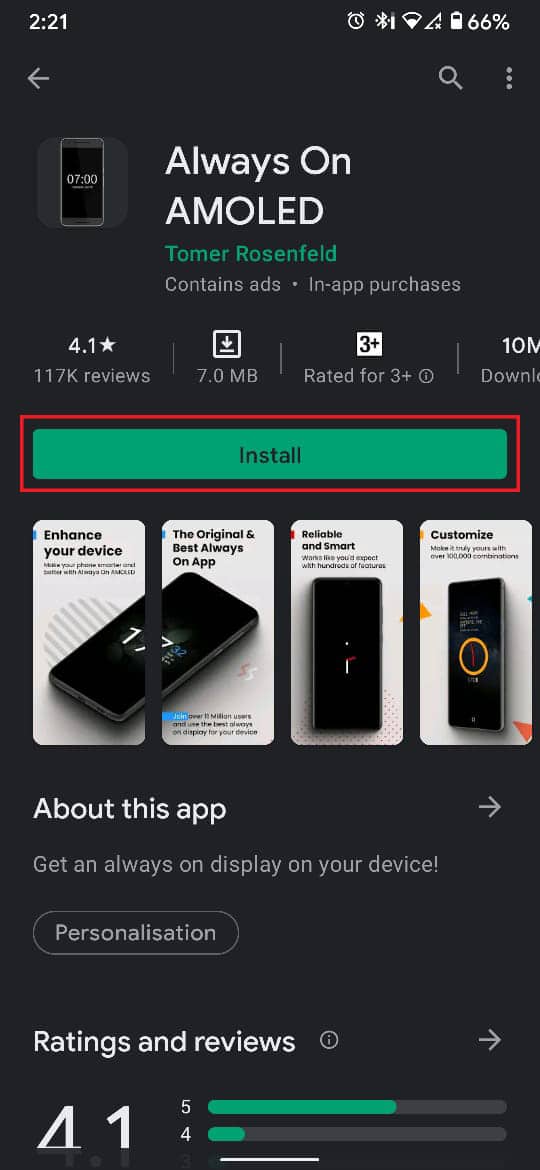
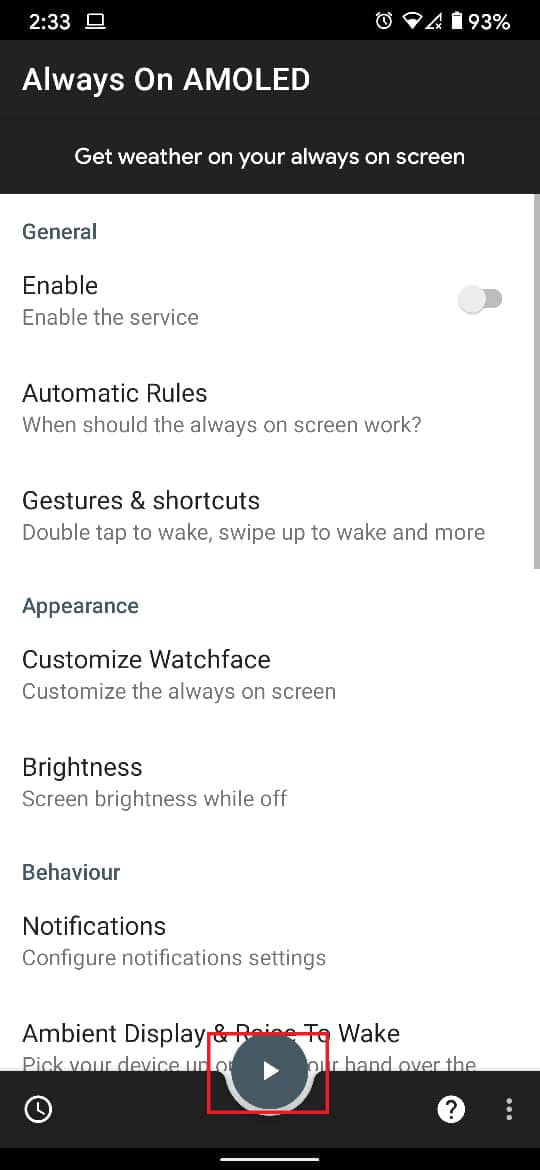
The inbuilt Always On feature on Android although effective, is not really customizable. Moreover, the feature is not available on many Android devices. Thus, users have no choice but to opt for third-party applications. Всегда на AMOLED app, however, is more than just an Always On Display application. It offers several customization options for Always on display while the AMOLED display helps save a ton of battery life. Here’s how to enable Always On Display Android using this app:
1. Откройте Google. Play Маркет и скачайте Всегда на AMOLED.
2. Нажмите на Откройте to run Always on Display APK file.
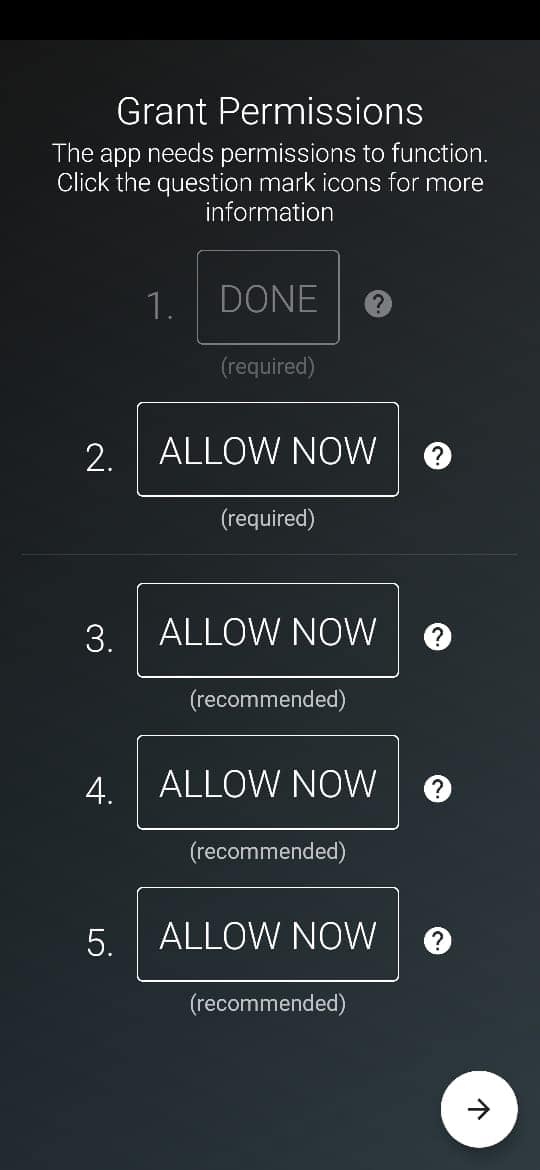
3. Предоставить разрешения которые необходимы для того, чтобы приложение функционировало с оптимальной производительностью.
4. Next, настроить параметры изменить яркость, стиль часов, продолжительность окружающего дисплея, параметры активации и т. д., чтобы настроить экран Android Always on Display.
5. Теперь нажмите на Кнопка воспроизведения отображается в нижней части экрана, чтобы preview the ambient display.
Рекомендуется:
Мы надеемся, что вы смогли понять how to enable Always on display Android as well as utilize the Always On Display app. Let us know which method worked for you. Have any queries or suggestions? Drop them in the comment section below.