Fix MultiVersus e le o fa'alauiloa ile Windows 10

MultiVersus is a famous online multiplayer fighting game that is rocking today’s gaming world. Yet, few users complain about the MultiVersus not launching issue when the game is launched on their Windows 10 PC. If you are in the same boat, the troubleshooting hacks discussed in this article will help you sail the problem.
How to Fix MultiVersus Not Launching in Windows 10
If you are vexed by MultiVersus won’t launch issue in your Windows 10 computer, here are a few possible reasons why you must analyze them carefully to sort out the problem.
- E le ausia e le PC mana'oga autu o le ta'aloga.
- O lo'o fa'alavelaveina le ta'aloga o lo'o iai isi polokalame fa'alaua'imau.
- O lo'o e fa'aogaina se ta'avale e le'i fa'amaonia.
- O fa'atulagaina ata o le ta'aloga e sese le fa'atulagaina.
- Le i ai o malware ma siama.
- O le .NET framework ma le faiga fa'aoga e le'o fa'afouina i la latou fa'amatalaga lata mai.
- DirectX version e le'o fa'afou.
- Ova taimi.
- So'o se faila fa'apipi'i sese po'o fa'aletonu o le ta'aloga e mafua ai fo'i le fa'afitauli.
- Ole Microsoft C++ redistributable faila e le fetaui ma le taaloga ma le PC.
Here are a few possible troubleshooting methods that will help you fix the discussed issue.
Metotia 1: Metotia Fa'afitauli Fa'avae
Mulimuli i nei auala faʻafitauli faʻafitauli e faʻaleleia ai le mataupu.
1A. Check System Requirements
TeleVersus Tulaga Manaomia o le Faiga Fa'aitiiti
- CPU: Intel Core i5-2300 poʻo le AMD FX-8350
- pa'ū: 4 GB
- Pepa VITIO: Nvidia GeForce GTX 550 Ti or AMD Radeon HD 5850 | Intel UHD 750
- PIXEL SHADER: 5.0
- VERTEX SHADER: 5.0
- VAAIGA TUSI FA'AVAE: 6 GB
- VITIO FA'ATUATUA RAM: 1024 MB
TeleVersus Fautuaina Tulaga Manaomia
- CPU: Intel Core i5-3470 or AMD Ryzen 3 1200
- pa'ū: 8 GB
- Pepa VITIO: Nvidia GeForce GTX 660 or AMD Radeon R9 270
- PIXEL SHADER: 5.0
- VERTEX SHADER: 5.0
- VAAIGA TUSI FA'AVAE: 6 GB
- VITIO FA'ATUATUA RAM: 2048 MB
1B. Check your internet connection
Unstable internet connection leads to MultiVersus is not working issue, also if there are any obstacles between your router and your computer, they may interfere with the wireless signal and will cause intermittent connection problems.
E mafai ona e tamoe a suega vave ia iloa le maualuga maualuga o le saoasaoa o fesoʻotaiga e manaʻomia mo le fesoʻotaʻiga talafeagai.
Ia mautinoa o lo'o fa'amalieina e lau masini ta'iala o lo'o i lalo.
- Su'e le malosi fa'ailo o lau feso'otaiga ma afai e matua maualalo, fa'amama uma fa'alavelave i le va o le ala.
- Aloese mai le tele o masini e feso'ota'i i le feso'otaiga tutusa.
- Fa'atau i taimi uma se modem/router ua fa'amaonia e lau Internet Service Provider (ISP) ma e leai ni fete'ena'iga.
- Aua le faʻaogaina uaea tuai, malepe, pe faaleagaina. Sui uaea pe a mana'omia.
- Ia mautinoa o uaea mai le modem i le router ma le modem i le puipui o loʻo mautu ma leai se faʻalavelave.
Afai ei ai ni faʻafitauli fesoʻotaʻiga i luga ole laiga, siaki la matou taʻiala Faʻafefea ona foia Faʻafitauli Faʻafesoʻotaʻi Fesoʻotaʻiga i luga Windows 10 e foia ai le tutusa.
1C. Stop Overclocking
- Every high-end computer is built with the option of Overclocking which helps in outputting more juice than your specifications that you already have. Running the graphics card or processor faster than the default speed refers to overclocking.
- A tupu lenei mea, o le a oʻo lau komepiuta i le maualuga o le vevela pe a maeʻa se taimi patino. E iloa e le komepiuta lenei mea ma fetuutuunai le saosaoa o le uati i le saosaoa masani seia oo ina malulu. Ua toe fa'ateleina le saosaoa o le uati pe a mālūlū.
- E fa'ateleina ai le fa'atinoga o lau komepiuta ma ose fesoasoani tele pe a leai sau komepiuta mamana.
- It must be noted that all the games do not support overclocking. The same applies to MultiVersus. So, you must try disabling all overclocking on your computer and try launching the game. If it launches well, the issue is fixed.
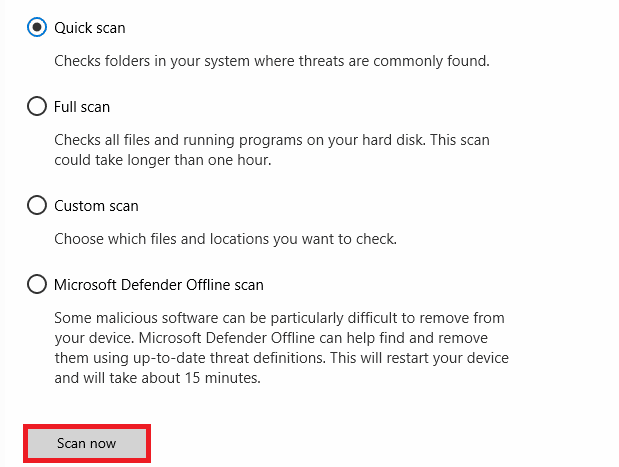
1D. Fa'agasolo Malware Scan
The presence of a virus or malware attack will result in gaming problems on your computer. If in case, the virus attack is very severe, you cannot connect to any online game continuously at all. To resolve the problem, you have to remove the virus or malware completely from your Windows 10 computer.
Ua fautuaina oe e su'esu'e lau komepiuta e pei ona fa'atonuina i la matou ta'iala.
E le gata i lea, afai e te manaʻo e aveese malware mai lau komepiuta, siaki la matou taʻiala Faʻafefea ona Aveese Malware mai lau PC i totonu Windows 10.
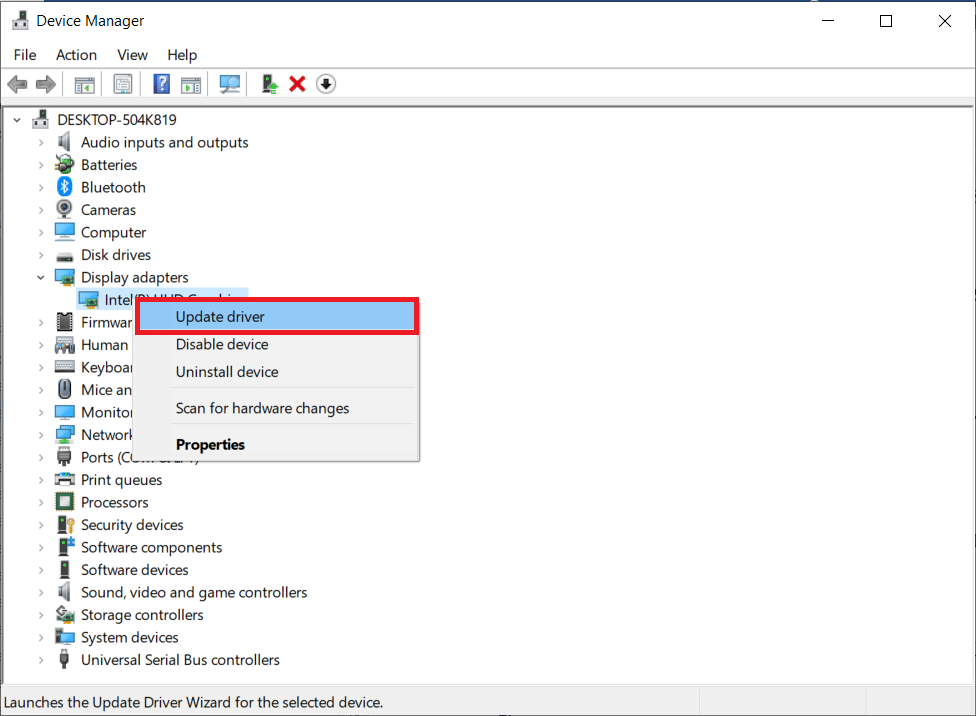
1E. Update GPU Drivers
Graphical drivers are responsible for heavy graphical images and video processing games. If you face any launching conflicts in the MultiVersus game, make sure you use an updated version of device drivers, as they serve as a link between the hardware and Operating System of your PC. Many users have suggested that updating drivers have fixed MultiVersus not working issue. Read and implement the steps instructed in our guide 4 Ways to Update Graphics Drivers in Windows 10 to do so.
Faitau foi: Fa'asa'o Aveta'avale Na Maua e Windows mo lau Masini ae Fa'afeiloa'i se Sese
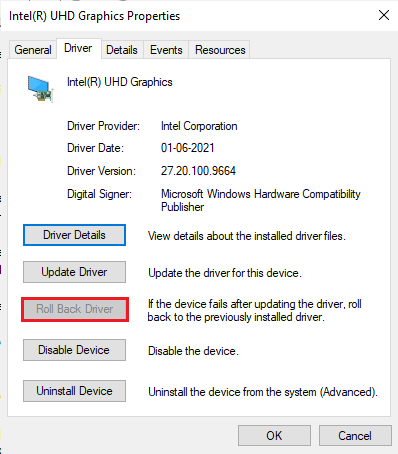
1F. Roll Back GPU Drivers
Sometimes, the current version of GPU drivers may cause the discussed launching issue in MultiVersus, and in this case, you have to restore previous versions of installed drivers. This process is called rollback o avetaavale ma e faigofie ona toe fa'afo'i au ta'avale komepiuta i lo latou tulaga muamua e ala i le mulimuli i la matou ta'iala Fa'afefea ona Toe Ta'avale Aveta'avale Windows 10.
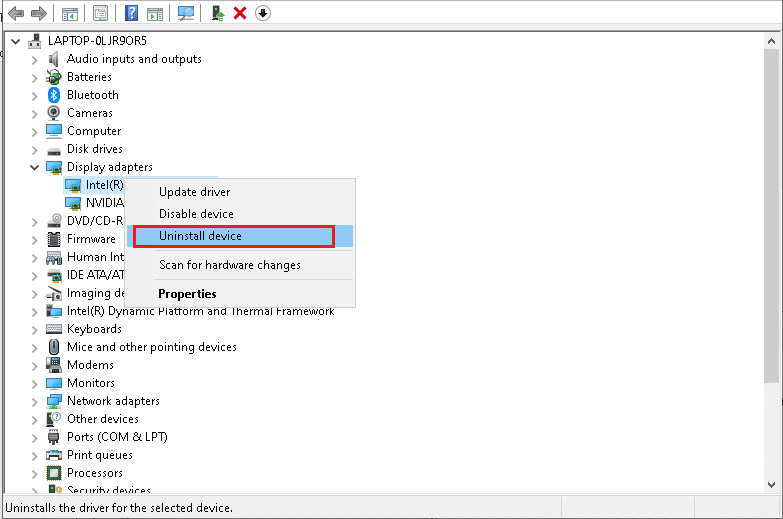
1G. Reinstall GPU Driver
If you still face MultiVersus not starting issue after updating your GPU drivers, then reinstall device drivers to fix any incompatibility issues. There are several ways to reinstall drivers on your computer. Yet, you can easily reinstall Graphical drivers as instructed in our guide How to Uninstall and Reinstall Drivers on Windows 10.
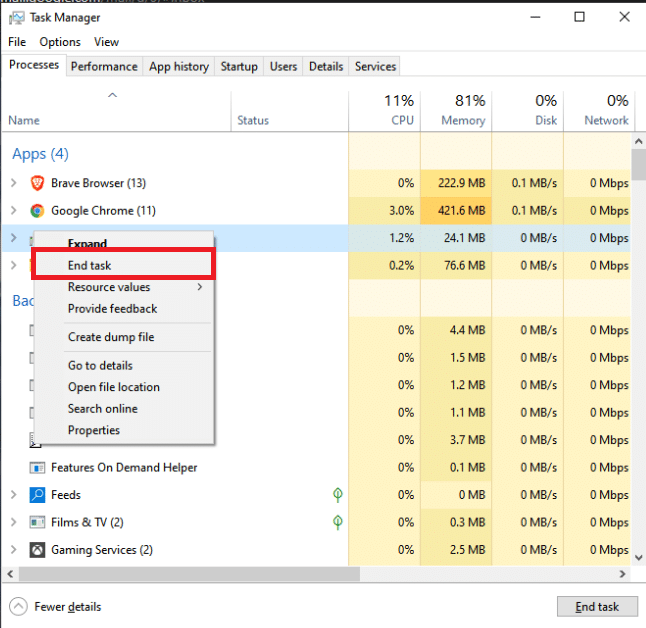
1H. End Background Processes
Several users have confirmed that MultiVersus not starting on PC can be resolved by closing all the background tasks running on your PC. To implement the task, follow our guide How to End Task in Windows 10, and proceed as instructed.
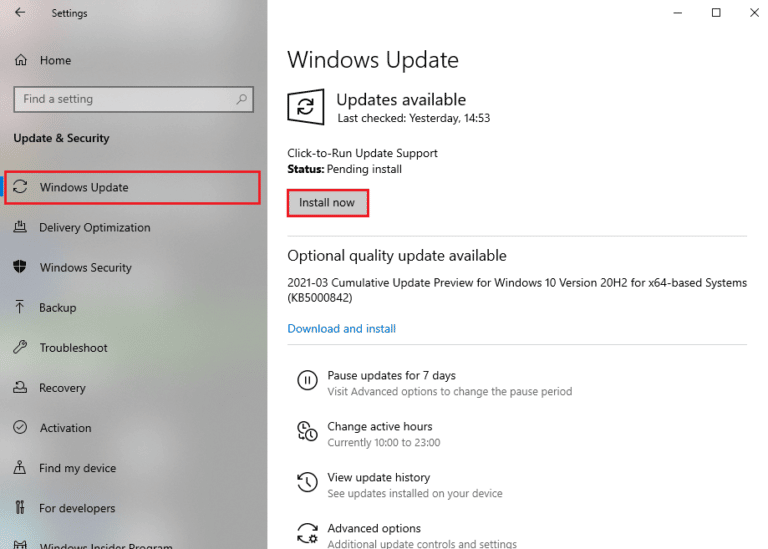
1I. Update Windows
You can also eradicate bugs in your computer and game by updating your Operating System. Always ensure if you have updated your Windows Operating System and if any updates are pending in action, use our guide How to Download and Install Windows 10 Latest Update
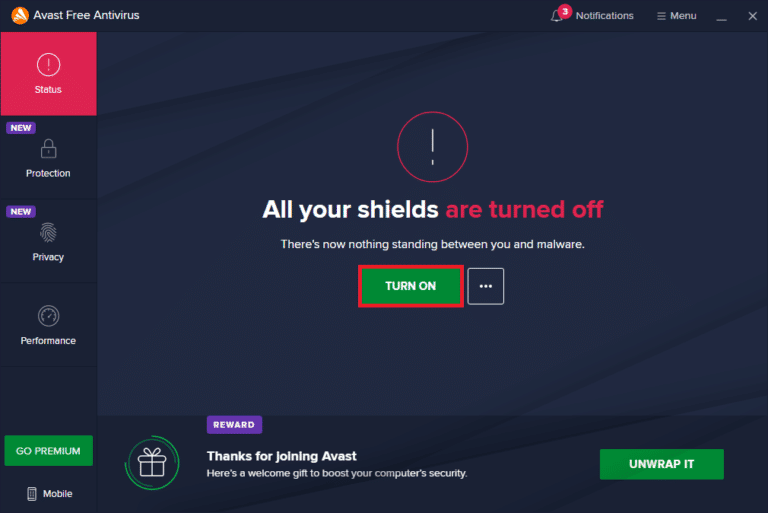
1J. Disable Antivirus Temporarily (If Applicable)
Some incompatible antivirus programs installed on your computer will cause MultiVersus launching problem. To avoid conflicts, you must ensure the security settings of your Windows 10 computer and check if they are stable or not. To find whether the antivirus suite is the reason for the discussed issue, disable it once and try connecting to a network.
Faitau la matou taʻiala ile auala e faʻagata ai le Antivirus le tumau Windows 10 ma mulimuli i faʻatonuga e faʻamalo ai lau polokalame Antivirus mo sina taimi i lau PC.
Afai ei ai sau fofo mo lou faʻafitauli pe a uma ona faʻagata le polokalame antivirus i lau komepiuta, ua fautuaina oe e aveese atoa le polokalame mai lau PC.
Read our guide Force Uninstall Programs which won’t Uninstall in Windows 10 to uninstall your antivirus program on your computer.
Faitau foi: Auala e aveese ai McAfee LiveSafe i totonu Windows 10
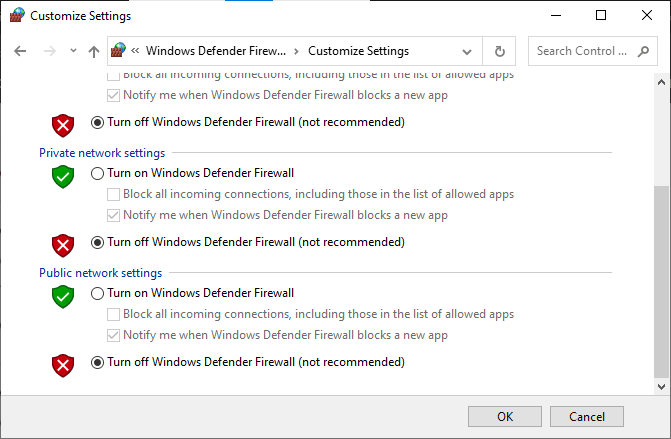
1K. Turn Off Windows Defender Firewall (Not Recommended)
Your computer will face MultiVersus is not working issue, due to an over-protective firewall suite in the Windows 10 PC. To resolve the problem, you can either add a new rule for your game, whitelist the game or as the last fix, disable the firewall temporarily.
Our guide on How to Disable Windows 10 Firewall will help you.
1L. Toe faaleleia Faila Faiga
If there are any missing or damaged files on your Windows 10 PC, you will face MultiVersus takes forever to launch issue. Yet, you are repairing these corrupt files by using inbuilt utilities namely, File Checker System ma Faʻapipiʻiina o Auaunaga Faʻamatalaga ma Pulega.
Faitau la matou taʻiala ile Faʻafefea ona Toe Faʻaleleia Faiga Faʻatonu ile Windows 10 ma mulimuli i laasaga e pei ona faʻatonuina e toe faʻaleleia uma au faila leaga.
Method 2: Run MultiVersus Game as Administrator
If MultiVersus does not have required administrative privileges, a few essential features of the game will be limited causing you MultiVersus not launching issue whenever you open the game or install any updates. Follow the below-mentioned instructions to run the game as an administrator.
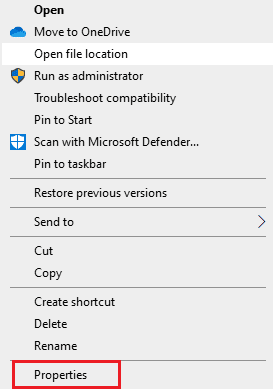
1. Taumatau-kiliki i le MultiVersus shortcut luga ole Desktop.
Manatua: E mafai foi ona e alu i le fa'atonuga fa'apipi'i ma taumatau-kiliki i luga.
2. Ma, filifili le meatotino filifiliga.
3. O lenei, agai i le le tulaga ogatasi tab ma kiliki Taʻosaʻo lenei polokalame i le avea ai o se pule.
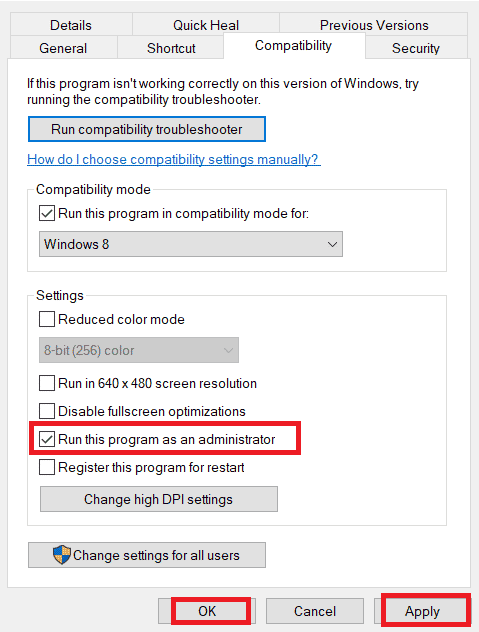
4. Mulimuli ane, kiliki i luga Faʻaoga> LELEI e teu ai suiga.
Check if you have fixed MultiVersus launching issues.
Faitau foi: Fix WoW e fa'avavau e fa'alauiloa i totonu Windows 10
Metotia 3: Suia Taaloga Fa'amuamua
The preference of an application or process tells the computer the importance and if it should be given preference over the others while allocating the resources. The priority of every application is normal except the system processes, by default. MultiVersus might crash if it didn’t get enough resources.
1. Tiliki le Ctrl + Shift + Esc ki faatasi e tatala Taskbar.
2. O lenei, saili mo MultiVersus process.
3. Ona sui lea o le faamuamua i Fa'amuamua maualuga ma siaki pe aoga lenei.
Manatua: Suia le fa'amuamua ma le fa'aeteete tele ona o le suia o le fa'amuamua o le fa'agasolo ma le fa'atamala e ono fa'agesegese pe le mautu ai lau masini.
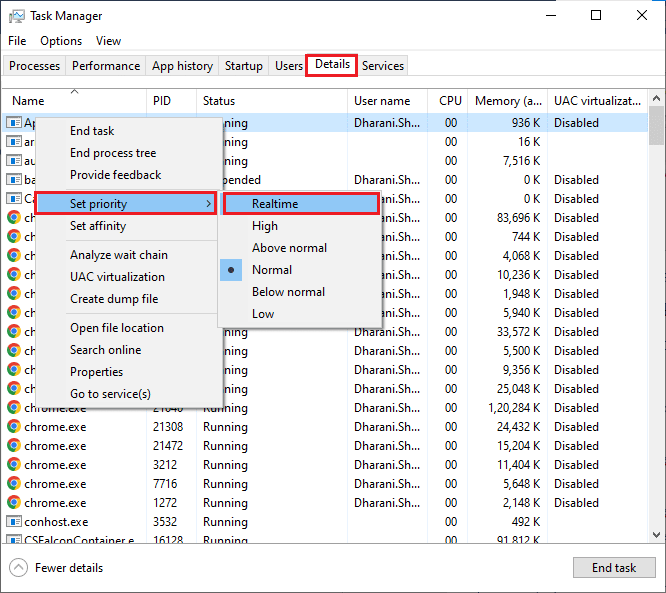
4. Tapuni le galuega Pule ma toe toe fai lau komepiuta.
Metotia 4: Seti Fa'atinoga Maualuga
E mafai fo'i ona e fa'amalieina lau ta'aloga pe a fa'atulaga lau fa'atulagaina o fuafuaga o le malosi maualuga. O nei fuafuaga eletise ua atiae e pulea ai le eletise i luga o tulaga feaveaʻi. Mulimuli i fa'atonuga o lo'o ta'ua i lalo e fa'aoga ai le fa'atulagaina o fuafuaga o le malosi maualuga i lau masini.
1. Tiliki le Windows + I ki i le taimi e tasi e tatala ai Faʻamalama tulaga
2. Lenei, kiliki luga System faatulagaga.
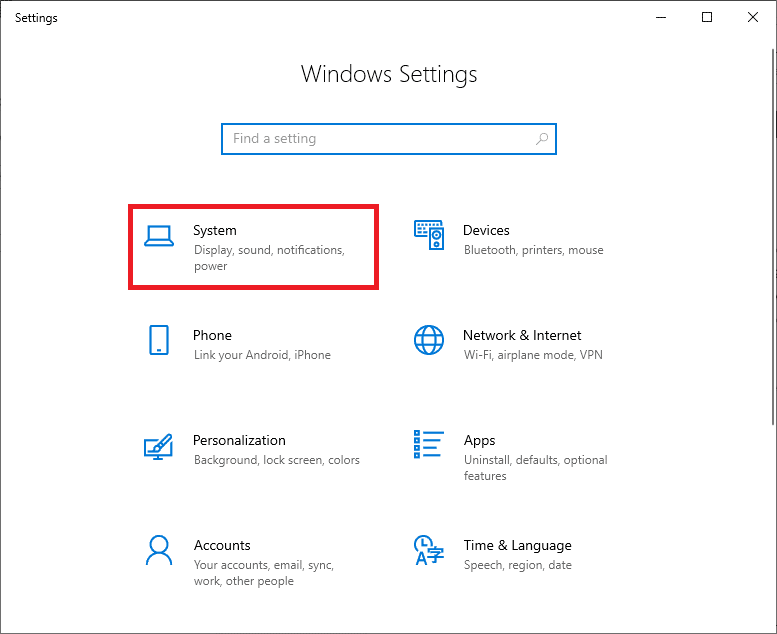
3. O lenei, filifili le Malosiaga & moe filifiliga ma kiliki Faʻaopoopo eletise faʻaopoopo i lalo Faʻafesoʻotaʻi.
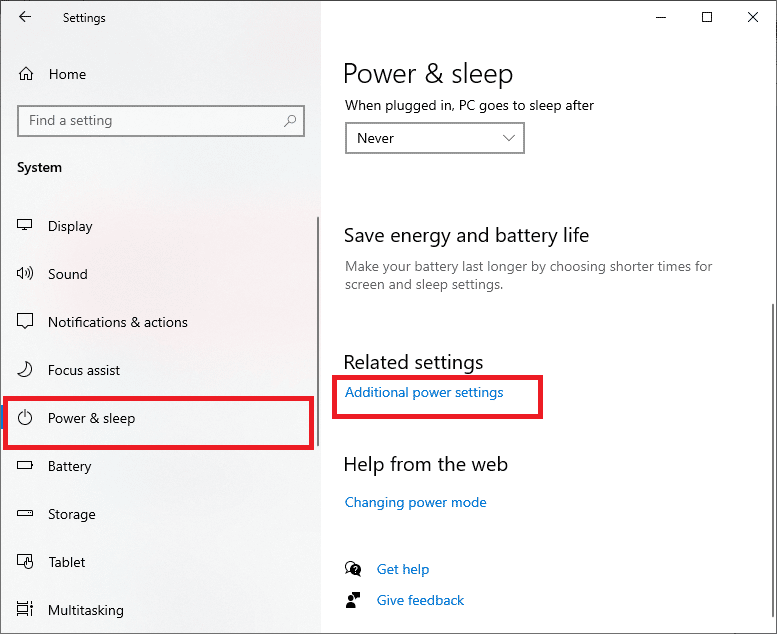
4. O lenei, filifili le Maualuga-faʻatinoga filifiliga i lalo Fuafuaga faaopoopo maualuga e pei ona faaalia i le ata i lalo.
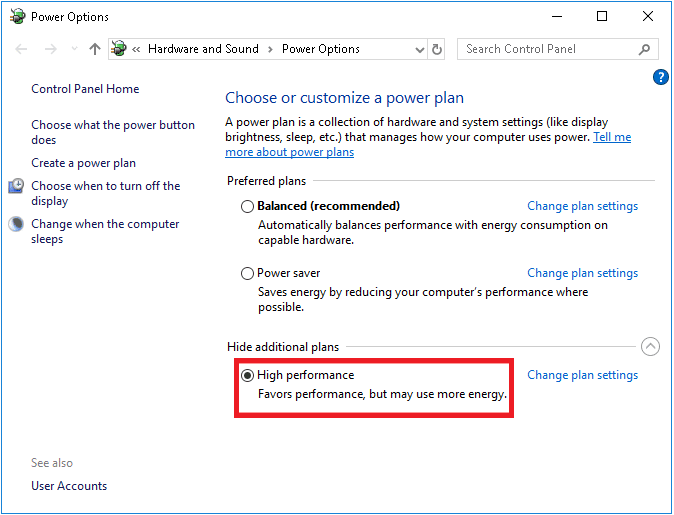
Now you have optimized your system, check if you have fixed MultiVersus won’t launch on startup issue.
Faitau foi: Fa'asa'o le misi o faila o lo'o siiina mai i luga ole Steam
Method 5: Update Steam App & MultiVersus Game
If you use an outdated Steam application, you cannot access any games smoothly. Hence always make sure you use an updated version of Steam and MultiVersus game before launching it.
1. Lue Key Windows ma le ituaiga ausa, ona kiliki lea Tatala.
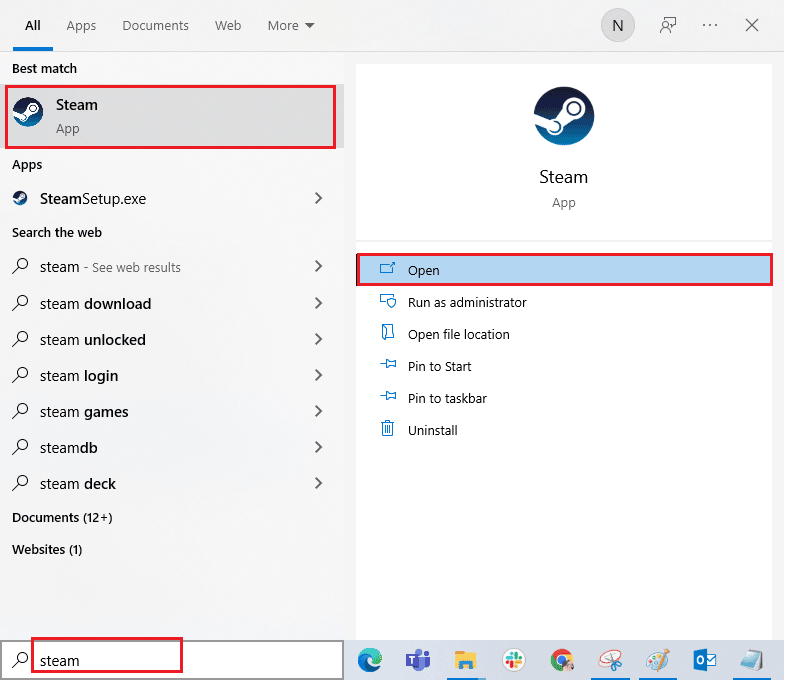
2. Lenei, kiliki luga ausa i le pito i luga agavale tulimanu o le lau sosoo ai ma Siaki mo fa'afouga a le Steam Client... e pei ona faamamafaina i lalo.
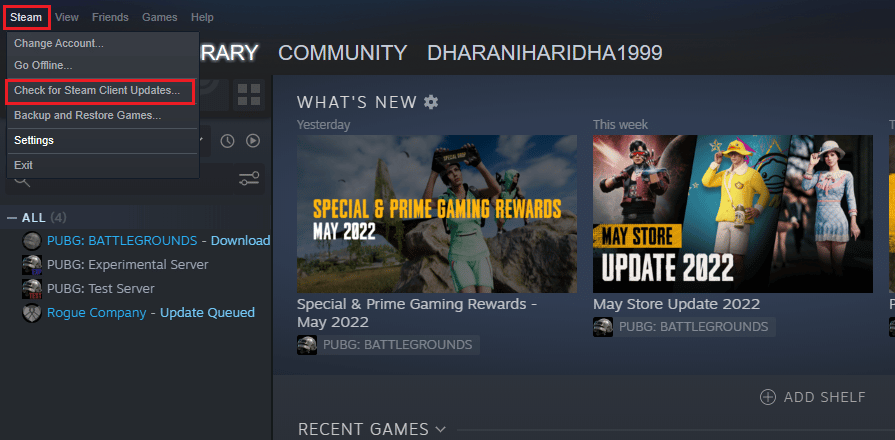
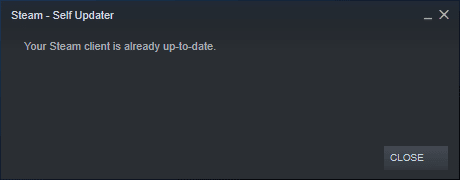
3. Afai ei ai ni au faʻafouga fou e sii mai, faʻapipiʻi ma faʻamautinoa o lo'o fa'afou lau client Steam.
4. Lenei, toe fa'alauiloa le Steam ma siaki pe ua foia nei le mataupu.
Likewise, it is always essential that your game run at its latest version to avoid any conflicts. Until your game is updated, you cannot log in to MultiVersus servers successfully.
I faafou lau taaloga, mulimuli i laasaga o loʻo taʻua i lalo.
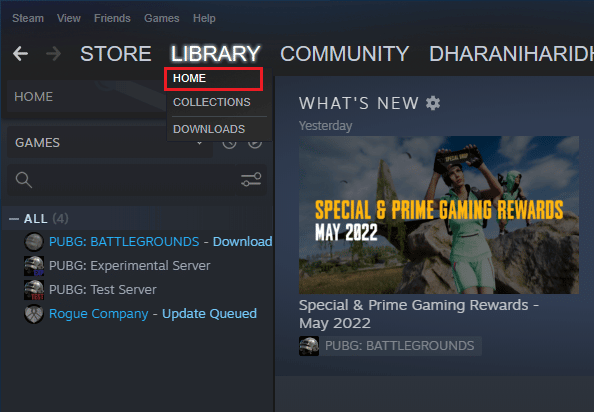
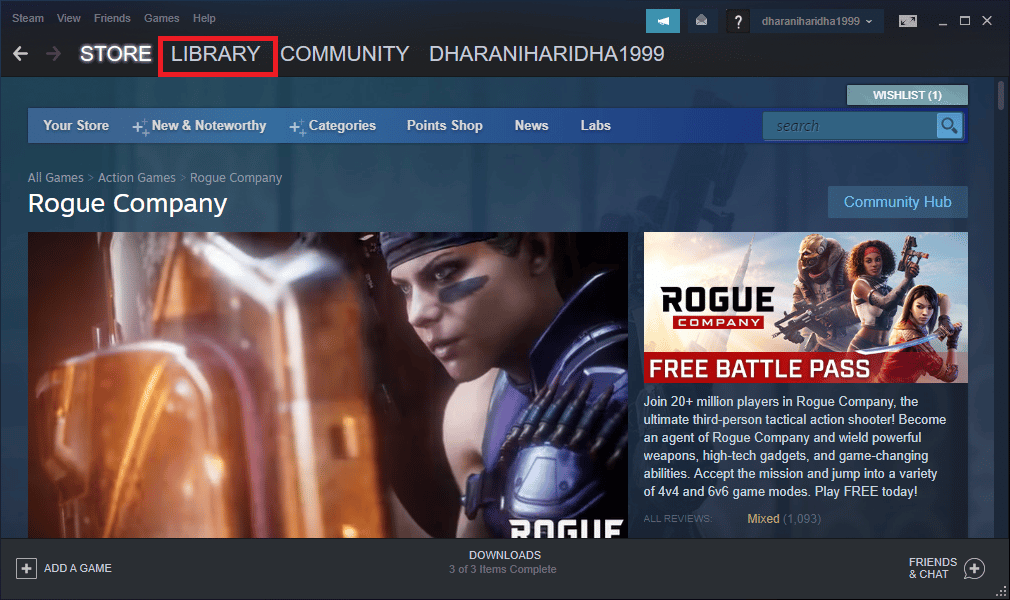
1. Tatala ausa ma agai atu i LIBRARY.
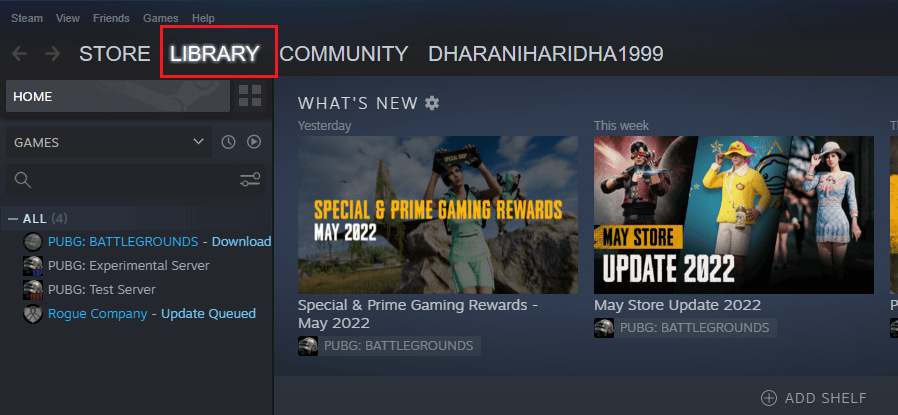
2. Lenei, kiliki luga AIGA and search for MultiVersus.
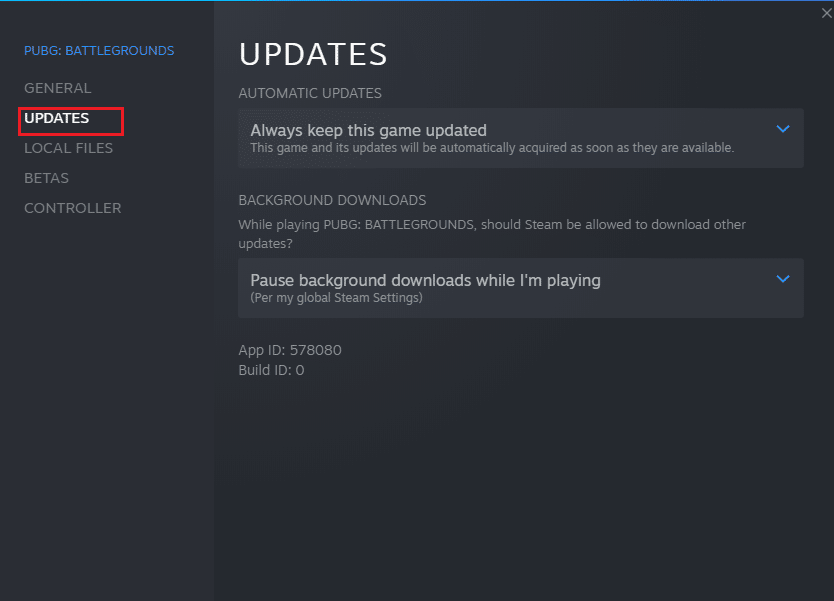
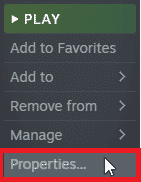
3. Ona, kiliki-i luga ole taaloga ma filifili le Meatotino… filifiliga.

4. Ia, sui i le TULAFONO tab ma siaki pe iai ni fa'afouga o lo'o fa'atali. Afai o lea, mulimuli i fa'atonuga i luga ole lau e la'u mai ai fa'afouga fou.
After an update, check if MultiVersus not launching issue is fixed.
Metotia 6: Fa'ato'a Fa'apena le Fa'atonuina o Ata atoa
Few users have suggested that disabling full-screen optimizations on PC has helped them fix MultiVersus is not launching issue. Follow as instructed.
1. Navigate to the Steam LIBRARY meaai.
2. Now, right-click on the MultiVersus game and click on Meatotino…
3. Ia, sui i le LAUTELE tab ma kiliki FA'ATAU FILIFILI... e pei ona faaalia.
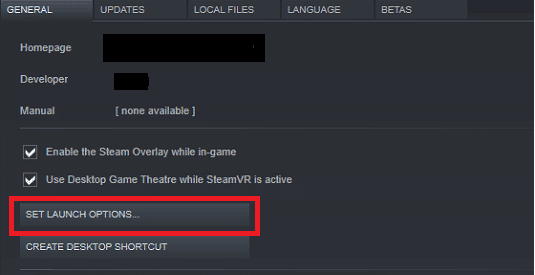
4. O lenei, o le a tatalaina se faamalama fou ma se lapataiga tagata faʻaoga maualuga. Ina ia tatalaina le taaloga i le faʻamalama faʻamalama, faʻaoga le –faamalama parameter.
5. Ia, sefe suiga i le kilikiina OK ma alu ese mai le faamalama Properties.
6. Lenei, toe feiloaʻi le taaloga and ensure that it runs in windowed mode.
Manatua: You can also navigate to FA'ATAU FILIFILIGA… toe lolomi ma lolomi ia vaega nei nai lo le parakalafa mulimuli.
–faamalama -w 1024
7. Now, save the changes by clicking on OK.
O lenei parakalafa o le a setiina le taaloga e fa'alauiloa ile fa'amalama fa'amalama.
Faitau foi: Fix Steam App Configuration Unavailable in Windows 10
Metotia 7: Fa'agata In-Game Overlay
The Steam Overlay is a piece of Steam that allows the users to access friends list, and web browser and allows in-game purchasing. It is a significant tool, yet it sometimes triggers MultiVersus not launching on startup issue. If you want to solve this problem, then turn off the Steam game overlay.
1. tatala le ausa app ma kiliki LIBRARY.
2. Ia, kiliki-matau i luga TeleVersus ma kiliki Meatotino…

3. Ia, sui i le LAUTELE tab ma aveese le faailoga o le pusa o loo i ai Fa'amalo le Steam Overlay a'o i totonu o le ta'aloga.
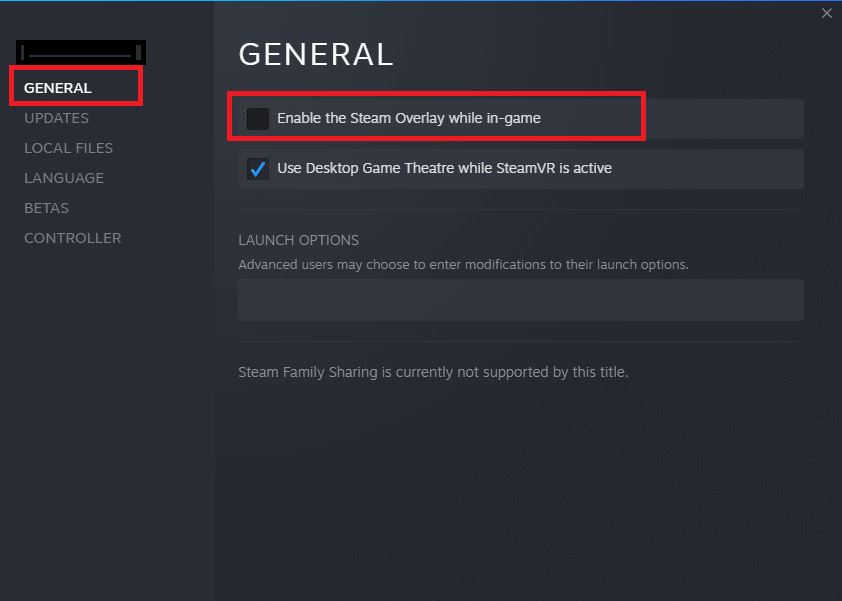
4. I le iuga, toe tatala le taaloga and check if the MultiVersus launching issue is solved.
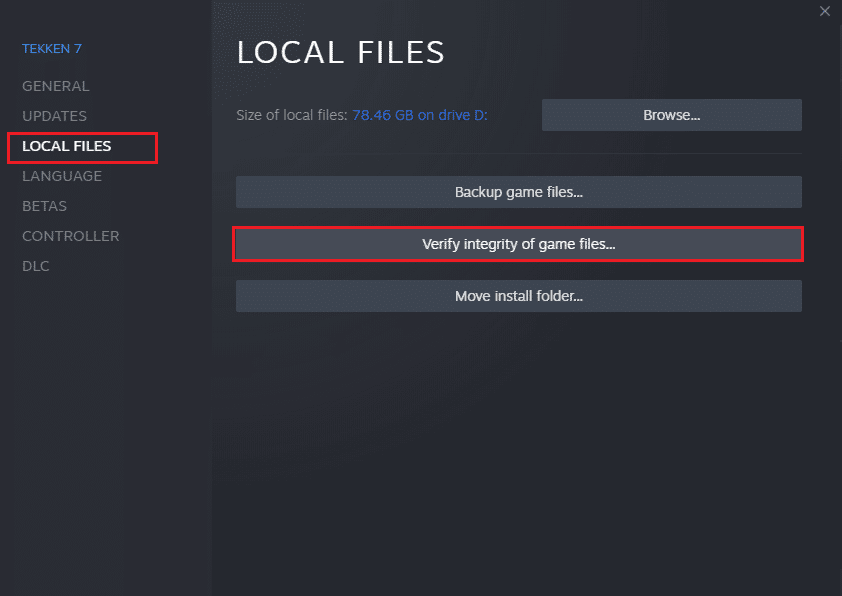
Metotia 8: Fa'amaonia le Sa'o o faila Ta'aloga
We have seen many cases in which the game files are either missing or corrupt or it had incomplete installations. Users could also experience MultiVersus not starting on PC issue if they are interrupted by the update process or if the game files are being moved. In this method, you will be opening Steam and using the built-in function for verifying the integrity of the game. It will be replaced if the application finds something. Read our guide on how to verify integrity of game files on Steam.
Faitau foi: Fix Steam Client Bootstrapper Not Responding in Windows 10
Metotia 9: Fa'afou .NET Framework
.NET framework in Windows 10 computer is essential for uninterrupted service of modern apps and games. Many games have an auto-update feature for the .NET framework, and thus it will be updated automatically whenever an update is available. In another case, if an update prompts in your PC, you can manually install the latest version of the .NET framework, as discussed below, to fix MultiVersus not launching issue.
1. Siaki mo fou faafouga mo le NET faʻavae mai le 'Upega tafaʻilagi aloaia a Microsoft.
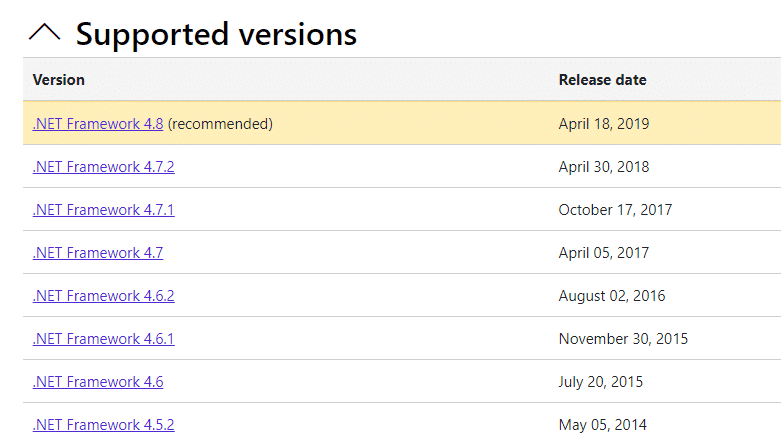
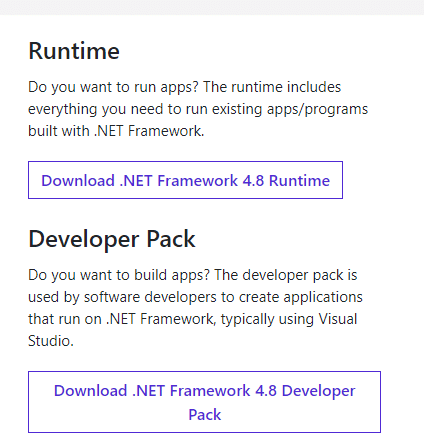
2. Afai e iai ni fa'afouga, kiliki i luga o le/fautuaina fesoʻotaʻi ma kiliki Download .NET Framework 4.8 Taimi Taimi filifiliga.
Manatua: Aua le kiliki i luga Download le .NET Framework 4.8 Developer Pack e pei ona faʻaaogaina e le au fai polokalame.
3. Alu i le O a'u download, kiliki-lua i luga o le faila seti e tamoe ai le faila sii mai ma mulimuli i le luga o lau faʻatonuga to install the .NET framework successfully on your Windows PC. Once done, check if you have fixed the discussed issue or not.
Metotia 10: Fa'afou DirectX
To enjoy a seamless multimedia experience on MultiVersus, you have to make sure whether DirectX is installed, and it is updated to its latest version. DirectX helps you improve the visual media experience for graphical games and applications especially. It is worth updating DirectX needed for this game.
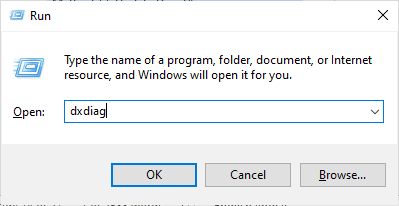
1. Ta i le Windows + R ki i le taimi e tasi e amata ai le momoʻe pusa talatalanoa.
2. Ituaiga taʻutaʻua ma lolomi le Ulufale i totonu tatala DirectX Diagnostic Meafaigaluega.
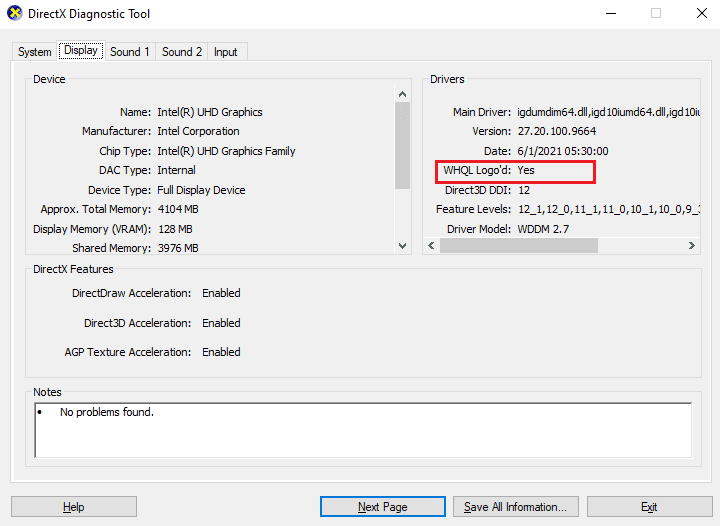
3. Siaki le DirectX Lomiga, if it contains DirectX 12 pe leai.
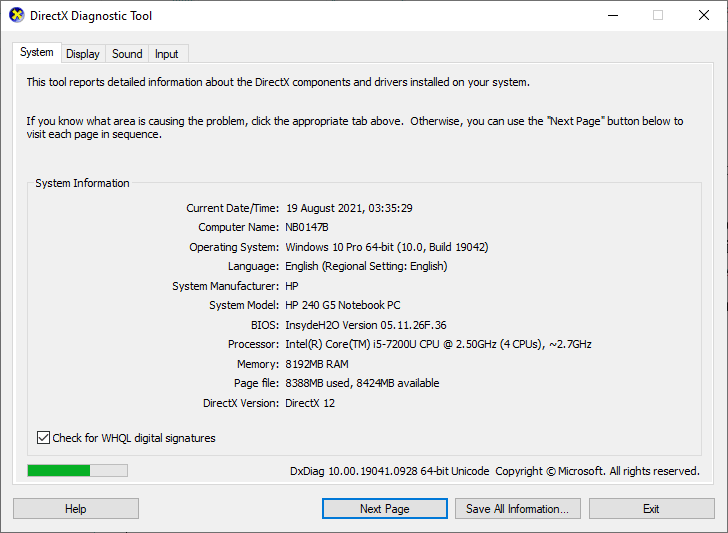
4. If you do not have DirectX 12 in your system, download and install it from the DirectX download itulau by following the on-screen instructions.
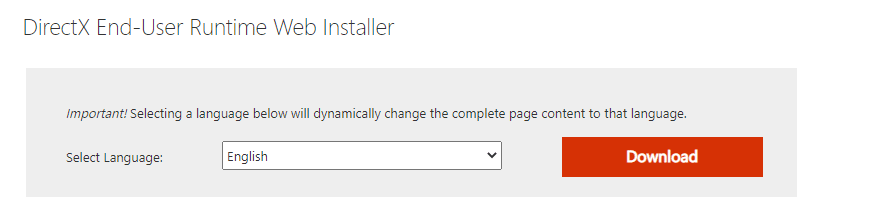
After installing DirectX, check if the issue occurs again.
Manatua: Ia mautinoa Siaki mo saini numera WHQL pusa ua siaki i totonu System tab ma i fa'amau uma, siaki pe WHQL Logo'd ia seti i ioe.
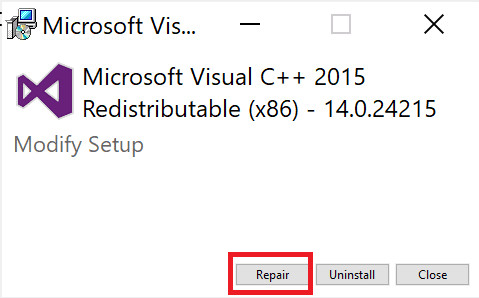
Metotia 11: Toe fa'aleleia Microsoft Visual C++ Toe tufatufaina
Alternately, you can try to repair the Microsoft Visual C++ Redistributable packages to fix MultiVersus not launching issue as follows:
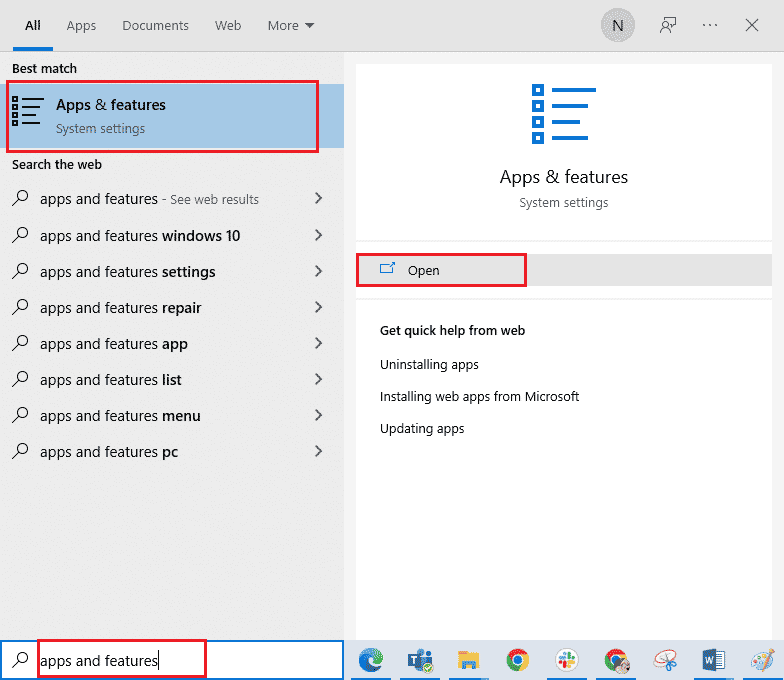
1. Ta i le Key Windows, ituaiga Polokalama & foliga, ona kiliki lea tatala.
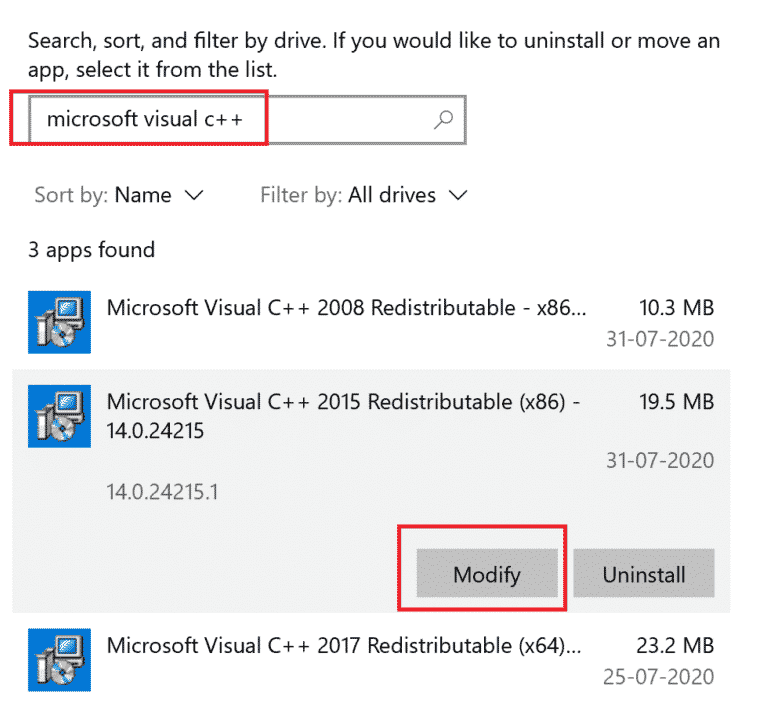
2. Saili mo Microsoft Visual C ++ Toe faʻasoa afī.
3. Then, select the package, and click on Suia filifiliga.
4. Ona, kiliki ioe i luga o le Pule o le Pulea o Tagata pusa talatalanoa.
5. In the pop-up window that appears, click on faʻafou. Faatali mo le faagasologa ia maeʻa.
6. Repeat the above steps to modify all the Microsoft Visual C++ Redistributable packages.
7. I le iuga, toe amata le PC.
Open the application that you were unable to open previously. If this did not work, try reinstalling the C++ redistributable instead.
Faitau foi: Fa'asa'o le Microsoft Visual C++ 2015 Redistributable Setup Fails Error 0x80240017
Metotia 12: Toe fa'apipi'i le Microsoft Visual C++ Redistributable
If the previous method of repairing the Microsoft C++ Visual Redistributable did not fix MultiVersus won’t launch issue, then you will have to reinstall the redistributable. Follow the given steps to uninstall & then install these again.
1. tatala le Polokalama & foliga faatulagaga faiga.
2. Filifili le Microsoft Visual C ++ Toe faʻasoa package, then click on Uninstall filifiliga.
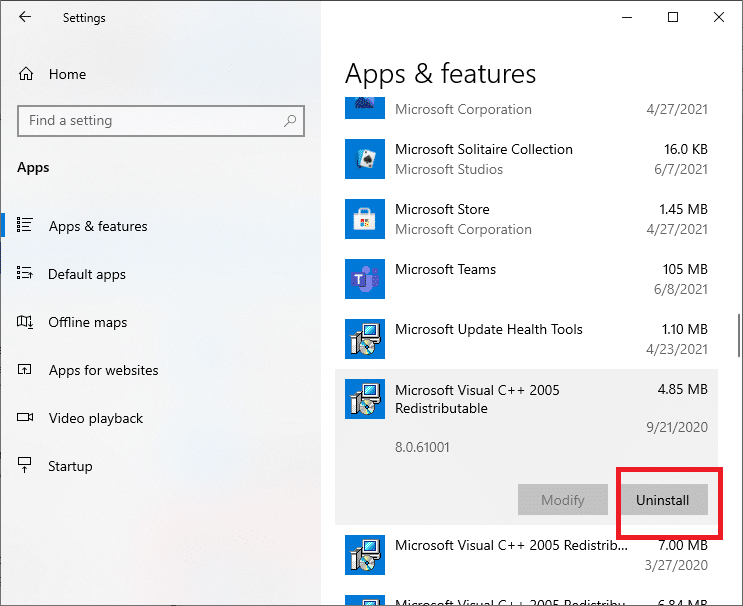
3. Kiliki Uninstall option again to confirm and remove the package.
Manatua: Make sure to uninstall all the Microsoft Visual C++ Redistributable packages.
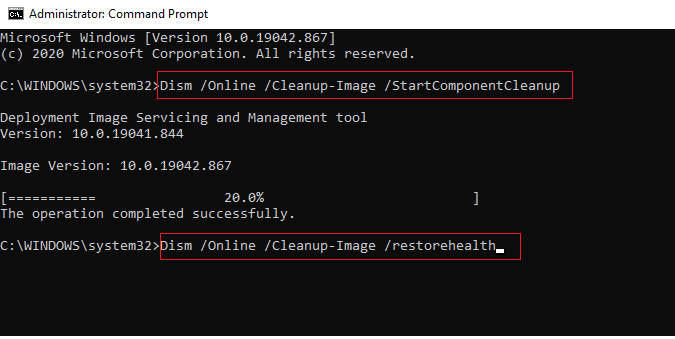
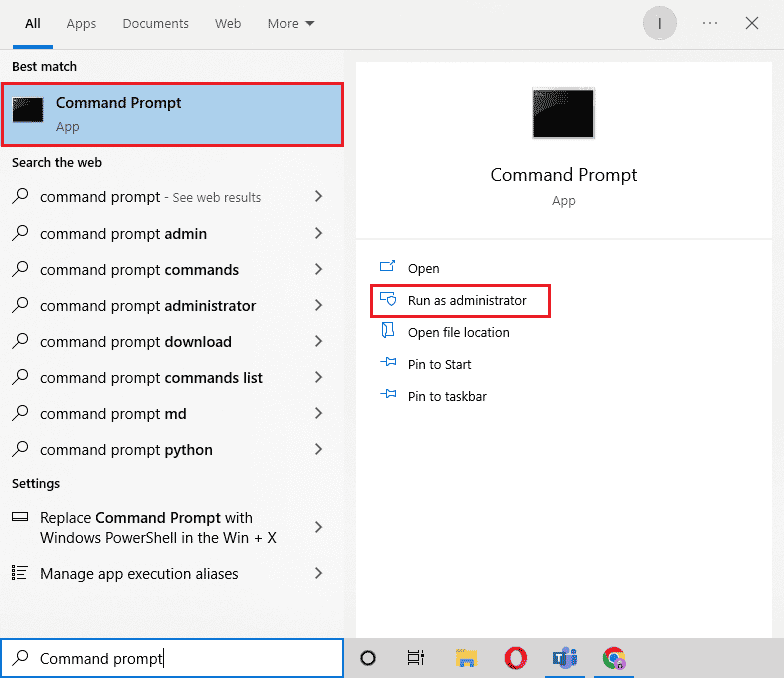
4. Ta i le Key Windows, ituaiga Umiaina Poloaiga, ona kiliki lea Taumafai e avea ma pule.
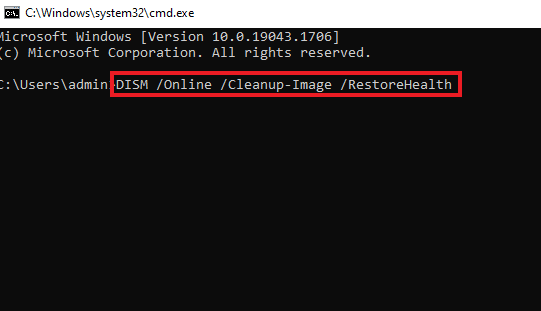
5. Tusi mea nei poloaiga ma fetaomi ulu ki ina ua maeʻa taʻitasi:
DISM /online /Cleanup-Image /StartComponentCleanup
DISM /online /Cleanup-Image /RestoreHealth
6. A uma loa le faagasologa, toe amata le PC.
7. Sosoo ai, asiasi i le Microsoft Visual C++ Redistributable webpage to download the latest C++ package as shown here.
8. Once downloaded, open the faila faila by double-clicking on it in O a'u download. faatuina the package by following the on-screen instructions.
9. Once the installation is complete, finally toe amata le PC.
fautuaina:
Matou te faʻamoemoe na fesoasoani lenei taʻiala ma e mafai ona e faʻaleleia MultiVersus not launching issue on your Windows 10 PC. Let us know which method worked for you the best. Feel free to reach out to us with your queries and suggestions via the comments section below.