- in fönster by Administration
Hur man inaktiverar Live Tiles i Windows 10 Start-menyn

Live tiles in Windows 10 Start Menu display information at a glance without opening the app. Also, Live tiles show live previews of application content and show notifications to the users. Now, many users don’t want these Live tiles in their Start Menu as they consume a lot of data to update the previews. Now Windows 10 have an option to disable particular applications Live tiles, and you just have to right-click on a tile and select “Turn live tile off” option.
But if you want to disable the Live tile preview for all the applications completely, then there are no such settings in Windows 10. But there is a registry hack through which this can be easily achieved. So without wasting any time let’s see How to Disable Live Tiles in Windows 10 Start Menu with the help of the below-listed guide.
Se till att skapa en återställningspunkt, ifall något går fel.
Although this will only work for a particular application, this method is sometimes useful if you want to disable the Live tiles for a particular app.
1. Klicka på Start eller tryck Windows-nyckel på tangentbordet.
2. Högerklicka på particular app, then selects “Unpin från Start. "

3. This will successfully remove the particular tile from the Start Menu.
Method 2: Turn Off Live Tiles
1. Klicka på Start eller tryck Windows-nyckel på tangentbordet.
2. Högerklicka på particular app sedan chooses More.
3. From the Choose menu, click on “Stäng av Live Tile".
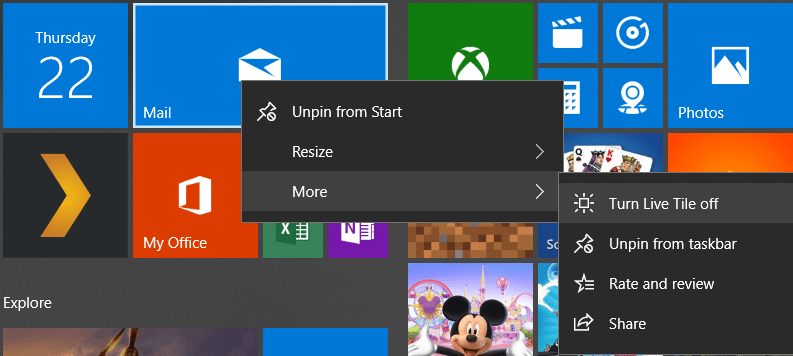
4. This will disable Live tiles in Windows 10 Start Menu for a particular app.
Method 3: Disable Live Tiles using Group Policy Editor
1. Tryck på Windows-tangent + R och skriv sedan gpedit.msc och tryck på Enter.

2. Navigera nu till följande sökväg under Group Policy Editor:
User Configuration -> Administrative Templates -> Start Menu and Taskbar -> Notifications
3. Make sure to select Notifications then from right window pane double-click on “Turn off tile notifications."
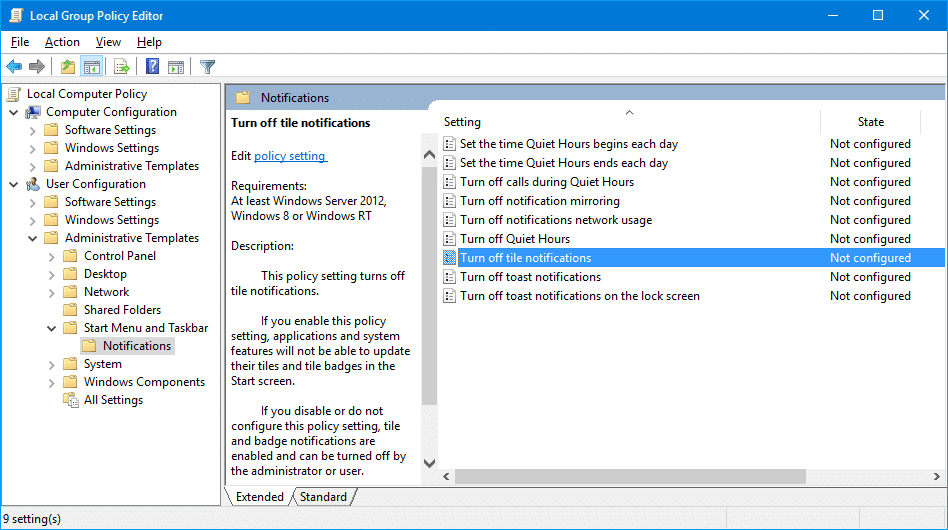
4. Make sure to set it to Enabled then click Apply followed by OK.
5. This will disable live tiles feature for all apps on Start Screen.
Method 4: Disable Live Tiles using Registry Editor
1. Tryck på Windows-tangent + R och skriv sedan regedit och tryck på Enter.

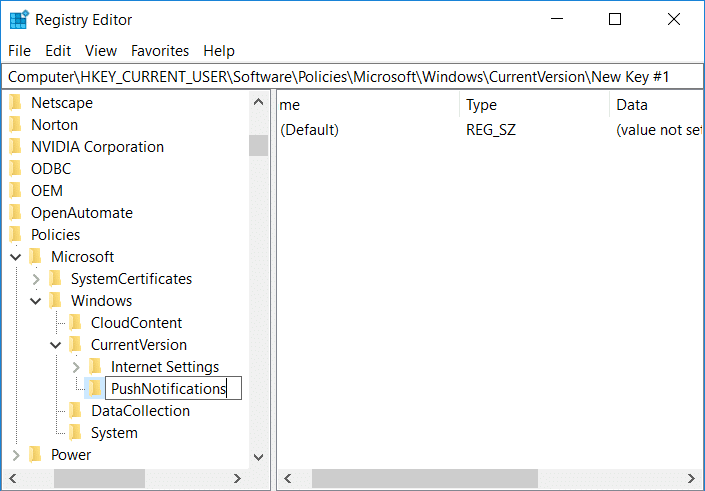
2. Navigera nu till följande registernyckel:
HKEY_CURRENT_USERSoftwarePoliciesMicrosoftWindowsCurrentVersion
3. Högerklicka på Current Välj sedan Ny> Nyckel and then name this key as PushNotifications.
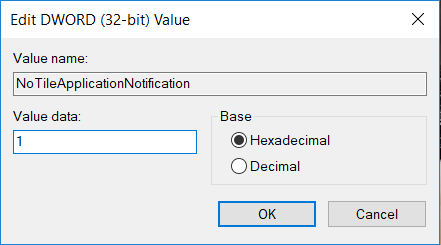
4. Now right-click on PushNotifications key and select Nytt > DWORD-värde (32-bitars).
5. Namnge denna nya DWORD som NoTileApplicationNotification and then double-click on it.

6. Change the value of this DWORD till 1 och klicka på OK.
7. Stäng Registereditorn och starta om datorn för att spara ändringarna.
Rekommenderas:
Det är det du har lärt dig framgångsrikt Hur man Disable Live Tiles in Windows 10 Start Menu but if you still have any questions regarding this post then feel free to ask them in the comment’s section.