- in விண்டோஸ் 10 by நிர்வாகம்
Windows 10 இல் Windowsapps கோப்புறையை எவ்வாறு அணுகுவது

The Windows operating system has a file directory structure that hasn’t changed much across major releases. You’ll find the core system files in the Windows folder, user profile data in the Users folder, and program files in the Program Files and Program Files (x86) folders.
What about Microsoft Store apps, however? Unlike other desktop apps, Microsoft Store apps remain hidden in a secret WindowsApps folder. Windows limits access to this folder from standard Windows user accounts, so to view or edit it in any way, you’ll need to make some changes. Here’s what you’ll need to do.
What is the WindowsApps Folder in Windows 10?
The WindowsApps folder, as we’ve mentioned, is a restricted folder containing Microsoft Store apps. It also contains some Windows apps that use the Universal Windows Platform (UWP) app style (as introduced in Windows 8), such as the Your Phone app (yourphone.exe).
From a security point of view, restricting the WindowsApps folder makes sense. By sandboxing Microsoft Store apps from the rest of Windows, and limiting ownership of the files to a hidden TrustedInstaller user account, Microsoft Store apps have limited access to the rest of Windows compared to standard desktop apps.
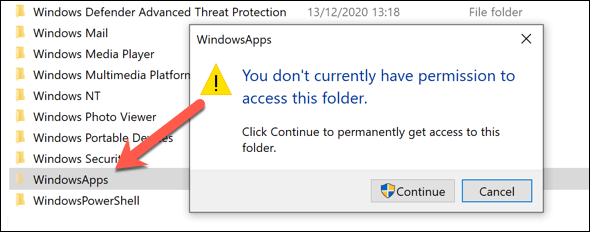
Unfortunately, this does mean that making any changes to the WindowsApps folder (or viewing it at all) is difficult. You’ll need to take steps to take ownership of the folder first, allowing you access to change the folder afterwards.
However, it’s important to consider the security risks before you attempt this. While Microsoft vets apps for quality and safety, limiting access to the WindowsApps folder adds another layer of protection, preventing access to other sensitive files or folders (such as your user profile folder in the C:Users directory).
By taking ownership of the folder, you’re reducing this added protection, and exposing more of your system data to Microsoft Store apps. If you’re concerned, you should தீம்பொருளை ஸ்கேன் செய்யுங்கள் afterwards to offer yourself peace of mind.
Using Windows File Explorer to Access the WindowsApps Folder
To access the WindowsApp folder in Windows 10, the easiest method is to use Windows File Explorer. You’ll need to enable the viewing of hidden folders and take ownership of the folder, giving you the ability to view the folder and make changes.
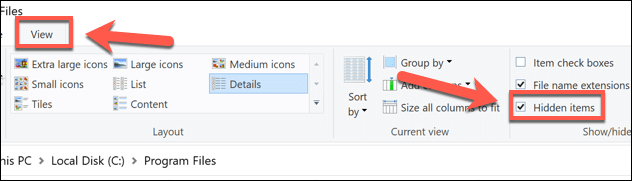
- To start, open File Explorer on your Windows PC. Windows hides certain folders by default, so you’ll need to disable this first. To do this, select காண்க > மறைக்கப்பட்ட உருப்படிகளை. This will cause hidden files and folders to appear in the directory list on the right.
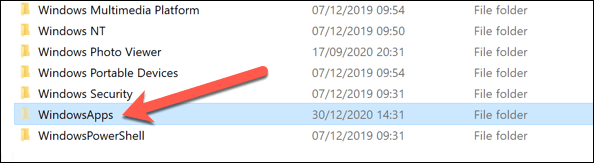
- With hidden folders accessible, open the நிரல் கோப்புகள் directory (usually சி: நிரல் கோப்புகள்) using the address bar. The WindowsApp folder should be visible in the directory list.
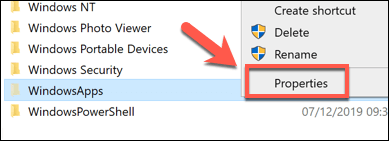
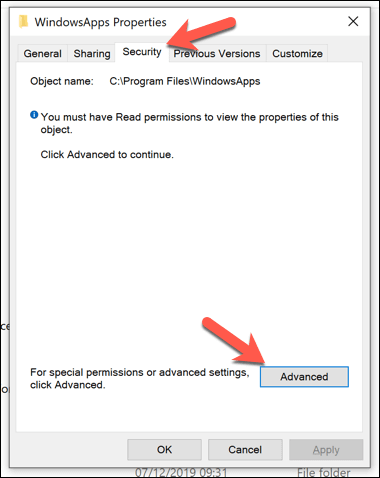
- To take control of WindowsApps, right-click the folder and select பண்புகள்.
- ஆம் பண்புகள் சாளரம், தேர்ந்தெடுக்கவும் பாதுகாப்பு தாவல், பின்னர் தேர்ந்தெடுக்கவும் மேம்பட்ட விருப்பம்.
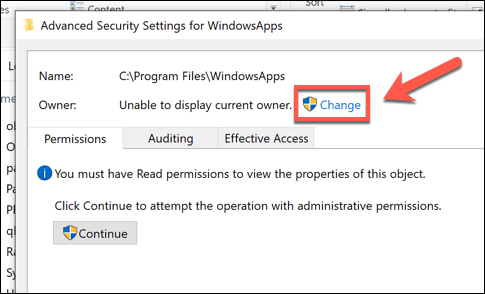
- ஆம் மேம்பட்ட பாதுகாப்பு அமைப்புகள் சாளரம், தேர்ந்தெடுக்கவும் மாற்றம் button, listed next to the உரிமையாளர் information at the top.
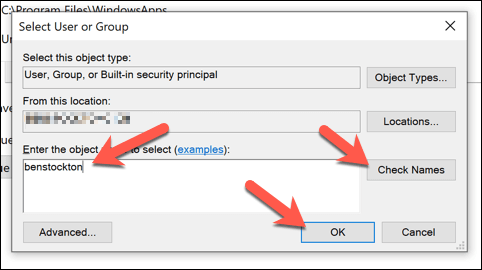
- ஆம் பயனர் அல்லது குழுவைத் தேர்ந்தெடுக்கவும் box, type the username for your Windows user account, then select பெயர்கள் சரிபார்க்கவும் தேர்ந்தெடுப்பதற்கு முன் OK. For Microsoft accounts, type your email address instead.
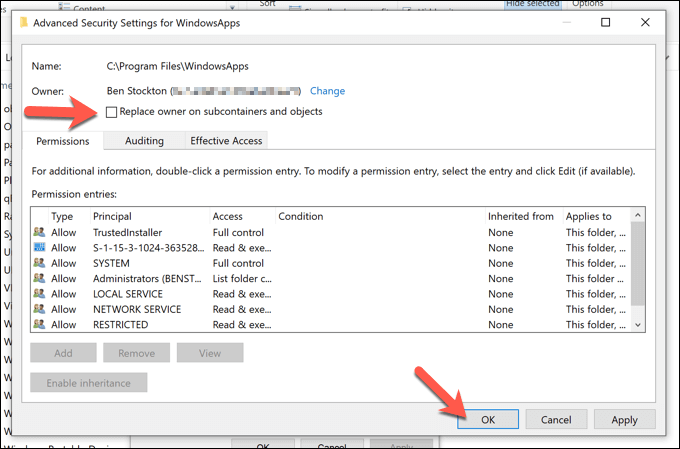
- Ownership of the folder will update to reflect your username (as seen in the உரிமையாளர் information at the top of the window). Make sure to enable the துணை உரிமையாளர்கள் மற்றும் பொருள்களின் உரிமையாளரை மாற்றவும் checkbox at the top of the menu. If you’re happy to proceed, select OK (அல்லது விண்ணப்பிக்க > OK) to make the change.
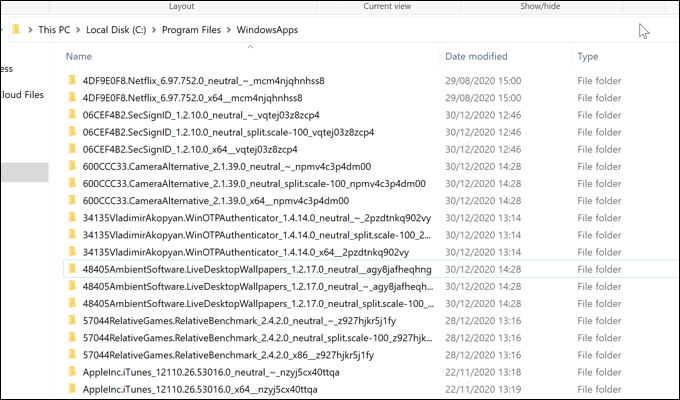
- You should now be able to view and edit the WindowApps folder, along with all sub-folders and files. Double-click the WindowsApps கோப்புறையில் சி: நிரல் கோப்புகள் directory to view the full contents.
Gaining Access to WindowsApps using the Windows PowerShell
The method above will grant you access to the WindowsApps folder and allow you to take ownership, but it can be quite a cumbersome process to follow. If you want to quickly change ownership of the WindowsApps folder and gain full access, you can use விண்டோஸ் பவர்ஷெல் பதிலாக.
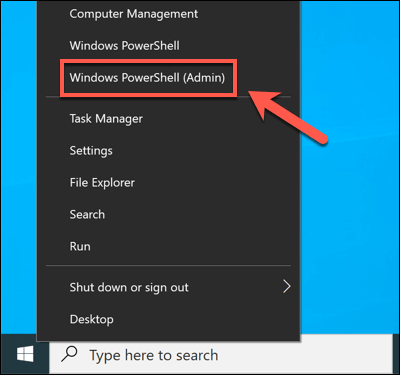
- To open a new PowerShell window, right-click the Start menu and select the விண்டோஸ் பவர்ஷெல் (நிர்வாகம்) விருப்பம்.
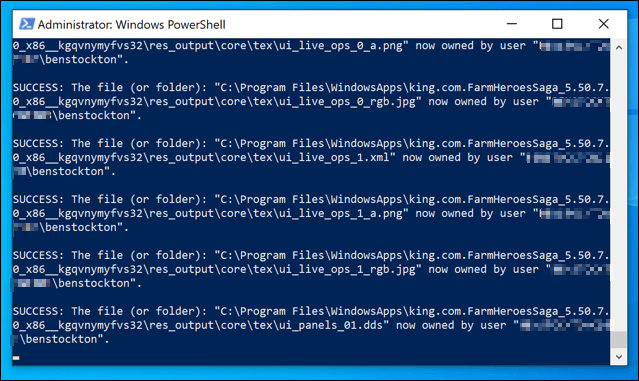
- In the new PowerShell சாளரம், வகை takeown /f “C:Program FilesWindowsApps” /r மற்றும் பத்திரிகை உள்ளிடவும். This will take some time to complete. By using the /f (force) and /r (recursive) flags, the எடு command will force ownership of the WindowsApps folder to change, applying the change to all files and subfolders.
Once the process is complete, the WindowsApps folder (C:Program FilesWindowsApps) will be accessible to you in Windows File Explorer.
Understanding the WindowsApps Folder Structure
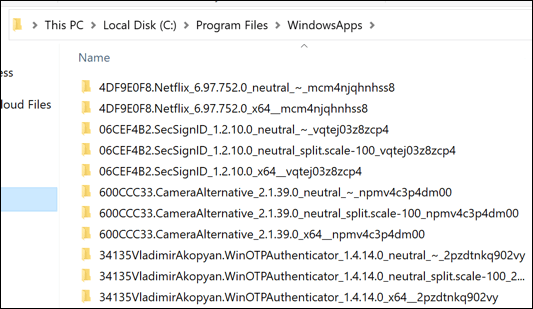
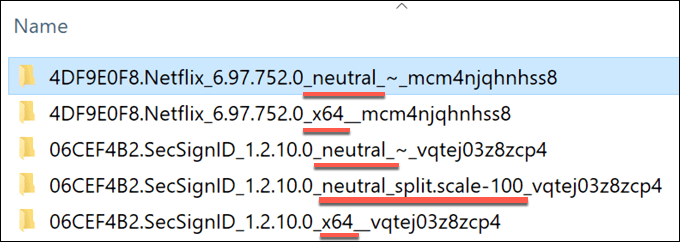
Unlike the Program Files folder, the WindowsApp folder isn’t structured by a simple app name. A Microsoft Store app folder in WindowsApps will have a naming structure that typically follows this pattern: name, version number, architecture (போன்ற x64 for standard 64-bit CPU PCs), and Microsoft Store publisher ID.
For example, the Netflix app folder is named 4DF9E0F8.Netflix_6.97.752.0_x64__mcm4njqhnhss8. அந்த 4DF9E0F8.Netflix component is the internal app name, while 6.97.752.0 is the app version.
The architecture, x64, points to the common 64-bit CPU architecture, while mcm4njqhnhss8 is the publisher ID for Netflix. All app folders in the WindowsApps folder will, in some way, follow this structure.
You may also see some apps with more than one folder. While the name, app version, and publisher ID remain the same, some folders will have நடுநிலை or neutral_split.scale for architecture. This usually points to common data files (such as app metadata) that remain the same, regardless of the target architecture.
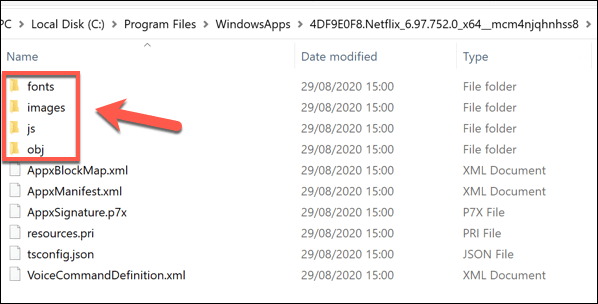
Core files, however, are found in the main architecture folder (such as the x64 folder). Some apps may have இயங்கக்கூடிய கோப்புகள் you can run directly, while others are web apps, with javascript and other web assets visible.
Netflix, for instance, is a web-based app. Inside the core Netflix x64 directory, folders labelled js, images, fonts, மற்றும் பொருள் point to its origins, with javascript and HTML code. Other apps, like the Microsoft Bing News app, come with an executable file and dynamic link library (DLL) files instead, similar to standard desktop apps.
If you’re curious, you can take a look around the various sub-folders to gain an understanding of how the apps you install work, but you won’t be able to make any changes to the code.
Troubleshooting Microsoft Store Apps on Windows 10
Once you gain access to the WindowsApps folder, you can explore the different Microsoft Store apps that you have installed and (if necessary) remove them. Some apps, like yourphone.exe, are core Windows apps that you shouldn’t remove, while others (like those you install from the Store yourself) can be uninstalled safely.
It’s probably best to uninstall Microsoft Store apps through the Microsoft Store itself or by using the Windows Settings menu, however. If you’re having trouble updating apps you’ve installed yourself, you may need to look at why, including checking for slow Microsoft Store downloads.