- in หน้าต่าง by ผู้ดูแลระบบ
ปิดการใช้งานทัชแพดโดยอัตโนมัติเมื่อเชื่อมต่อเมาส์

If you use a traditional mouse over Touchpad, you could automatically disable touchpad when you plug in the USB Mouse. This can be easily done via Mouse Properties in Control Panel where you have a label called “Leave touchpad on when a mouse is connected”, so you need to uncheck this option and you’re good to go. If you have Windows 8.1 with the latest update, you could easily configure this option right from PC settings.
This option makes it easier for users to navigate and you don’t need to worry about accidental touch or click over touchpad when using a USB Mouse. So without wasting any time let’s see How to Automatically disable Touchpad when Mouse is Connected in Windows 10 with the help of the below-listed guide.
ปิดการใช้งานทัชแพดโดยอัตโนมัติเมื่อเชื่อมต่อเมาส์
ตรวจสอบให้แน่ใจว่าได้สร้างจุดคืนค่าในกรณีที่มีสิ่งผิดปกติเกิดขึ้น
Method 1: Disable Touchpad when Mouse is connected via Settings
1. กด Windows Key + I เพื่อเปิด การตั้งค่า จากนั้นคลิกที่ อุปกรณ์

2. จากเมนูด้านซ้ายมือ ให้เลือก ทัชแพด
3. Under Touchpad ยกเลิกการเลือก "เปิดทัชแพดไว้เมื่อเชื่อมต่อเมาส์"
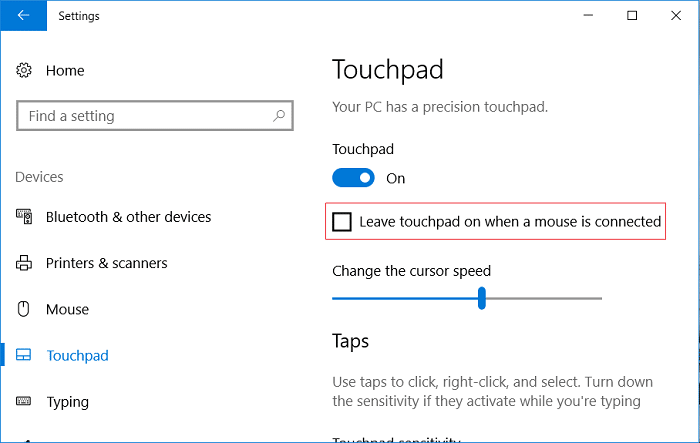
4. รีบูทพีซีของคุณเพื่อบันทึกการเปลี่ยนแปลง
Method 2: Disable Touchpad when Mouse is connected via Mouse Properties
1. กด Windows Key + Q เพื่อเปิด Search พิมพ์ ควบคุม, และคลิกที่ แผงควบคุม จากผลการค้นหา

2 จากนั้นคลิกที่ ฮาร์ดแวร์และเสียง.

3. Under Devices and Printers click on เม้าส์
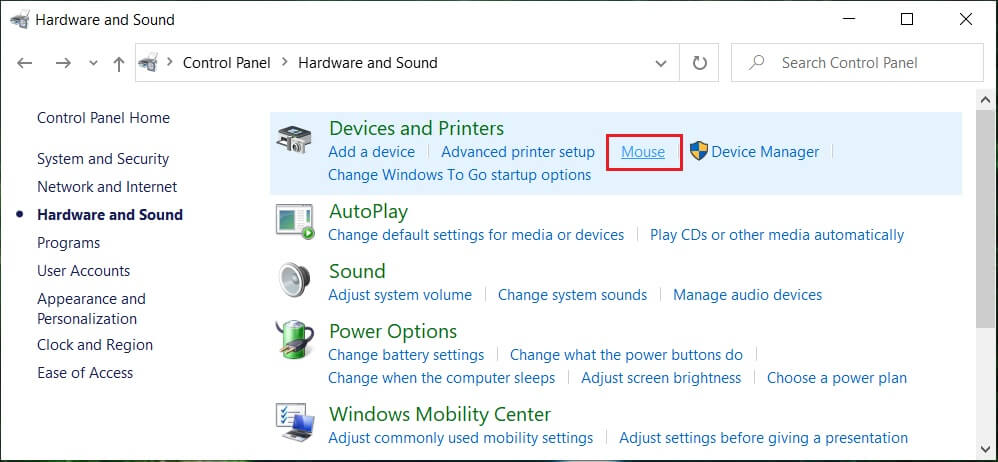
4. เปลี่ยนเป็น ELAN or Device Settings แท็บแล้ว ยกเลิกการเลือก "Disable internal pointing device when the external USB pointing device is attached"
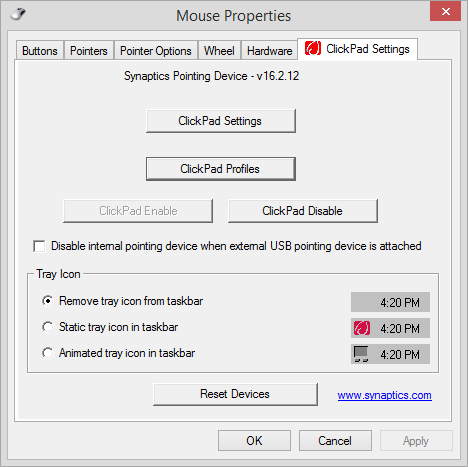
5. คลิก Apply ตามด้วย ตกลง
Method 3: Disable Dell Touchpad when Mouse is connected
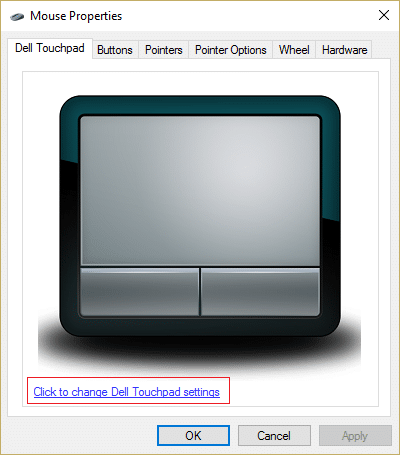
1. กด Windows Key + R แล้วพิมพ์ main.cpl และกด Enter เพื่อเปิด คุณสมบัติของเมาส์
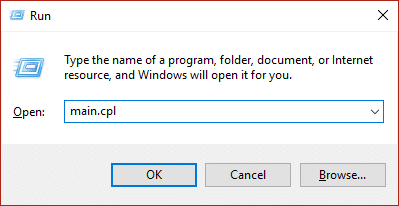
2. Under Dell Touchpad tab, click on “Click to change Dell Touchpad settings"
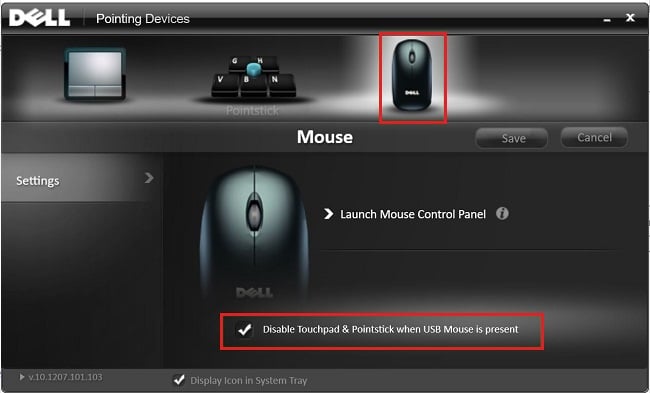
3. From Pointing Devices, select the Mouse picture from the top.
4. เครื่องหมายถูก “Disable Touchpad when USB mouse is present"
5. รีบูทพีซีของคุณเพื่อบันทึกการเปลี่ยนแปลง
Method 4: Disable Touchpad when Mouse is connected via Registry
1. กด Windows Key + R แล้วพิมพ์ regedit และกด Enter เพื่อเปิด Registry Editor

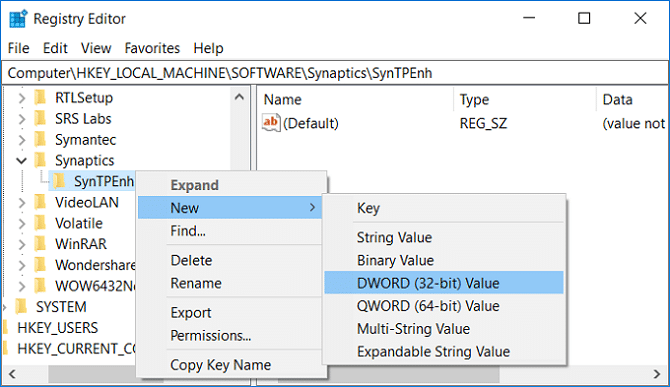
2. ไปที่คีย์รีจิสทรีต่อไปนี้:
HKEY_LOCAL_MACHINESOFTWAREsynapticsSynTPEnh
3 คลิกขวาที่ SynTPenh จากนั้นเลือก ใหม่ > DWORD (32 บิต) ค่า
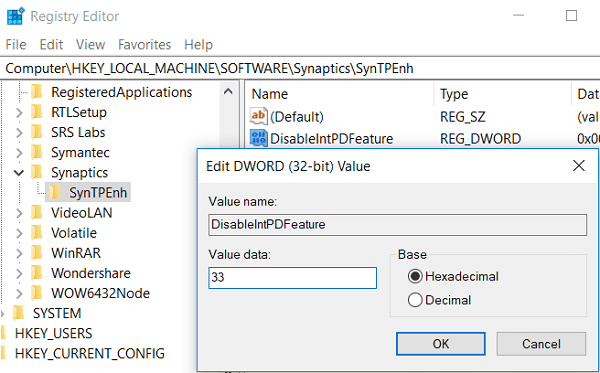
4. Name this DWORD as DisableIntPDF ธรรมชาติ and then double click on it to change its value.
5. ตรวจสอบให้แน่ใจว่า Hexadecimal is selected under Base then เปลี่ยนค่าเป็น 33 และคลิกตกลง
6. รีบูทพีซีของคุณเพื่อบันทึกการเปลี่ยนแปลง
Method 5: Disable Touchpad when Mouse is Connected in Windows 8.1
1. Press Windows Key + C key to open การตั้งค่า เสน่ห์.
2 เลือก เปลี่ยนการตั้งค่าเครื่องคอมพิวเตอร์ than from the left-hand menu click on PC and Devices.
3 จากนั้นคลิกที่ เมาส์และทัชแพด, then from the right window look for an option labelled as “เปิดทัชแพดไว้เมื่อเชื่อมต่อเมาส์"
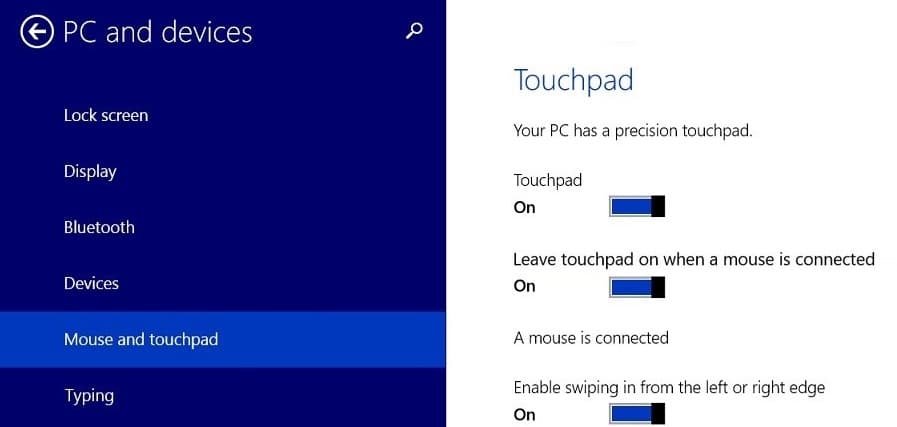
4 ตรวจสอบให้แน่ใจ disable or turn off the toggle for this option.
5. Reboot your PC to save changes, and this will automatically disable Touchpad when Mouse is connected.
ที่แนะนำ:
นั่นคือคุณประสบความสำเร็จ Disable Touchpad when Mouse is Connected in Windows 10 แต่ถ้าคุณยังคงมีข้อสงสัยเกี่ยวกับคู่มือนี้ อย่าลังเลที่จะถามพวกเขาในส่วนความคิดเห็น