- in หน้าต่าง by ผู้ดูแลระบบ
Fix OBS Error Failed to Connect to Server

Open Broadcaster Software, or OBS, is an open-source software meant for live streaming and video recording. This free software is plausibly one of the most popular streaming encoders. Supported by a community of developers, OBS is available for Windows, macOS, BSD, and Linux. The program is also often used by gamers to share screen captures for the purpose of tutorials or video presentations. OBS provides a variety of audio and video sources to make the final output creative. While using OBS on their respective systems, users have reported encountering OBS error failed to connect to server. The issue is usually seen to occur while streaming through the OBS application. If you are someone facing the same issue then we have brought you a perfect guide that will help you fix this problem with some easy and effective methods. But before diving into the fixes straight away, let us explore the reasons that lead to the connection issue.
How to Fix OBS Error Failed to Connect to Server in Windows 10
OBS connection issues with the server are usually prompted while streaming through the app. A couple of reasons can trigger this issue which are listed below:
- Internet connection issues.
- Streaming server issues.
- Outdated installation of OBS.
- ซอฟต์แวร์ระบบที่ล้าสมัย
- Wrong configuration of Bind IP or MTU.
- OBS access blocked by Firewall.
- Greater MTU size.
- Corrupt router settings.
Before starting with the methods to fix connection to server issue in OBS, make sure that the streaming servers are up. Also, check your internet connectivity and stabilize it if it is weak or there is no connection. In addition to this, you can also try a simple reboot of the system to resolve the issue. If these convenient fixes don’t work then move on to the list of methods in the order they are mentioned below:
Method 1: Change Streaming Server
If the server is unavailable or down, OBS error failed to connect to server error is prompted. Therefore, the first method involves checking the streaming server and then changing the streaming server to a different location to resolve the issue.
หมายเหตุ: Use a port scanner to check if the server port is open before starting with the steps given below.
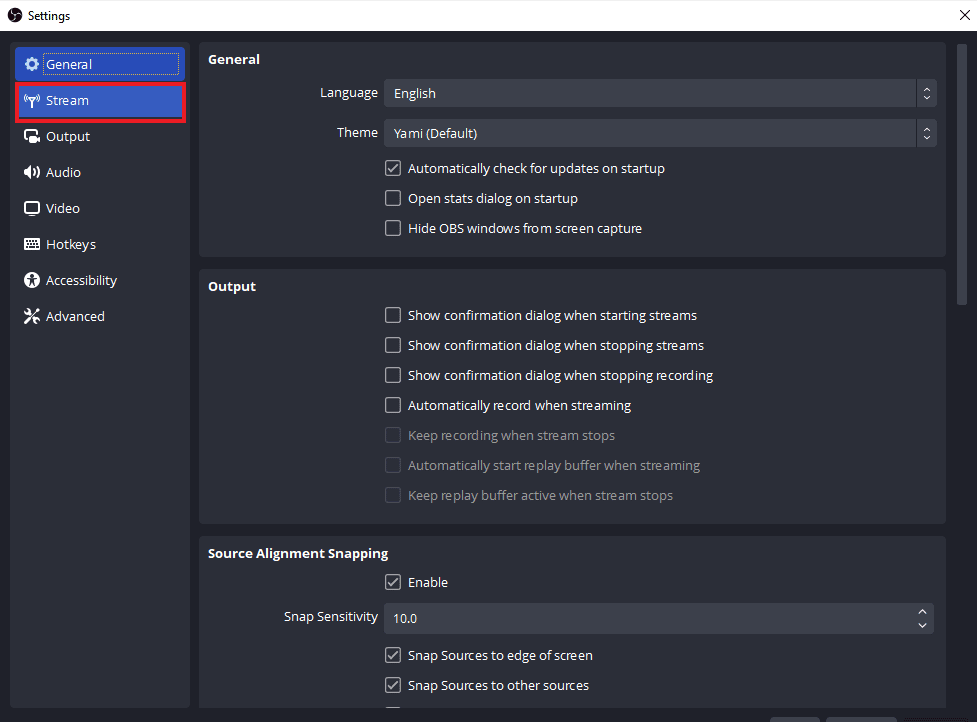
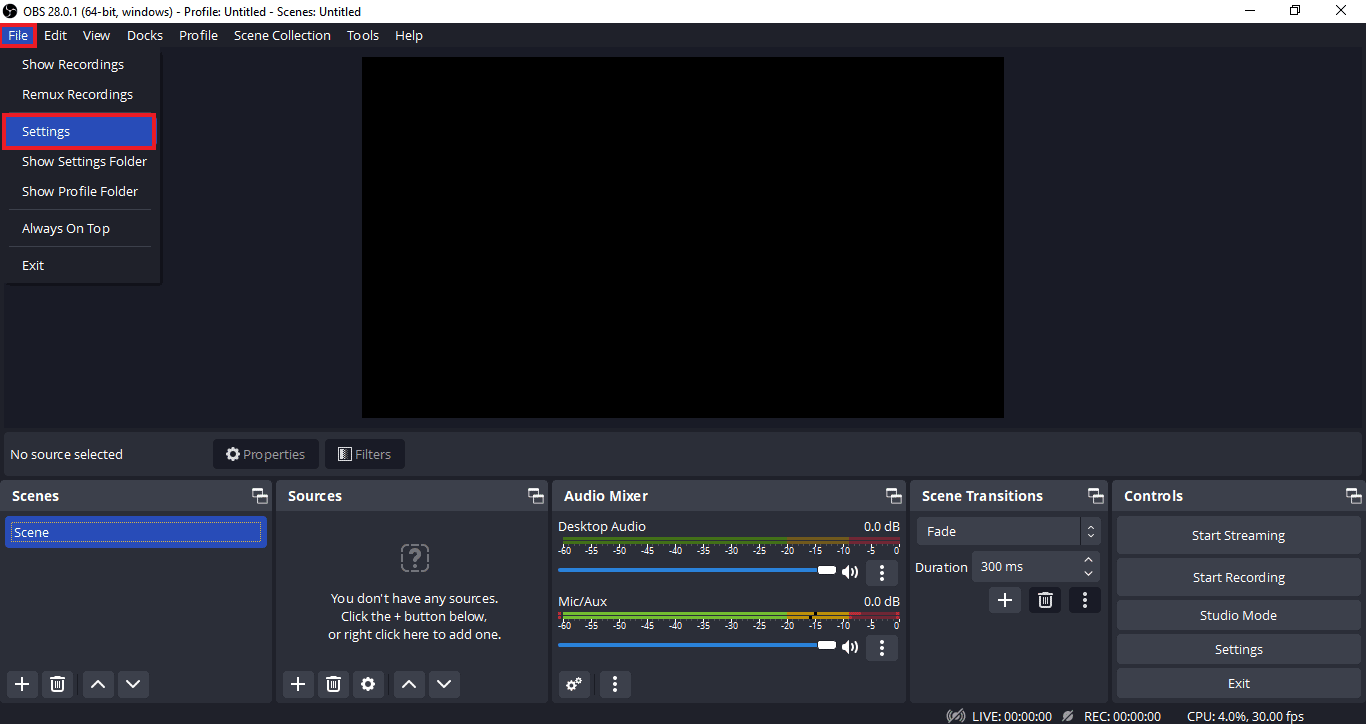
1 เปิด OBS application, select the เนื้อไม่มีมัน tab at the top, and launch การตั้งค่า ในนั้น.

2. ตอนนี้คลิกที่ กระแส แถบ
3. Next, click on the tab beside เซิร์ฟเวอร์ เพื่อขยายเมนูแบบเลื่อนลง
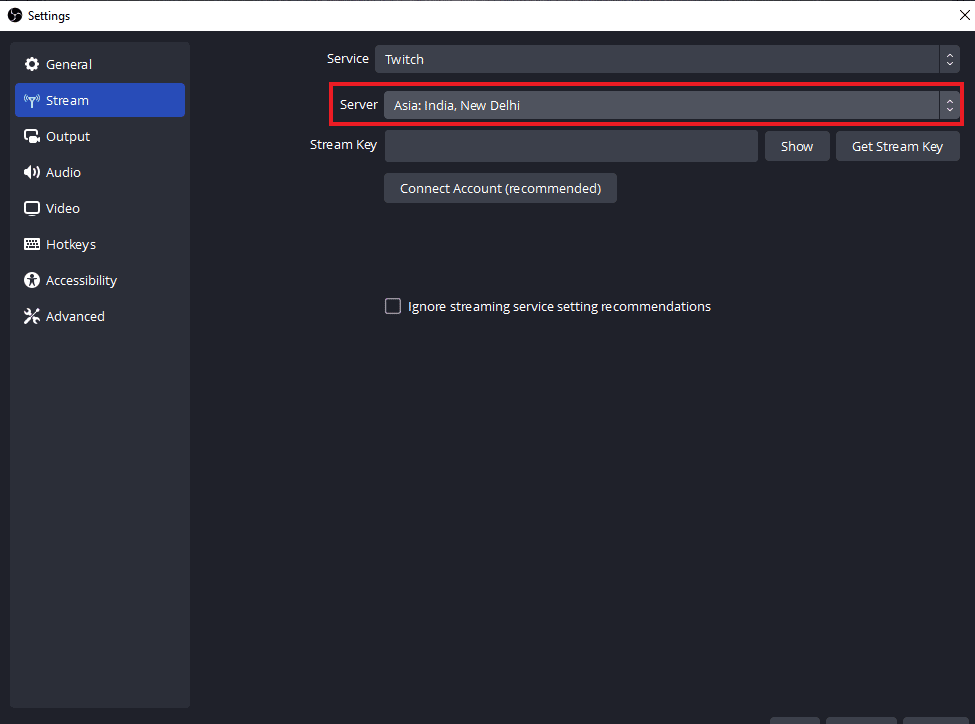
4. ตอนนี้ เลือกก เซิร์ฟเวอร์ที่แตกต่างกัน และ ใช้ การเปลี่ยนแปลง.
5. สุดท้าย relaunch the OBS app when the steps are performed and check if the server issue has been resolved.
Method 2: Enable Dynamic Bitrate
The next method that comes to the rescue if you are still facing connection issues with the server in OBS is to enable dynamic bitrate in OBS. Facing frames dropout through the streaming process can be resolved by activating dynamic bitrate in Advanced Settings in OBS. Look at the steps given below for more details about this fix:
หมายเหตุ: Dynamic Bitrate option is only available for OBS version 24 and above.
1 เปิดตัว แอพพลิเคชั่น OBS on your system, select the เนื้อไม่มีมัน tab, and open การตั้งค่า ในนั้น.

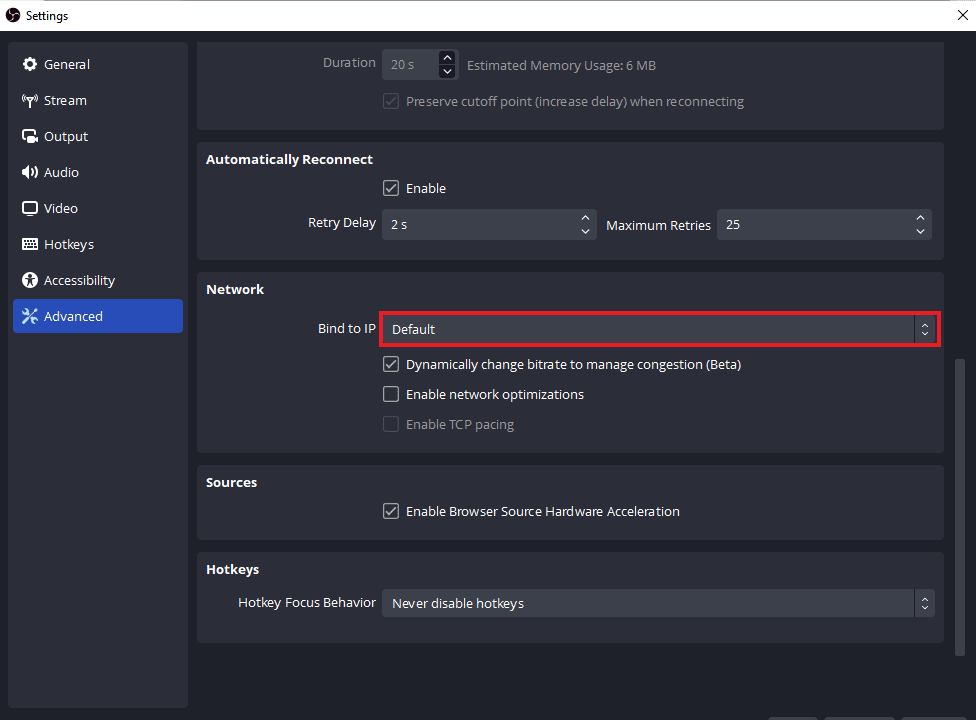
2. ตอนนี้ เลือก ระดับสูง แถบ

3. Next, in the Network section, select the option of Dynamically change bitrate to manage congestion (Beta).
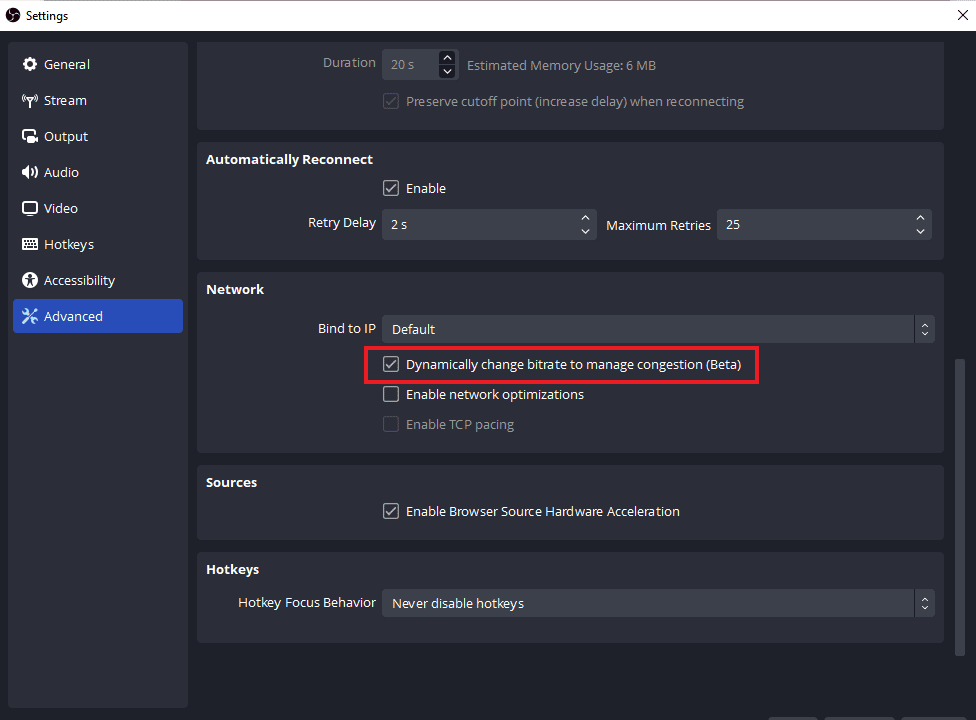
4. ตอนนี้ ใช้การเปลี่ยนแปลง made and launch OBS application again to check if the connection issue is resolved.
ยังอ่าน: วิธีแก้ไข OBS ไม่บันทึกเสียงเกม
Method 3: Create and Re-Enter New Stream Key
Due to an issue between OBS application and the streaming service, be it a glitch or a flaw, OBS not connecting to server issue can be triggered. If this is the case with you, then try creating a new stream key and then re-enter it. Follow the instructions given below to create a new stream key:
หมายเหตุ: The streaming service used here is Facebookคุณยังสามารถใช้ YouTube.
1. เปิดตัวใด ๆ เว็บเบราเซอร์ และเปิดของคุณ Facebook account in it.
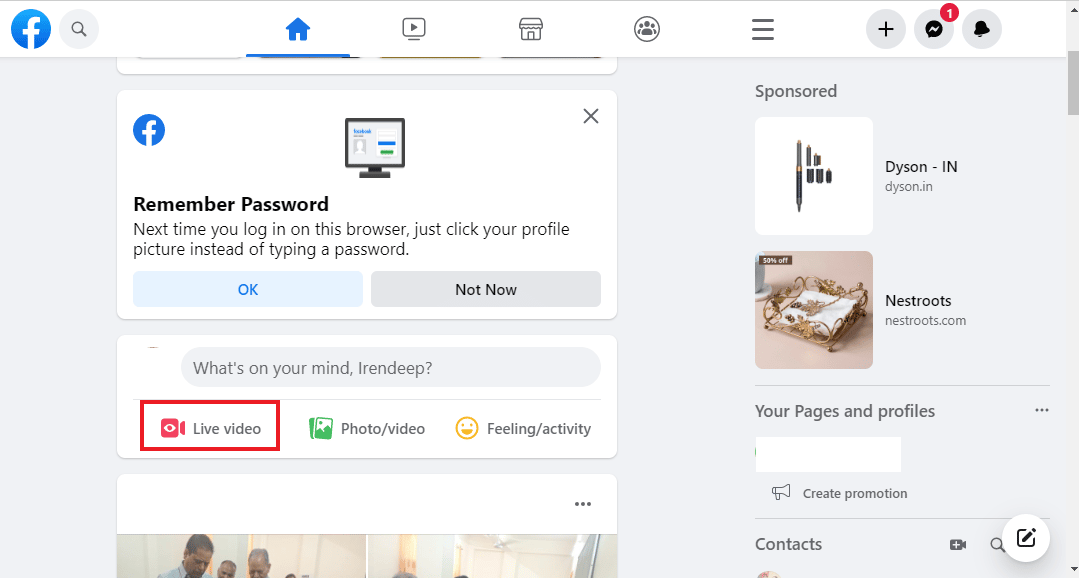
ฮิต คลิกที่ วิดีโอแบบถ่ายทอดสด ตัวเลือกในหน้าแรก
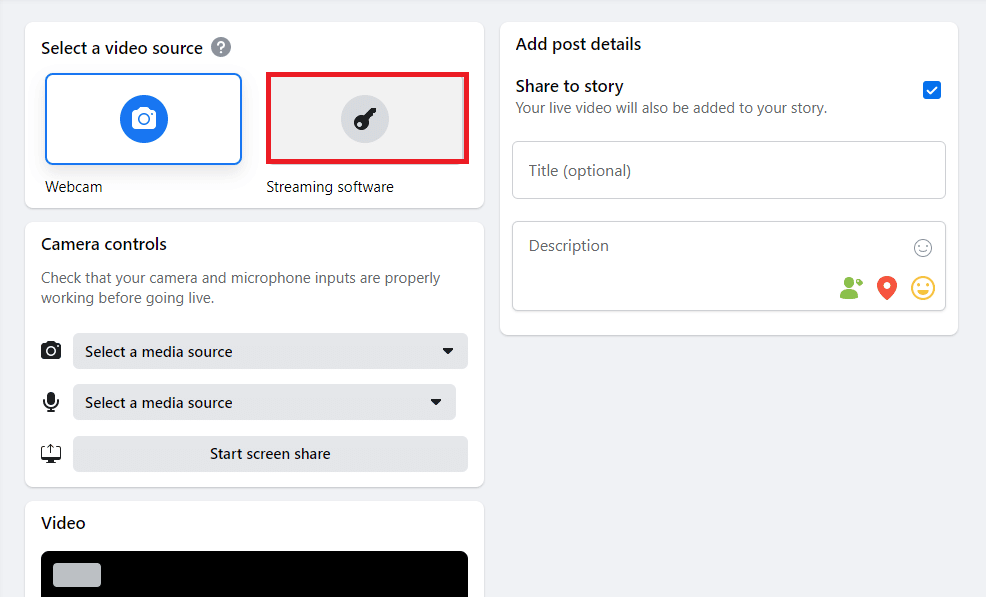
3 ตอนนี้ให้คลิกที่ ซอฟต์แวร์สตรีมมิ่ง.
4 จากนั้นคลิกที่ รีเซ็ต to create a new stream key.
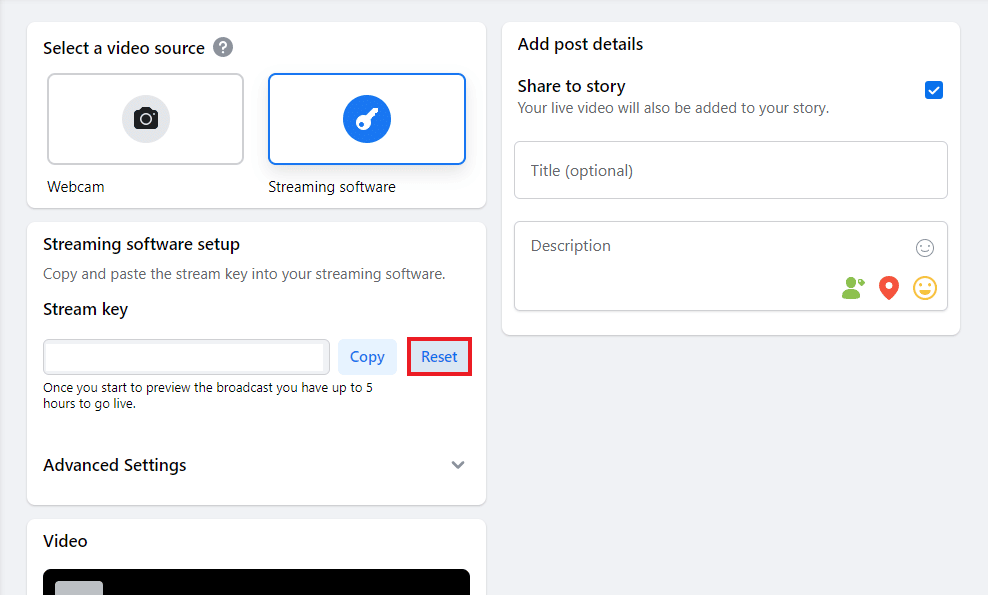
5. ตอนนี้ คัดลอกไฟล์ Stream key และเปิดตัว แอพพลิเคชั่น OBS.
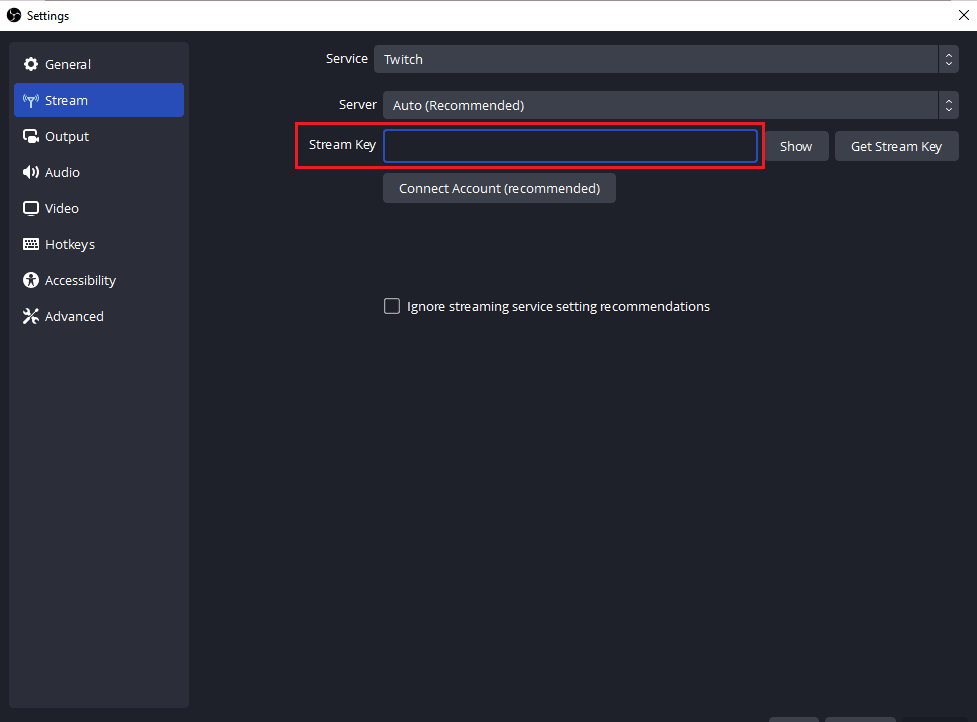
6. In it, launch การตั้งค่า และเปิด กระแส แถบ

7. Paste the copied key from Facebook to the สตรีมคีย์ option in it and ใช้ การเปลี่ยนแปลง.
After performing the steps, close OBS and launch it again to check if the connection server issue is resolved.
Method 4: Update OBS Application
OBS is failed to connect to server error can also be triggered if the OBS application on your system is outdated. This can prompt incompatibility issues and therefore it is important to update OBS to the most recent build, use the steps below for it:
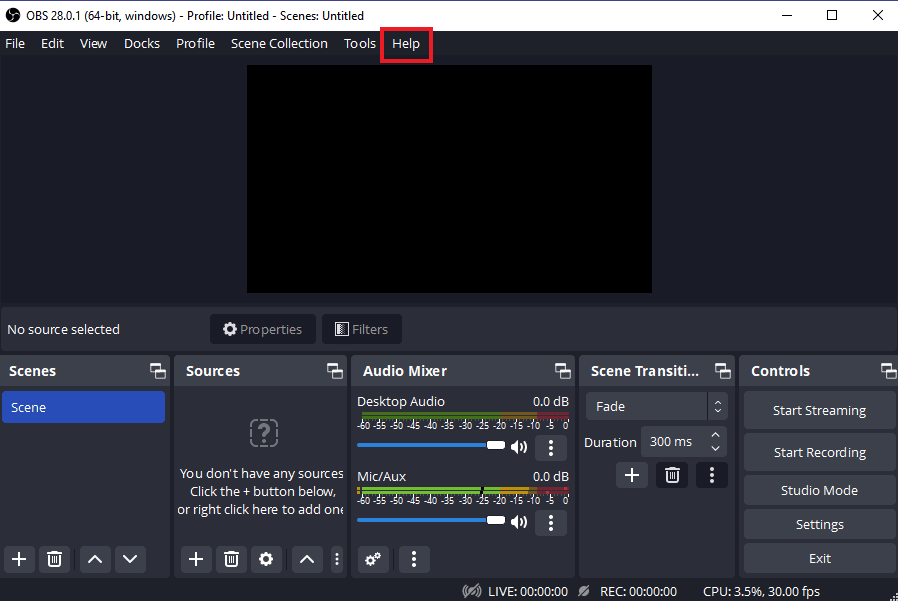
1 เปิด OBS on your desktop and click on the การช่วยเหลือ ตัวเลือกตามที่แสดง
2. ตอนนี้เลือก ตรวจสอบ For Updates จากเมนูแบบเลื่อนลง
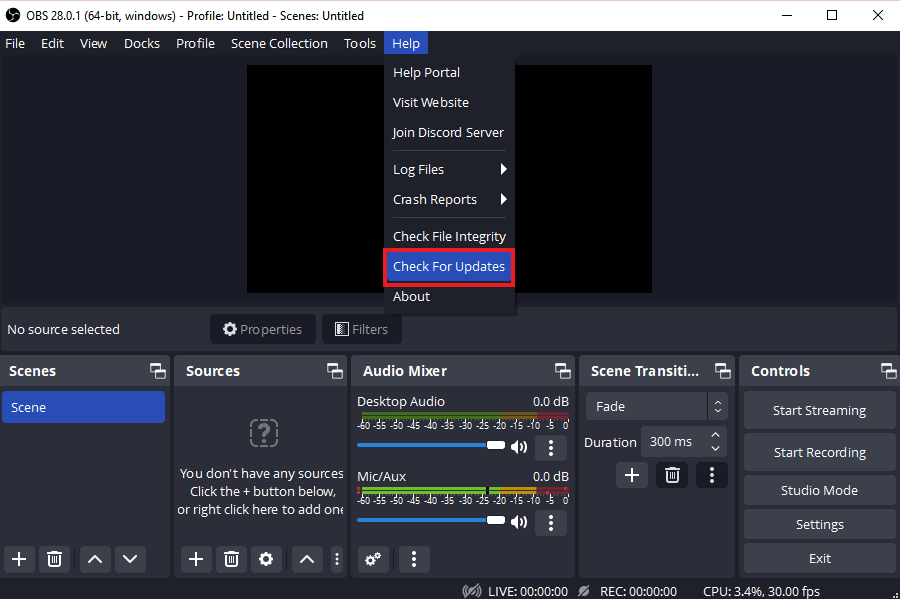
3. หากมีการอัพเดต การติดตั้ง มันแล้ว รีบูต your device to launch OBS free from connection issue.
ยังอ่าน: แก้ไขคอมพิวเตอร์ไม่แสดงบนเครือข่ายใน Windows 10
Method 5: Edit Bind IP Option
Another fix that can help you with OBS error failed to connect to server is editing the Bind IP option present in Advanced OBS settings. Altering Bind to IP to default or other option available helps in resolving the connection error. Try the steps given below to edit it:
1 เปิด OBS program และคลิกที่ เนื้อไม่มีมัน เพื่อเปิด การตั้งค่า.
2. Now, in it, click on ระดับสูง.
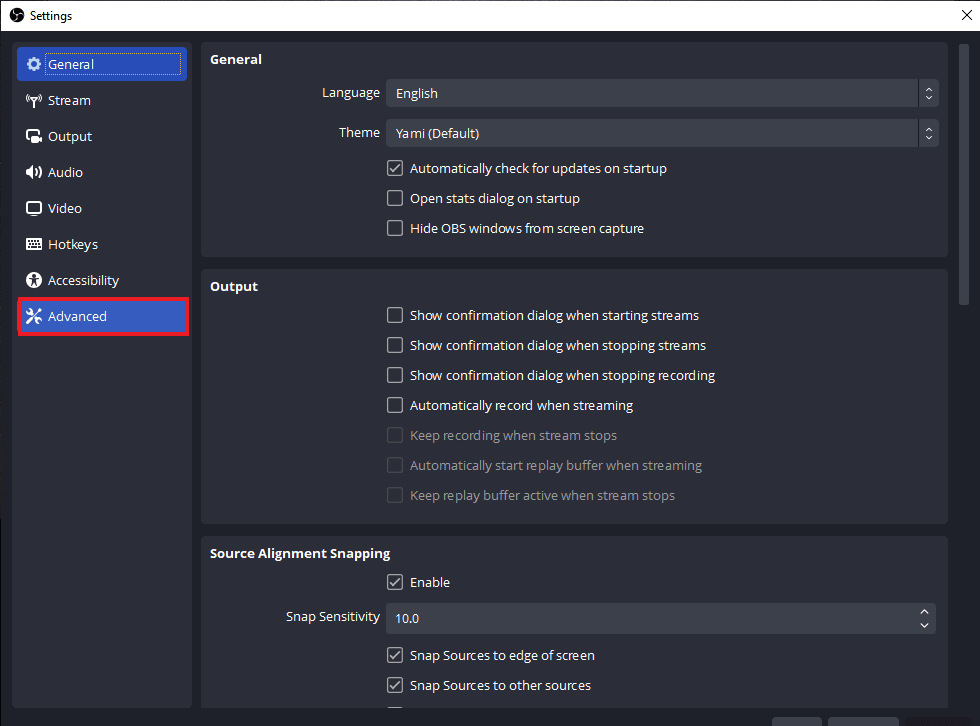
3. จากนั้นเลื่อนลงไปที่ไฟล์ เครือข่าย section and expand the drop-down menu of ผูกกับ IP.
4. Set it to ค่าเริ่มต้น, in case it is already on Default then select network connection name with the IP address.
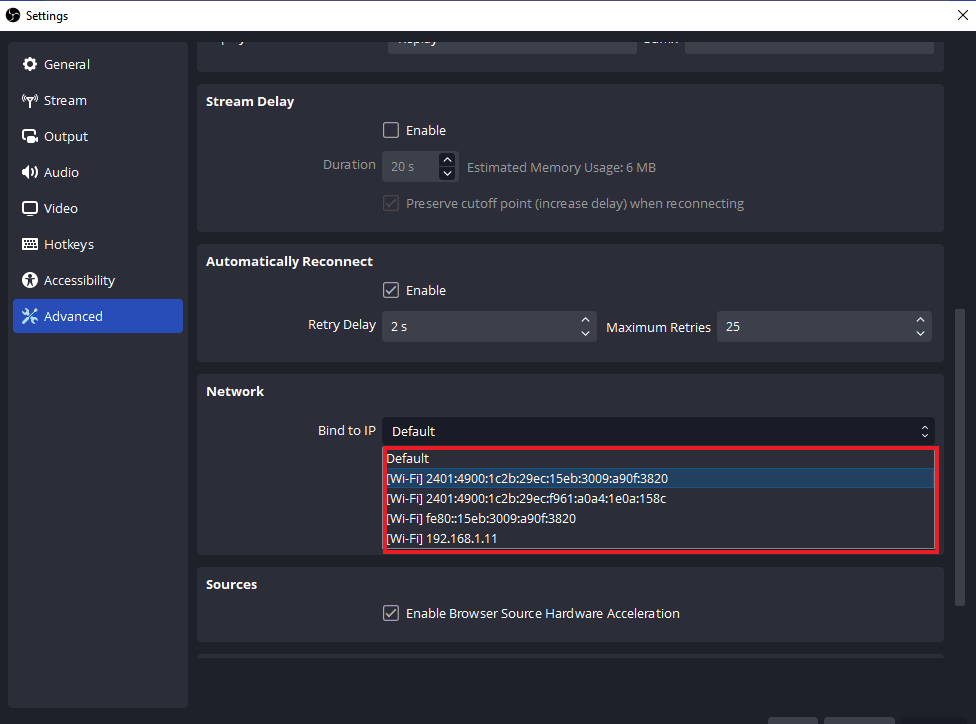
5. เมื่อเสร็จแล้ว ใช้การเปลี่ยนแปลง and check whether OBS is able to connect to the server now.
วิธีที่ 6: อัปเดต Windows
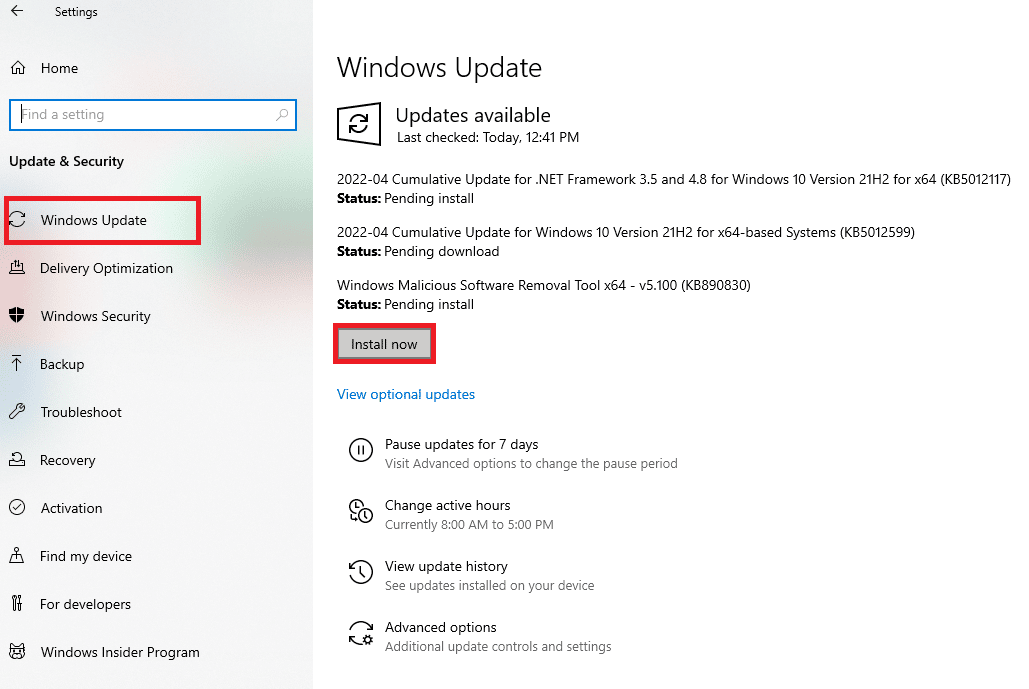
If there is no update available for OBS application on your device or even after an update you are still experiencing OBS error, then you must check an update for your system. Incompatibility issues of the outdated OS with the updated version of OBS program can be a cause for this problem, so try to install a fresh update for your system with the help of our guide How to Download and Install Windows 10 Latest Update.
ยังอ่าน: วิธีรีเซ็ตการตั้งค่าเครือข่ายใน Windows 10
Method 7: Allow OBS Through Firewall
The next method that is extremely useful when it comes to an application unable to connect to the server, similar to this case, is to check if the Firewall, a pre-installed security software of a system, is blocking the application. If it is a possibility in your case then you must allow OBS through Firewall in your system to resolve OBS not connecting to server. You can also check our guide Allow or Block Apps through the Windows Firewall to implement the method.

Method 8: Lower MTU Size
Maximum Transmission Unit, also known as, MTU, is used by OBS to set the maximum size of the network packet. The streaming server used for OBS can drop the packets that are sent by a client that are actually much greater in size than the configured MTU. If this happens, OBS is failed to connect to server issue can arise. In such a situation, lowering the MTU can be of help. You can lower its size using the steps below:
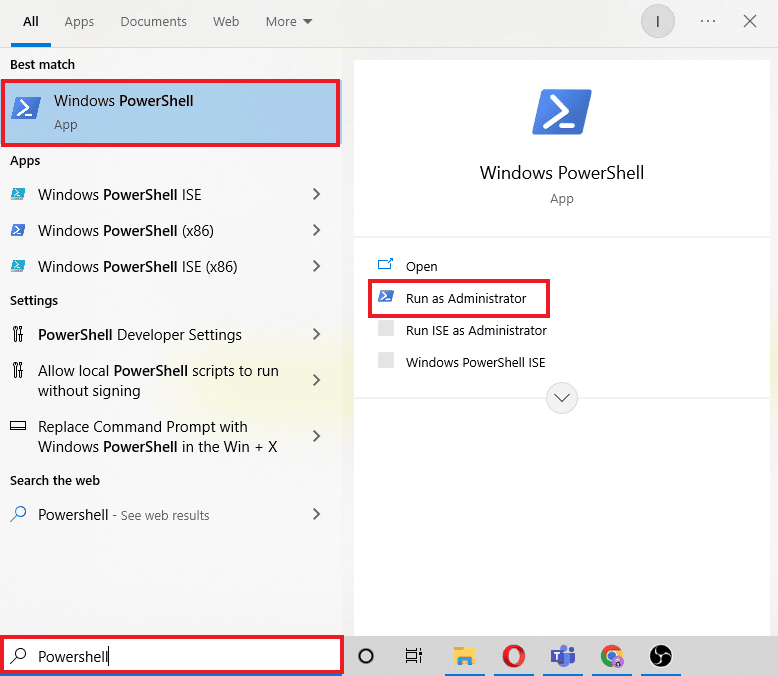
1 ใน แถบค้นหาของ Windowsป้อน PowerShellและคลิกที่ Run as administrator.
2. พิมพ์ข้อความต่อไปนี้ คำสั่ง และกด ใส่รหัส.
netsh int ipv4 แสดงอินเทอร์เฟซย่อย
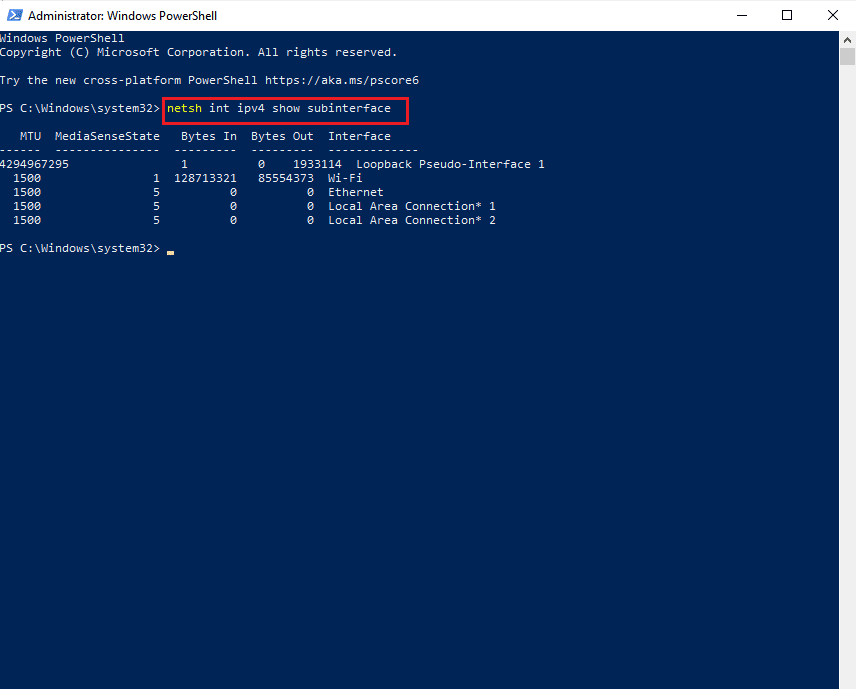
3. ถัดไป ตรวจสอบ ชื่อเครือข่าย ใน อินเตอร์เฟซ column and execute the given คำสั่ง.
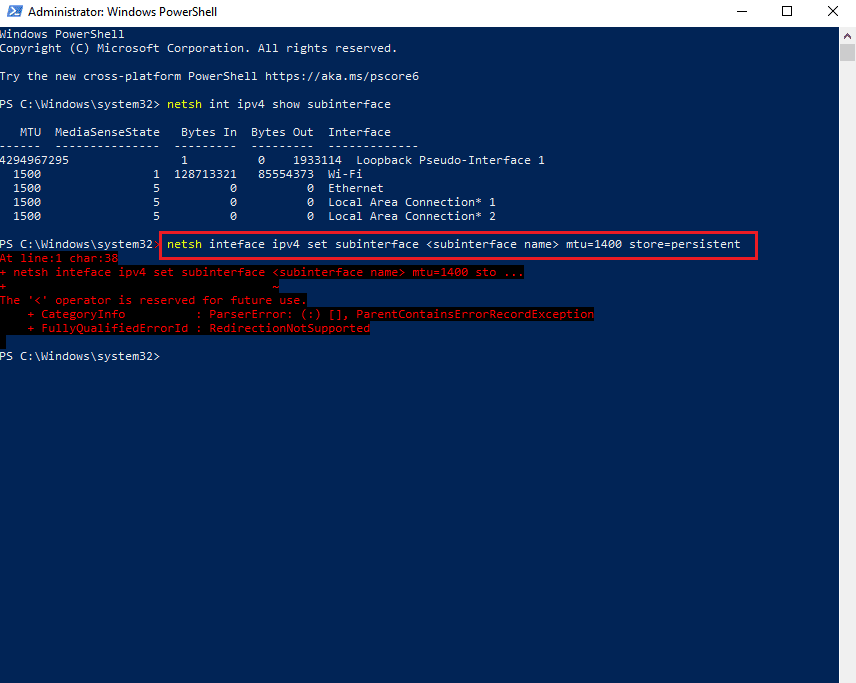
netsh interface ipv4 set subinterface <subinterface name> mtu=1400 store=persistent
4. ตอนนี้ให้ดำเนินการดังต่อไปนี้ คำสั่ง again to check if the ขนาดบุคคล มีการเปลี่ยนแปลง.
netsh int ipv4 แสดงอินเทอร์เฟซย่อย
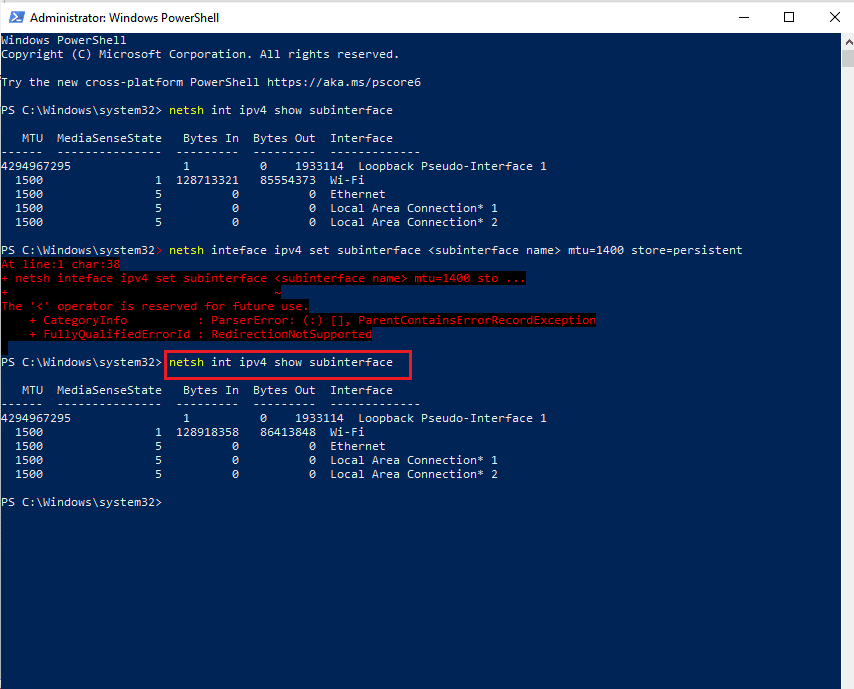
5. ในที่สุด รีบูต พีซี and check if the connection issue in OBS is now settled.
ยังอ่าน: Fix Twitch Resource Format Not Supported
วิธีที่ 9: รีเซ็ตเราเตอร์
If none of the above-mentioned methods have helped you till now, the last possible reason can be corrupt router settings resulting in OBS error failed to connect to server. In this case, reset the router to factory default settings. This can be done simply by pressing the reset button that is present at the backside of the router or through the web portal for which steps are given below:
หมายเหตุ: Resetting the router will reset all of the device settings.
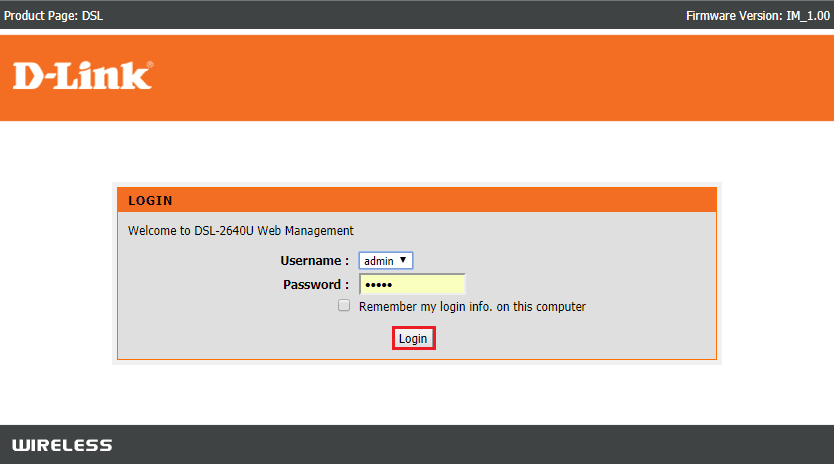
1. เปิดเบราว์เซอร์และพิมพ์ 192.168.1.1 หรือ 192.168.1.2 ในแถบที่อยู่
2. ตอนนี้ ป้อนของคุณ หนังสือรับรอง และคลิกที่ เข้าสู่ระบบ.
3. Next in การตั้งค่าให้เลือก รีเซ็ตแล้วเปิด การวินิจฉัย.
4. ตอนนี้ใน ซ่อมบำรุง คลิกที่ คืนค่าการตั้งค่าเริ่มต้น.

Once the process is complete, the router will restart on its own.
ที่แนะนำ:
We hope that this doc could help you to fix OBS error failed to connect to server with the 9 best methods possible. If you have any queries or suggestions then feel free to drop them in the comments section present below.