If you are planning on a clean installation of Windows 10, you need to create a bootable USB flash drive, or in case of recovery, you will need the bootable USB or DVD. Since the release of Windows 10 and if you’re on a newer device then your system uses UEFI mode ( Unified Extensible Firmware Interface) instead of the legacy BIOS (Basic Input/Output System) and because of this, you need to be sure that the installation media includes the correct firmware support.
Now there are many ways to create a Windows 10 bootable USB flash drive, but we will show you how to do that using Microsoft Media Creation Tool and Rufus. So without wasting any time, let’s see How to Create Bootable USB Flash Drive to install Windows 10 with the help of the below-listed guide.
วิธีสร้าง Windows 10 แฟลชไดรฟ์ USB ที่สามารถบู๊ตได้
Method 1: Create bootable USB media to install Windows 10 using Media Creation Tool
1. Download the Media Creation Tool from the Microsoft website.
2. ดับเบิลคลิกที่ MediaCreationTool.exe ไฟล์เพื่อเปิดแอปพลิเคชัน
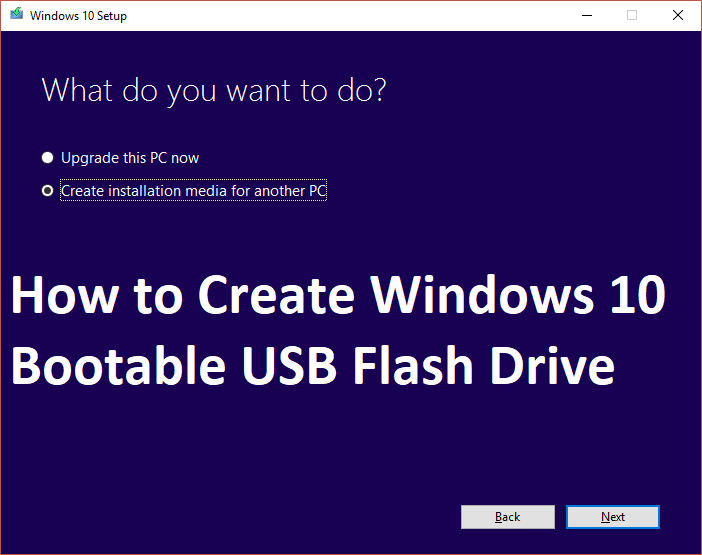
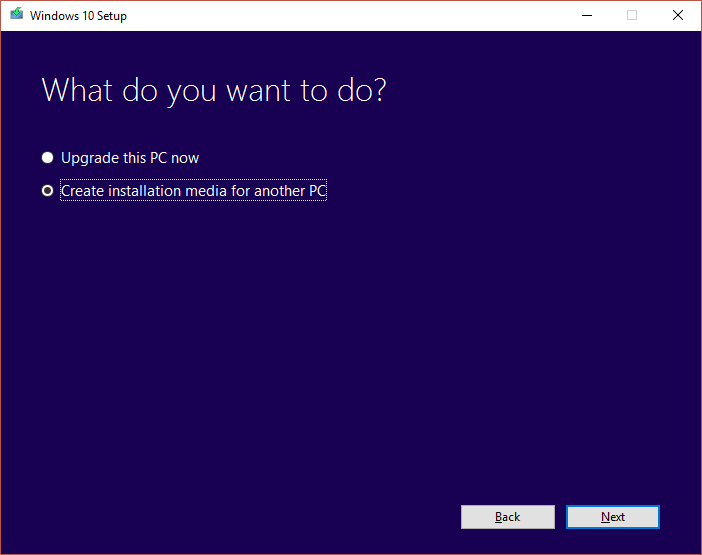
3 คลิก ยอมรับ จากนั้นเลือก “Create installation media (USB flash drive, DVD,หรือ ISO ไฟล์) for another PC"และคลิก ถัดไป
4. Now the language, edition, and architecture will automatically be selected according to your PC configuration but if you still want to set them yourself ยกเลิกการเลือกตัวเลือก at the bottom saying “ใช้ตัวเลือกที่แนะนำสำหรับพีซีนี้"

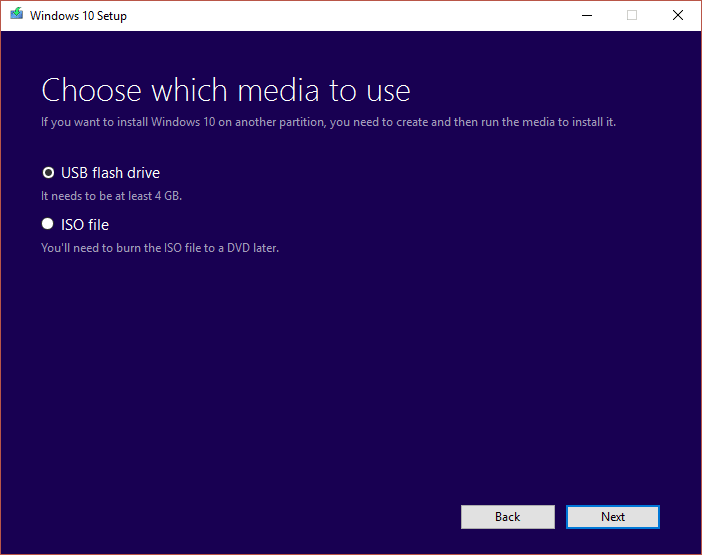
5. Click Next and then select the USB flash drive option and again click ถัดไป
6. Make sure to insert the USB and then click Refresh drive list.
7. Select your USB แล้วคลิก ถัดไป
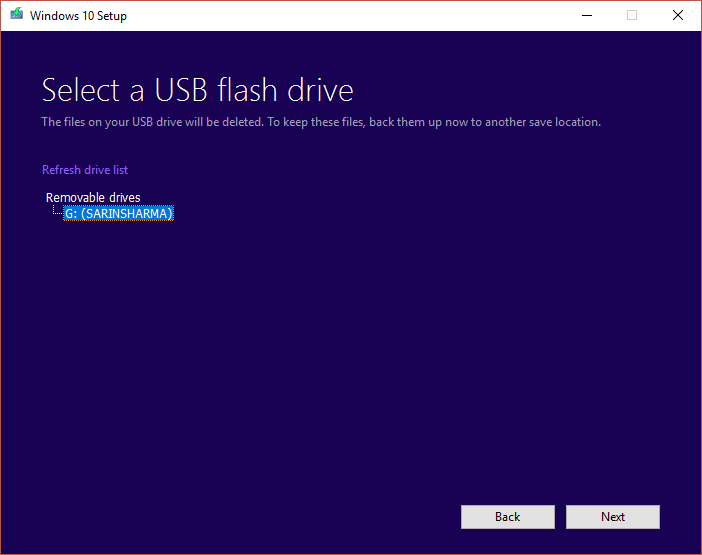
หมายเหตุ This will format the USB and will erase all data.
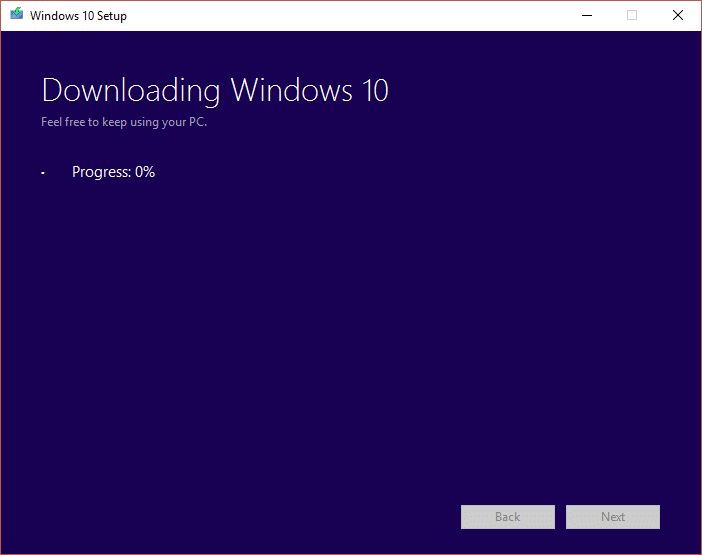
8. Media Creation Tool will begin downloading Windows 10 files, and it will create the bootable USB.
Method 2: How to create Windows 10 Bootable USB using Rufus
1. Insert your USB Flash Drive into PC and make sure it’s empty.
หมายเหตุ You will need at least 7 GB of free space on the drive.
2. ดาวน์โหลดรูฟัส and then double-click on the .exe file to launch the application.
3. Select your USB device under Device, then under “Partition scheme and target system type” select the GPT partition scheme for UEFI.
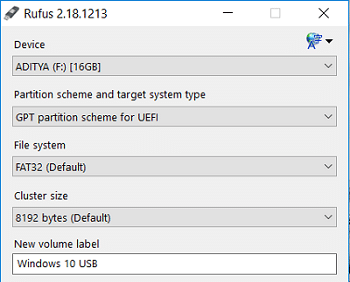
4. Under New volume label type Windows 10USB or any name you desire.
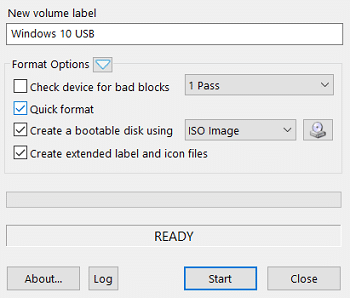
5. ถัดไปภายใต้ Format Options, ตรวจสอบให้แน่ใจ:
Uncheck “Check the device for bad blocks.”
Check “Quick Format.”
Check “Create a bootable disk using”and select ISO image from the drop-down
Check “Create extended label and icon files
6. ตอนนี้ภายใต้ “Create a bootable disk using ISO image” click the drive icon next to it.
![]()
7. Select the Windows 10 image and click Open.
หมายเหตุ You could download the Windows 10 ISO using Media Creation Tool and follow method 1 instead of USB select ISO file.
8 คลิก เริ่มต้น และคลิก OK to confirm the format of the USB.
ที่แนะนำ:
นั่นคือคุณได้เรียนรู้สำเร็จแล้ว วิธีสร้าง Windows 10 แฟลชไดรฟ์ USB ที่สามารถบู๊ตได้ แต่ถ้าคุณยังคงมีข้อสงสัยเกี่ยวกับโพสต์นี้ อย่าลังเลที่จะถามพวกเขาในส่วนความคิดเห็น

")