- in หน้าต่าง by ผู้ดูแลระบบ
How to install Internet Explorer on Windows 10

How to install Internet Explorer on Windows 10: แม้ว่า Microsoft Edge is the default browser that is pre-installed on Windows 10 but many users still prefer to use Internet Explorer over other web browsers. As a user, you cannot uninstall Internet Explorer because it’s a Windows feature. But there are ways to turn on and off IE on Windows 10. If Internet Explorer is turned off in the Windows feature then you won’t be able to use IE on your system. IE will essentially be hidden until you again turn on Internet Explorer. In this article, you will learn about how to install/uninstall Internet Explorer in Windows 10.
Internet Explorer is Missing on Windows 10?
Users are reporting that they are not being able to open Internet Explorer on their Windows 10 PC. Another case is when users are doing a clean installation of Windows 10 they are unable to find Internet Explorer. In reality, Internet Explorer is turned off in Windows feature, although you can’t uninstall Internet Explorer, but you can turn it off or on.
How to install Internet Explorer on Windows 10
ตรวจสอบให้แน่ใจว่าได้สร้างจุดคืนค่าในกรณีที่มีสิ่งผิดปกติเกิดขึ้น
Method 1: Pin the IE to your Taskbar in Windows 10
This Internet Explorer will most likely be installed on your system, so you have to search it and then pin it to your taskbar so that it becomes easily available. To do this the steps are –
1. กด Windows Key + S to bring up the search then type “Internet Explorer"
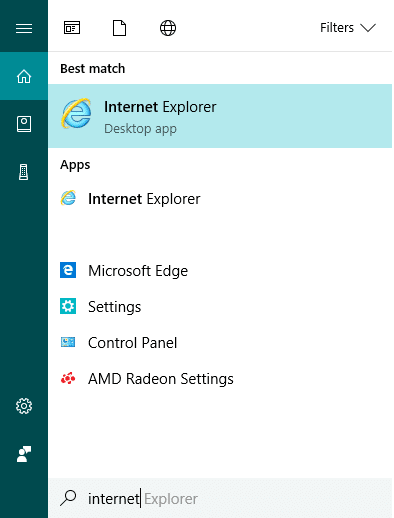
2.You will see that Internet Explorer will come in the top result of the search list.
3.Right-click on IE and choose the option “ขาแถบ"
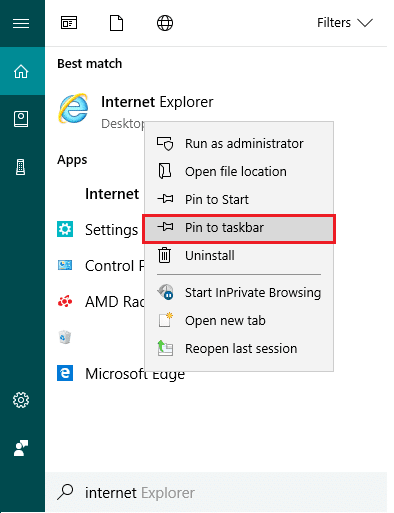
4.Now, you will see the Internet Explorer icon on your taskbar using which you can easily access IE anytime you want.
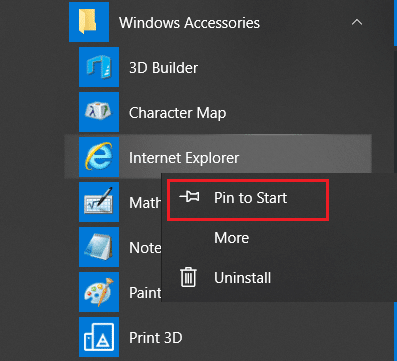
Method 2: Find Internet Explorer using Windows Accessories
Another way to find & pin Internet Explorer on Desktop is by using Windows 10 Settings:
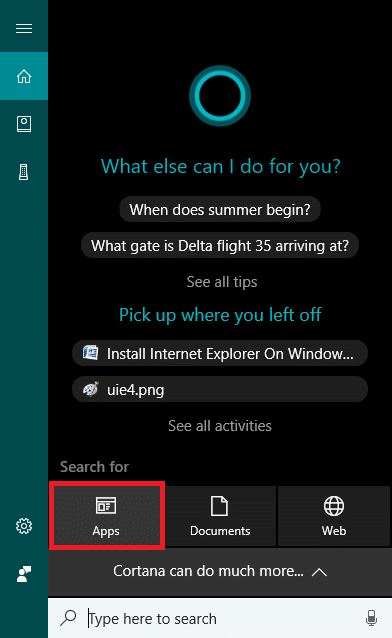
1.Go to the Start button then click on “แอปพลิเคทั้งหมด“. Or you can click on แอป under the Cortana search.

2.From there, you have to scroll down until you find the “อุปกรณ์เสริมของ Windows” โฟลเดอร์
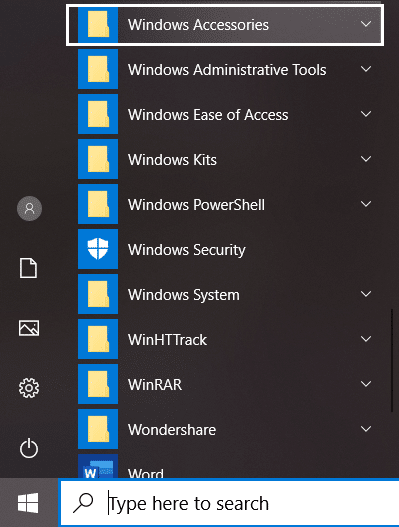
3.Click on it and you will find Internet Explorer in the list.
5.Right-click on Internet Explorer & choose the option “ขาแถบ"
Method 3: Turn On/Off Internet Explorer
In this step, we will learn how you can Turn On or Off Internet Explorer on your PC. To do this the steps are –
1.Type ควบคุม ใน Windows Search จากนั้นคลิกที่ แผงควบคุม จากผลการค้นหา
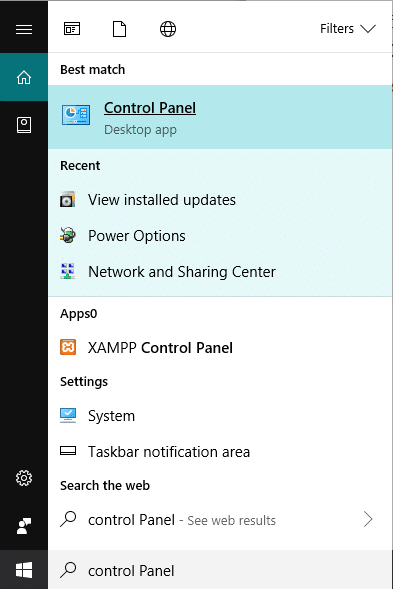
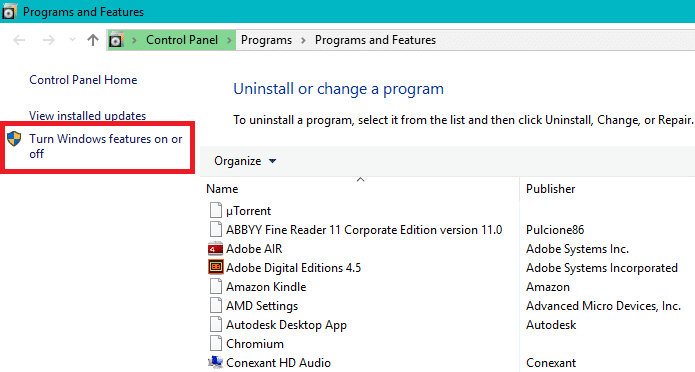
2.คลิกที่ “ถอนการติดตั้งโปรแกรม” under Control Panel.

3.From the left-hand menu click on “เปิดหรือปิดคุณสมบัติ Windows"
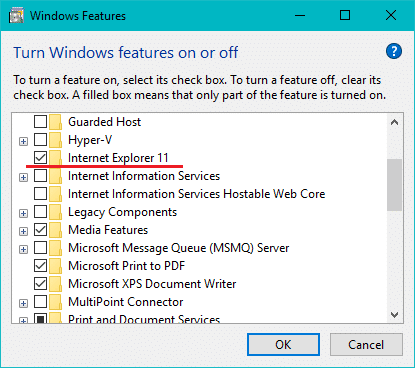
4.You will see a new pop up window will open (which is Windows Feature Window).
5.In the list, checkmark the box next to the Internet Explorer. This will turn ON the Internet Explorer on your system.
6.One done, click OK to save changes.
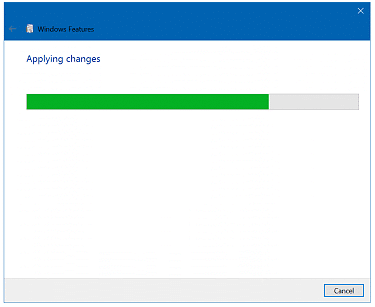
หมายเหตุ It will take some time for Windows to apply the changes.
7. รีบูตเครื่องพีซีของคุณเพื่อบันทึกการเปลี่ยนแปลง
Once the PC restart, you will notice that Internet Explorer is easily accessible through Windows search.
Method 4: Install or Uninstall Internet Explorer on Windows 10
1.กด Windows Key + I เพื่อเปิด Settings จากนั้นคลิกที่ ปพลิเคชัน
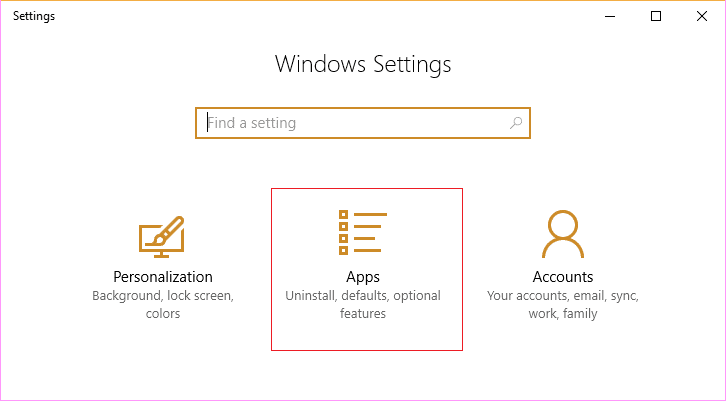
2.จากเมนูด้านซ้ายมือ ให้คลิกที่ แอพและคุณสมบัติ
3.Now under Apps & features, click on “จัดการคุณสมบัติเสริม" หรือ "คุณสมบัติเสริม"
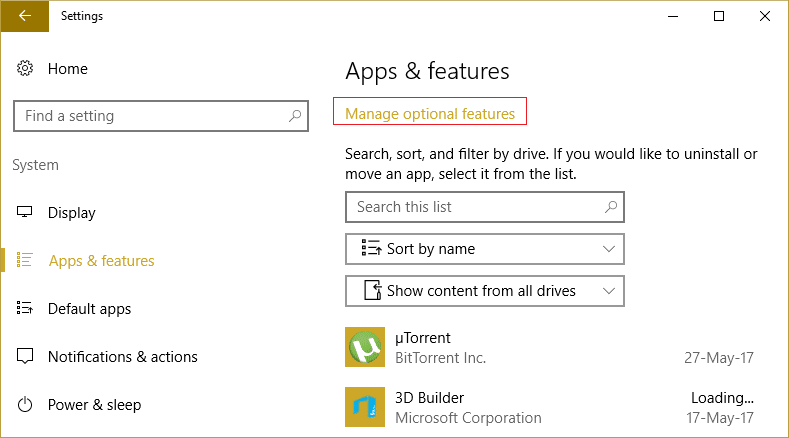
4.Scroll down the list and look for Internet Explorer.
5.Once you find it, you can either Uninstall Internet Explorer (if IE is installed) or ติดตั้ง (if IE is uninstalled) on your system.
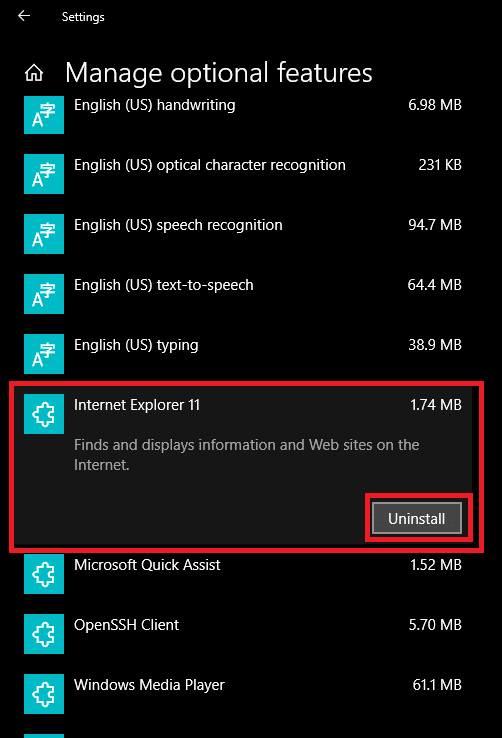
6.ตอนนี้คลิก ติดตั้งหรือถอนการติดตั้ง button depending upon the status of IE on your system.
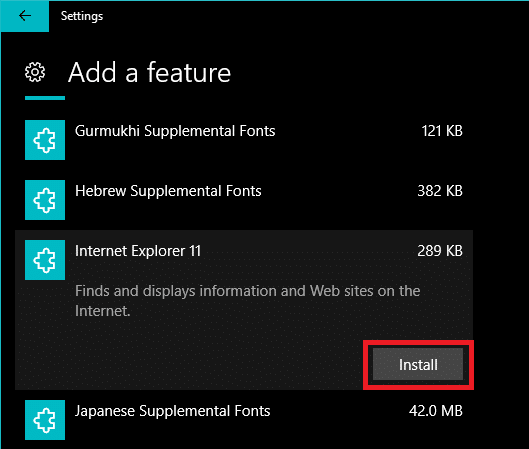
7.เมื่อเสร็จแล้ว รีบูทพีซีของคุณเพื่อบันทึกการเปลี่ยนแปลง
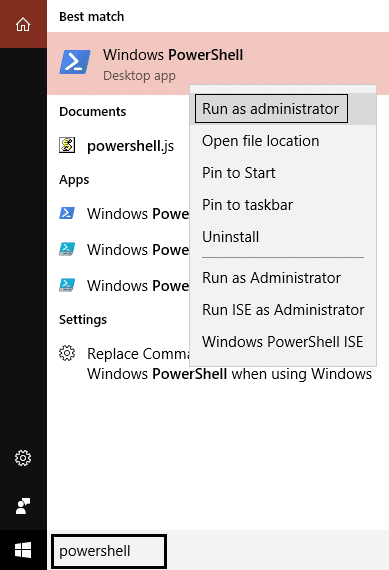
Method 5: Use PowerShell to Install or Uninstall Internet Explorer
Another way to Install or Uninstall Internet Explorer on Windows 10 is via PowerShell. To do this the steps you need to follow are –
1.Click the Start and search the term “พาวเวอร์เชลl ".
2.Right-click the PowerShell application, and open it as “เรียกใช้ในฐานะผู้ดูแลโหมด”
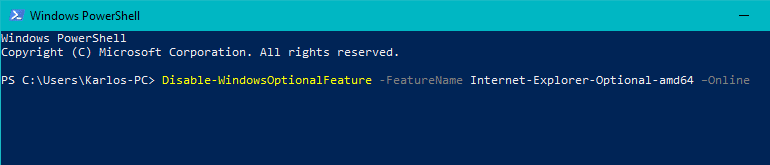
3.Type the following command depending on your choice:
To Uninstall Internet Explorer:
Disable-WindowsOptionalFeature –FeatureName "Internet-Explorer-Optional-amd64" -Online

To Install Internet Explorer:
Enable-WindowsOptionalFeature –FeatureName "Internet-Explorer-Optional-amd64" -All –Online
4.Once you type any one of the above commands and hit Enter, it will then prompt you to restart your system. You have to พิมพ์ Y และกด Enter
5.Your system will reboot to apply changes.
ที่แนะนำ:
นั่นคือถ้าคุณได้เรียนรู้ How to เรียบร้อยแล้ว Uninstall or Install Internet Explorer on Windows 10 แต่ถ้าคุณยังคงมีคำถามใด ๆ เกี่ยวกับบทความนี้ โปรดอย่าลังเลที่จะถามพวกเขาในส่วนความคิดเห็น