- in pencereler by admin
Windows 10'da MultiVersus'un Başlatılmamasını Düzeltme

MultiVersus is a famous online multiplayer fighting game that is rocking today’s gaming world. Yet, few users complain about the MultiVersus not launching issue when the game is launched on their Windows 10 PC. If you are in the same boat, the troubleshooting hacks discussed in this article will help you sail the problem.
How to Fix MultiVersus Not Launching in Windows 10
If you are vexed by MultiVersus won’t launch issue in your Windows 10 computer, here are a few possible reasons why you must analyze them carefully to sort out the problem.
- PC oyunun temel gereksinimlerini karşılamıyor.
- Başka bir arka plan programı oyuna müdahale ediyor.
- Doğrulanmamış bir sürücü sürümü kullanıyorsunuz.
- Oyunun grafik ayarları yanlış yapılandırılmış.
- Kötü amaçlı yazılım ve virüslerin varlığı.
- .NET çerçevesi ve işletim sistemi en son sürümüne güncellenmedi.
- DirectX sürümü güncel değil.
- Overclock.
- Oyunun yanlış yapılandırılmış veya bozuk kurulum dosyaları da soruna neden olur.
- Microsoft C++ yeniden dağıtılabilir dosyaları oyun ve bilgisayarla uyumlu değildir.
Here are a few possible troubleshooting methods that will help you fix the discussed issue.
Yöntem 1: Temel Sorun Giderme Yöntemleri
Söz konusu sorunu çözmek için bu temel sorun giderme yöntemlerini izleyin.
1 A. Sistem Gereksinimlerini Kontrol Edin
Çoklu Karşı Minimum Sistem Gereksinimleri
- işlemci: Intel Core i5-2300 veya AMD FX-8350
- RAM: 4 GB
- VİDEO KARTI: Nvidia GeForce GTX 550 Ti or AMD Radeon HD 5850 | Intel UHD 750
- PİKSEL GÖLGELENDİRİCİ: 5.0
- KÖŞE PARLATICI: 5.0
- BOŞ DİSK ALANI: 6 GB
- ATANMIŞ VİDEO RAM: 1024 MB
Çoklu Karşı Önerilen Gereksinimler
- işlemci: Intel Core i5-3470 veya AMD Ryzen 3 1200
- RAM: 8 GB
- VİDEO KARTI: Nvidia GeForce GTX 660 or AMD Radeon R9 270
- PİKSEL GÖLGELENDİRİCİ: 5.0
- KÖŞE PARLATICI: 5.0
- BOŞ DİSK ALANI: 6 GB
- ATANMIŞ VİDEO RAM: 2048 MB
1B. Check your internet connection
Unstable internet connection leads to MultiVersus is not working issue, also if there are any obstacles between your router and your computer, they may interfere with the wireless signal and will cause intermittent connection problems.
çalıştırabilirsiniz hız testi Doğru bağlantı için gereken optimum ağ hızı seviyesini bilmek.
Cihazınızın aşağıdaki kriterleri karşıladığından emin olun.
- Ağınızın sinyal gücünü bulun ve çok düşükse aradaki tüm engelleri kaldırın.
- Aynı ağa çok fazla cihazın bağlı olmasından kaçının.
- Her zaman İnternet Servis Sağlayıcınız (İSS) tarafından doğrulanmış ve çakışma olmayan bir modem/yönlendirici satın alın.
- Kullanmayın eski, kırık veya hasarlı kablolar. Gerekirse kabloları değiştirin.
- Modemden yönlendiriciye ve modemden duvara giden kabloların sağlam ve bozulmamış olduğundan emin olun.
İnternet bağlantısıyla ilgili herhangi bir sorun varsa, aynı sorunu gidermek için Windows 10'da Ağ Bağlantısı Sorunları Nasıl Giderilir kılavuzumuza bakın.
1C. Stop Overclocking
- Every high-end computer is built with the option of Overclocking which helps in outputting more juice than your specifications that you already have. Running the graphics card or processor faster than the default speed refers to overclocking.
- Bu durumda bilgisayarınız belirli bir süre sonra maksimum sıcaklığa ulaşacaktır. Bilgisayar bunu algılar ve soğuyana kadar saat hızını normal hıza ayarlar. Soğuduktan sonra saat hızı tekrar artırılır.
- Bu, bilgisayarınızın performansını artırır ve güçlü bir bilgisayarınız yoksa çok yardımcı olur.
- It must be noted that all the games do not support overclocking. The same applies to MultiVersus. So, you must try disabling all overclocking on your computer and try launching the game. If it launches well, the issue is fixed.
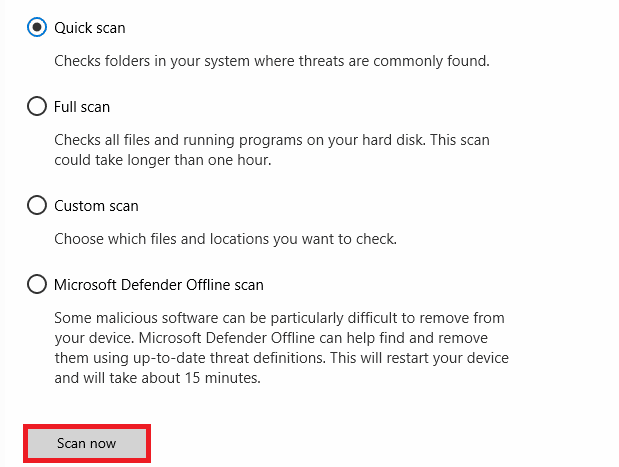
1D. Kötü Amaçlı Yazılım Taramasını Çalıştır
The presence of a virus or malware attack will result in gaming problems on your computer. If in case, the virus attack is very severe, you cannot connect to any online game continuously at all. To resolve the problem, you have to remove the virus or malware completely from your Windows 10 computer.
Bilgisayarınızı kılavuzumuzda anlatıldığı gibi taramanız tavsiye edilir. Bilgisayarımda Virüs Taramasını Nasıl Çalıştırırım?
Ayrıca, bilgisayarınızdan kötü amaçlı yazılımları kaldırmak istiyorsanız, Windows 10'da Bilgisayarınızdan Kötü Amaçlı Yazılım Nasıl Kaldırılır kılavuzumuza bakın.
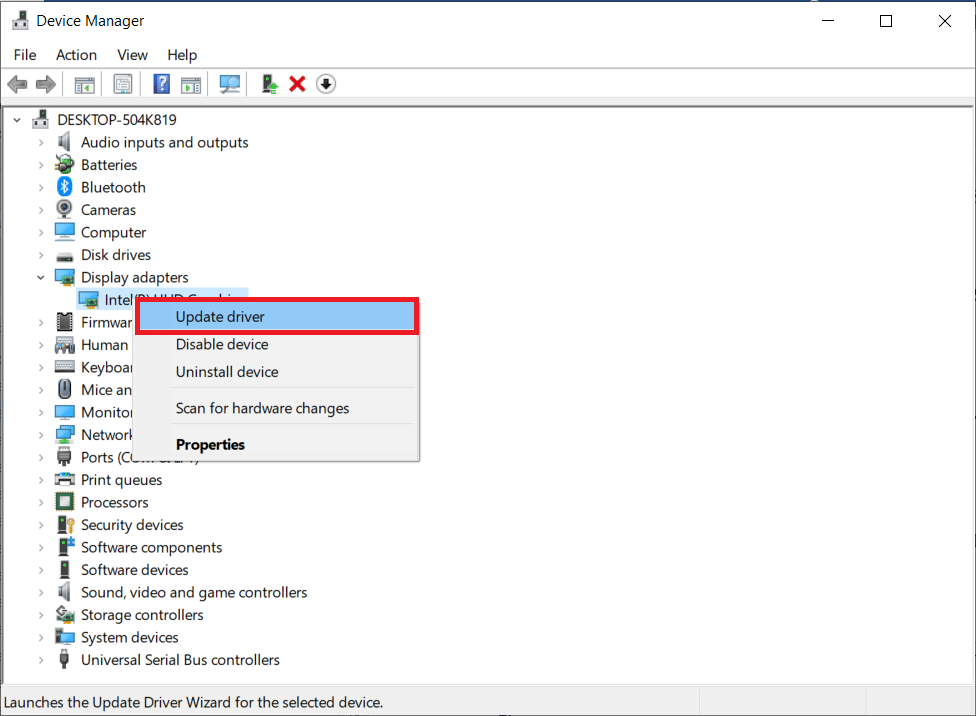
1E. Update GPU Drivers
Graphical drivers are responsible for heavy graphical images and video processing games. If you face any launching conflicts in the MultiVersus game, make sure you use an updated version of device drivers, as they serve as a link between the hardware and Operating System of your PC. Many users have suggested that updating drivers have fixed MultiVersus not working issue. Read and implement the steps instructed in our guide 4 Ways to Update Graphics Drivers in Windows 10 to do so.
Ayrıca Oku: Cihazınız için Windows Bulunan Sürücüleri Onarın, Ancak Bir Hatayla Karşılaşıldı
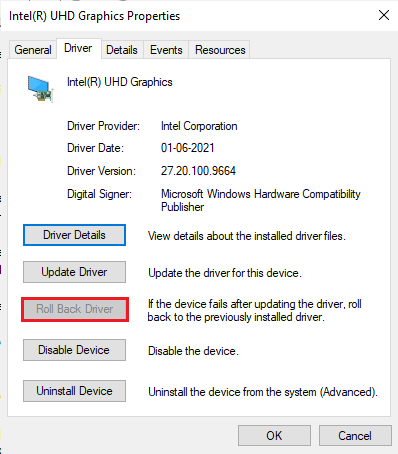
1F. Roll Back GPU Drivers
Sometimes, the current version of GPU drivers may cause the discussed launching issue in MultiVersus, and in this case, you have to restore previous versions of installed drivers. This process is called sürücülerin geri alınması Windows 10'da Sürücüleri Geri Alma kılavuzumuzu takip ederek bilgisayar sürücülerinizi kolayca önceki durumuna geri alabilirsiniz.
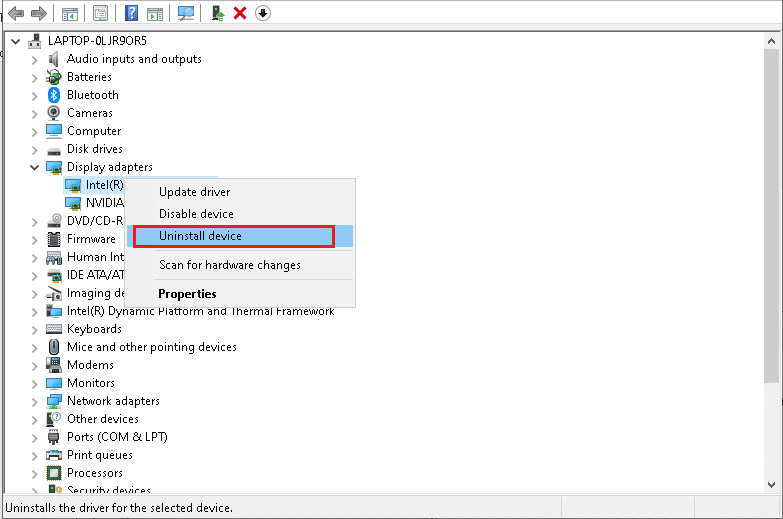
1G. Reinstall GPU Driver
If you still face MultiVersus not starting issue after updating your GPU drivers, then reinstall device drivers to fix any incompatibility issues. There are several ways to reinstall drivers on your computer. Yet, you can easily reinstall Graphical drivers as instructed in our guide How to Uninstall and Reinstall Drivers on Windows 10.
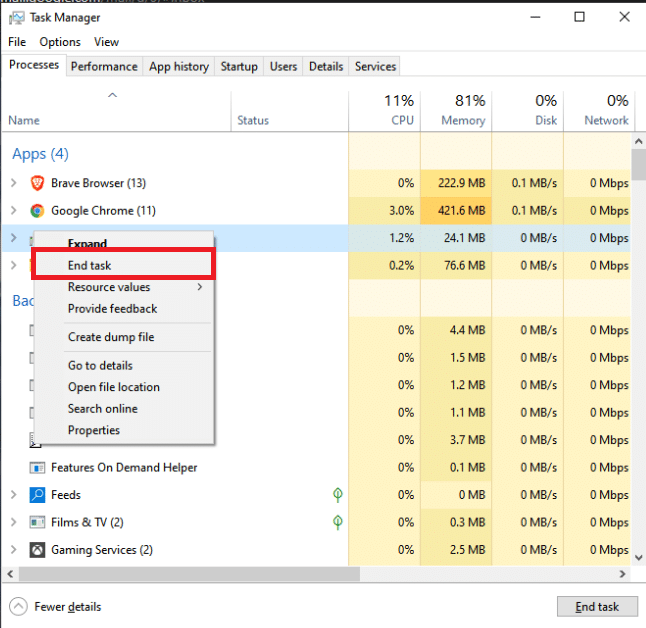
1H. End Background Processes
Several users have confirmed that MultiVersus not starting on PC can be resolved by closing all the background tasks running on your PC. To implement the task, follow our guide How to End Task in Windows 10, and proceed as instructed.
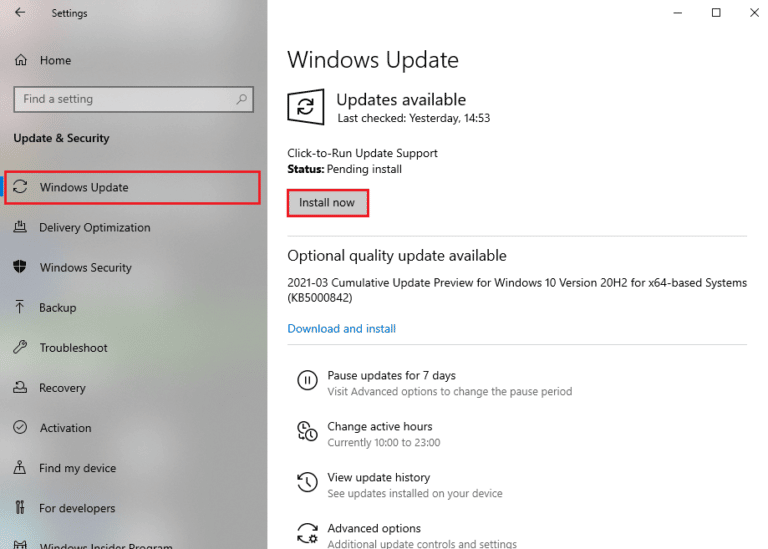
1I. Update Windows
You can also eradicate bugs in your computer and game by updating your Operating System. Always ensure if you have updated your Windows Operating System and if any updates are pending in action, use our guide How to Download and Install Windows 10 Latest Update
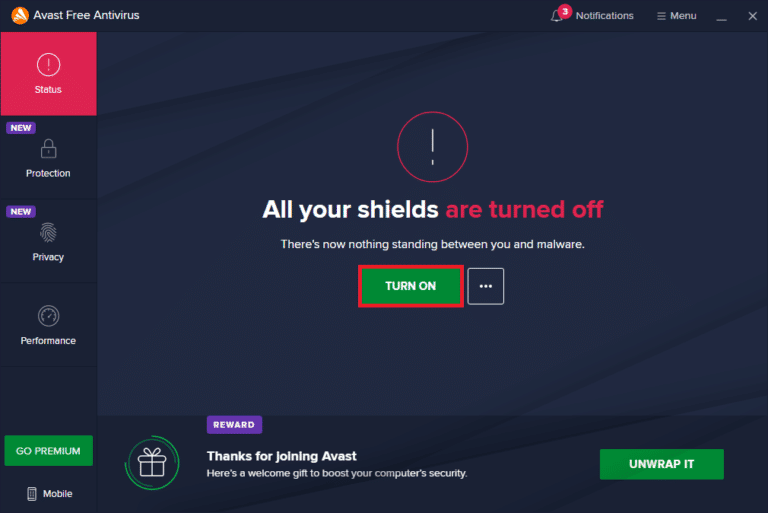
1J. Disable Antivirus Temporarily (If Applicable)
Some incompatible antivirus programs installed on your computer will cause MultiVersus launching problem. To avoid conflicts, you must ensure the security settings of your Windows 10 computer and check if they are stable or not. To find whether the antivirus suite is the reason for the discussed issue, disable it once and try connecting to a network.
Windows 10'da Antivirüsün Geçici Olarak Devre Dışı Bırakılması hakkındaki kılavuzumuzu okuyun ve PC'nizde Antivirüs programınızı geçici olarak devre dışı bırakmak için talimatları izleyin.
Bilgisayarınızdaki antivirüs programını devre dışı bıraktıktan sonra sorununuza çözüm bulunursa programı bilgisayarınızdan tamamen kaldırmanız önerilir.
Read our guide Force Uninstall Programs which won’t Uninstall in Windows 10 to uninstall your antivirus program on your computer.
Ayrıca Oku: Windows 10'da McAfee LiveSafe Nasıl Kaldırılır
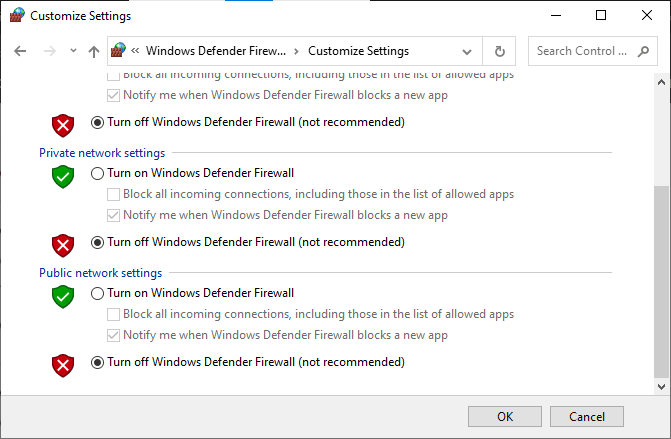
1K. Turn Off Windows Defender Firewall (Not Recommended)
Your computer will face MultiVersus is not working issue, due to an over-protective firewall suite in the Windows 10 PC. To resolve the problem, you can either add a new rule for your game, whitelist the game or as the last fix, disable the firewall temporarily.
Our guide on How to Disable Windows 10 Firewall will help you.
1L. Sistem Dosyalarını Onar
If there are any missing or damaged files on your Windows 10 PC, you will face MultiVersus takes forever to launch issue. Yet, you are repairing these corrupt files by using inbuilt utilities namely, Sistem Dosyası Denetleyicisi ve Dağıtım Görüntü Hizmeti ve Yönetimi.
Windows 10'da Sistem Dosyalarının Nasıl Onarılacağı hakkındaki kılavuzumuzu okuyun ve tüm bozuk dosyalarınızı onarmak için talimatlarda belirtilen adımları izleyin.
Method 2: Run MultiVersus Game as Administrator
If MultiVersus does not have required administrative privileges, a few essential features of the game will be limited causing you MultiVersus not launching issue whenever you open the game or install any updates. Follow the below-mentioned instructions to run the game as an administrator.
1. Sağ tıklayın MultiVersus shortcut Masaüstünde.
Not: Ayrıca, yükleme dizini ve sağ tıklayın.
2. Ardından, Emlaklar seçeneği.
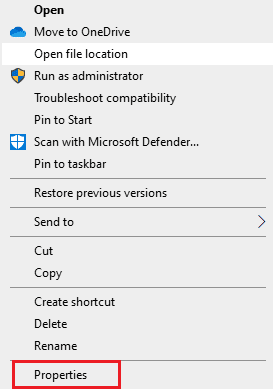
3. Şimdi şuraya geçin: uygunluk sekmesini tıklayın ve üzerine tıklayın. Yönetici olarak bu programı çalıştır.
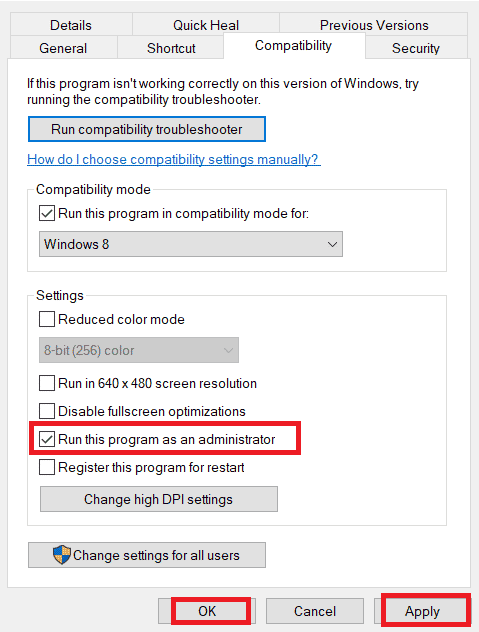
4. Son olarak, tıklayın Uygula> Tamam değişiklikleri kaydetmek için.
Check if you have fixed MultiVersus launching issues.
Ayrıca Oku: Fix WoW Takes Forever to Launch in Windows 10
Yöntem 3: Oyun İşlemi Önceliğini Değiştirme
The preference of an application or process tells the computer the importance and if it should be given preference over the others while allocating the resources. The priority of every application is normal except the system processes, by default. MultiVersus might crash if it didn’t get enough resources.
1. Tuşuna basın. Ctrl + Shift + Esc tuşları birlikte açmak için görev çubuğu.
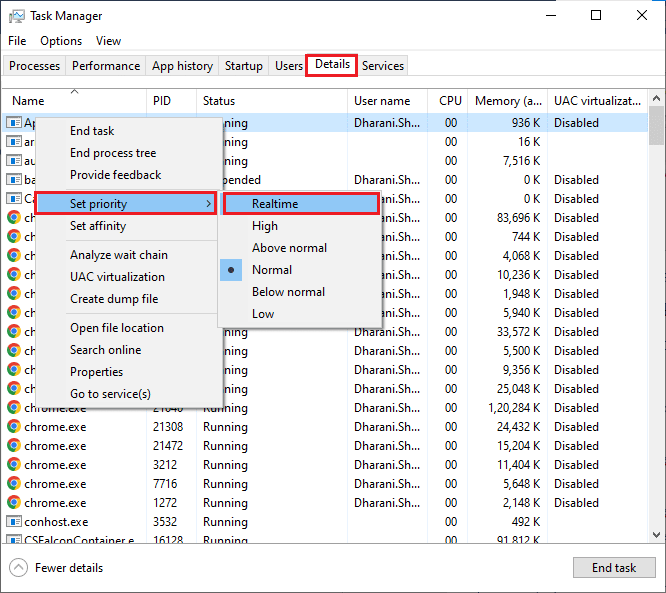
2. Şimdi şunu arayın: MultiVersus process.
3. Ardından önceliği şu şekilde değiştirin: Yüksek öncelik ve bunun işe yarayıp yaramadığını kontrol edin.
Not: Sürecin önceliğini dikkatsizce değiştirmek sisteminizi son derece yavaş veya dengesiz hale getirebileceğinden, önceliği büyük bir dikkatle değiştirin.
4. Kapat görev Yöneticisi ve reboot senin bilgisayarın.
Yöntem 4: Yüksek Performansı Ayarla
You can also optimize your game when setting your high-performance power plan settings. These power plans are developed to manage the power settings on portable settings. Follow the below-mentioned instructions to use high-performance power plan settings in your system.
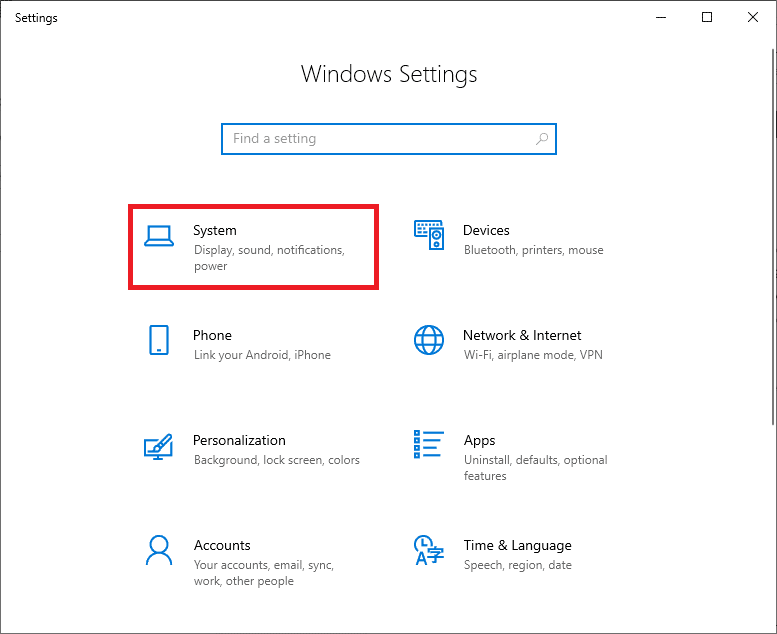
1. Tuşuna basın. Windows + I tuşları aynı anda açmak Windows Ayarları.
2. Şimdi, üzerine tıklayın sistem ayarı.
3. Şimdi, Güç ve uyku seçenek ve tıklayın Ek güç ayarları altında İlgili ayarlar.
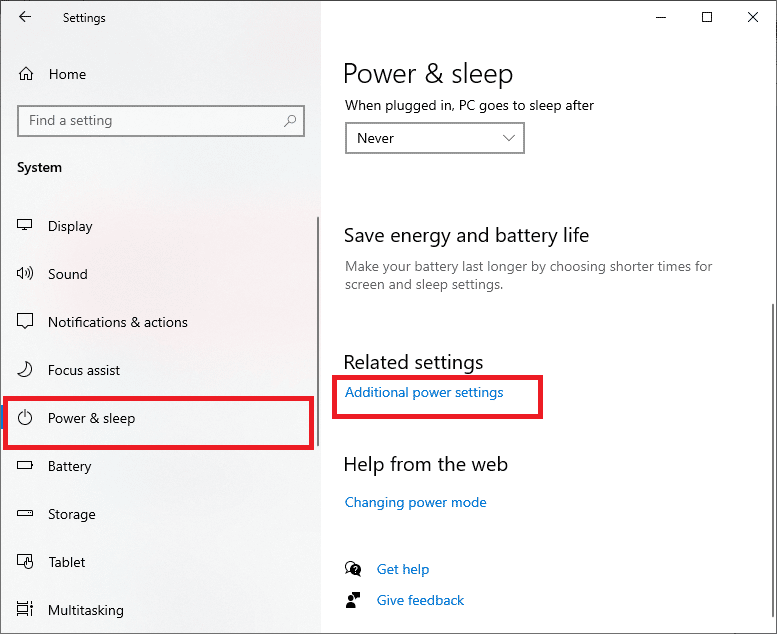
4. Şimdi, Yüksek performans altında seçenek Yüksek ek planlar aşağıdaki resimde gösterildiği gibi.
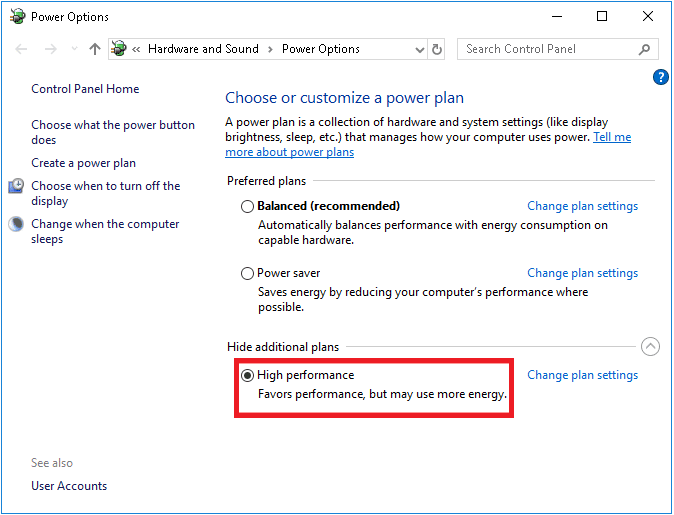
Now you have optimized your system, check if you have fixed MultiVersus won’t launch on startup issue.
Ayrıca Oku: Steam'de Eksik İndirilen Dosya Hatasını Düzeltme
Method 5: Update Steam App & MultiVersus Game
If you use an outdated Steam application, you cannot access any games smoothly. Hence always make sure you use an updated version of Steam and MultiVersus game before launching it.
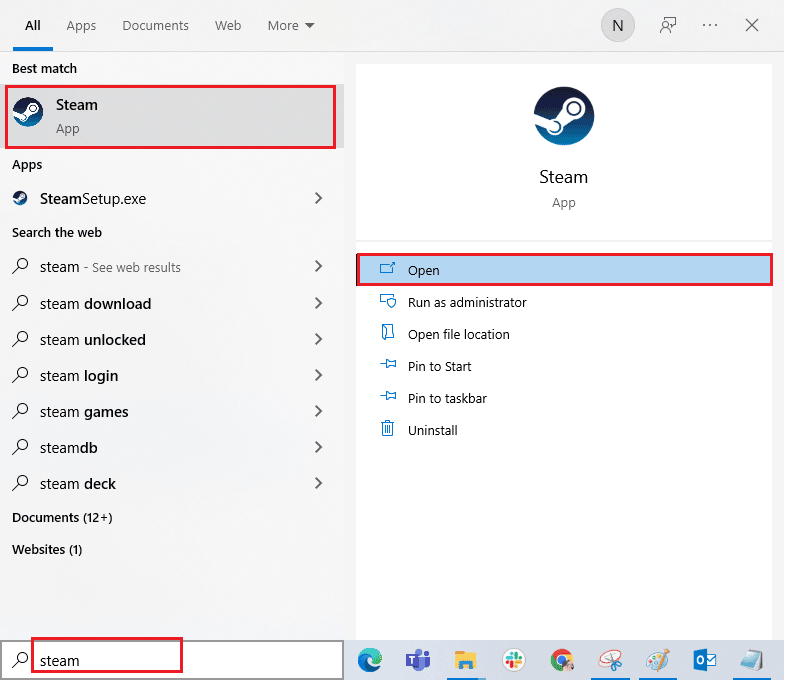
1. vurmak Windows tuşu ve tip Steamve ardından tıklayın Aç.
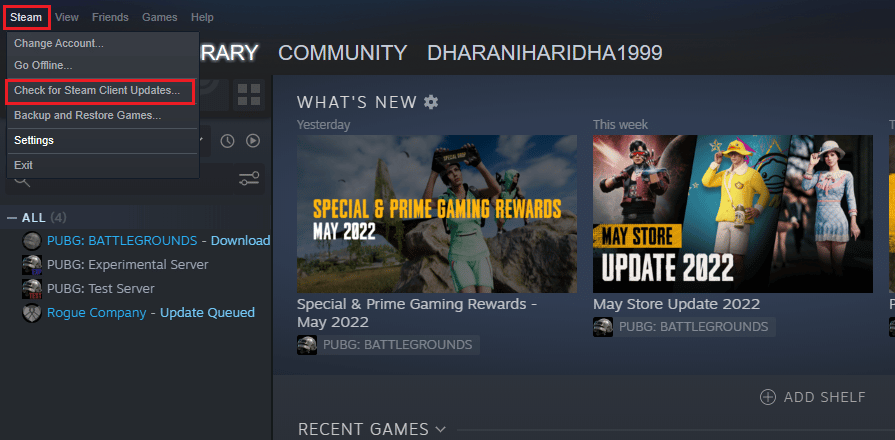
2. Şimdi, üzerine tıklayın Steam ekranın sol üst köşesinde ve ardından Steam İstemcisi Güncellemelerini Kontrol Edin… aşağıda vurgulandığı gibi.
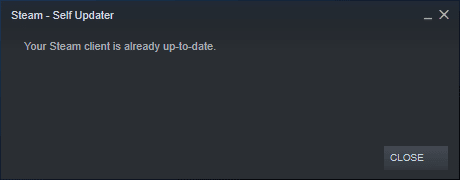
3. İndirilecek yeni güncellemeleriniz varsa bunları yükleyin ve Steam istemciniz güncel.
4. Şimdi, Steam'i yeniden başlat ve sorunun şimdi çözülüp çözülmediğini kontrol edin.
Likewise, it is always essential that your game run at its latest version to avoid any conflicts. Until your game is updated, you cannot log in to MultiVersus servers successfully.
için oyununu güncelle, follow the below-mentioned steps.
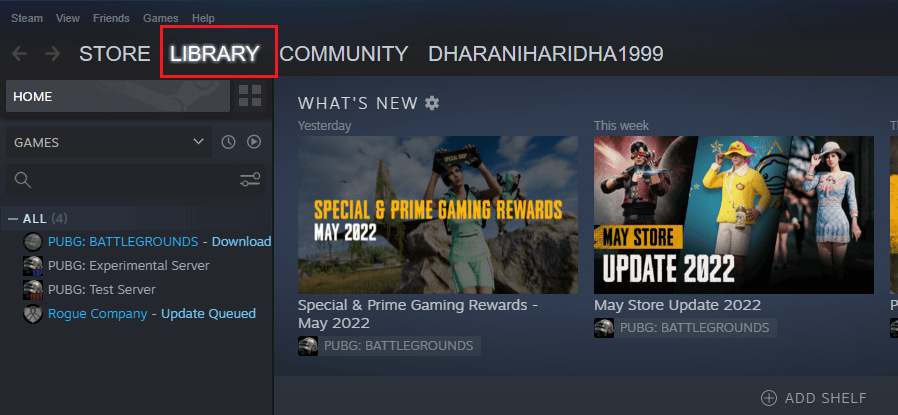
1. Başlatmak Steam ve gidip gidin KÜTÜPHANE.
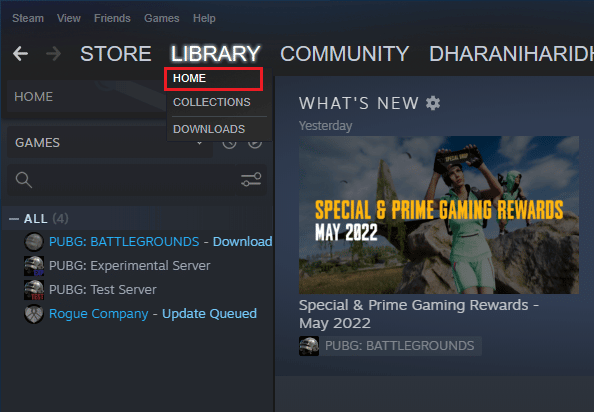
2. Şimdi, üzerine tıklayın ANA SAYFA and search for MultiVersus.
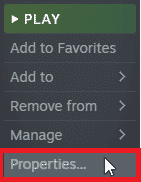
3. Daha sonra oyuna sağ tıklayın ve Özellikleri… seçeneği.

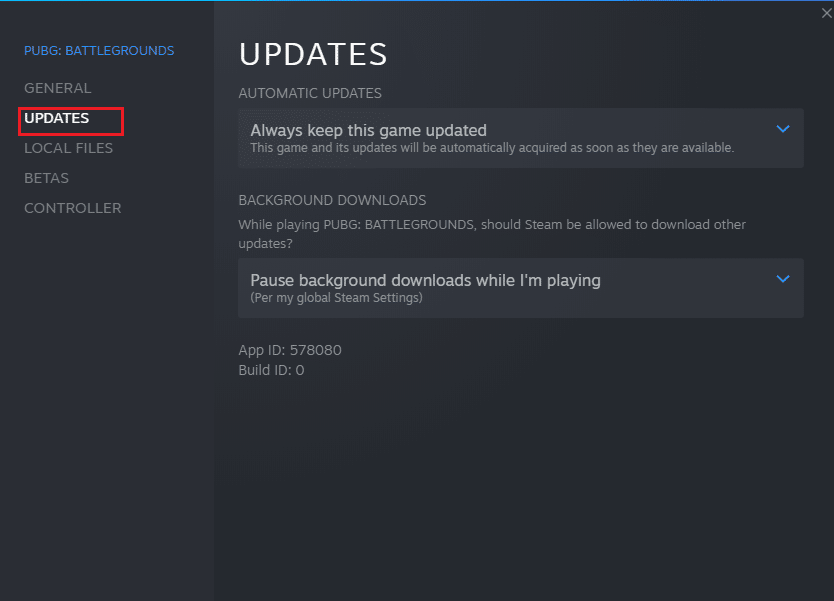
4. Şimdi, GÜNCELLEMELER sekmesine tıklayın ve herhangi bir güncellemenin işlemde olup olmadığını kontrol edin. Öyleyse en son güncellemeleri indirmek için ekrandaki talimatları izleyin.
After an update, check if MultiVersus not launching issue is fixed.
Yöntem 6: Tam Ekran Optimizasyonlarını Devre Dışı Bırak
Few users have suggested that disabling full-screen optimizations on PC has helped them fix MultiVersus is not launching issue. Follow as instructed.
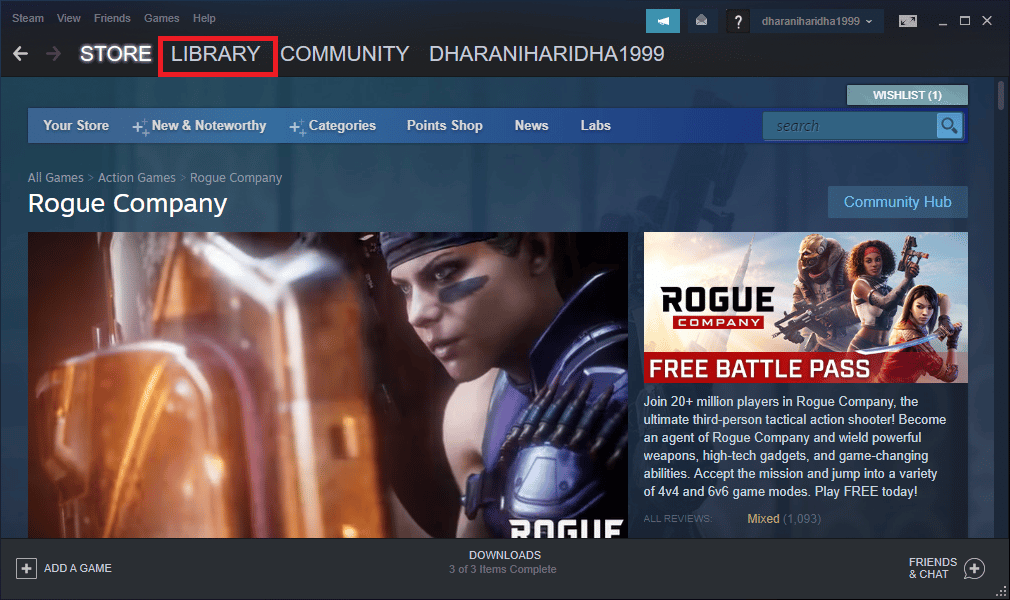
1. Navigate to the Steam KÜTÜPHANE menüsü.
2. Now, right-click on the MultiVersus game and click on Özellikleri…
3. Şimdi, GENEL sekmesini tıklayın ve üzerine tıklayın. BAŞLATMA SEÇENEKLERİNİ AYARLA… Tasvir edildiği gibi.
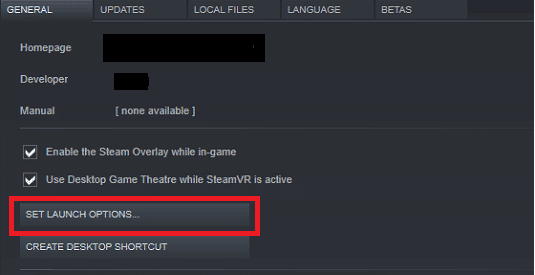
4. Artık gelişmiş kullanıcı uyarısının yer aldığı yeni bir pencere açılacaktır. Oyunu pencereli modda açmak için şunu yazın: -pencereli parametre.
5. Şimdi tıklayarak değişiklikleri kaydedin. OK ve Özellikler penceresinden çıkın.
6. Şimdi, relaunch oyun and ensure that it runs in windowed mode.
Not: You can also navigate to BAŞLATMA SEÇENEKLERİNİ AYARLA… tekrar ve son parametre yerine aşağıdaki parametreleri yazın.
–pencereli -w 1024
7. Now, save the changes by clicking on OK.
Bu parametre oyunun pencereli modda başlatılmasını ayarlayacaktır.
Ayrıca Oku: Windows 10'da Kullanılamayan Steam Uygulama Yapılandırmasını Düzeltme
Yöntem 7: Oyun İçi Yerleşimi Devre Dışı Bırak
The Steam Overlay is a piece of Steam that allows the users to access friends list, and web browser and allows in-game purchasing. It is a significant tool, yet it sometimes triggers MultiVersus not launching on startup issue. If you want to solve this problem, then turn off the Steam game overlay.
1. Aç Steam uygulamasını tıklayın ve tıklayın KÜTÜPHANE.
2. Şimdi sağ tıklayın Çoklu Karşı ve üzerine tıklayın Özellikleri…

3. Şimdi, GENEL tab and uncheck the box containing Enable the Steam Overlay while in-game.
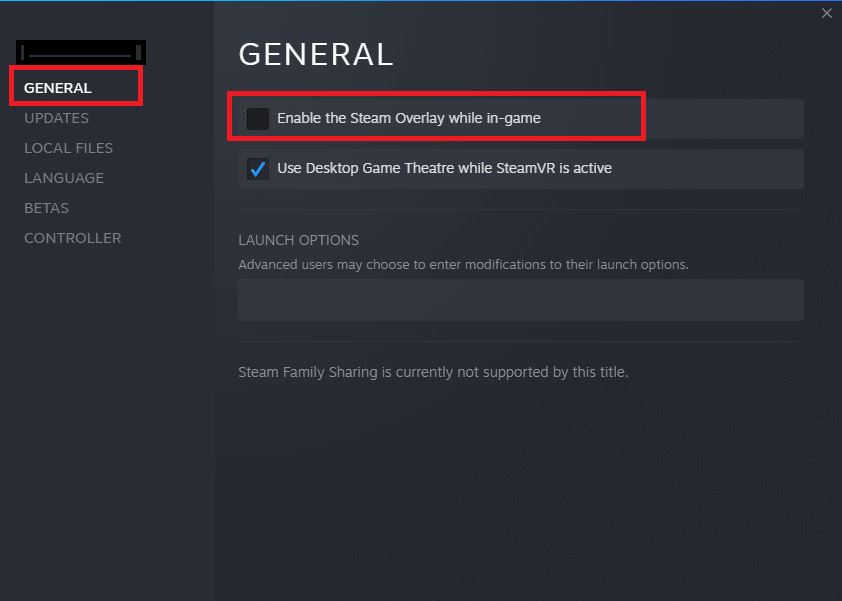
4. En sonunda, oyunu yeniden başlat and check if the MultiVersus launching issue is solved.
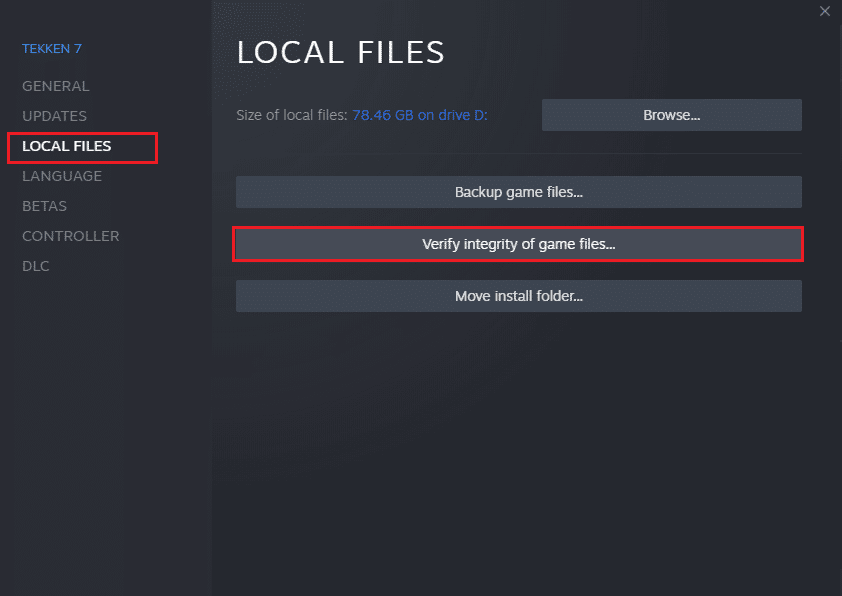
Yöntem 8: Oyun dosyalarının Bütünlüğünü Doğrulayın
We have seen many cases in which the game files are either missing or corrupt or it had incomplete installations. Users could also experience MultiVersus not starting on PC issue if they are interrupted by the update process or if the game files are being moved. In this method, you will be opening Steam and using the built-in function for verifying the integrity of the game. It will be replaced if the application finds something. Read our guide on how to verify integrity of game files on Steam.
Ayrıca Oku: Fix Steam Client Bootstrapper Not Responding in Windows 10
Yöntem 9: .NET Framework'ü Güncelleştirin
.NET framework in Windows 10 computer is essential for uninterrupted service of modern apps and games. Many games have an auto-update feature for the .NET framework, and thus it will be updated automatically whenever an update is available. In another case, if an update prompts in your PC, you can manually install the latest version of the .NET framework, as discussed below, to fix MultiVersus not launching issue.
1. Kontrol edin yeni güncellemeler için . NET framework itibaren Microsoft'un resmi web sitesi.
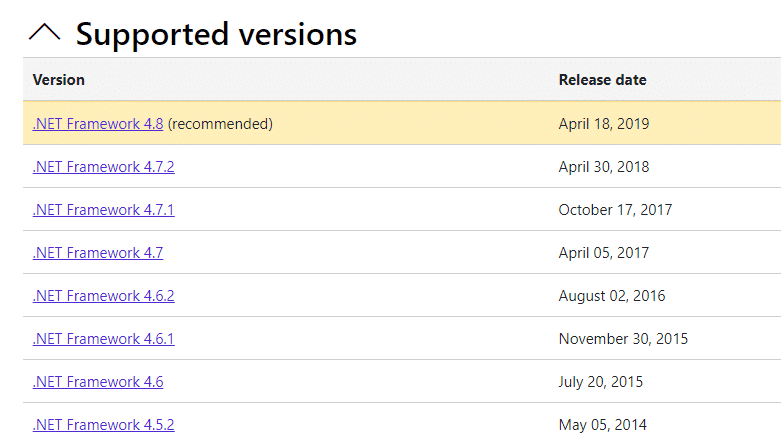
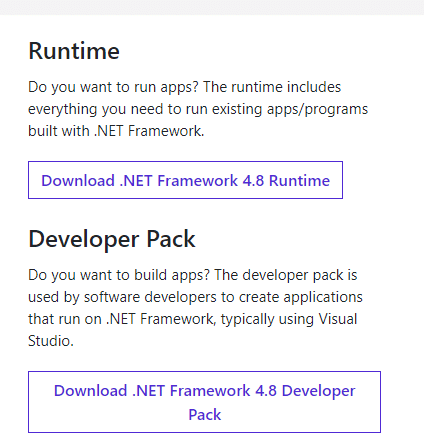
2. Herhangi bir güncelleme varsa ilgili/Tavsiye edilen bağlantı ve tıklayın .NET Framework 4.8 Çalışma Zamanını İndirin seçeneği.
Not: Tıklamayın .NET Framework 4.8 Geliştirici Paketini İndirin yazılım geliştiricileri tarafından kullanıldığı için.
3. Gidin İndirdiklerim, double-click on the setup file to run the downloaded file and follow the ekran talimatları to install the .NET framework successfully on your Windows PC. Once done, check if you have fixed the discussed issue or not.
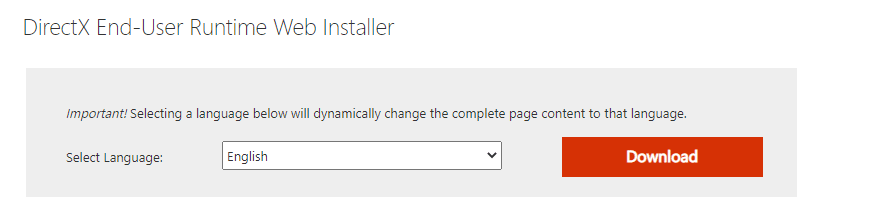
Yöntem 10: DirectX'i Güncelle
To enjoy a seamless multimedia experience on MultiVersus, you have to make sure whether DirectX is installed, and it is updated to its latest version. DirectX helps you improve the visual media experience for graphical games and applications especially. It is worth updating DirectX needed for this game.
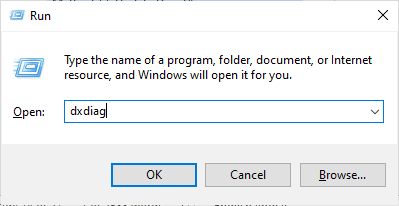
1. düğmesine basın. Windows + R tuşları başlatmak için aynı anda koşmak iletişim kutusu.
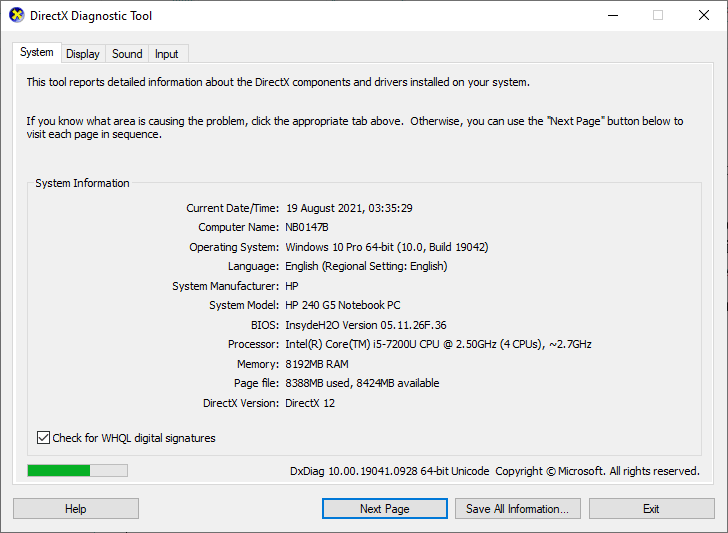
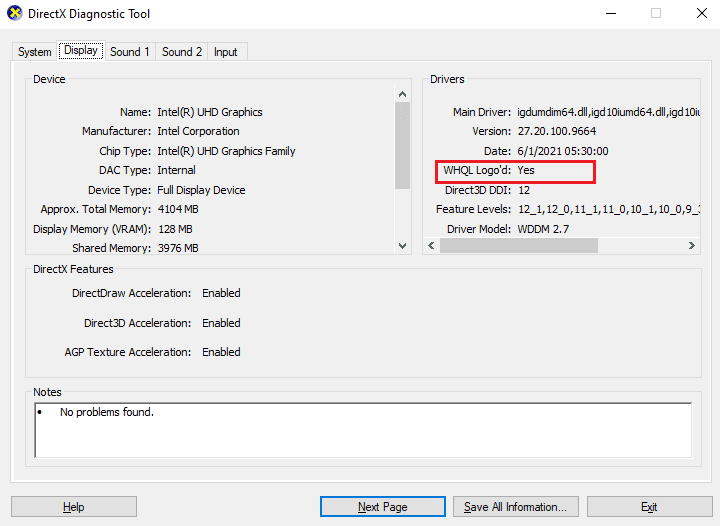
2. tip dxdiag basın ve Giriş anahtarı açmak için DirectX Tanı Aracı.
3. Kontrol edin DirectX Sürümü, if it contains DirectX 12 veya olmasın.
4. If you do not have DirectX 12 in your system, download and install it from the DirectX indirme sayfası ekrandaki talimatları izleyerek.
After installing DirectX, check if the issue occurs again.
Not: Sağlamak WHQL dijital imzalarını kontrol edin kutu işaretlendi sistem sekmesinde ve tüm sekmelerde olup olmadığını kontrol edin WHQL Logosu ayarlanmak Evet.
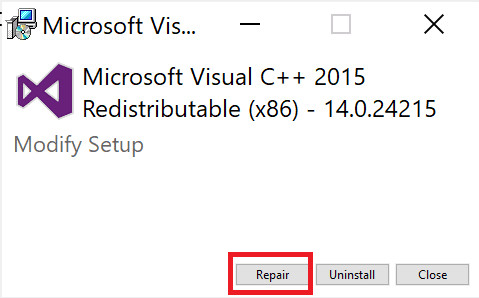
Yöntem 11: Microsoft Visual C++ Yeniden Dağıtılabilir Dosyasını Onarın
Alternately, you can try to repair the Microsoft Visual C++ Redistributable packages to fix MultiVersus not launching issue as follows:
1. düğmesine basın. Windows tuşuyazın Uygulamalar ve özelliklerve ardından tıklayın Açılış.
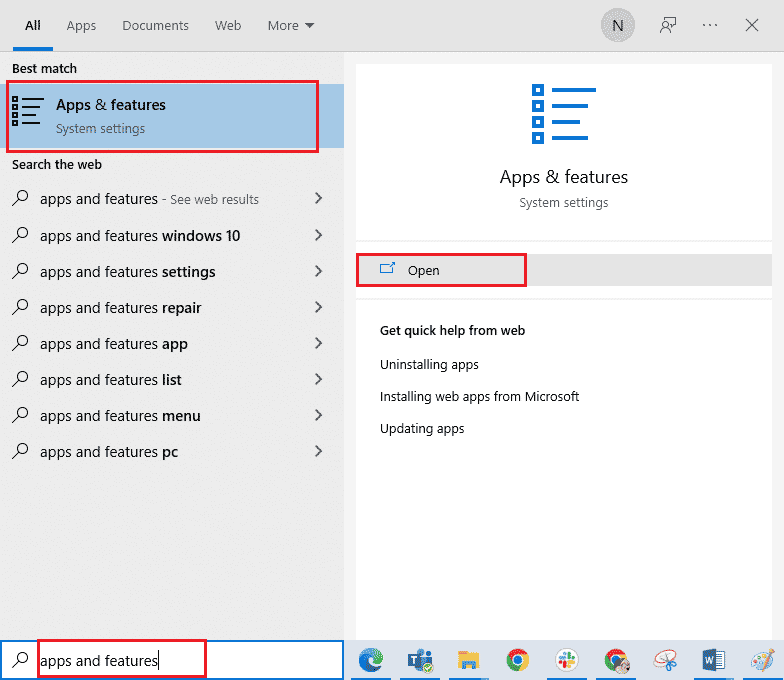
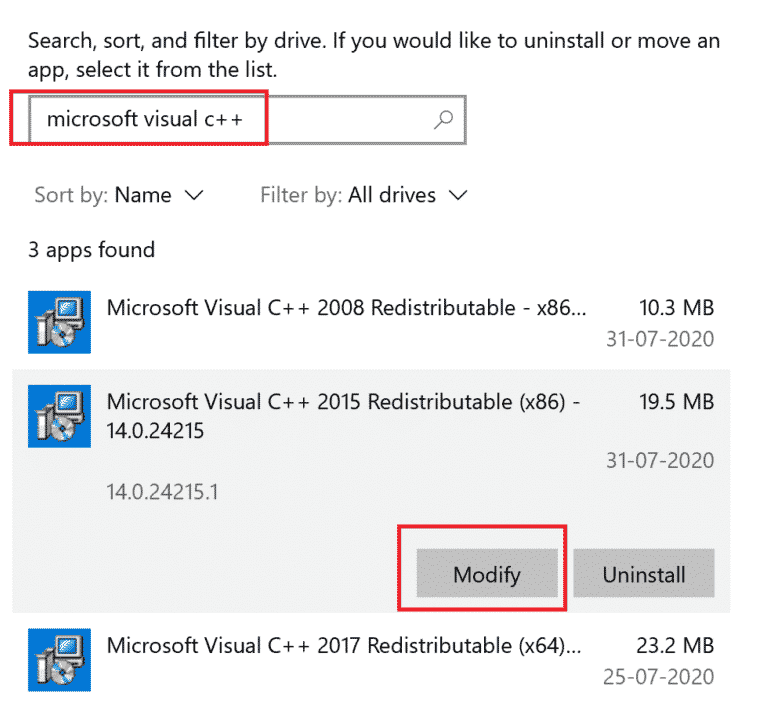
2. Arayın Microsoft Visual C ++ Yeniden Dağıtılabilir paket.
3. Then, select the package, and click on değiştirmek seçeneği.
4. Ardından, tıklayın Evet üzerinde Kullanıcı Hesabı Denetimi iletişim kutusu.
5. Görünen açılır pencerede simgesine tıklayın. Onarım. İşlemin bitmesini bekleyin.
6. Repeat the above steps to modify all the Microsoft Visual C++ Redistributable packages.
7. En sonunda, bilgisayarı yeniden başlat.
Daha önce açamadığınız uygulamayı açın. Bu işe yaramazsa, bunun yerine C++ yeniden dağıtılabilir dosyasını yeniden yüklemeyi deneyin.
Ayrıca Oku: Microsoft Visual C++ 2015 Yeniden Dağıtılabilir Kurulum Başarısız Hatası 0x80240017'yi Düzeltme
Yöntem 12: Microsoft Visual C++ Yeniden Dağıtılabilir Dosyasını Yeniden Yükleme
If the previous method of repairing the Microsoft C++ Visual Redistributable did not fix MultiVersus won’t launch issue, then you will have to reinstall the redistributable. Follow the given steps to uninstall & then install these again.
1. Aç Uygulamalar ve özellikler sistem ayarları.
2. Seçin Microsoft Visual C ++ Yeniden Dağıtılabilir package, then click on kaldırma seçeneği.
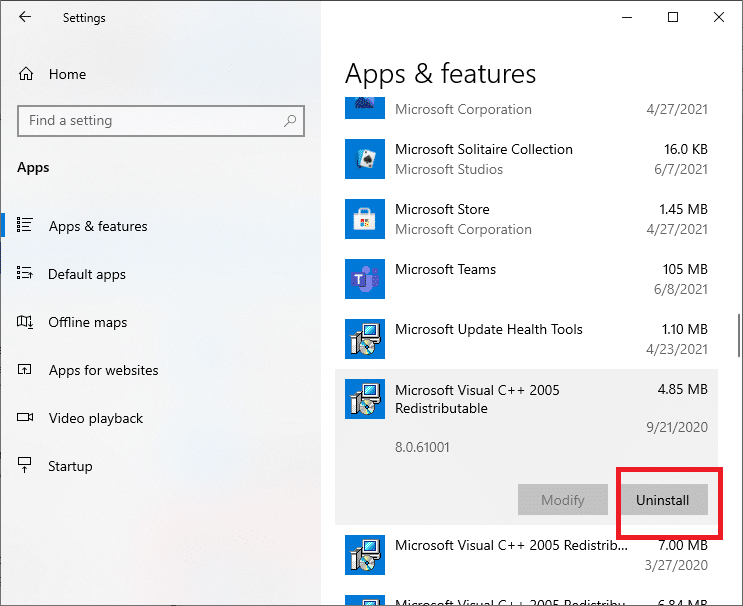
3. Tıklamak kaldırma option again to confirm and remove the package.
Not: Make sure to uninstall all the Microsoft Visual C++ Redistributable packages.
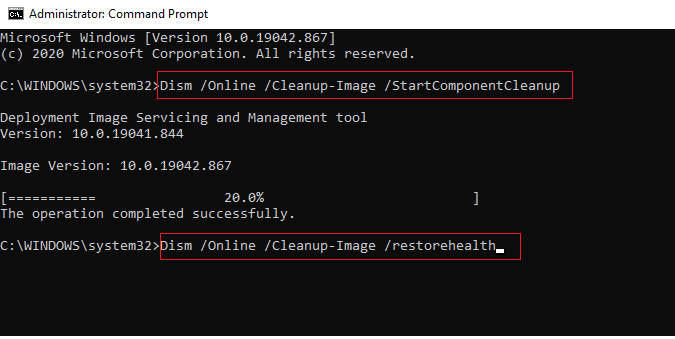
4. düğmesine basın. Windows tuşuyazın komut İstemive ardından tıklayın Yönetici olarak çalıştır.
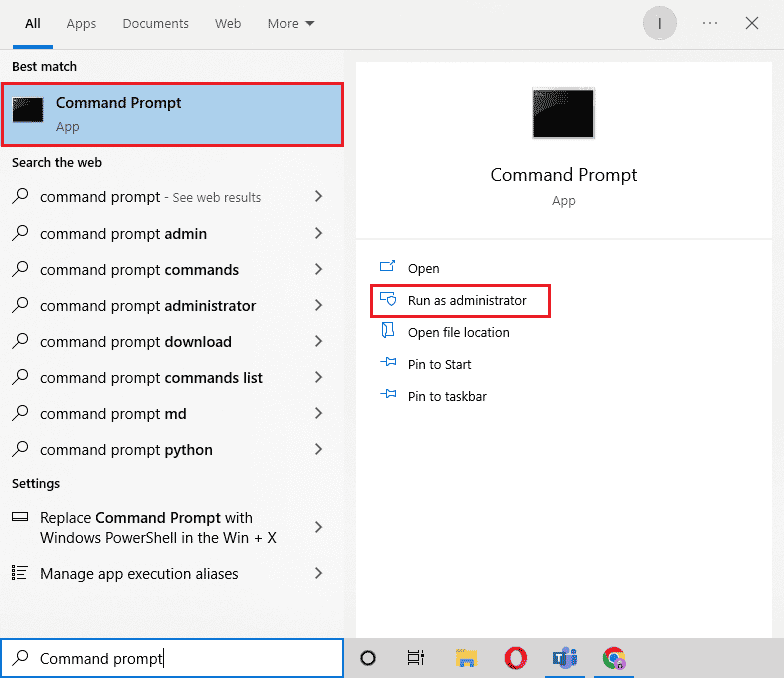
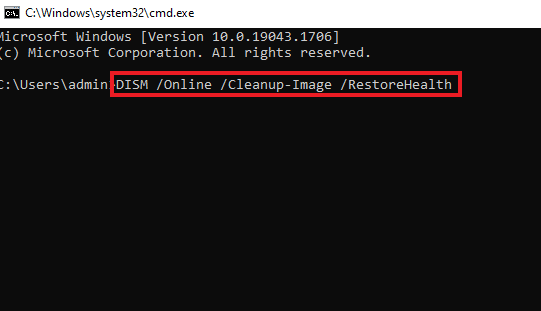
5. Aşağıdakini yazın komutlar ve basın Keşfet anahtar Her birinden sonra:
DISM /online /Cleanup-Image /StartComponentCleanup
DISM /online /Cleanup-Image /RestoreHealth
6. İşlem tamamlandıktan sonra, bilgisayarı yeniden başlat.
7. Ardından, şu adresi ziyaret edin: Microsoft Visual C++ Redistributable webpage Burada gösterildiği gibi en son C++ paketini indirmek için.
8. İndirdikten sonra açın. indirilmiş dosya üzerine çift tıklayarak İndirmelerim. kurmak Ekrandaki talimatları izleyerek paketi doldurun.
9. Once the installation is complete, finally bilgisayarı yeniden başlat.
Önerilen:
Bu kılavuzun yardımcı olduğunu ve sorunu çözebileceğinizi umuyoruz. MultiVersus not launching issue on your Windows 10 PC. Let us know which method worked for you the best. Feel free to reach out to us with your queries and suggestions via the comments section below.