- in windows by Адміністратор
Rebuild Font Cache in Windows 10

Font Cache works the same way as Icon Cache, and Windows operating system creates a cache for fonts to load them faster and to display them to the interface of the app, Explorer etc. If for some reason the font cache is corrupted then the fonts may not appear properly, or it starts displaying invalid font characters in Windows 10. To resolve this issue, you need to rebuild the font cache, and in this post, we will see how to do that.
The font cache file is stored in the Windows folders: C:WindowsServiceProfilesLocalServiceAppDataLocalFontCache, If you are trying to access this folder then you won’t be able to do that directly as Windows protect this folder. Font’s are cached in more than one files in the above folder. Anyway, without wasting any time, let’s see How to Rebuild Font Cache in Windows 10 with the help of the below-listed tutorial.
Rebuild Font Cache in Windows 10
Обов’язково створіть точку відновлення на випадок, якщо щось піде не так.
Спосіб 1: вручну перебудуйте кеш шрифтів у Windows 10
1. Натисніть клавішу Windows + R, а потім введіть services.msc і натисніть Enter.

2. Прокрутіть вниз, доки не знайдете «Windows Font Cache service” in the services window.
Примітка: Press W key on the keyboard to locate the Windows Font Cache service.
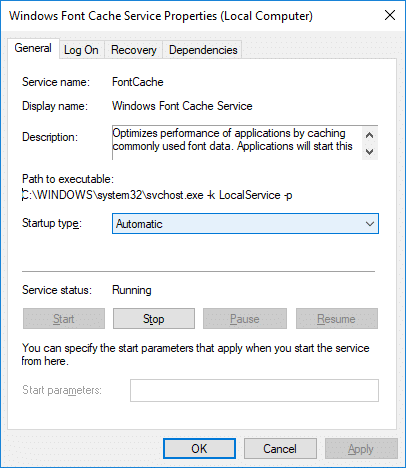
3. Right-click on Window Font Cache Service потім вибирає Властивості.
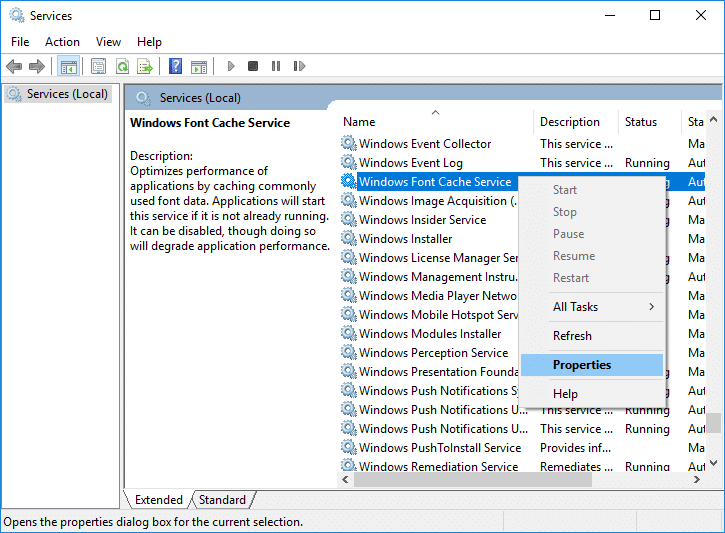
4. Make sure to click on Стоп потім встановіть Тип запуску as Вимкнено.
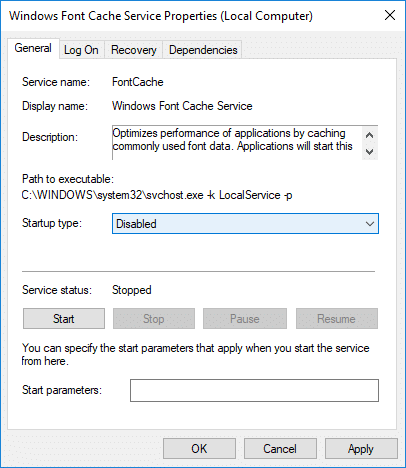
5. Натисніть Застосувати, а потім ОК.
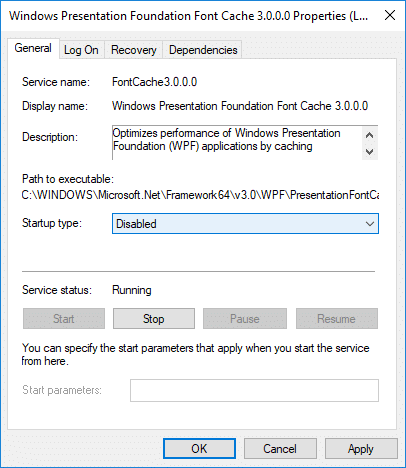
6. Do the same (Follow the steps 3 to 5) for Windows Presentation Foundation Font Cache 3.0.0.0.
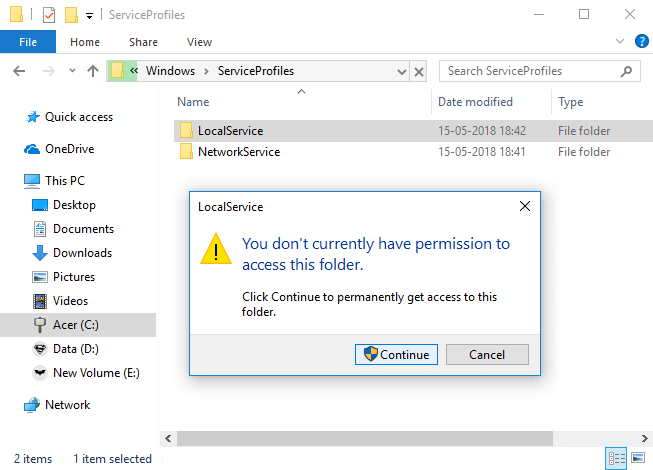
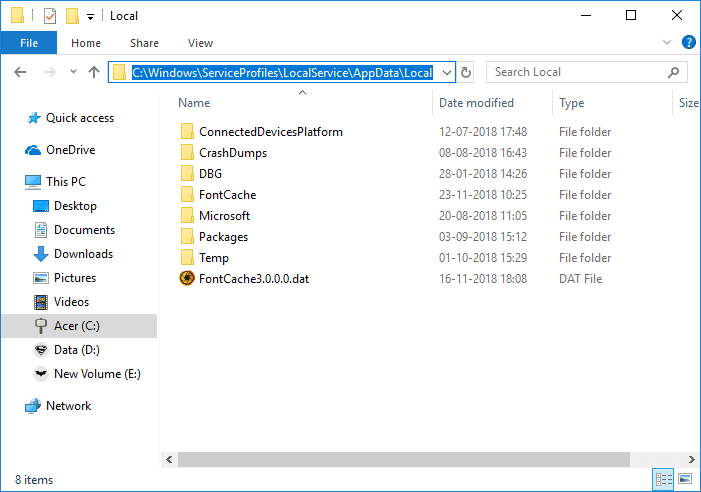
7. Now navigate to the following folder by going to one folder at a time:
C:WindowsServiceProfilesLocalServiceAppDataLocal
Примітка: Do not copy and paste the above path as certain directories are protected by Windows. You need to manually double-click on each of the above folders and click продовжувати to access the above folders.
8. Now once inside the Local folder, delete all the files with the name FontCache and .dat as the extension.
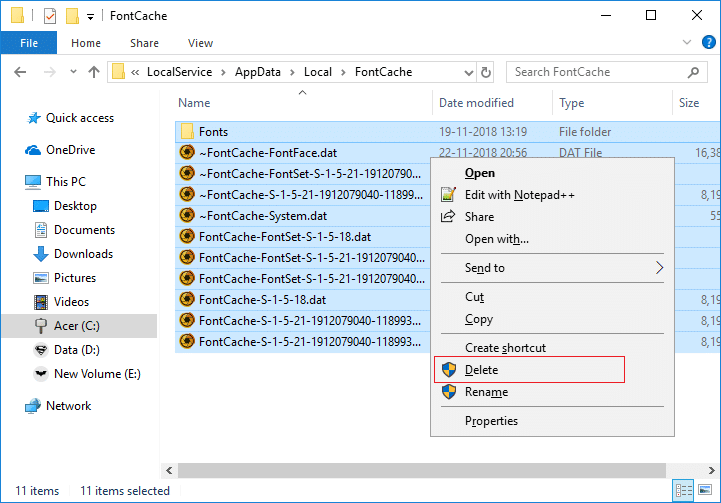
9. Далі двічі клацніть на FontCache і delete all of its content.
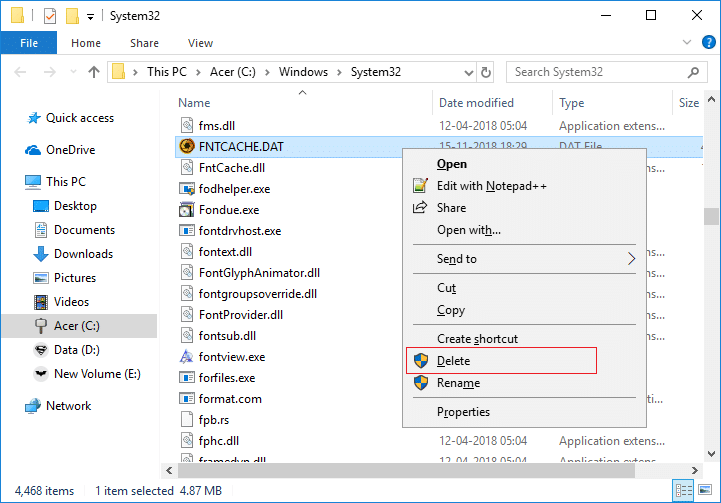
10. You need to also delete the file FNTCACHE.DAT з наступного каталогу:
C: WindowsSystem32
11. Once done, reboot your PC to save changes.
12. After the reboot, make sure to start the following services and set their startup type as Automatic:
Windows Font Cache Service
Кеш-пам'ять шрифтів Windows Presentation Foundation 3.0.0.0
13. This will successfully Rebuild Font Cache in Windows 10.
If you still see the invalid characters after restarting, you need to repair your Windows 10 using DISM.
Method 2: Rebuild Font Cache in Windows 10 using the BAT file
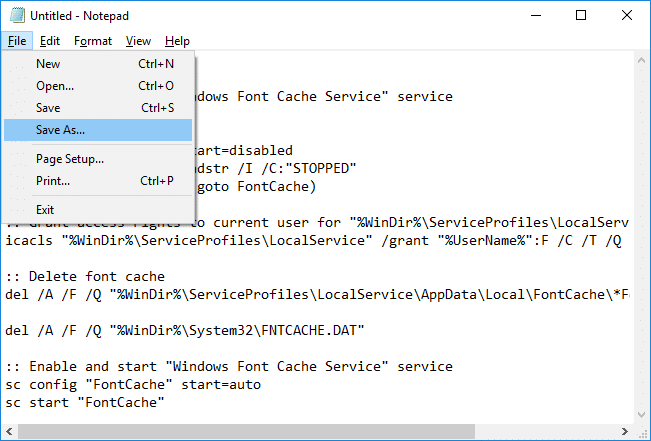
1. Відкрийте Блокнот, а потім скопіюйте та вставте наступне:
@echo off

:: Stop and disable "Windows Font Cache Service" service
:FontCache
sc stop "FontCache"
sc config "FontCache" start=disabled
sc query FontCache | findstr /I /C:"STOPPED"
if not %errorlevel%==0 (goto FontCache)

:: Grant access rights to current user for "%WinDir%ServiceProfilesLocalService" folder and contents
icacls "%WinDir%ServiceProfilesLocalService" /grant "%UserName%":F /C /T /Q

:: Delete font cache
del /A /F /Q "%WinDir%ServiceProfilesLocalServiceAppDataLocalFontCache*FontCache*"

del /A /F /Q "%WinDir%System32FNTCACHE.DAT"

:: Enable and start "Windows Font Cache Service" service
sc config "FontCache" start=auto
sc start "FontCache"
2.Now from Notepad menu click on філе потім натисніть Зберегти як.
3. From Save as type drop-down select “Всі файли”, а потім у розділі Тип імені файлу Rebuild_FontCache.bat (розширення .bat дуже важливо).
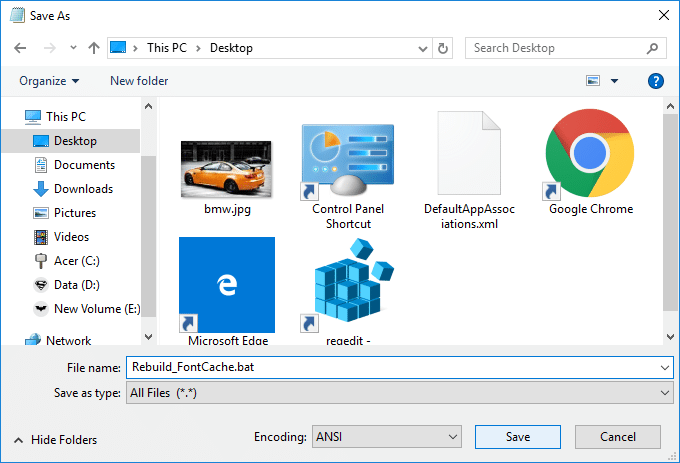
4. Make sure to navigate to desktop then click on Зберегти.
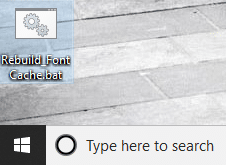
5. Двічі клацніть на Rebuild_FontCache.bat to run it and once done reboot your PC to save changes.
Рекомендується:
Ось і все, ви успішно навчилися How to Rebuild Font Cache in Windows 10 але якщо у вас все ще є запитання щодо цього посібника, не соромтеся ставити їх у розділі коментарів.