Enable Enhanced Anti-Spoofing for Windows Hello Face Authentication

Enable Enhanced Anti-Spoofing for Windows Hello Face Authentication: Windows 10 PC allows you to sign-in using fingerprint, face recognition, or iris scan using Windows Hello. Now Windows hello is a biometrics-based technology which enables users to authenticate their identity in order to access their devices, apps, networks etc using any one of the above methods. Now face detection in Windows 10 works well, but it can’t differentiate between a photo of your face inside your mobile or the actual user face.
The potential threat because of this issue is that someone with your photo could unlock your device by using their mobile. To overcome this difficulty, the anti-spoofing technology comes into actions and once you have enabled the anti-spoofing for Windows Hello Face Authentication, a photo of the authentic user cannot be used to login into the PC.
Once the enhanced anti-spoofing is enabled, Windows will require all users on the device to use anti-spoofing for facial features. This policy is not enabled by default and users have to manually enable anti-spoofing feature. Anyway, without wasting any time let’s see How to Enable Enhanced Anti-Spoofing for Windows Hello Face Authentication with the help of the below-listed tutorial.
Enable Enhanced Anti-Spoofing for Windows Hello Face Authentication
کچھ غلط ہونے کی صورت میں بحالی پوائنٹ بنانا یقینی بنائیں۔
Method 1: Disable or Enable Enhanced Anti-Spoofing for Windows Hello Face Authentication in Group Policy Editor
1. ونڈوز کی + R دبائیں پھر ٹائپ کریں۔ gpedit.msc اور کھولنے کے لئے درج کریں پر دبائیں گروپ پالیسی ایڈیٹر۔

2. درج ذیل مقام پر جائیں:
Computer ConfigurationAdministrative TemplatesWindows ComponentsBiometricsFacial Features
3.Select چہرے کی خصوصیات then in right window pane double-click on the “بہتر اینٹی سپوفنگ کو ترتیب دیں۔"پالیسی.
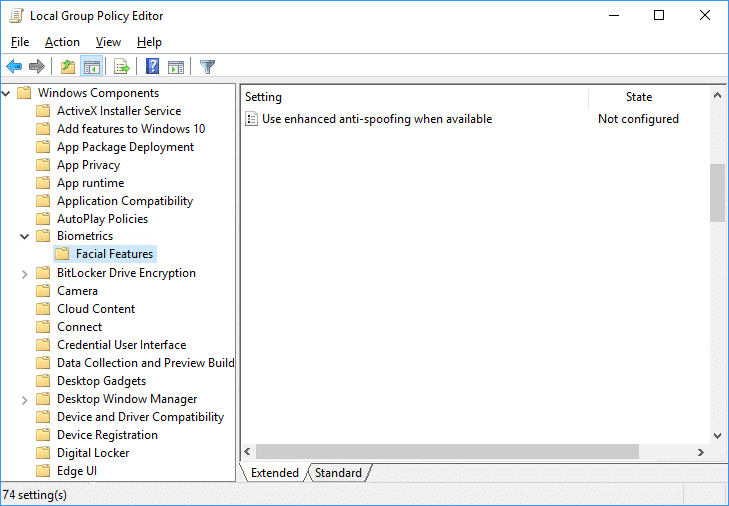
4.Now change the settings of the Configure enhanced anti-spoofing policy according to:
To Enable Enhanced Anti-Spoofing for Windows Hello Face Authentication: Select Not Configured or Disabled
To Disable Enhanced Anti-Spoofing for Windows Hello Face Authentication: Select Enabled

5.Click Apply followed by OK then close Group Policy Editor.
6. تبدیلیوں کو بچانے کے لیے اپنے کمپیوٹر کو دوبارہ بوٹ کریں۔
Method 2: Disable or Enable Enhanced Anti-Spoofing for Windows Hello Face Authentication in Registry Editor
1. ونڈوز کی + R دبائیں پھر ٹائپ کریں۔ کی regedit اور کھولنے کے لئے درج کریں پر دبائیں رجسٹری ایڈیٹر۔

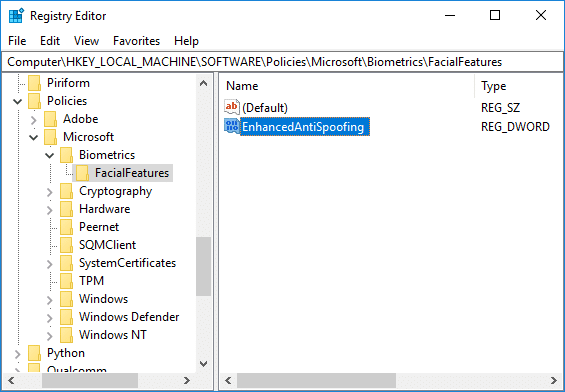
2. درج ذیل رجسٹری کلید پر جائیں:
HKEY_LOCAL_MACHINESOFTWAREPoliciesMicrosoftBiometricsFacialFeatures
3. پر دائیں کلک کریں۔ FacialFeatures پھر منتخب کریں نیا > DWORD (32-bit) قدر۔
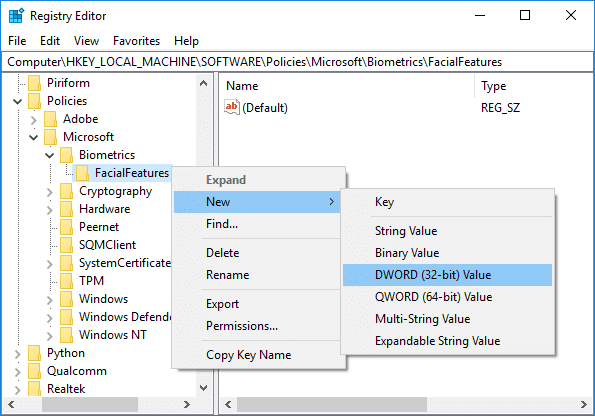
4. اس نئے بنائے گئے DWORD کو نام دیں۔ EnhancedAntiSpoofing اور داخل کریں.

5.Double-click on EnhancedAntiSpoofing DWORD and change it’s value to:
Enable Enhanced Anti-Spoofing: 1
Disable Enhanced Anti-Spoofing: 0
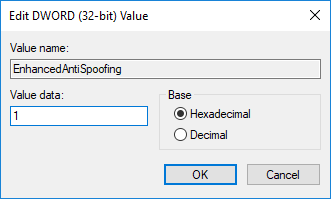
6.Once you have typed the correct value simply click OK.
7.Close registry editor and reboot your PC to save changes.
سفارش کی جاتی ہے:
یہ آپ نے کامیابی سے سیکھا ہے۔ How to Enable Enhanced Anti-Spoofing for Windows Hello Face Authentication in Windows 10 لیکن اگر آپ کے پاس اب بھی اس پوسٹ کے حوالے سے کوئی سوالات ہیں تو بلا جھجھک ان سے تبصرے کے سیکشن میں پوچھیں۔