ونڈوز 10 میں کسی اور ایپ کے استعمال میں کیمرے کو درست کریں۔

Several users have faced camera used by another app issue when they are trying to access camera in Skype or other similar applications. This issue occurs both in inbuilt and external camera devices and it is reported on versions of Windows 7, 8.1, 10, and 11. To be more precise, this issue is faced after the 20H2 update of the Windows Operating System. The camera in use issue is not specific to any particular application on your device but it occurs on your PC for many reasons. In this guide, you will learn effective troubleshooting methods that will help you fix camera is being used by another application issue.
How to Fix Camera In Use by Another App in Windows 10
Here are some valid reasons that contribute to the camera used by another app problem. You are advised to analyze the reasons deeply so that you could follow appropriate troubleshooting methods to resolve the problem so easily.
- غائب، پرانے، یا غیر موافق کیمرہ ڈرائیورز۔
- The files and cache in-camera application are corrupt or incompatible with your Operating System.
- Camera access is not granted in your Windows 10 PC.
- Antivirus programs may restrict camera access.
- کرپٹ کیمرہ ایپ۔
- Some other programs on PC are using your camera.
- کیمرے کی ترتیبات مناسب نہیں ہیں۔
- Windows Defender Firewall is blocking Camera access.
- Webcam security features are contributing to the error.
We have investigated several technical forums regarding the camera used by another app issue and thereby analyzed the troubleshooting hacks to fix the problem.
Method 1: Close Programs that Use Camera
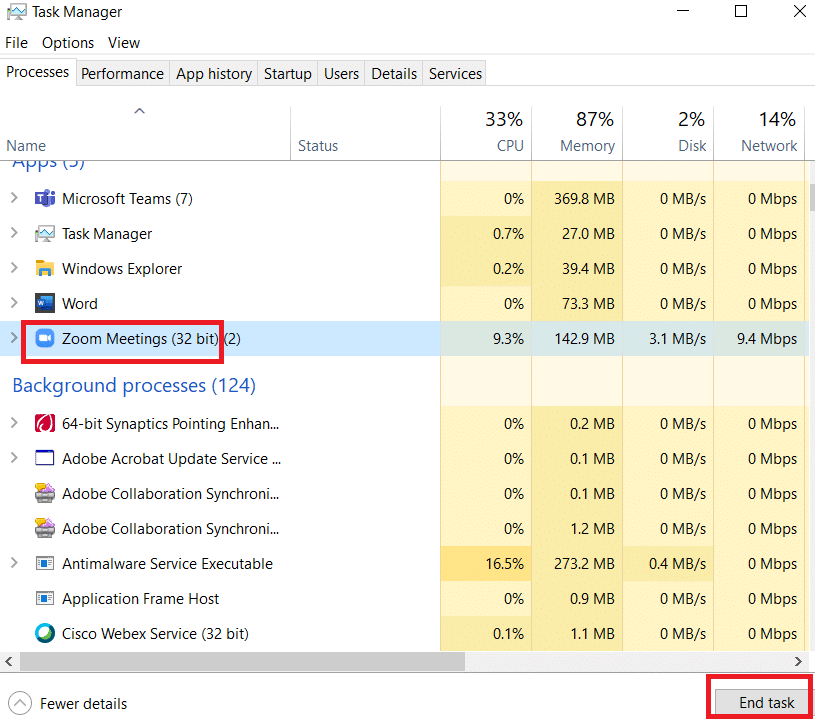
The camera in your device can only be used by one application at a time. If you guess that other applications are using the camera, you are advised to close all background applications that are active on your device. You can either exit from all programs by closing all of them one by one or by Task Manager. To do so, follow our guide on How to End Task in Windows 10.
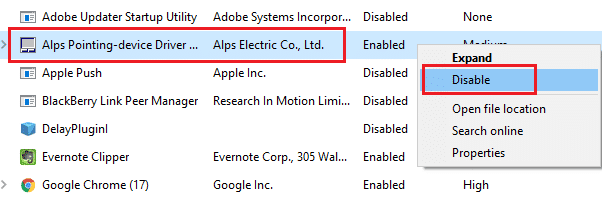
In addition, you are advised to disable start-up programs on your Windows 10 PC. To implement the task, follow our guide on 4 Ways to Disable Startup Programs in Windows 10
طریقہ 2: کیمرے تک رسائی کی اجازت دیں۔
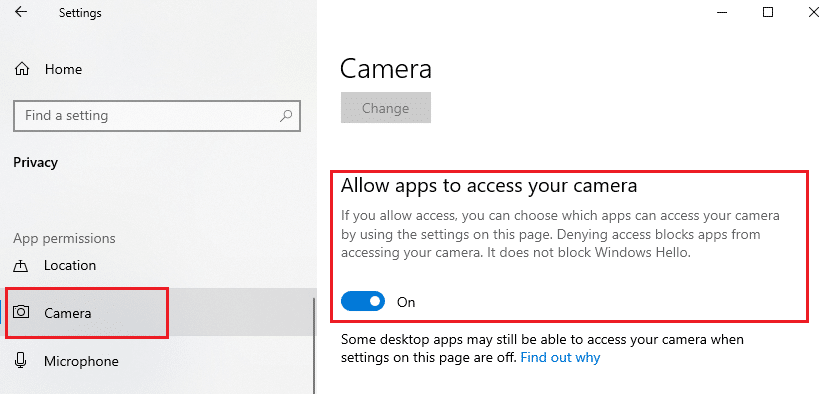
If you are experiencing a camera used by another app issue in your Windows 10 computer, there are some chances that access to the camera is not granted appropriately. Also, you can easily fix this issue by allowing access to the camera in Windows Settings. Here are a few steps to grant permission.
1. You can launch ونڈوز ترتیبات دبانے سے ونڈوز + آئی کیز۔ ایک ہی وقت میں.
2. پھر ، منتخب کریں نجی معلومات کی حفاظتی آپشن جیسا کہ دکھایا گیا ہے۔
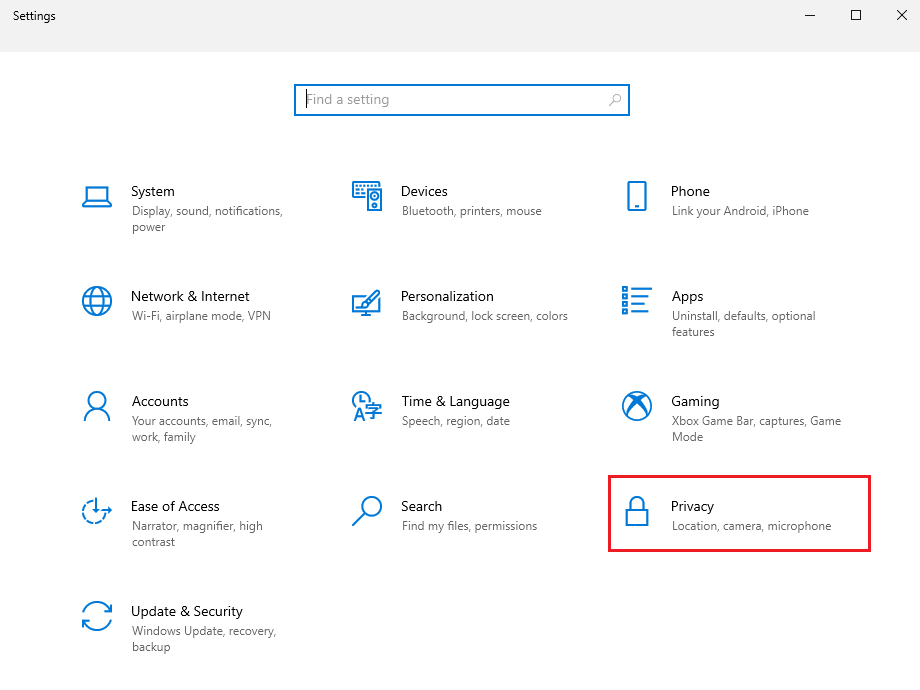
3. پھر، بائیں پین میں، تلاش کریں اور منتخب کریں۔ کیمرے آپشن.
نوٹ: یقینی بنائیں ایپس کو اپنے کیمرے تک رسائی کی اجازت دیں۔ آپشن کو فعال کیا گیا ہے جیسا کہ دکھایا گیا ہے۔
بھی پڑھیں: Omegle کیمرہ کام نہیں کر رہا ہے اسے کیسے ٹھیک کریں۔
طریقہ 3: ہارڈ ویئر اور ڈیوائسز ٹربل شوٹر چلائیں۔
If you find your Windows 10 computer is facing any hardware-related issues, it can be easily sorted by running ہارڈ ویئر اور ڈیوائسز ٹربل شوٹر۔. All the issues identified by the troubleshooter will be automatically resolved by the troubleshooter itself. For instance, if there are any corrupt settings in your PC and if there are any specific changes intended to be done, the troubleshooter helps you a lot. Follow our guide to Run Hardware and Devices Troubleshooter to fix issues and implement the steps as instructed.
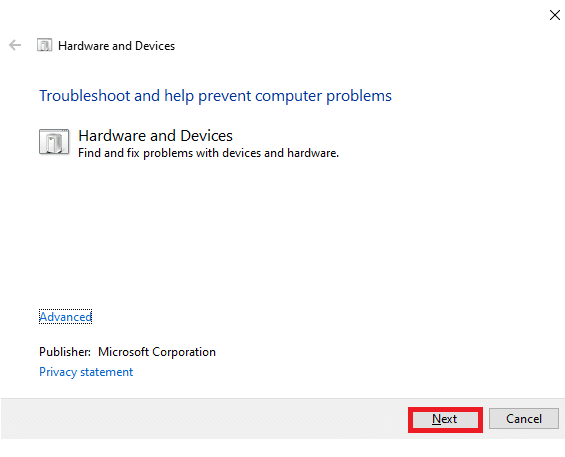
Once you have fixed all the suggestions mentioned at the end of the troubleshooting process, check if you have fixed camera used by another app issue.
طریقہ 4: کیمرہ ڈیوائس ڈرائیور کو فعال کریں۔
If you have accidentally disabled the webcam or camera in your device settings, you will face camera in use issue. So, if you have disabled the webcam in your device, enable it on your computer as instructed below.
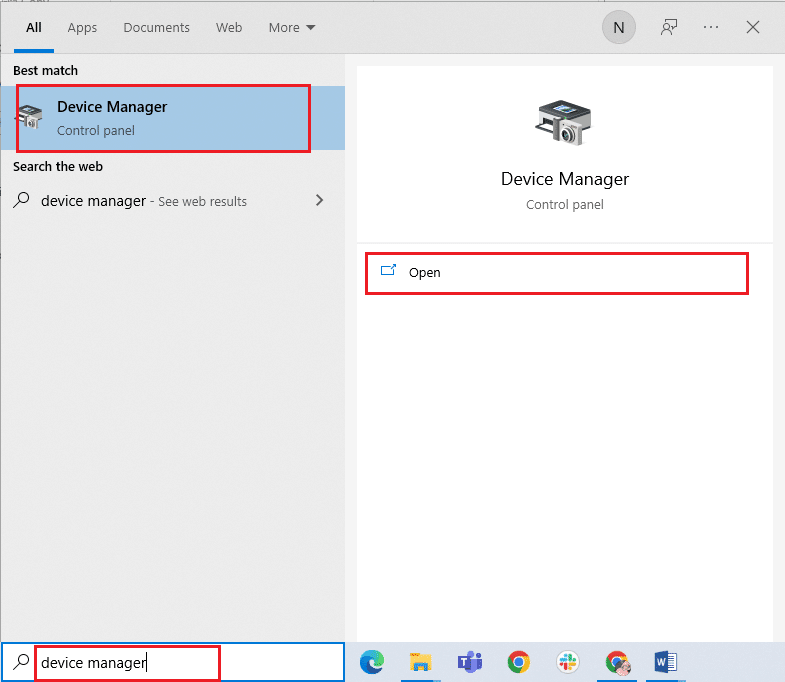
1. مارو ونڈوز کلیدی اور ٹائپ کریں آلہ منتظم. پھر ، پر کلک کریں اوپن.
2. جیسے ہی آلہ منتظم ونڈو کھلتی ہے، پر ڈبل کلک کریں۔ کیمروں اس کو بڑھانے کے لیے سیکشن۔
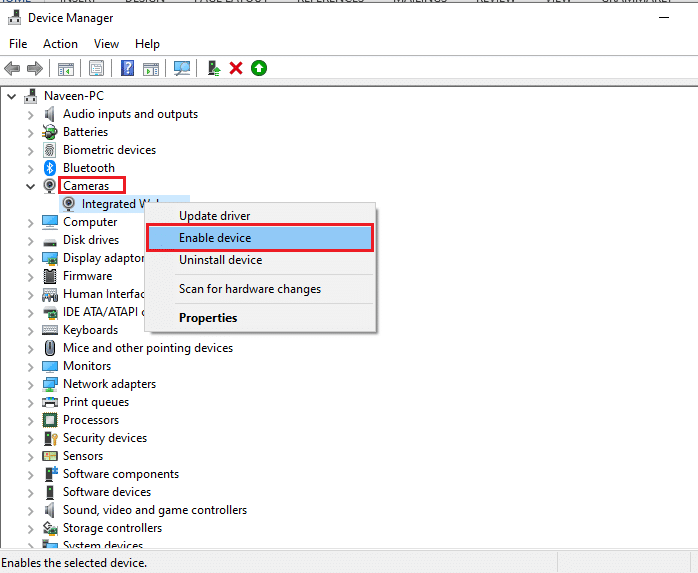
3. اب، اپنے کیمرہ ڈیوائس پر دائیں کلک کریں اور منتخب کریں۔ آلہ کو فعال کریں آپشن.
بھی پڑھیں: 8 Best Webcam for Streaming in India (2022)
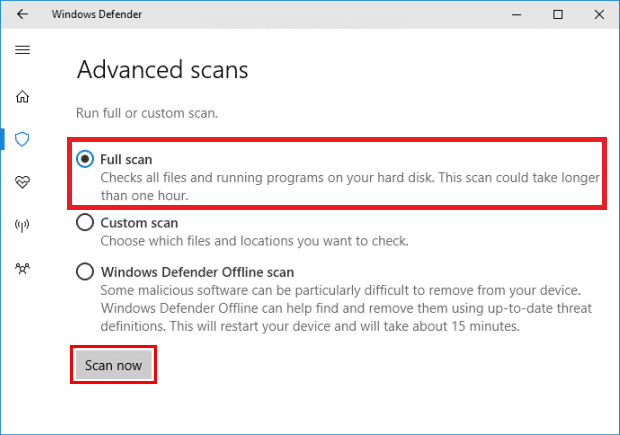
طریقہ 5: میلویئر اسکین چلائیں۔
Several Microsoft experts suggest that, scanning PC will help you maintain your computer threat free. If there are any virus or malware intrusions in your PC, you cannot use external and internal hardware devices. Hence, you are advised to scan your computer as instructed in our guide on How do I Run a Virus Scan on my Computer?
اس کے علاوہ، اگر آپ اپنے کمپیوٹر سے میلویئر کو ہٹانا چاہتے ہیں، تو ہمارے گائیڈ کو چیک کریں کہ ونڈوز 10 میں اپنے کمپیوٹر سے میلویئر کو کیسے ہٹایا جائے۔
طریقہ 6: ونڈوز کو اپ ڈیٹ کریں۔
Also, if there are any bugs in your PC, they can only be fixed after a Windows update. Microsoft releases regular updates to fix all these bugs thereby sorting camera is being used by another application issue. Hence, ensure if you have updated your Windows Operating System and if there are any updates pending in action, use our guide to Download and Install Windows 10 Latest Update.
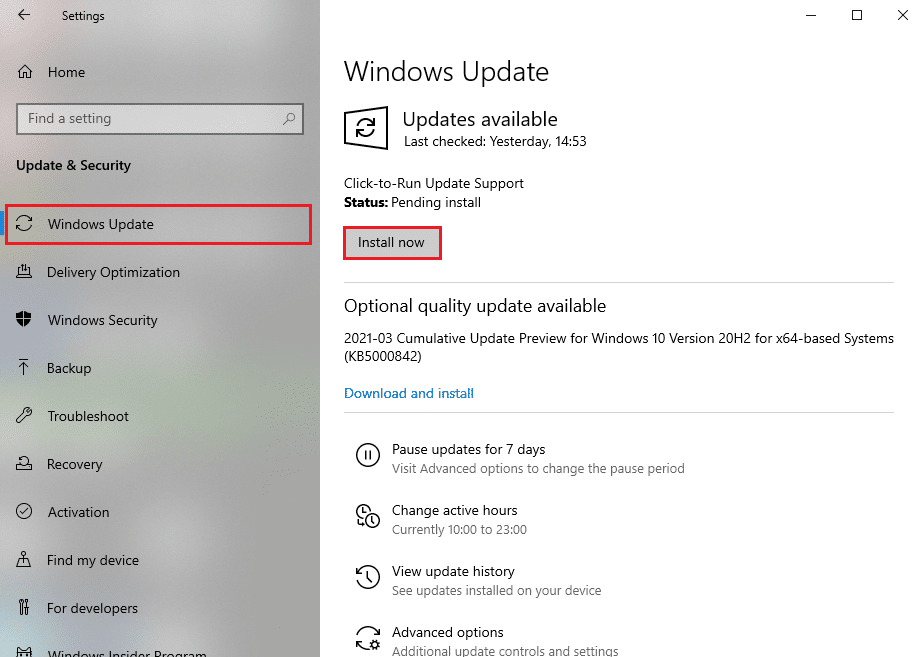
اپنے ونڈوز آپریٹنگ سسٹم کو اپ ڈیٹ کرنے کے بعد، چیک کریں کہ آیا آپ اپنے کیمرے تک رسائی حاصل کر سکتے ہیں۔
بھی پڑھیں: How To Fix No Camera Found In Google Meet
طریقہ 7: ونڈوز فائر وال کو غیر فعال کریں۔
Sometimes, Windows Defender Firewall in your computer might prevent camera access, for some security reasons. If in case, camera has been blocked by Windows Defender Firewall, you have to enable it or disable the Firewall securities temporarily from your computer. If you do not know how to disable Windows Defender Firewall, our guide to Disable Windows 10 Firewall will help you do so.
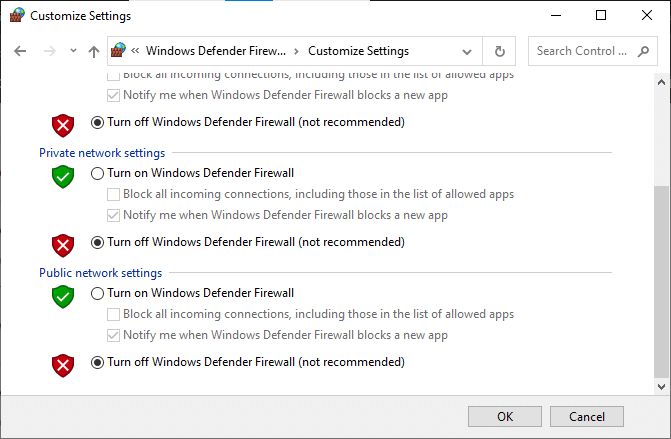
اپنے کیمرہ تک رسائی حاصل کرنے کے بعد، یقینی بنائیں کہ آپ فائر وال سویٹ کو دوبارہ فعال کرتے ہیں، کیونکہ سیکیورٹی پروگرام کے بغیر کمپیوٹر ہمیشہ خطرہ ہوتا ہے۔
Method 8: Update or Rollback Camera Drivers
If there are any incompatible or outdated camera drivers in your computer, you will face camera in use issue. To fix the problem, either update the camera drivers or roll back them if necessary.
آپشن I: ڈرائیوروں کو اپ ڈیٹ کریں۔
1. ٹائپ کریں آلہ منتظم in the Windows 10 search menu and click on اوپن.
2. پھر، پر ڈبل کلک کریں۔ کیمروں اس کو بڑھانا
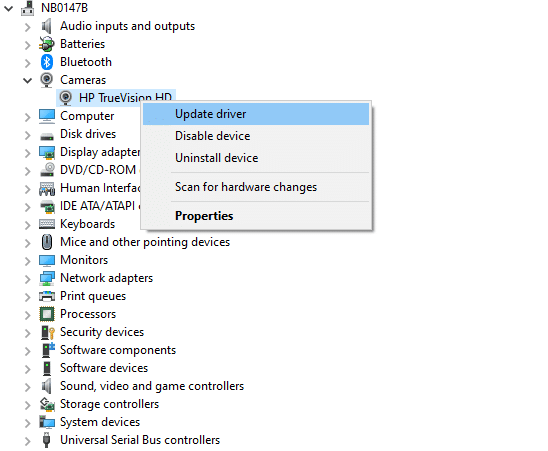
3. اب، پر دائیں کلک کریں۔ آپ کا ڈرائیور (say HP TrueVision HD) and then select ڈرائیور کو اپ ڈیٹ کریں.
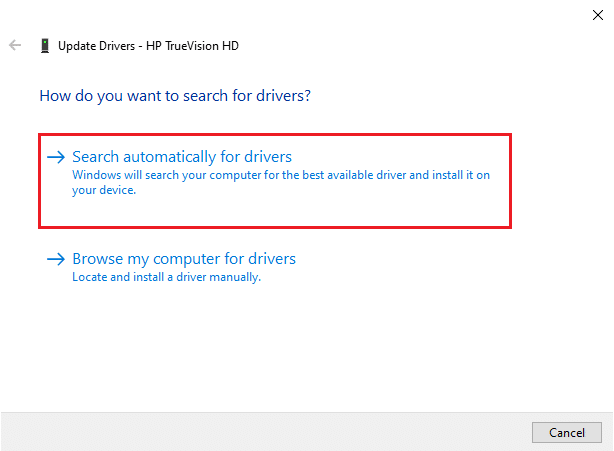
4. اب، پر کلک کریں ڈرائیوروں کے لئے خود بخود تلاش کریں. This will identify and install the apt drivers automatically.
5A. If there are updates pending to be installed, the update will be successful.
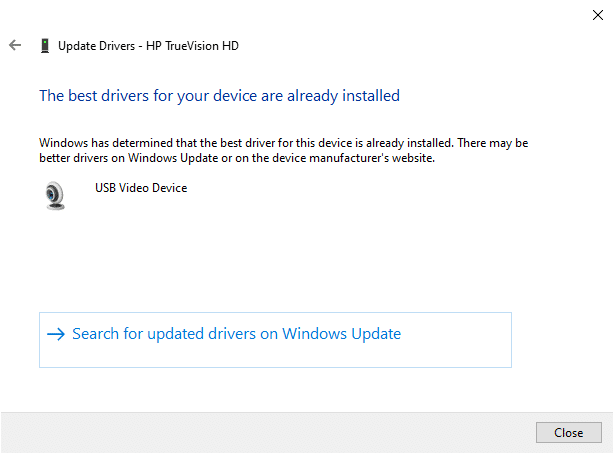
5B. You will get آپ کے آلے کے لیے بہترین ڈرائیورز پہلے ہی انسٹال ہیں۔ message if the drivers are already updated.
6. Exit the window and ربوٹ آپ کا کمپیوٹر
بھی پڑھیں: ایک اور ایپلیکیشن ساؤنڈ ایرر کے ذریعہ اس ڈیوائس کو درست کریں۔
Option II: Rollback Drivers
1. As you did earlier, open آلہ منتظم اور توسیع کیمروں سیکشن پر ایک اقتصادی کینڈر سکین کر لیں۔
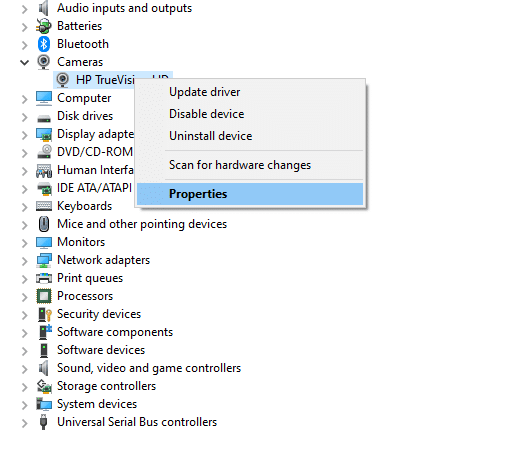
2. پر دائیں کلک کریں ڈرائیور اور منتخب کریں پراپرٹیز آپشن.
3. پر جائیں ڈرائیور ٹیب اور پر کلک کریں رول بیک ڈرائیور.
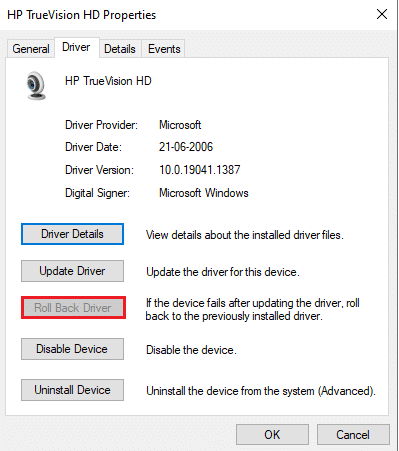
4. پر کلک کریں OK تبدیلیوں کو بچانے کے لئے.
5. آخر میں، پر کلک کریں۔ جی ہاں in the prompt and دوبارہ شروع کریں your computer. Now, you can access your camera.
بھی پڑھیں: ڈیوائس ڈرائیور کیا ہے؟ یہ کیسے کام کرتا ہے؟
طریقہ 9: ایپس کو اپ ڈیٹ کریں۔
You must make sure whether all the applications associated with the Microsoft Store are updated to its latest version. This will ensure if all the inter related apps are up to its latest version thereby fixing camera used by another app problem. Follow the steps as instructed.
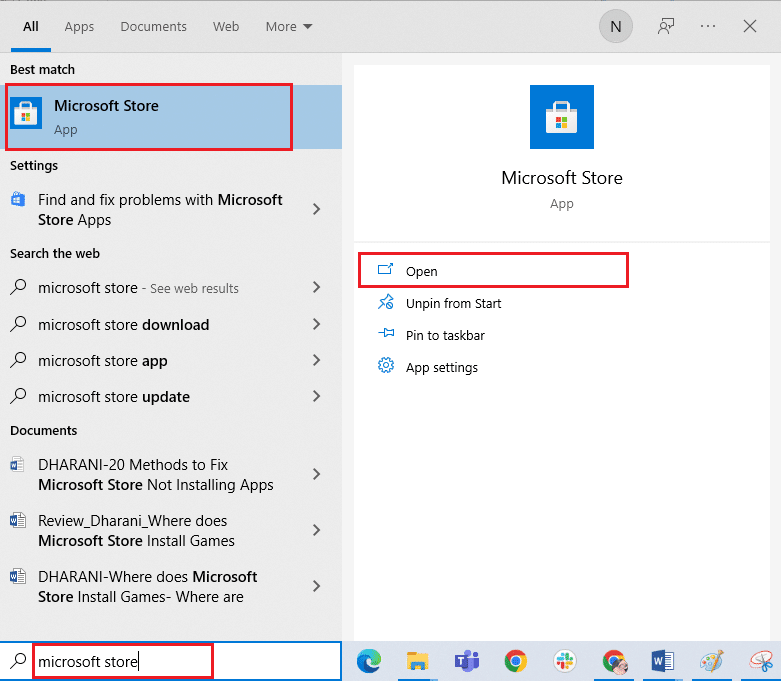
1. ٹائپ کریں مائیکروسافٹ سٹور تلاش کے مینو میں اور پر کلک کریں۔ اوپن.
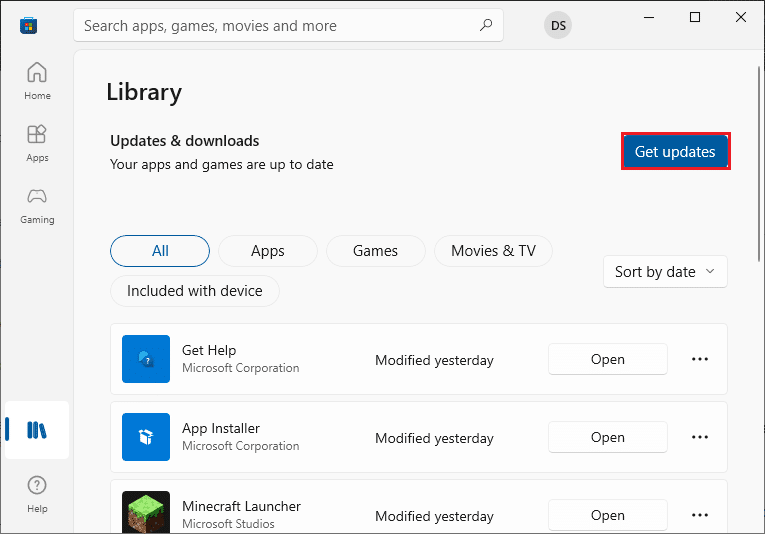
2. میں اگلا مائیکروسافٹ سٹور ونڈو ، پر کلک کریں لائبریری آئیکن جیسا کہ دکھایا گیا ہے۔
![]()
3. اب، پر کلک کریں اپ ڈیٹس حاصل کریں بٹن جیسا کہ دکھایا گیا ہے۔
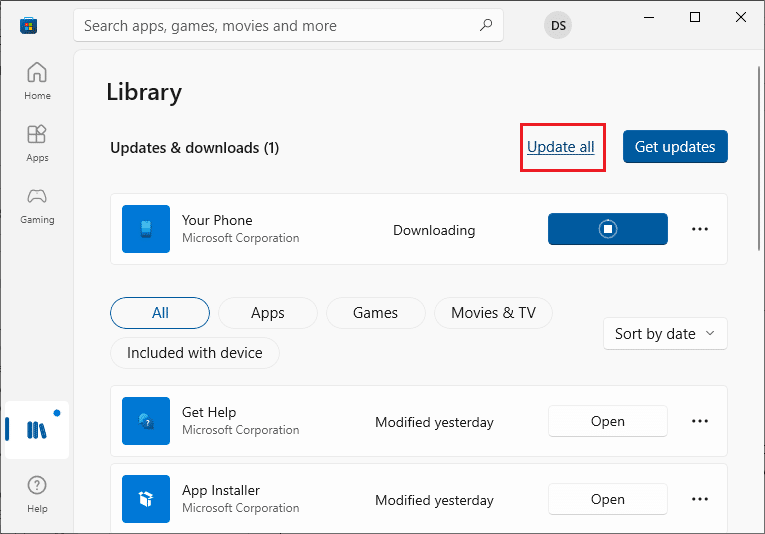
4. اگلا ، پر کلک کریں تمام تجدید کریں بٹن پر کلک کرنا ہے۔
5. انتظار کریں جب تک آپ حاصل نہ کریں۔ آپ کی ایپس اور گیمز اپ ٹو ڈیٹ ہیں۔ فوری طور پر.
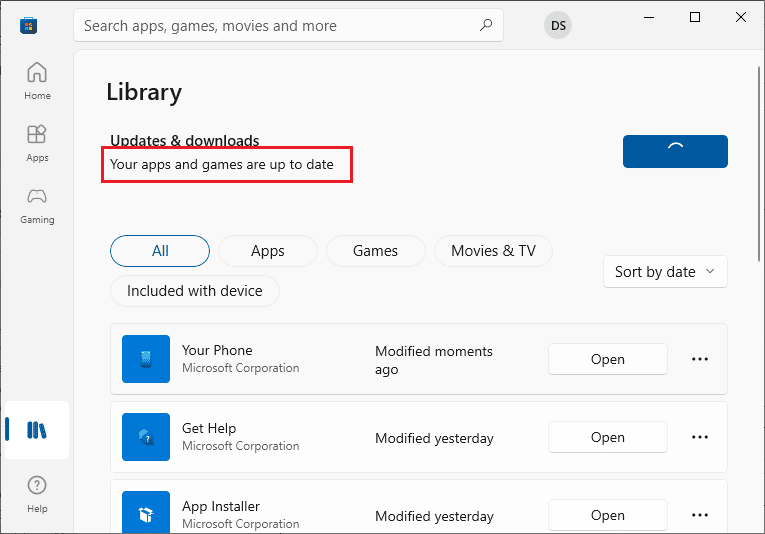
After updating the apps, check if you have fixed the problem.
طریقہ 10: پرابلم ایپس کو دوبارہ انسٹال کریں۔
For app related problems that are causing you camera is being used by another application issue, you have no other options than to reinstall them. Here are few instructions to reinstall problematic applications in Microsoft Store.
نوٹ: اس گائیڈ میں ، زوم ایک مثال کے طور پر لیا جاتا ہے۔
1. ٹائپ کریں کنٹرول پینل تلاش کے مینو میں اور پر کلک کریں۔ اوپن.
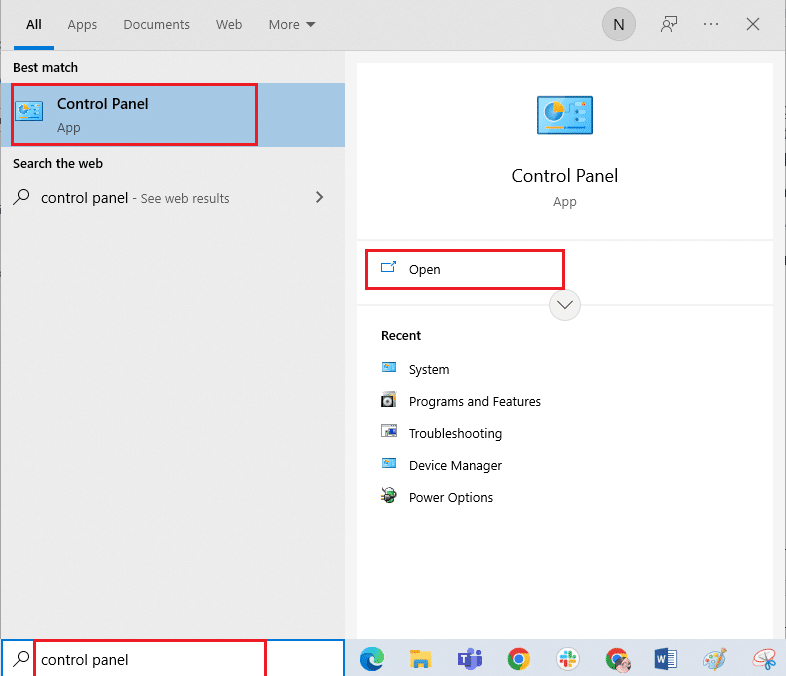
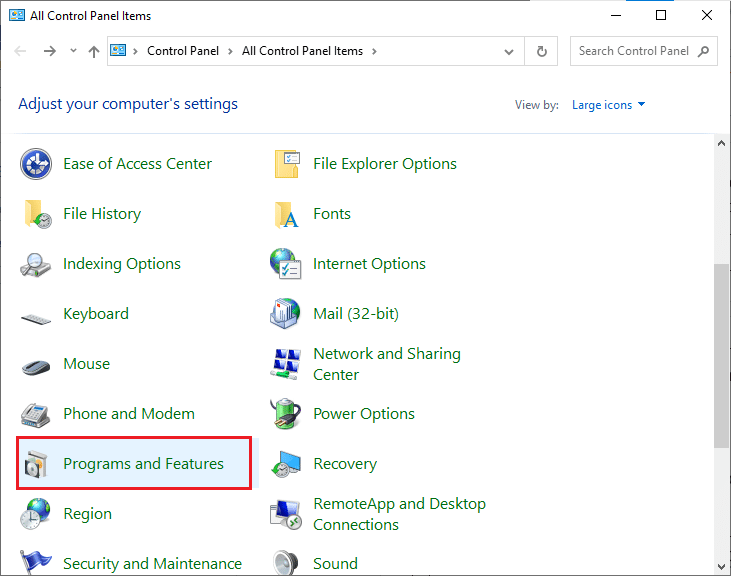
2. سیٹ کریں بذریعہ دیکھیں > بڑے آئیکنز، پھر کلک کریں پروگرام اور خاکے آپشن.
3. اب، پر کلک کریں زوم اور منتخب کریں انسٹال کریں آپشن.
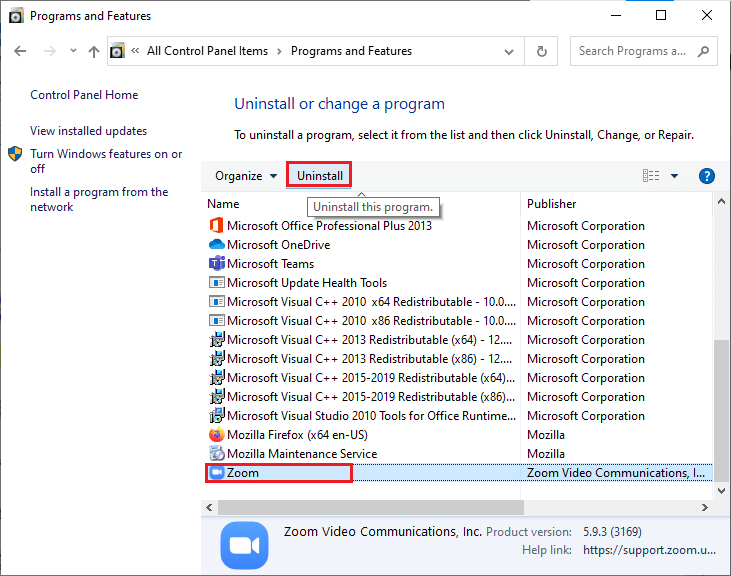
4. پرامپٹ کی تصدیق کریں اگر کوئی ہے اور ربوٹ ایپ مکمل طور پر ان انسٹال ہونے کے بعد آپ کا پی سی۔
5. Download Zoom from the سرکاری سائٹ.

6. اب، تشریف لے جائیں۔ میرے ڈاؤن لوڈز اور چلائیں زوم انسٹالر setup file. Wait until the app gets installed on your PC. Now, you can access the camera in the newly installed app.
بھی پڑھیں: ٹیموں پر کام نہ کرنے والے کیمرہ کو درست کریں۔
طریقہ 11: کیمرہ دوبارہ رجسٹر کریں۔
If none of the above-discussed methods have helped you, then have a try to re-register your camera as instructed below. There are two methods to implement the task.
آپشن I: ونڈوز پاور شیل کے ذریعے
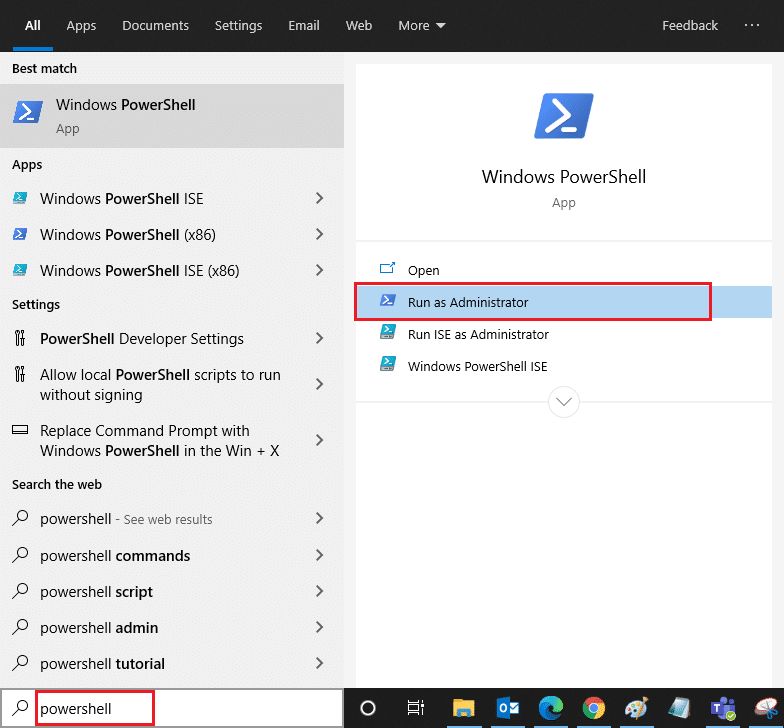
1. ٹائپ کریں PowerShell کے سرچ بار میں اور پر کلک کریں۔ انتظامیہ کے طورپر چلانا جیسے دکھایا گیا ہے.
2. Then, type the following command and hit کلید درج کریں.
Get-AppxPackage -allusers Microsoft.WindowsCamera | Foreach {Add-AppxPackage -DisableDevelopmentMode -رجسٹر "$($_.InstallLocation)AppXManifest.xml"}
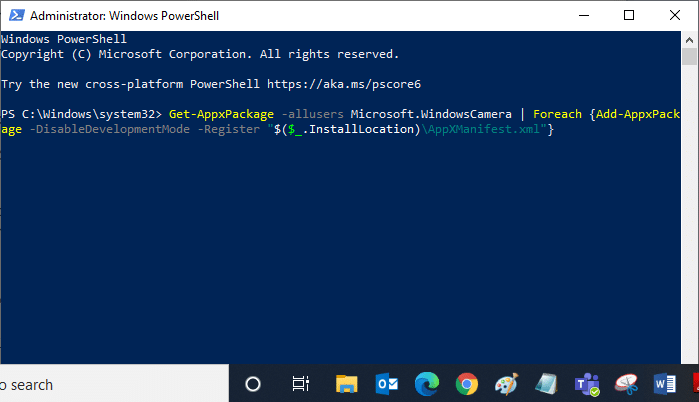
3. Wait until the common execution is successful and check if you have fixed camera in use issue .
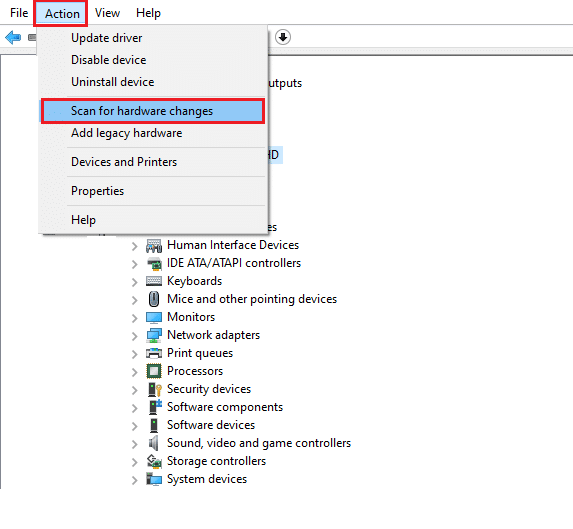
اختیار II: ڈیوائس مینیجر کے ذریعے
1. کھولو آلہ منتظم ونڈوز سرچ بار سے۔
2. اب، کو پھیلائیں۔ کیمروں اس پر ڈبل کلک کرکے سیکشن۔
3. Then, right-click on the camera driver (e.g. HP TrueVision HD) اور منتخب کریں۔ آلہ انسٹال کریں آپشن.

4. اب، پر سوئچ کریں۔ عمل ٹیب اور منتخب کریں ہارڈ ویئر کی تبدیلیوں کے لئے اسکین آپشن.
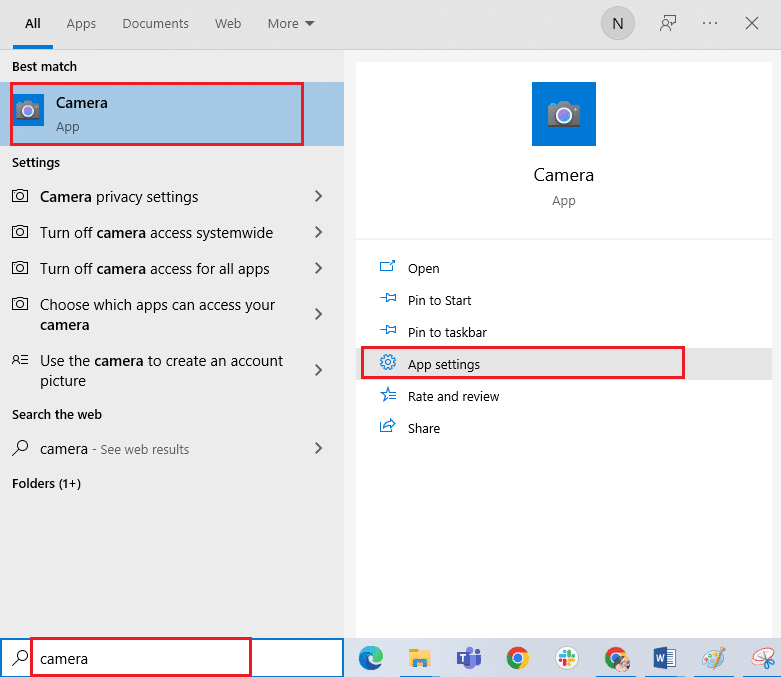
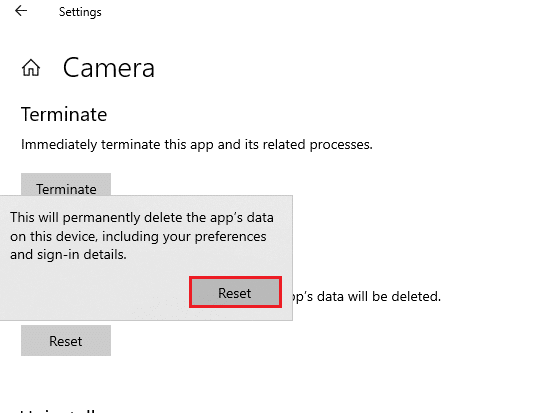
طریقہ 12: کیمرہ ایپ کو دوبارہ ترتیب دیں۔
You can also try resetting your camera application to fix camera used by another app issue. Follow as instructed below
1. مارو ونڈوز کلیدی، قسم کیمرے، اور پر کلک کریں۔ ایپ کی ترتیبات.
2. پھر، پر کلک کریں۔ پھر سیٹ کریں آپشن جیسا کہ نمایاں کیا گیا ہے۔
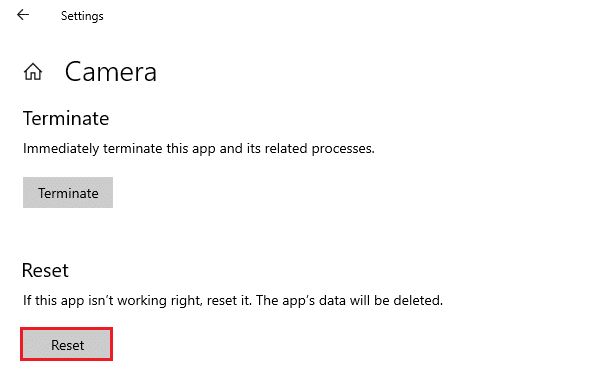
3. اگلا، پر کلک کرکے کسی بھی پرامپٹ کی تصدیق کریں۔ پھر سیٹ کریں.
بھی پڑھیں: ونڈوز 10 پر لیپ ٹاپ کیمرہ کا پتہ نہیں لگایا گیا درست کریں۔
طریقہ 13: نظام کی بحالی انجام دیں
If there are any incompatible Windows updates on your computer, your PC will not work as usual it does. So, restore your computer to a state whether everything was working fine. Here are some instructions to restore your PC. To do so, follow our guide on How to use System Restore on Windows 10 and implement the instructions as demonstrated.
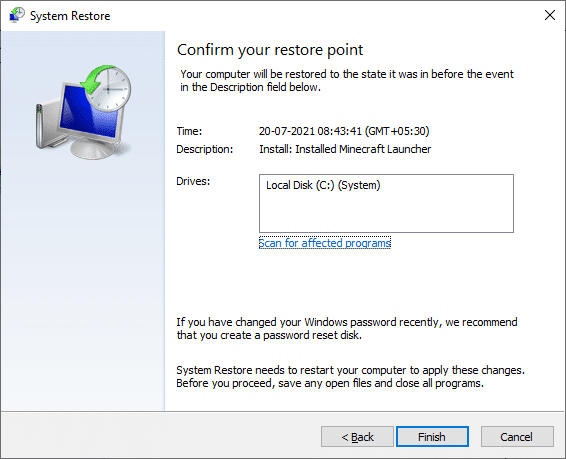
اپنے Windows 10 PC کو بحال کرنے کے بعد، چیک کریں کہ آیا آپ کا کیمرہ استعمال کر سکتے ہیں۔
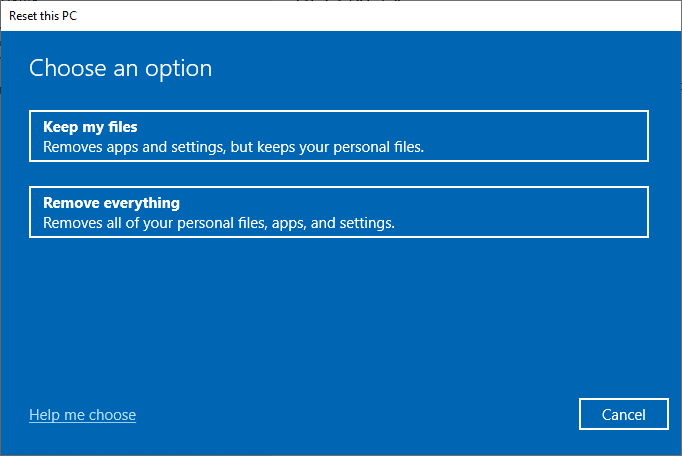
Method 14: Clean Install Windows 10
If none of the methods have helped you fix the said issue, then you have to clean install your Windows Operating System. To clean boot your computer, implement the steps as instructed in our guide to do a Clean Install of Windows 10
سفارش کی جاتی ہے:
It would be really frustrating not being able to access your camera in the middle of the meetings, but now you would have fixed استعمال میں کیمرے by another app issue in Windows 10. Keep visiting our page for more cool tips & tricks and leave your comments below. Also, if you have any queries/suggestions regarding this article, then feel free to drop them in the comments section.