Fix Windows 10 install Fails With Error C1900101-4000D

Fix Windows 10 install Fails With Error C1900101-4000D: If you’re trying to upgrade to Windows 10 but the install fails with error code C1900101-4000D then don’t worry as it occurs because the Windows installer cannot access important files required for installation. Sometimes this error is also caused because of a conflict during installation but you can’t be sure as there is no error message accompanying this error.
0xC1900101-0x4000D
The installation failed in the SECOND_BOOT phase with an error during MIGRATE_DATA operation
While there is no definite fix for this issue but users seem to be recommending a clean installation of Windows 10 which should only be used as a last resort. So without wasting any time let’s see How to Fix Windows 10 install Fails With Error C1900101-4000D with the help of below-listed troubleshooting guide.
Fix Windows 10 install Fails With Error C1900101-4000D
شرائط
a)Make sure to Update all drivers, including graphic, sound, BIOS, USB devices, printers, etc before the installing Windows 10.
b)Remove all external USB devices such as pen drive, external hard disk, USB keyboard & mouse, USB printer and all peripherals.
c)Use an ethernet cable instead of WiFi and disable WiFi until the update is complete.
Method 1: Temporarily Disable Antivirus and Firewall before attempting Upgrade
1. پر دائیں کلک کریں۔ اینٹی وائرس پروگرام کا آئیکن سسٹم ٹرے سے اور سلیکٹ کریں۔ غیر فعال.

2. اگلا، وہ ٹائم فریم منتخب کریں جس کے لیے اینٹی وائرس غیر فعال رہے گا۔

نوٹ: ممکنہ وقت کی سب سے چھوٹی مقدار کا انتخاب کریں مثال کے طور پر 15 منٹ یا 30 منٹ۔
3.Once done, again try to upgrade your PC and check if the error resolves or not.
4.Type control in the Windows Search then click on کنٹرول پینل تلاش کے نتائج سے

5. اگلا، پر کلک کریں نظام اور حفاظت.
6. پھر کلک کریں۔ ونڈوز فائروال.

7. اب بائیں ونڈو پین سے پر کلک کریں۔ ونڈوز فائر وال کو آن یا آف کریں۔

8.ونڈوز فائر وال کو بند کریں کو منتخب کریں اور اپنے کمپیوٹر کو دوبارہ شروع کریں۔ Again try to upgrade your PC and see if you’re able to Fix Windows 10 install Fails With Error C1900101-4000D.
اگر مندرجہ بالا طریقہ کام نہیں کرتا ہے تو یقینی بنائیں کہ اپنے فائر وال کو دوبارہ آن کرنے کے لیے بالکل وہی اقدامات کریں۔
Method 2: Remove any hyphens from your computer or machine name
1. ونڈوز کی + R دبائیں پھر ٹائپ کریں۔ sysdm.cpl اور کھولنے کے لئے درج کریں پر دبائیں سسٹم پراپرٹیز۔

2.Make sure you’re under کمپیوٹر کے نام کا ٹیب پھر پر کلک کریں تبدیل کریں نیچے کے بٹن.
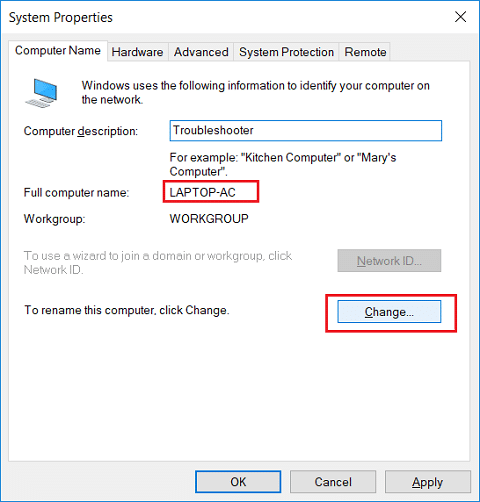
3.Make sure your machine name is simple no periods or hyphens or dashes.
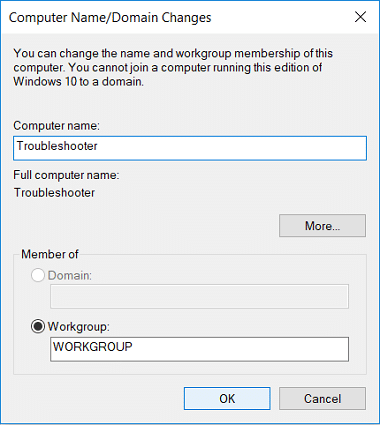
4.Click OK then Apply followed by OK.
5. تبدیلیوں کو بچانے کے لیے اپنے کمپیوٹر کو دوبارہ بوٹ کریں۔
طریقہ 3: یقینی بنائیں کہ ونڈوز اپ ٹو ڈیٹ ہے۔
1. ونڈوز کی + I دبائیں پھر منتخب کریں۔ تازہ کاری اور سیکیورٹی۔

2. اگلا، دوبارہ کلک کریں۔ اپ ڈیٹس کی جانچ پڑتال کریں اور کسی بھی زیر التواء اپ ڈیٹس کو انسٹال کرنا یقینی بنائیں۔

3. اپ ڈیٹس انسٹال ہونے کے بعد اپنے پی سی کو ریبوٹ کریں اور دیکھیں کہ کیا آپ کر سکتے ہیں۔ Fix Windows 10 install Fails With Error C1900101-4000D.
طریقہ 4: کلین بوٹ انجام دیں۔
This would make sure that if any 3rd party application is conflicting with Windows update then you will be able to successfully install Windows Updates inside Clean Boot. Sometimes 3rd party software can conflict with Windows Update and therefore cause Windows Update to be Stuck. In order, Fix Windows 10 install Fails With Error C1900101-4000D، آپ کو اپنے پی سی پر کلین بوٹ کرنے اور مسئلے کی مرحلہ وار تشخیص کرنے کی ضرورت ہے۔

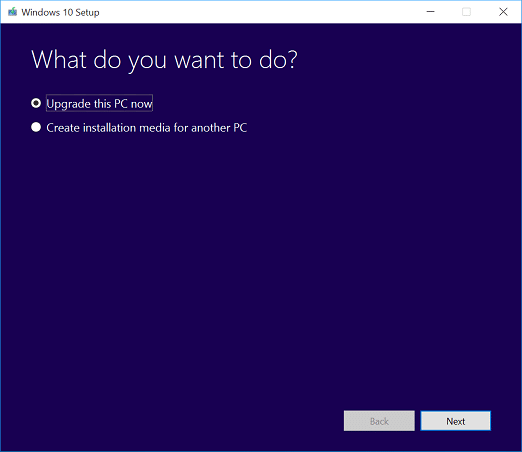
Method 5: Upgrade using Windows 10 Media Creation Tool
1.Download Media Creation Tool here.
2.Backup your data from system partition and save your license key.
3.Start the tool and choose to اس پی سی کو ابھی اپ گریڈ کریں۔
4.Accept the license terms.
5.After the installer is ready, choose to Keep personal files and apps.
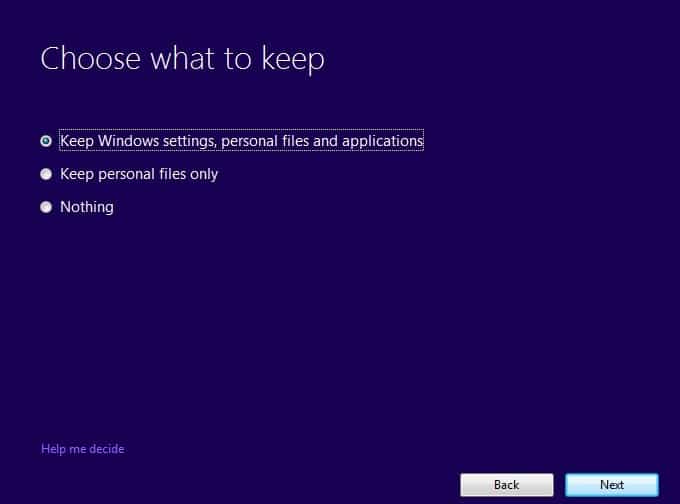
6.The PC will restart few times and your PC would be successfully upgraded.
طریقہ 6: SFC اور DISM چلائیں۔
1. Windows Key + X دبائیں پھر کلک کریں۔ کمانڈ پرامپٹ (ایڈمن)۔

2.اب cmd میں درج ذیل کو ٹائپ کریں اور انٹر دبائیں:
Sfc /scannow sfc /scannow /offbootdir=c: /offwindir=c:windows (اگر اوپر ناکام ہوجاتا ہے تو اسے آزمائیں)

3. مندرجہ بالا عمل کے ختم ہونے کا انتظار کریں اور ایک بار مکمل ہونے کے بعد اپنے کمپیوٹر کو دوبارہ شروع کریں۔
4. دوبارہ cmd کھولیں اور درج ذیل کمانڈ کو ٹائپ کریں اور ہر ایک کے بعد enter دبائیں:
a) Dism/Online/Cleanup-Image/CheckHealth b) Dism/Online/Cleanup-Image/ScanHealth c) Dism/Online/Cleanup-Image/RestoreHealth

5. DISM کمانڈ کو چلنے دیں اور اس کے ختم ہونے کا انتظار کریں۔
6. اگر اوپر کی کمانڈ کام نہیں کرتی ہے تو نیچے کی کوشش کریں:
Dism/Image:C:offline/Cleanup-Image/RestoreHealth/Source:c:testmountwindows Dism/Online/Cleanup-Image/RestoreHealth/Source:c:testmountwindows/LimitAccess
نوٹ: C:RepairSourceWindows کو اپنے مرمتی ماخذ (ونڈوز انسٹالیشن یا ریکوری ڈسک) کے مقام سے تبدیل کریں۔
7. تبدیلیاں محفوظ کرنے کے لیے اپنے پی سی کو ریبوٹ کریں اور دیکھیں کہ آیا آپ قابل ہیں یا نہیں۔ Fix Windows 10 install Fails With Error C1900101-4000D.
Method 7: Reset Windows Updates Components
1. Windows Key + X دبائیں پھر منتخب کریں۔ کمانڈ پرپیٹ (ایڈمن).
2.اب ونڈوز اپ ڈیٹ سروسز کو روکنے کے لیے درج ذیل کمانڈز ٹائپ کریں اور پھر ہر ایک کے بعد Enter دبائیں۔
نیٹ سٹاپ wuauserv
نیٹ سٹاپ کرپٹ ایس سی سی
نیٹ سٹاپ بٹس
نیٹ سٹاپ MSiserver

3. اگلا، سافٹ ویئر ڈسٹری بیوشن فولڈر کا نام تبدیل کرنے کے لیے درج ذیل کمانڈ ٹائپ کریں اور پھر Enter کو دبائیں۔
رینجر سی: ونڈوز سرورز تقسیم
رینج سی: ونڈوز سیسٹم ایکس این ایکس ایکسٹیکٹوٹ ایکس اینیم ایکس بلیٹ 32.old

4. آخر میں، Windows Update Services کو شروع کرنے کے لیے درج ذیل کمانڈ ٹائپ کریں اور ہر ایک کے بعد Enter دبائیں۔
خالص آغاز wuauserv
خالص آغاز کرپٹ ایس ایس سی
خالص شروع بٹس
خالص آغاز msiserver

5. تبدیلیوں کو بچانے کے لیے اپنے پی سی کو ریبوٹ کریں اور چیک کریں کہ آیا آپ قابل ہیں یا نہیں۔ Fix Windows 10 install Fails With Error C1900101-4000D.
Method 8: Delete Registry for Mounted Images
1. ونڈوز کی + R دبائیں پھر ٹائپ کریں۔ کی regedit اور رجسٹری ایڈیٹر کھولنے کے لیے Enter کو دبائیں۔

2. درج ذیل رجسٹری کلید پر جائیں:
HKEY_LOCAL_MACHINESOFTWAREMicrosoftWIMMountMounted Images
3.Select Mounted Images then in the right window pane right-click on (Default) and select Delete.
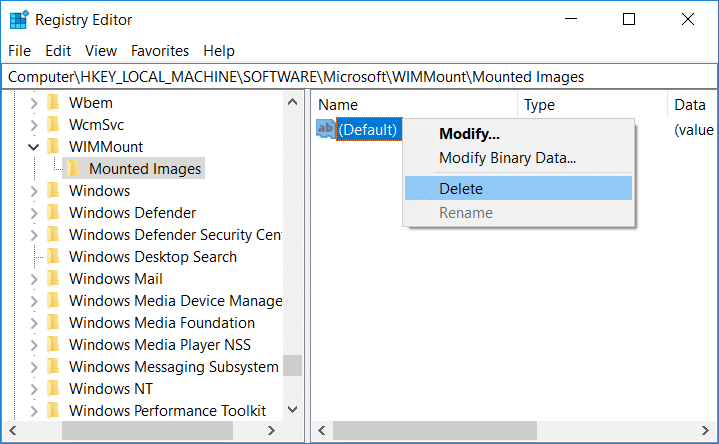
4.Exit Registry Editor and reboot your PC to save changes.
Method 9: Disable Wi-Fi Adapter and CD/DVD Drive
1. ونڈوز کی + R دبائیں پھر ٹائپ کریں۔ devmgmt.msc اور ڈیوائس مینیجر کو کھولنے کے لیے Enter کو دبائیں۔

2.Expand DVD/CD-ROM drives، پھر اپنے پر دائیں کلک کریں۔ سی ڈی/ڈی وی ڈی ڈرائیو۔ اور منتخب کریں آلہ غیر فعال کریں۔

3.Similarly, expand Network adapters then right-click on your WiFi اڈاپٹر اور منتخب کریں آلہ غیر فعال کریں۔
4.Again try to run Windows 10 setup and see if you’re able to Fix Windows 10 install Fails With Error C1900101-4000D.
Method 10: Run Malwarebytes and AdwCleaner
Malwarebytes ایک طاقتور آن ڈیمانڈ سکینر ہے جسے آپ کے کمپیوٹر سے براؤزر ہائی جیکرز، ایڈویئر اور دیگر قسم کے مالویئر کو ہٹانا چاہیے۔ یہ نوٹ کرنا ضروری ہے کہ Malwarebytes بغیر کسی تنازعہ کے اینٹی وائرس سافٹ ویئر کے ساتھ چلیں گے۔ Malwarebytes Anti-Malware کو انسٹال کرنے اور چلانے کے لیے، اس مضمون پر جائیں اور ہر قدم پر عمل کریں۔
1.Download AdwCleaner from this link.
2.Once the download is complete, double-click on the adwcleaner.exe file پروگرام کو چلانے کے لیے۔
3. پر کلک کریں "میں مانتا ہوں”بٹن لائسنس کے معاہدے کو قبول کریں.
4.On the next screen, click the سکین بٹن under Actions.
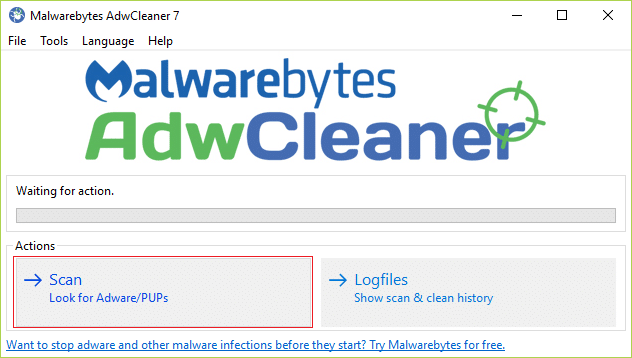
5.Now, wait for the AdwCleaner to search for PUPs and other malicious programs.
6. اسکین مکمل ہونے کے بعد، کلک کریں۔ صاف کریں in order to clean your system of such files.
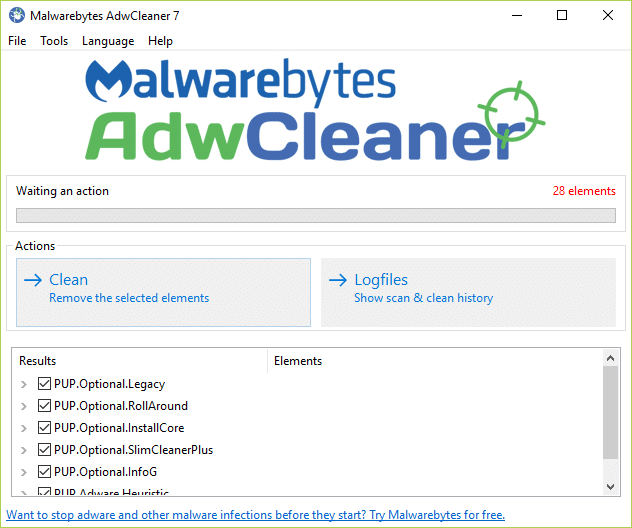
7.Save any work you might be doing as your PC will need to reboot, click OK to reboot your PC.
8.Once the computer reboots, a log file will open which will list all of the files, folders, registry keys, etc that were removed in the previous step.
سفارش کی جاتی ہے:
یہ آپ نے کامیابی سے حاصل کی ہے۔ Fix Windows 10 install Fails With Error C1900101-4000D لیکن اگر آپ کے پاس اب بھی اس گائیڈ کے بارے میں کوئی سوالات ہیں تو تبصرے کے سیکشن میں بلا جھجھک ان سے پوچھیں۔