How to Add a Picture Password in Windows 10

Windows 10 has a lot of security features which are very useful for all users. Still, today we are talking about a particular feature which makes it easier for users to authenticate themselves while logging into their PC. With the introduction of Windows 10, you could now use password, PIN or picture password to log in to your computer. You could also set all three of them and then from the sign-in screen, and you could switch between any of these options to authenticate yourself. The only problem with these sign-in options is that they don’t work in Safe Mode and you have to only use the traditional password to login to your computer in safe mode.
But in this tutorial, we would be talking specifically about Picture Passwords and how to set it up in Windows 10. With picture password, you don’t need to remember the long password instead you sign in by drawing different shapes or making the right gesture over an image to unlock your PC. So without wasting any time let’s see How to Add a Picture Password in Windows 10 نیچے دی گئی گائیڈ کی مدد سے۔
How to Add a Picture Password in Windows 10
کچھ غلط ہونے کی صورت میں بحالی پوائنٹ بنانا یقینی بنائیں۔
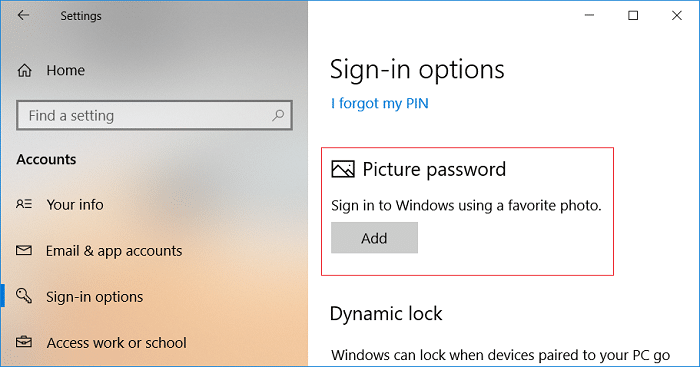
1. ترتیبات کو کھولنے کے لیے ونڈوز کی + I دبائیں پھر کلک کریں۔ اکاؤنٹس
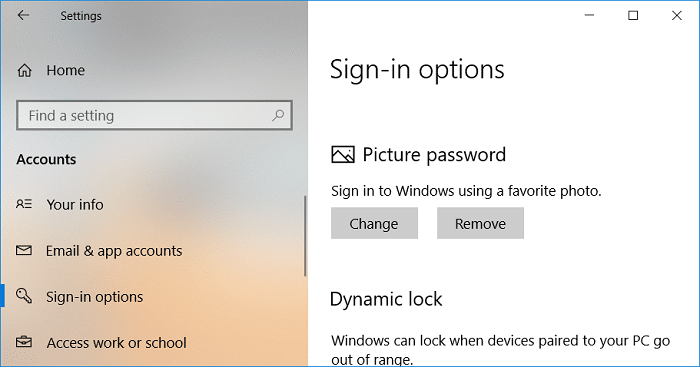
2. بائیں ہاتھ کے مینو سے، منتخب کریں۔ سائن ان کے اختیارات۔
3. اب دائیں ونڈو پین میں "پر کلک کریں۔شامل کریں"تحت Picture Password.
نوٹ: A local account must have a password to be able to add a picture password. A Microsoft account will be password protected by default.
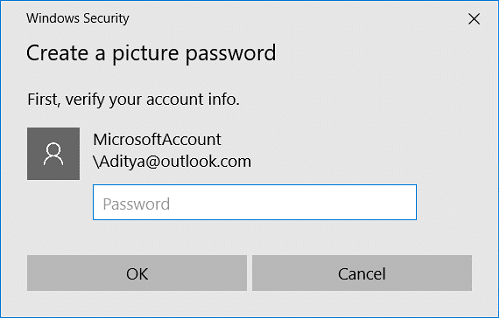
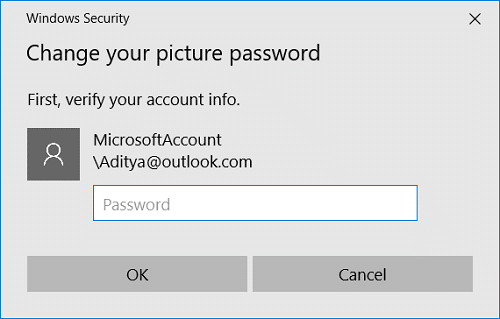
4. Windows will ask you to verify your identity, so Enter your account password and click OK.
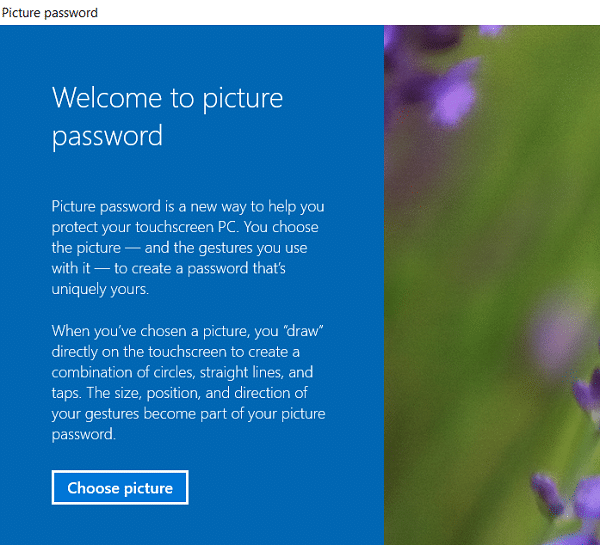
5. A new picture password window will open، پر کلک کریں "تصویر کا انتخاب کریں۔".
6 اگلے، navigate to the picture’s location in Open dialog box then select the picture and click کھولیں
7. Adjust the image by dragging it to position it the way you want then click “اس تصویر کو استعمال کریں۔".
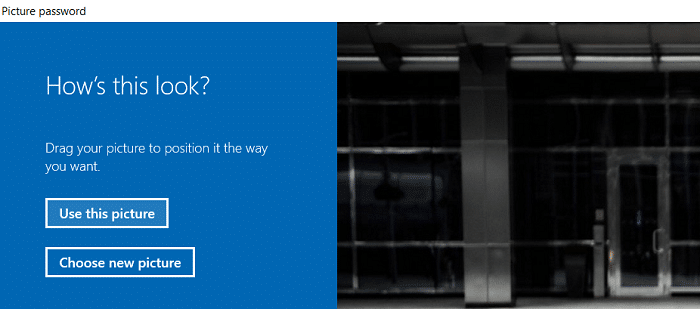
نوٹ: If you want to use a different picture, click on “Choose new picture” then repeat the steps from 5 to 7.
8. اب آپ کو کرنا پڑے گا۔ draw three gesture one by one on the picture. As you draw each gesture, you will see the numbers will move from 1 to 3.
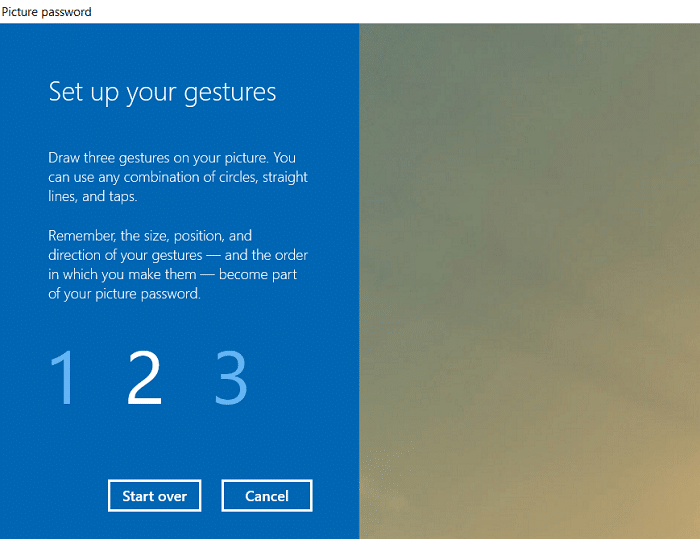
نوٹ: You can use any combination of circles, straight lines, and taps. You can click & drag to draw a circle or triangle or any shape you like.
9. Once you draw all the three gestures, you will be asked to draw them all again to confirm your password.
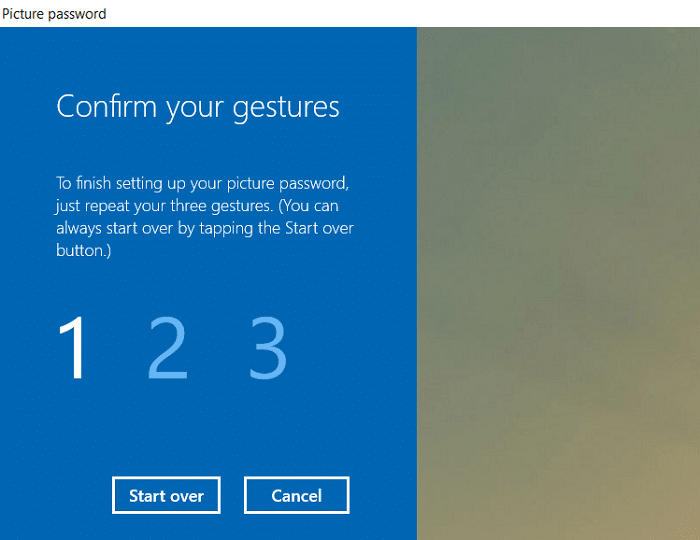
10. If you mess up your gestures, you could click on “پھر سے شروع” to start the process again. You would need to draw all the gestures from the beginning.
11. آخر میں، after adding all the gestures click Finish.
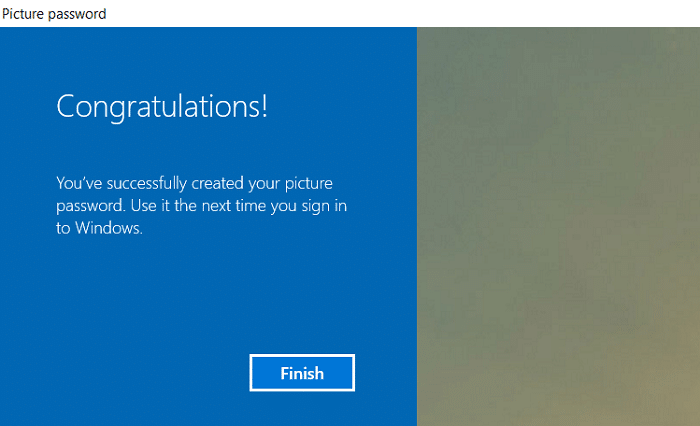
12. That’s it, your picture password has now been added as a sign-in option.
How to Change Picture Password in Windows 10
1. ترتیبات کو کھولنے کے لیے ونڈوز کی + I دبائیں پھر کلک کریں۔ اکاؤنٹس
2. بائیں ہاتھ کے مینو سے، منتخب کریں۔ سائن ان کے اختیارات۔
3. اب دائیں ونڈو پین میں "پر کلک کریں۔تبدیل کریں"کے نیچے بٹن Picture Password.
4. Windows will ask you to verify your identity, so Enter your account password اور ٹھیک ہے پر کلک کریں.
5. اب you have two options, either you could change the gestures of your current picture, or you could use a new picture.
6. To use the current picture, click on “اس تصویر کو استعمال کریں۔” and if you want to use a new image, click “نئی تصویر کا انتخاب کریں۔".
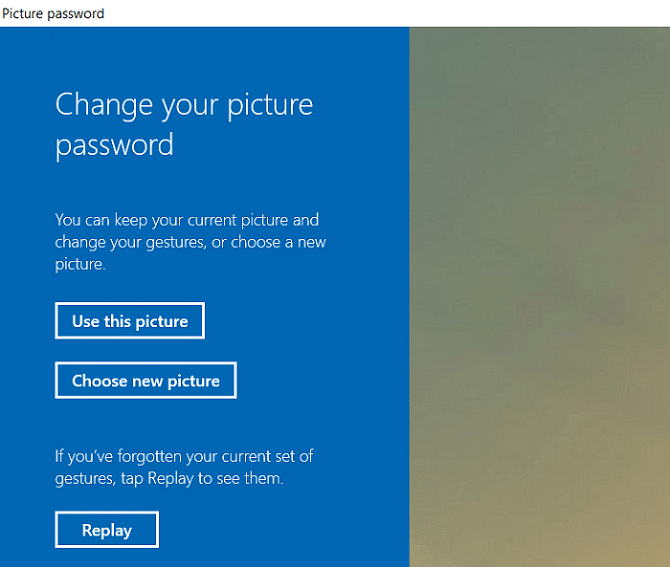
نوٹ: If you click “Use this picture” then skip the steps 7 and 8.
7. Navigate to and select the picture file you want to use then click کھولیں
8. Adjust the image by dragging it to position it the way you want then click “اس تصویر کو استعمال کریں۔".
9. اب آپ کو کرنا پڑے گا۔ draw three gesture one by one on the picture.
نوٹ: You can use any combination of circles, straight lines, and taps. You can click & drag to draw a circle or triangle or any shape you like.
10. Once you draw all the three gestures, you will be asked to draw them all again to confirm your password.
11. Finally, after adding all the gestures click ختم کرو.
12. تبدیلیاں محفوظ کرنے کے لیے اپنے پی سی کو ریبوٹ کریں۔
How to Remove a Picture Password in Windows 10
1. ترتیبات کو کھولنے کے لیے ونڈوز کی + I دبائیں پھر کلک کریں۔ اکاؤنٹس
2. بائیں ہاتھ کے مینو سے، منتخب کریں۔ سائن ان کے اختیارات۔
3. اب دائیں ونڈو پین میں "پر کلک کریں۔ہٹا دیں"کے نیچے بٹن Picture Password.
4. That’s it, your picture password has now been removed as a sign-in option.
5. تبدیلیوں کو بچانے کے لیے سب کچھ بند کریں اور اپنے کمپیوٹر کو دوبارہ شروع کریں۔
سفارش کی جاتی ہے:
یہ آپ نے کامیابی سے سیکھا ہے۔ How to Add a Picture Password in Windows 10 لیکن اگر آپ کے پاس اب بھی اس ٹیوٹوریل کے بارے میں کوئی سوال ہے تو بلا جھجھک ان سے تبصرے کے سیکشن میں پوچھیں۔