How To Create a Partition From Windows Drive Free Space

There are a lot of reasons you might want to create a partition from free space on your Windows drive. The most common reason is usually to install a different operating system (like Linux) so you can dual boot your PC.
Other reasons may include creating a new hard drive separate from your C: drive that’s dedicated to only data. Or you might want to create an encrypted partition that no one can access without the correct security keys.
Regardless of the reason, you shouldn’t just jump into the process immediately. There are a few things you should do to make sure you’ve sized the new partition correctly, and that you have a fall-back plan if things go bad.
Create a Windows 10 Backup
If you’re about to create a partition with the same hard drive where your primary Windows 10 operating system is installed, you need to do it safely.
Your first step should always be to take a backup image of your hard drive. Thankfully this is a very easy process to initiate, but it does take some time to complete. Set aside about an hour to finish this process.
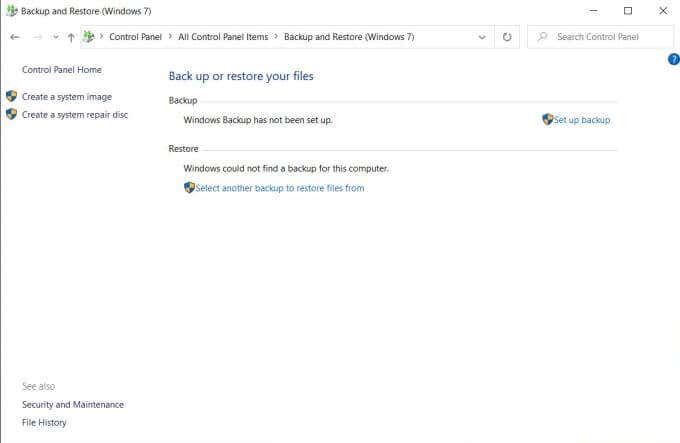
1. To start your Windows backup, open the Control Panel and select بیک اپ اور بحال (ونڈوز 7). منتخب کریں نظام کی تصویر بنائیں بائیں مینو سے
2. This will open a new window where you can select where you want to store the backup. Keep in mind that your backup storage needs to have available space that’s as large as the amount of space you’re currently using on your Windows 10 PC. Select اگلے جاری رکھنے کے لئے.

3. The backup process will take anywhere from 15 minutes to an hour depending how large your drive usage is. When it’s done, a new drive called WindowsImage بیک اپ will appear where you’ve selected to store your backup.
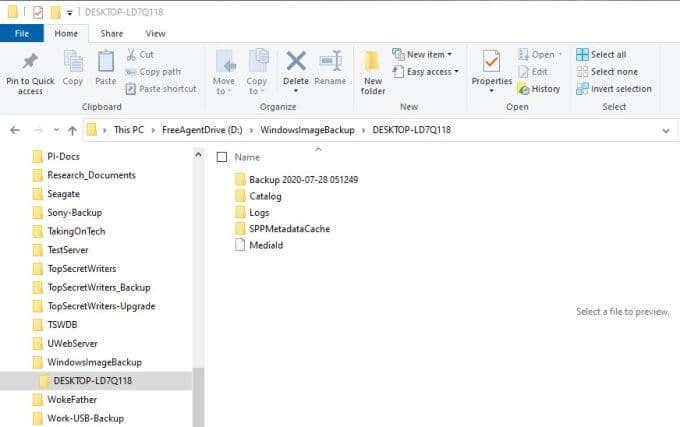
You may notice that you can’t view the contents of this directory. If this is the case, select Start, type ایکسپلورر.exeپر دائیں کلک کریں۔ Explorer.exe Run command اور منتخب کریں ایڈمنسٹریٹر کے طور پر چلائیں.
Now you can navigate to the backup folder and see that your Windows 10 backup completed successfully. You’re now ready to allocate free PC space from your main partition to another one.
نوٹ: If something goes wrong and you do need to recover your Windows 10, you can do so by opening the Control Panel, and selecting بیک اپ اور بحال (ونڈوز 7). منتخب کریں فائلوں کو بحال کرنے کے لیے دوسرا بیک اپ منتخب کریں۔ to select your backup and restore your system.
پر ہماری تفصیلی ہدایت نامہ پڑھیں how to create a Windows 10 system image backup.
Allocate Free Space To Create a Partition
To create a partition from your drive free space, you need to know how much free space you can spare. If you’re running Windows 10 on a single hard drive where only one main partition is allocated for the Windows 10 OS and all data files, you’ll need to make sure you still have plenty of space left over after you shrink that partition.
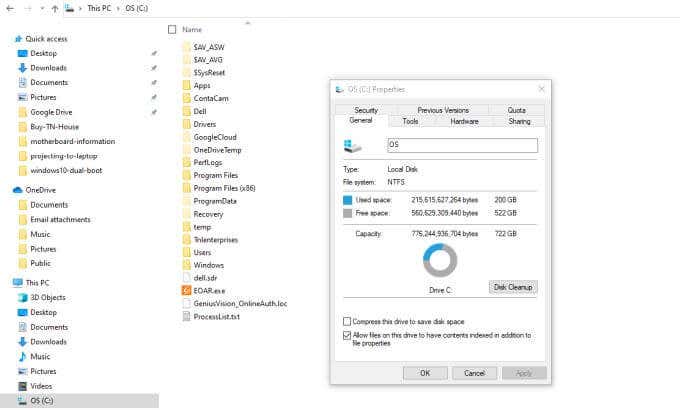
To check this, open File Explorer, right-click the main system drive (in this example, that’s C:), and select پراپرٹیز.
Here, you’ll see both Used space and Free space.
If you’re hoping to dual boot your PC with a new OS like Ubuntu Linux, make sure the free space can accommodate the minimum requirements of the new OS.
For example, Ubuntu requires at least 25 GB. To leave room for data, you’ll want to allocate around 100 GB for a Ubuntu OS partition.
Once you’ve calculated how much you want to shrink the main partition to make space for the new one, you’re ready to create your new partition.
1. Select the Start menu and type انتظامی. منتخب کریں Windows Administrative Tools App. Once the Administrative Tools window opens, select کمپیوٹر کے انتظام. In the Computer Management window, select ڈسک کے انتظام from the left menu. Here, you’ll see the C: drive partition and its overall size.
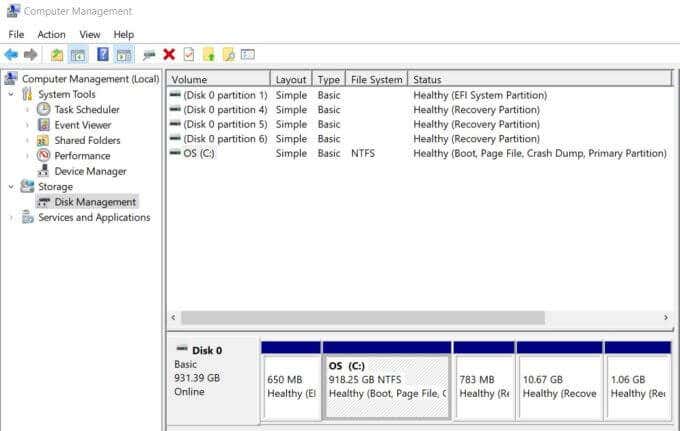
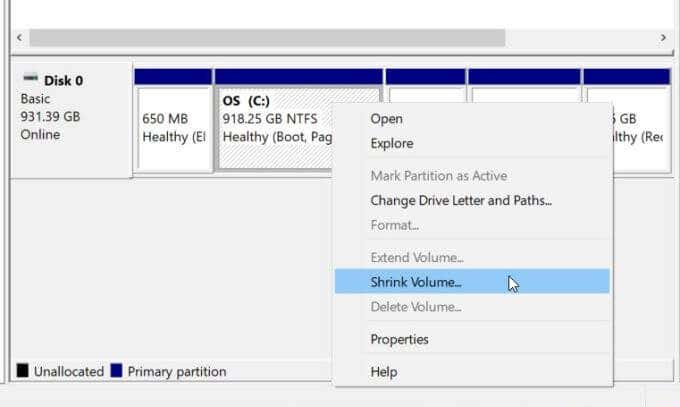
2. Right-click the C: partition and select جلد حجم ڈراپ ڈاؤن فہرست سے
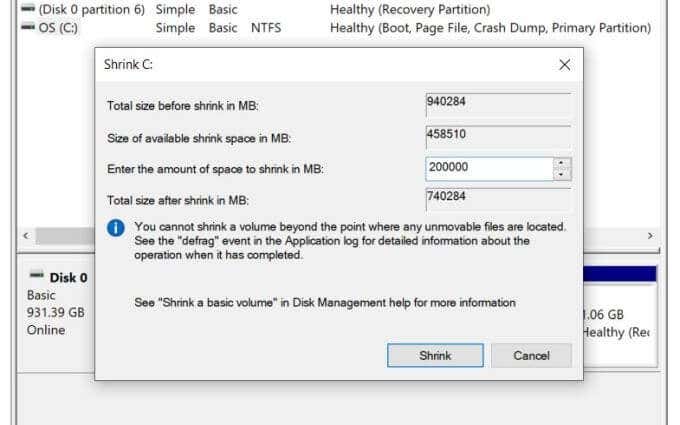
3. A window will pop-up where you can enter the amount of space to shrink the partition you selected. In the field for ایم بی میں سکڑنے کیلئے خلا کی مقدار درج کریں, you’ll need to enter the size of the new partition you want. For example, if you want the new partition to be 200 GB, you’ll type 200000. منتخب کریں سکیڑیں جب تم کر رہے ہو
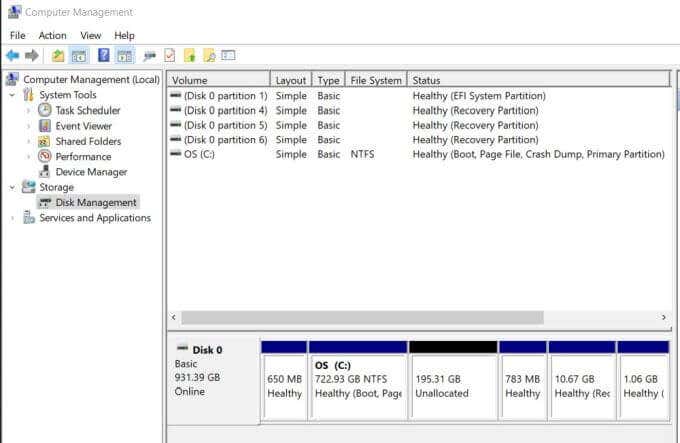
4. Once the Shrink operation is completed, you’ll see a new partition listed as “غیر منسلک".
Now that you’ve allocated free space from one partition to another, you’re ready to use it for whatever purpose you wanted it for.
Using Your Newly Allocated Partition
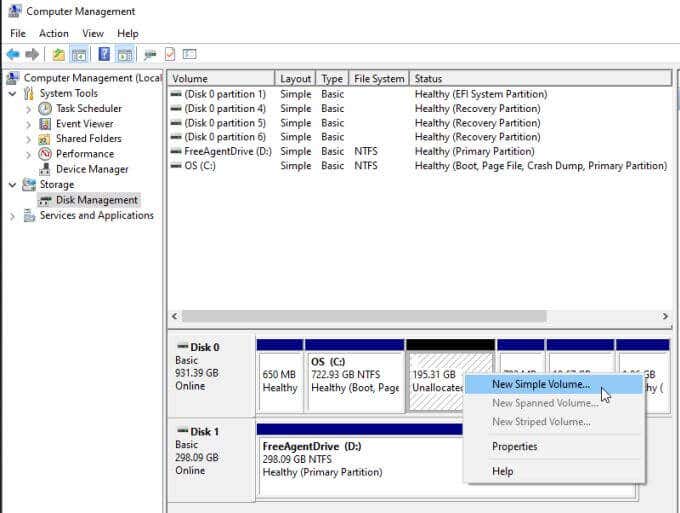
You’ll handle this Unallocated space differently depending what you want to use it for. If you’re only interested in using it as new storage space for data, just right-click the partition and select نیا سادہ حجم.
آپ make this an extended partition to store data.
If you’re interested in using it to dual boot your windows 10 PC with a Linux OS like Ubuntu, you can walk through our guide on dual booting Windows 10 with Ubuntu. Or follow our guide to dual boot Windows 10 with Mint.
You can also do both. If you create a dual boot system by installing Linux in a newly allocated partition, you could repeat the process above to create a third partition that can serve as shared data storage for both systems.
How you decide to use your newly allocated partition is completely up to you.