How to Install ADB on Windows 10: It is not possible to carry laptops or desktops everywhere you go. Instead, you carry mobile phones which you can use it for various purposes like calling, capturing photos, videos, documents, etc. But the problem with mobile phones is that it comes with limited memory and once the memory starts to fill up, then you need to transfer all or some of its data somewhere safe. And most people transfer their mobile data to their PC as its the only logical step. But the question arises how do you transfer your data from mobile phones to PCs?
The Answer to this question is ADB (Android Debug Bridge). So, the Windows is provided with ADB which allows you to connect your PCs to your android phones. Let’s dive in little more to understand what ADB is:
ADB: ADB stands for Android Debug Bridge which is a Software-interface for Android System. Technically, it is used to connect an android device with a computer using a USB cable or using wireless connections like Bluetooth. It also helps in executing commands on your mobile phone through your computers and allows you to transfer data from Android phones to your PC. ADB is part of Android SDK (Software Development Kit).
ADB can be used through Command Line (CMD) for Windows. Its main advantage is it enables to access phone contents like copy files from computer to phones or from phone to computer, install and uninstall any app and more, directly by using a computer without any actual interaction with the phone.
ونڈوز 10 پر ADB (Android Debug Bridge) کو کیسے انسٹال کریں۔
یہ بھی دیکھتے ہیں:
گوگل کروم کو ٹھیک کرنے کے ٹاپ 10 طریقے Android پر کریش ہوتے رہتے ہیں۔
ونڈوز 10 پر ڈسکارڈ انسٹالیشن کی خرابی کو ٹھیک کریں۔
متوازی جگہ کے بغیر ایک ہی ایپ کو دو بار کیسے انسٹال کریں۔
ونڈوز 10 پر ایک ساتھ دو ہیڈ فون کیسے استعمال کریں [اپ ڈیٹ 2023]
ونڈوز 11 میں اسٹارٹ مینو کی سفارشات کو کیسے ہٹایا جائے۔
In order to use ADB command line, you need to first install it on your computer. To install ADB in your computers follow the below steps:
Method 1 – Install Android SDK Command Line Tools
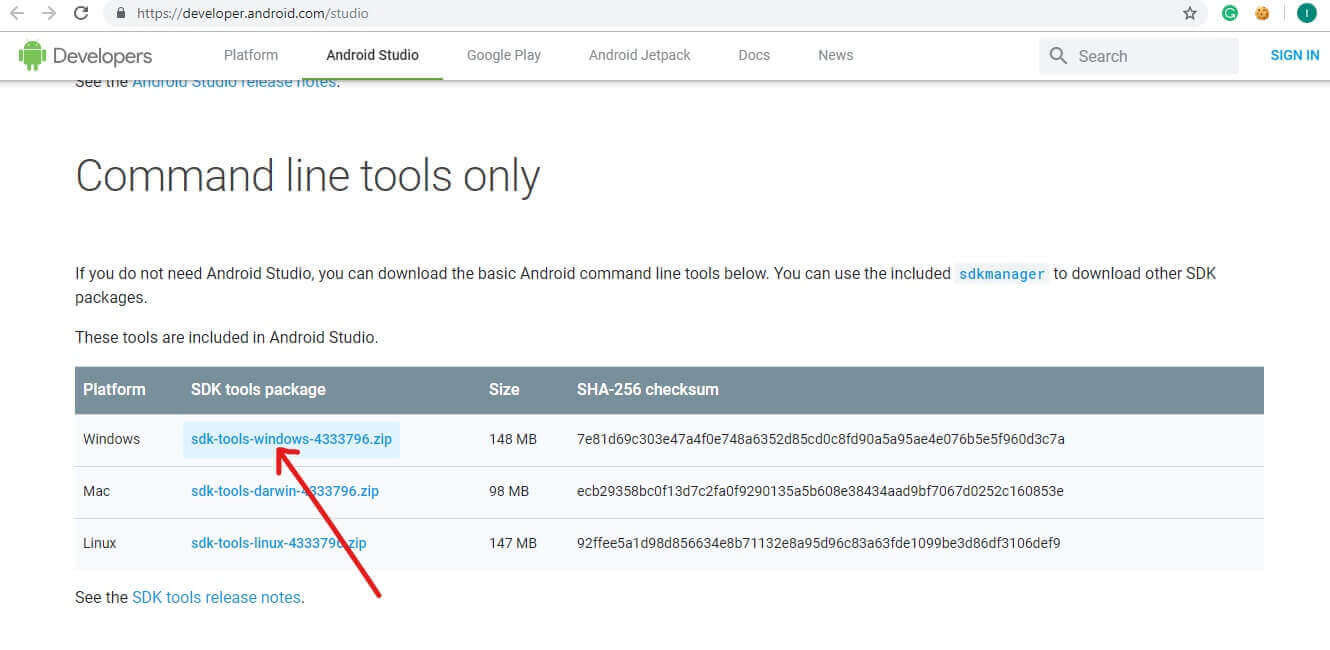
1.Visit the website and navigate to Command line tools only. Click on sdk-tools-windows to download SDK tools for Windows.
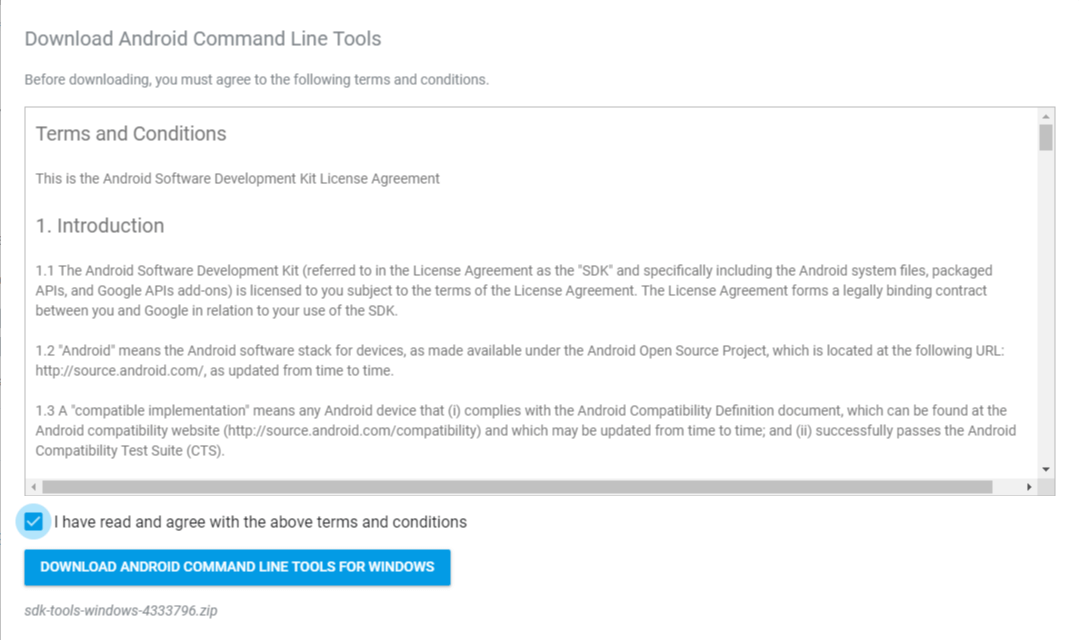
2.باکس کو چیک کریں near to “I have read and agree to the above terms and conditions”. Then click on “Download Android Command Line Tools for Windows”. The download will begin shortly.
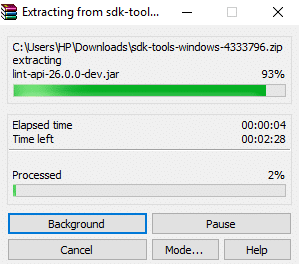
3.When the download completes, unzip the downloaded zip file. The ADB files under the zip are portable so you can extract them wherever you like.
4.Open unzipped folder.
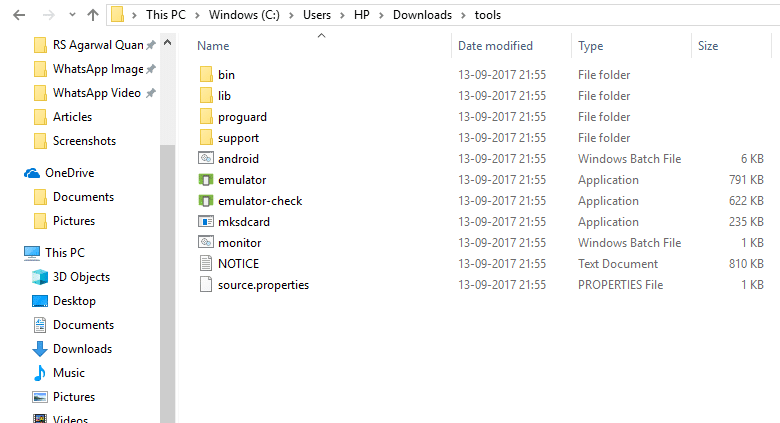
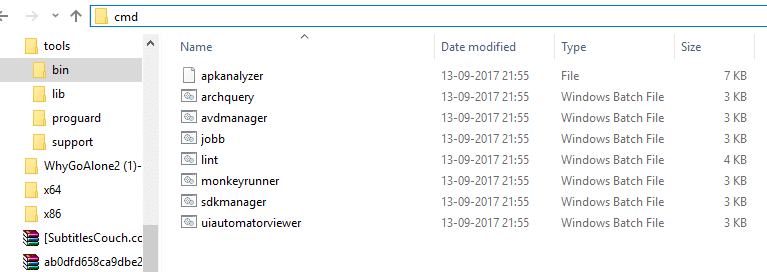
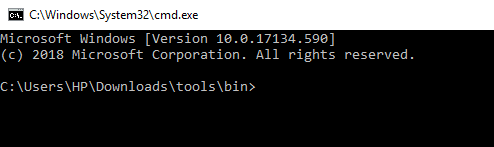
5.Now double-click on the bin folder to open it. Now type سییمڈی in the address bar of File Explorer and hit Enter to open کمانڈ پرامپٹ.
6.Command prompt will open up at the above path.
7.Run the below command on command prompt to download and install Android SDK Platform-tools:
“platform-tools” “platforms;android-28”
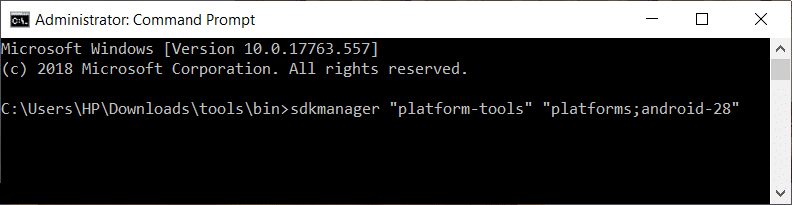
8.You will prompt to type (y/N) for permission. Type y for yes.
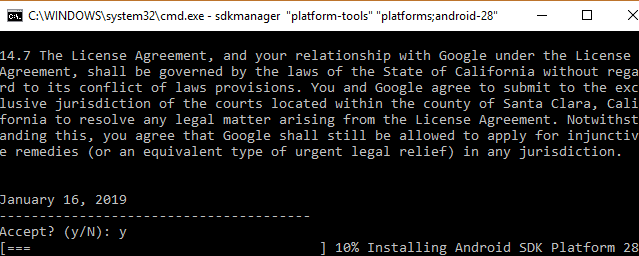
9.As soon as you type yes, downloading will start.
10.After downloading is completed, close the command prompt.
All your Android SDK platform tools will be downloaded and installed by now. Now you have successfully install ADB on Windows 10.
Method 2 – Enable USB Debugging on Phone
To use ADB command line tool, first, you need to enable the USB debugging feature آپ کے اینڈرائیڈ فون کا۔ To do so follow the below steps:
1.Open your phone ترتیبات اور پر کلک کریں فون کے بارے میں.
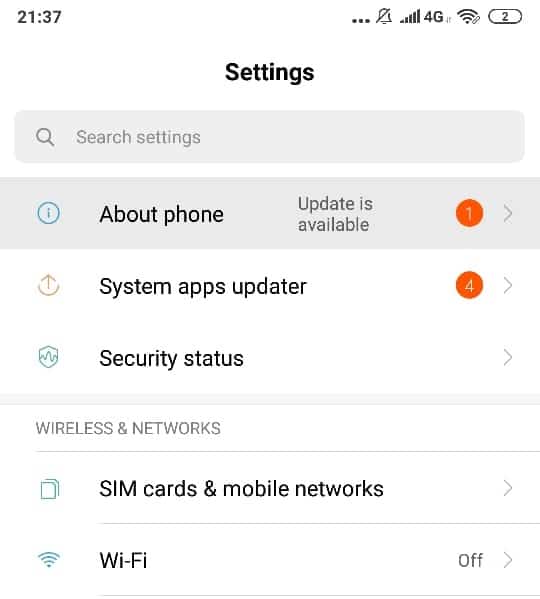
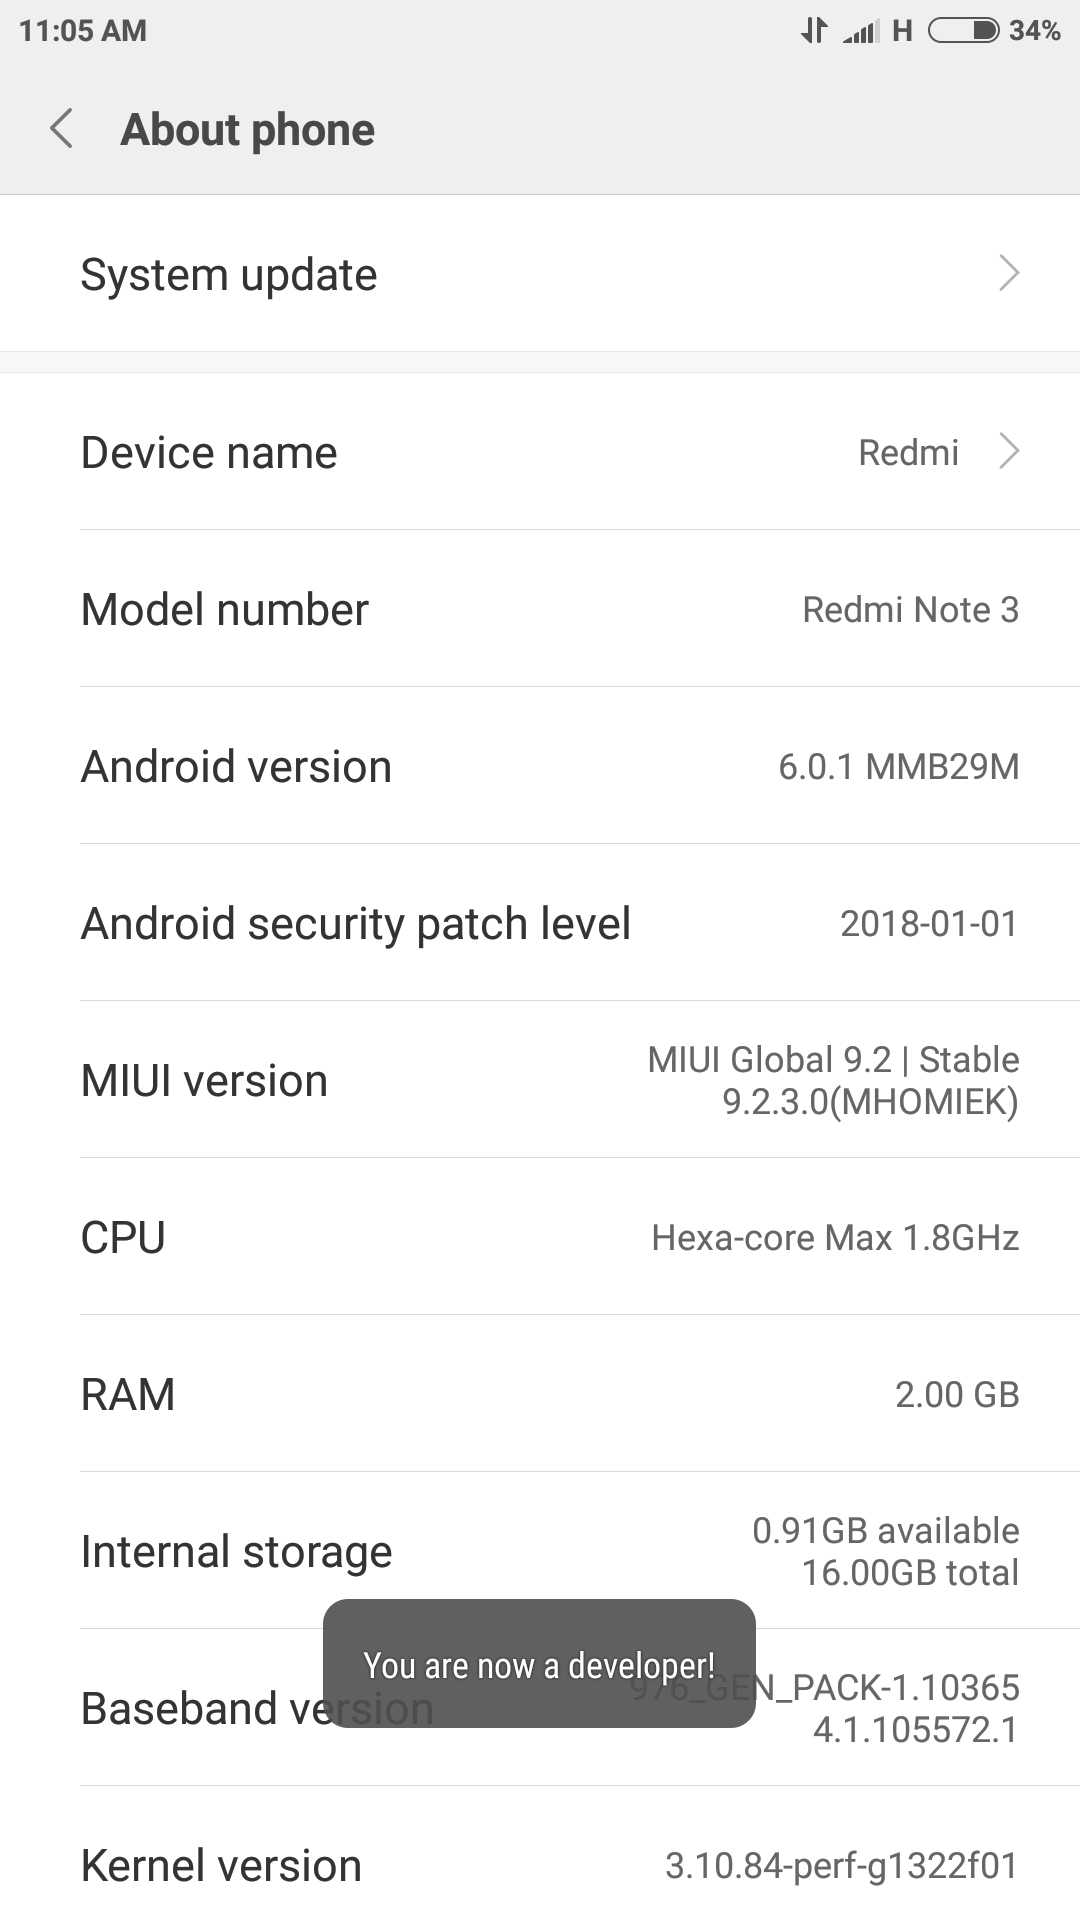
2.Under About phone, look for Build Number or MIUI Version.
3.Tap 7-8 times on the build number and then you will see a pop saying “اب آپ ایک ڈویلپر ہیں!” on your screen.
4.Again go back to the Settings screen and look for the اضافی ترتیبات آپشن.
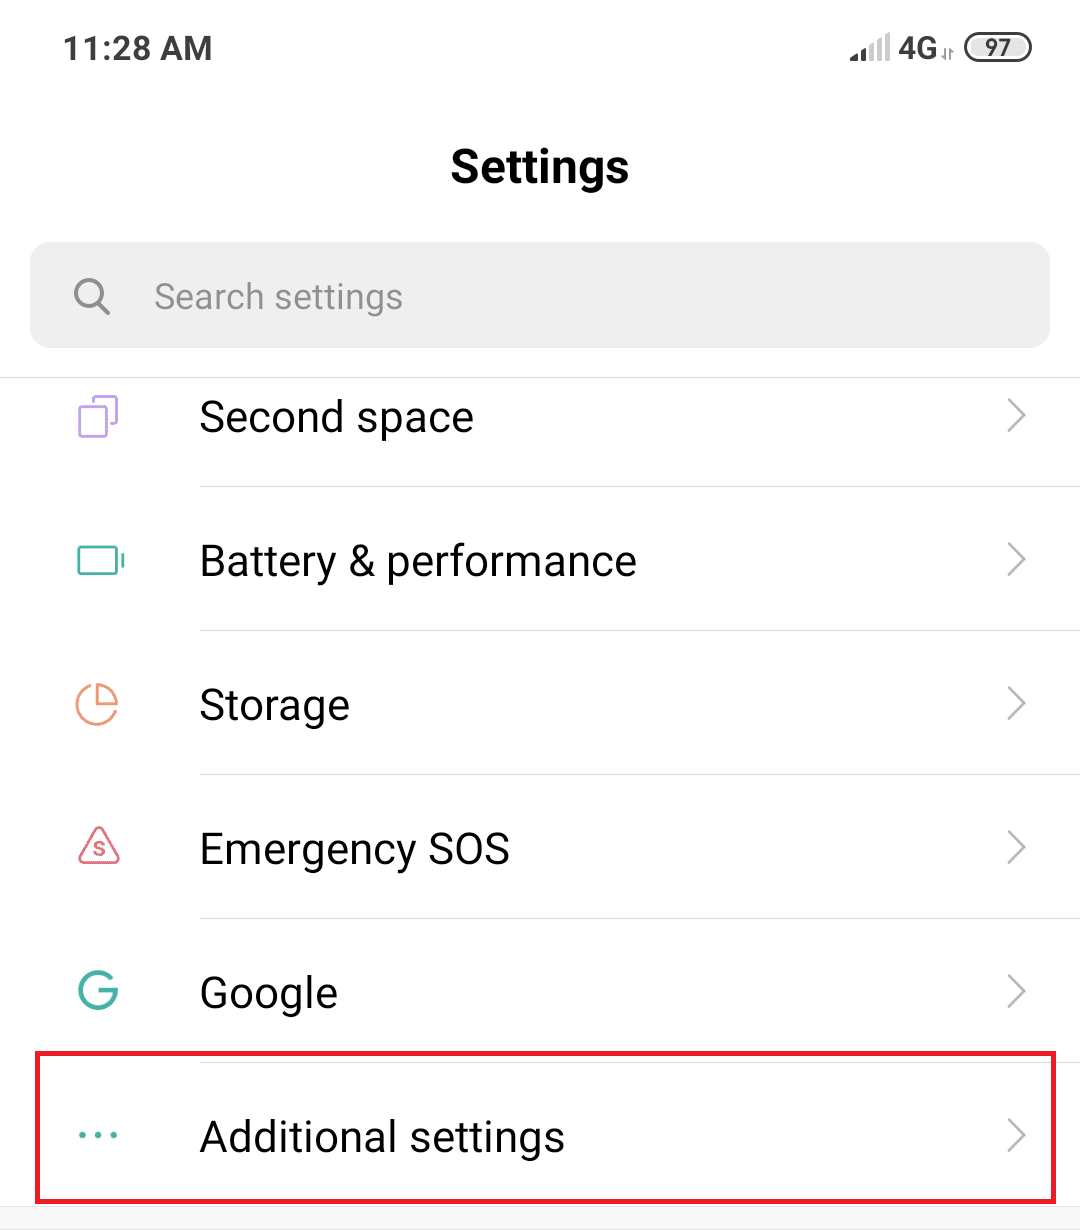
5.Under Additional settings, click on ڈویلپر کے اختیارات.
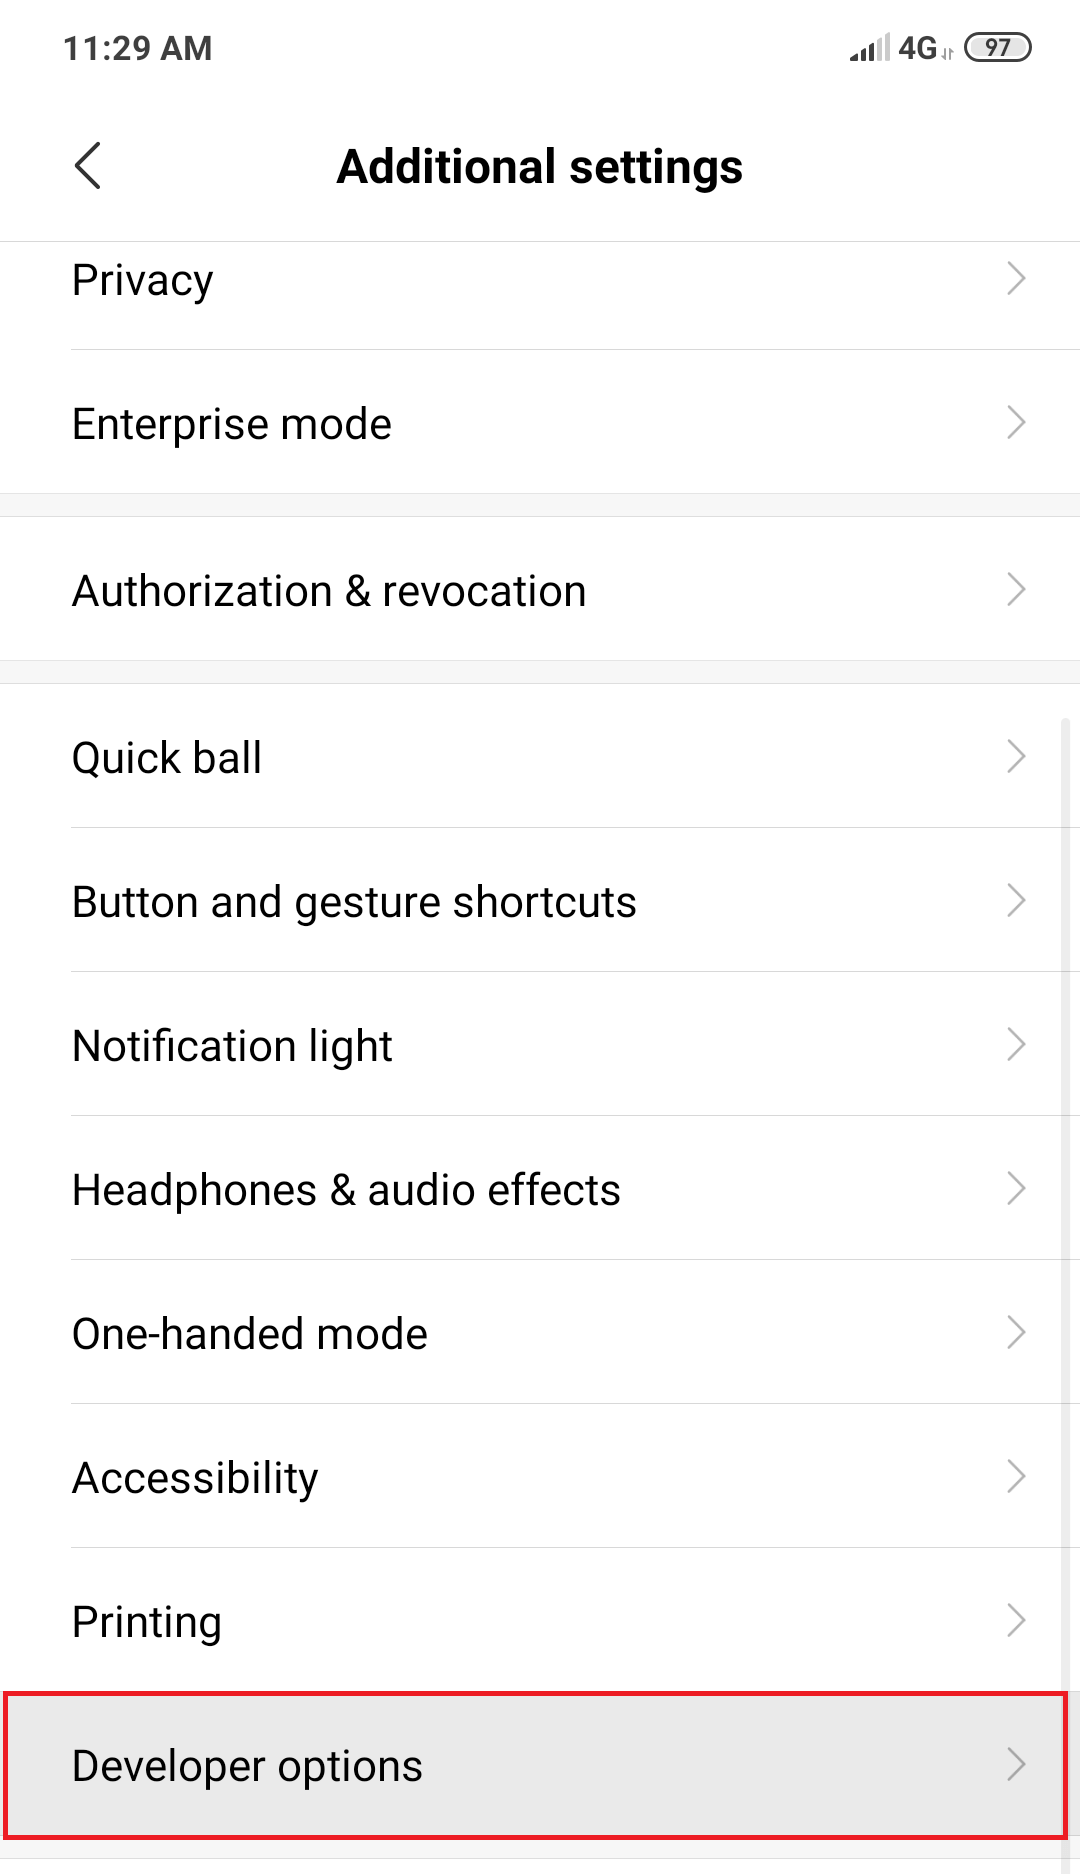
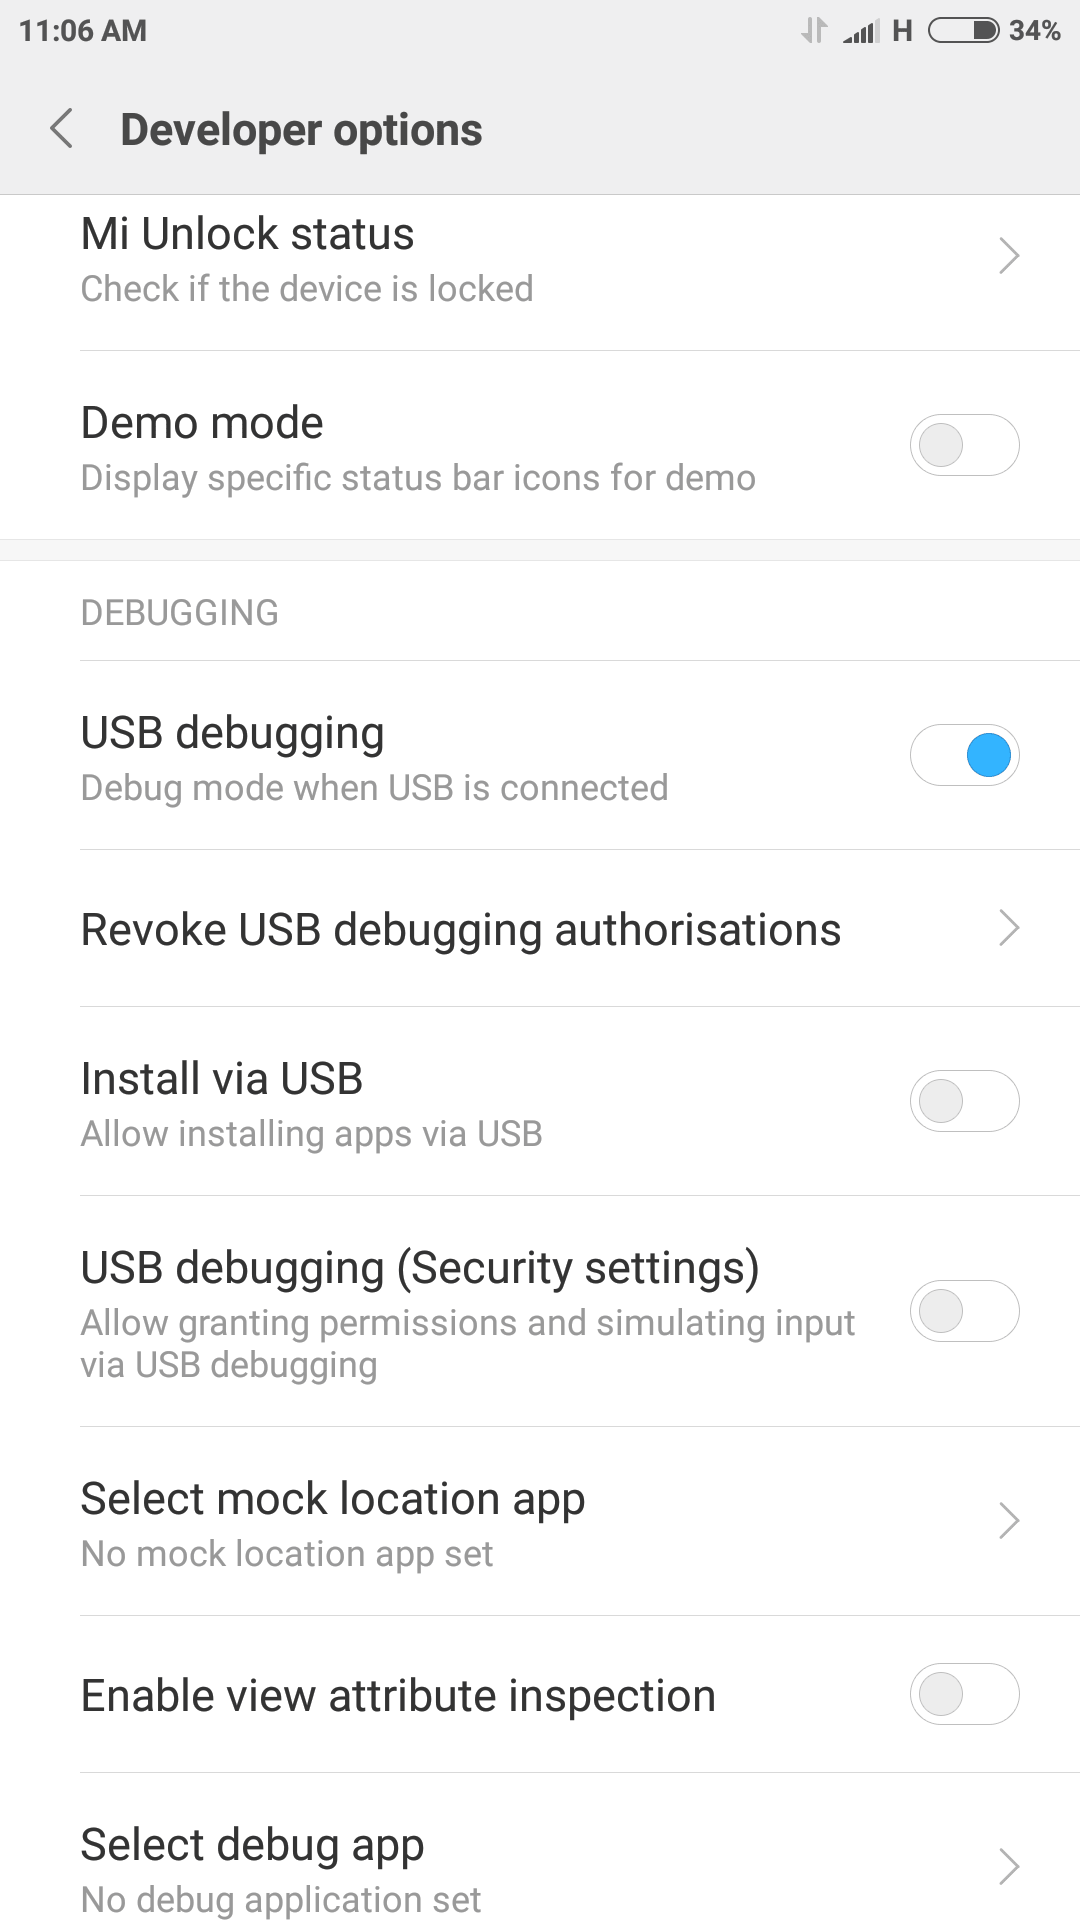
6.Under Developer options, look for USB debugging.
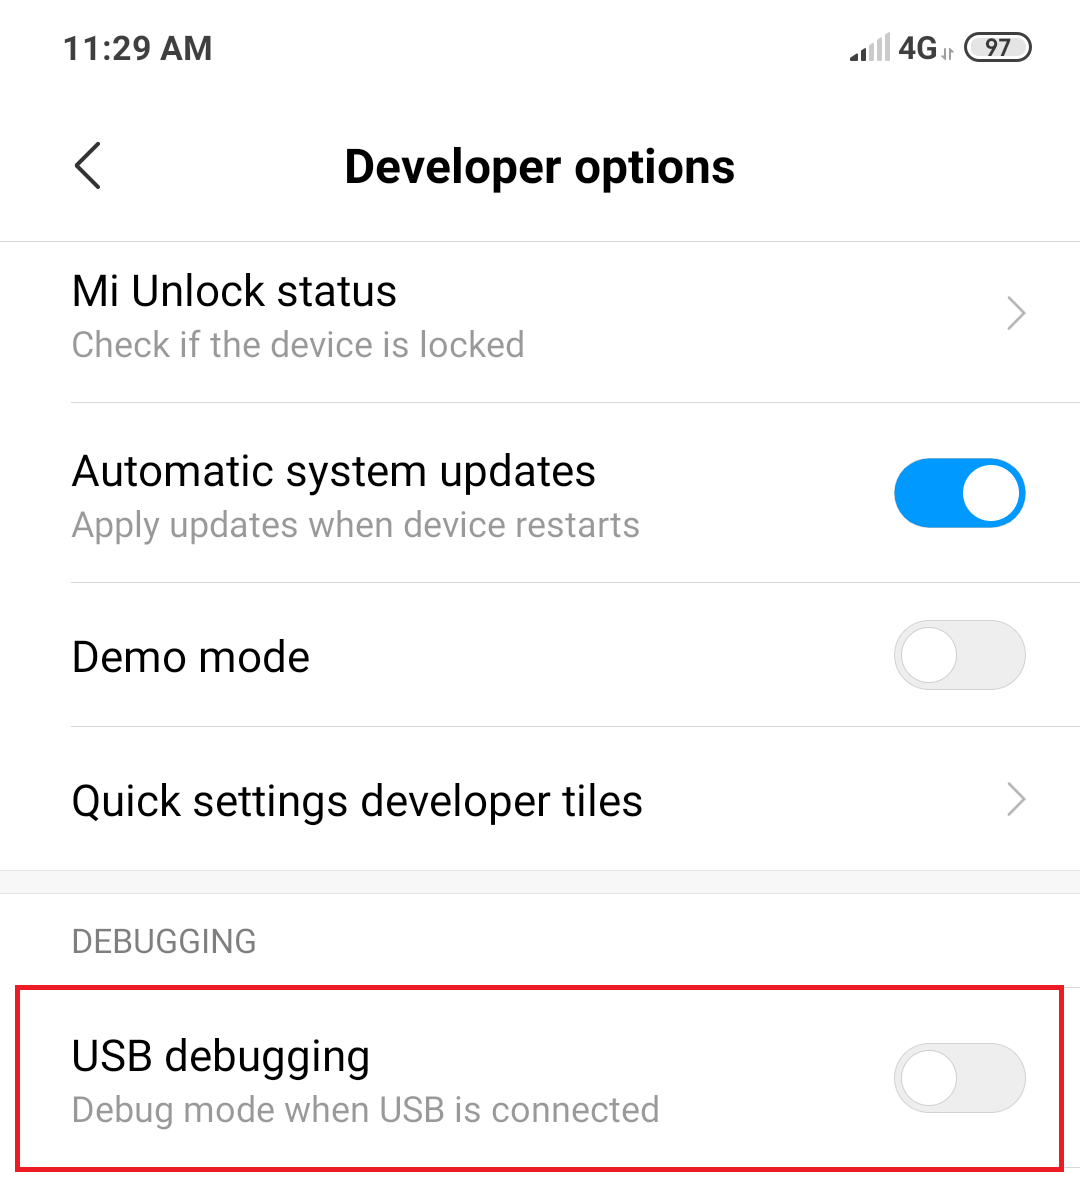
7.Toggle on the button in front of USB debugging. A confirmation message will appear on the screen, just click ٹھیک ہے.
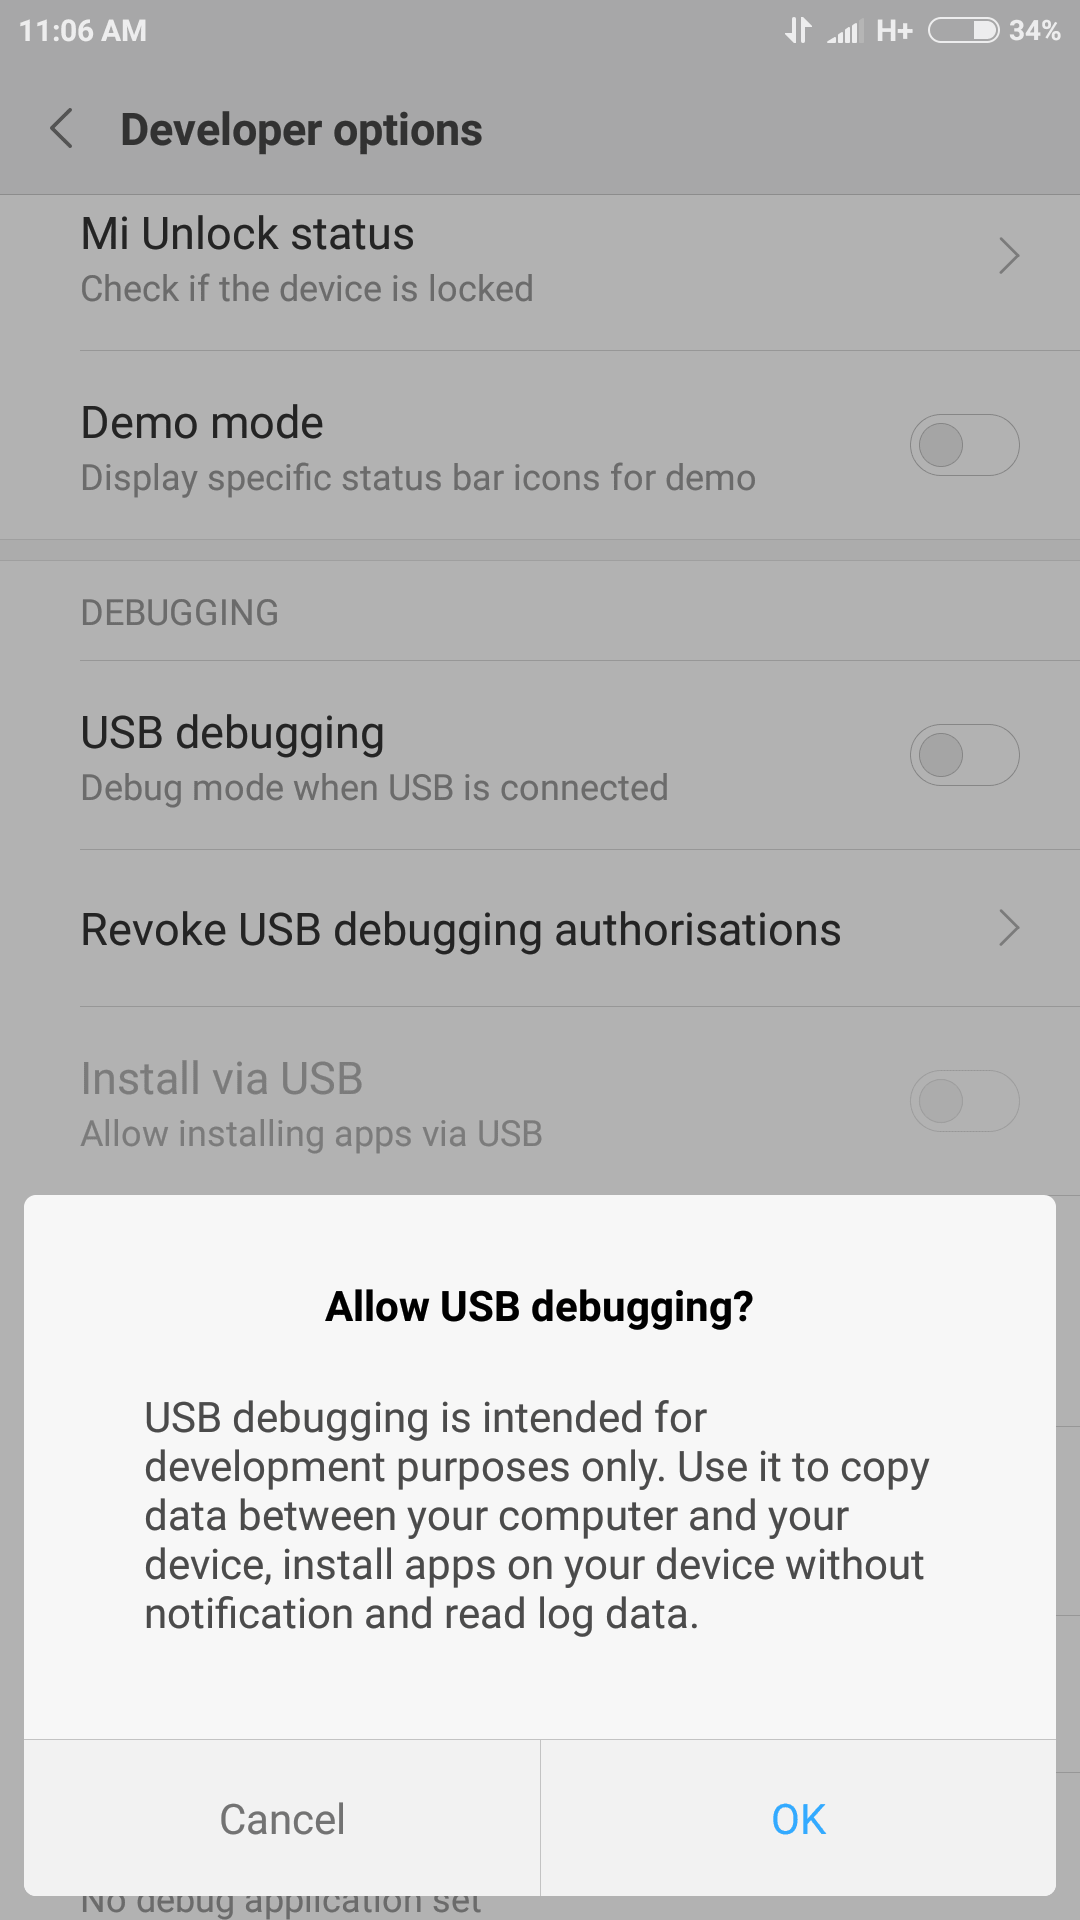
8. آپ کا USB ڈیبگنگ فعال ہے۔ اور استعمال کے لئے تیار ہے۔
Once you have followed the above steps, then connect your Android phone to the PC, it will ask for confirmation to allow using USB Debugging on your Phone, just click OK to allow it.
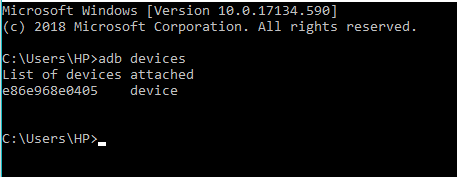
Method 3 – Test ADB (Android Debug Bridge)
Now you need to test the SDK platform tools and see if it is working properly & compatible with your device.
1.Open the folder where you have downloaded and installed the SDK platform tools.
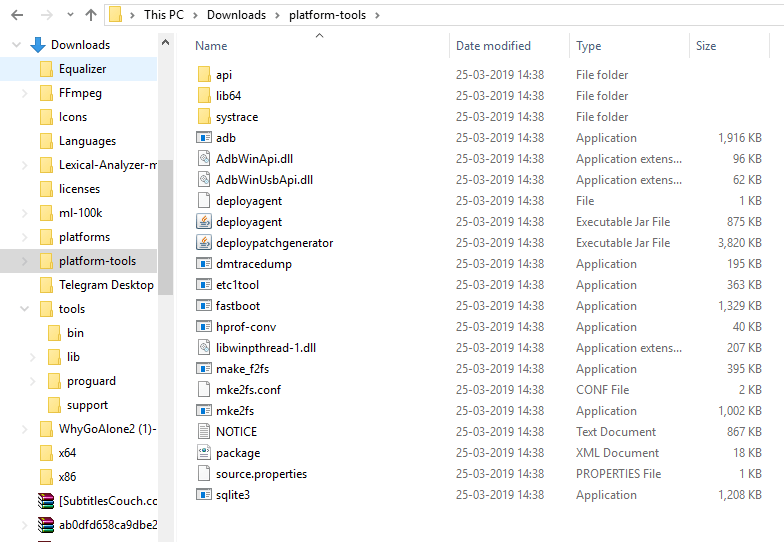
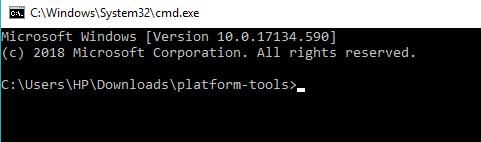
2.Open کمانڈ پرامپٹ by typing cmd in the address bar and hit Enter. The command prompt will open up.
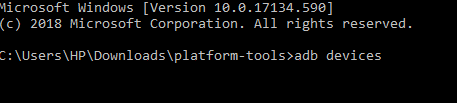
3.Now connect your Android phone to Computer using the USB cable to test whether or not ADB is working properly. To test it, run the following command into cmd and hit Enter:
"ایڈب ڈیوائسز"
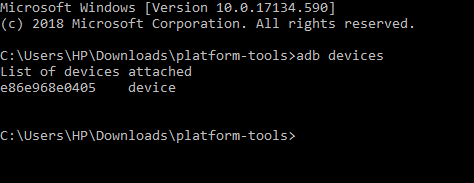
4.List of all the devices connected to your computer will appear and your Android device will be one of them.
Now you have install ADB on Windows 10, enabled the USB debugging option on Android and have tested ADB on your device. But, if you did not find your device in the above list then you will need to install the appropriate driver for your device.
Method 4 – Install Appropriate Driver
نوٹ:This step is only needed if you did not find your device in the above list when you ran the command “adb devices”. If you already found your device on the above list then skip this step and proceed to the next one.
First, download the driver package for your device from your phone’s manufacturer. So head to their website and find the drivers for your device. You can also search the XDA ڈویلپرز for driver downloads without the extra software. Once you have downloaded the driver, you need to install them using the following guide:
1. ونڈوز کی + R دبائیں پھر ٹائپ کریں۔ devmgmt.msc اور ڈیوائس مینیجر کو کھولنے کے لیے Enter کو دبائیں۔

2.From Device Manager click on Portable devices.
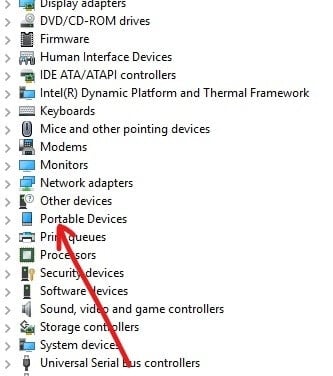
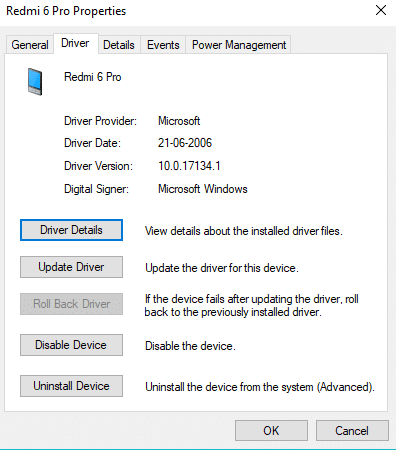
3.You will find your Android phone under Portable Devices. دایاں کلک کریں on it and then click on پراپرٹیز.

4. پر سوئچ کریں۔ ڈرائیور tab under your Phone Properties window.
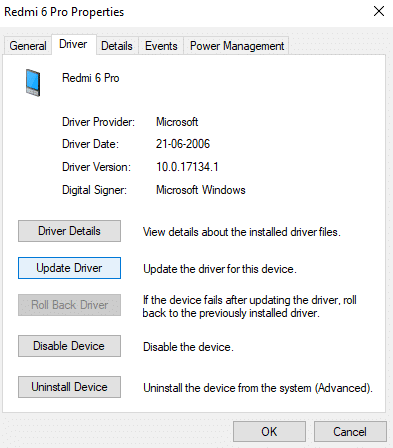
5.Under the Driver tab, click on ڈرائیور کو اپ ڈیٹ کریں.
6.A dialogue box will appear. Click on ڈرائیور کے سافٹ ویئر کیلئے میرے کمپیوٹر کو براؤز کریں.
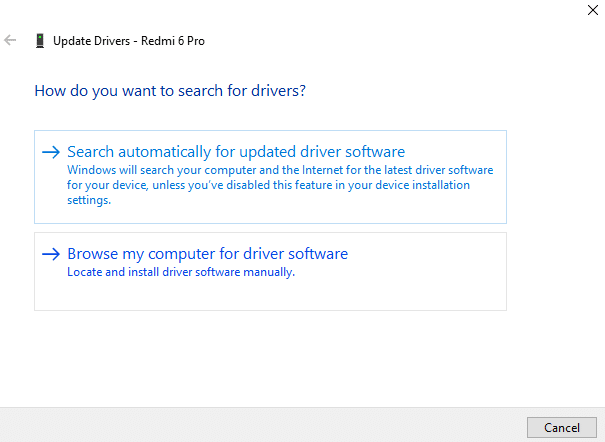
7.Browse to look for driver software on your computer and click اگلا.
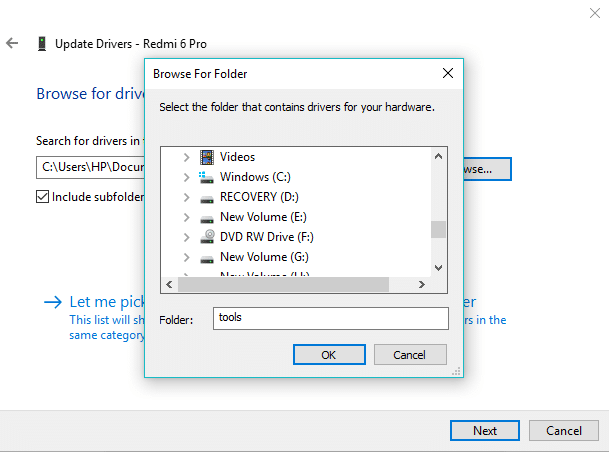
8.List of available drivers will appear and click on انسٹال انہیں انسٹال کرنے کے لئے.
After completing the above process, follow Method 3 again and now you will find your device in the list of devices attached.
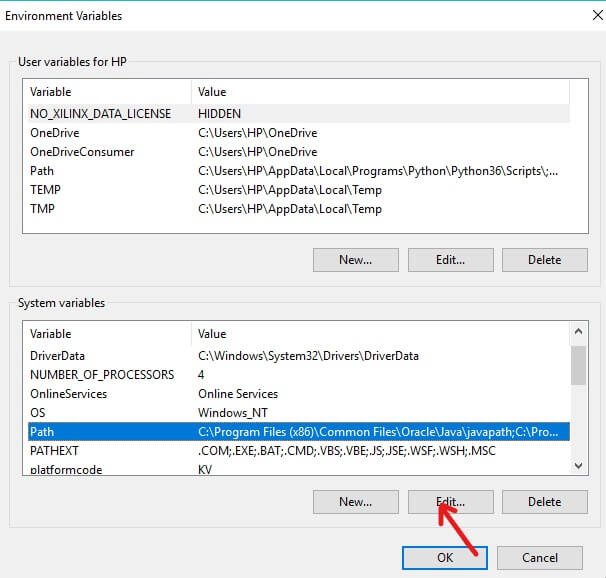
Method 5 – Add ADB to System Path
This step is optional as the only advantage of this step is that you won’t need to visit the whole ADB folder to open the Command Prompt. You will be able to open the Command Prompt whenever you want to use after adding the ADB to the Windows System Path. Once you have added it, you can simply type adb from the Command Prompt window whenever you want to use it and no matter which folder you are in. To add ADB to Windows System Path follow below steps:
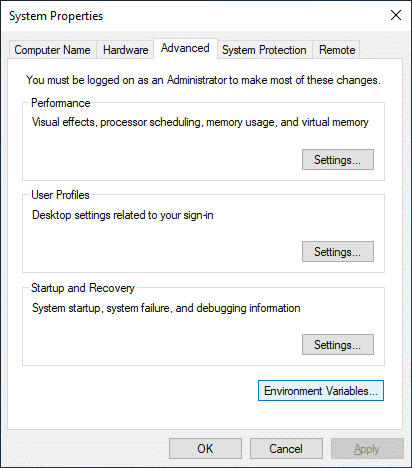
1. ونڈوز کی + R دبائیں پھر ٹائپ کریں۔ sysdm.cpl اور کھولنے کے لئے درج کریں پر دبائیں سسٹم پراپرٹیز۔

2. پر سوئچ کریں۔ اعلی درجے کی ٹیب۔
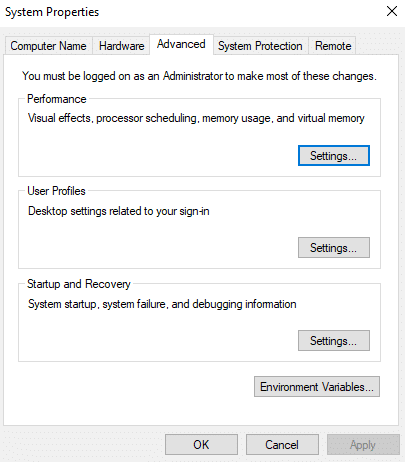
3.Cick on ماحولیاتی تغیرات بٹن پر کلک کرنا ہے۔
4.Under System Variables, look for a variable PATH.
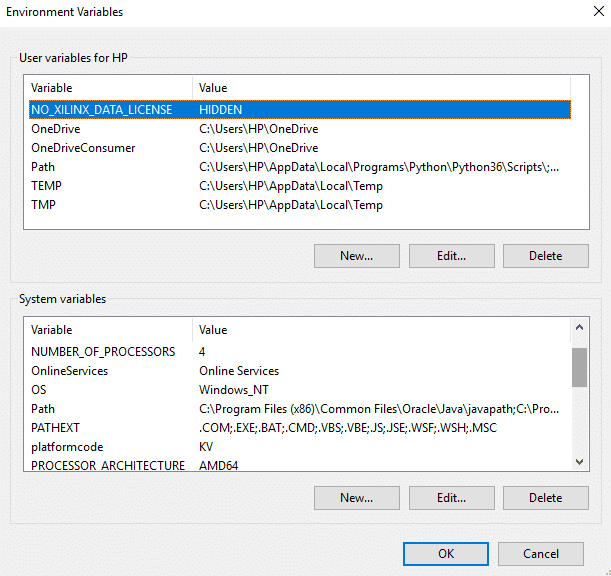
5.Select it and click on ترمیم کا بٹن۔
6.A new dialogue box will appear.
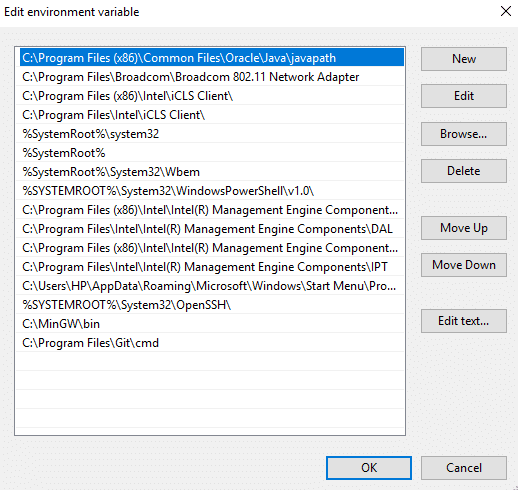
7.Cick on New button. It will add a new line at the end of the list.
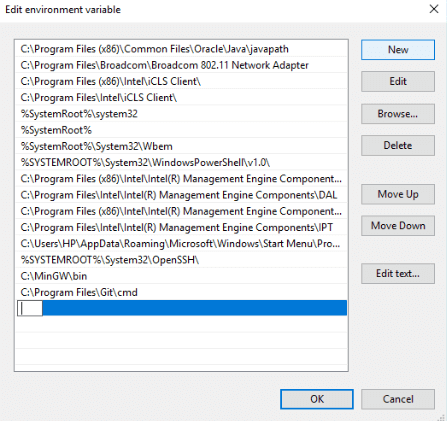
8.Enter the whole path (address) where you have downloaded and installed the SDK platform tools.
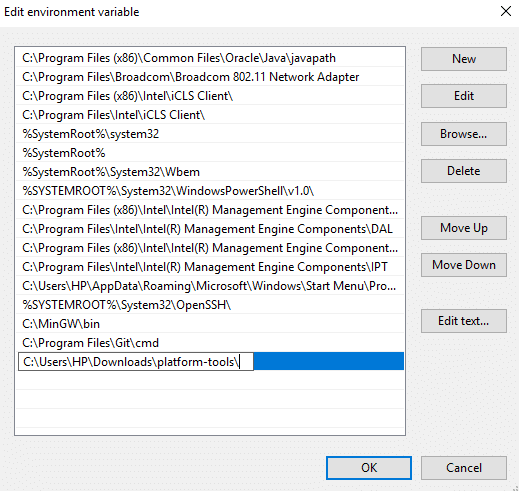
9.Once finished, click on the Ok button.
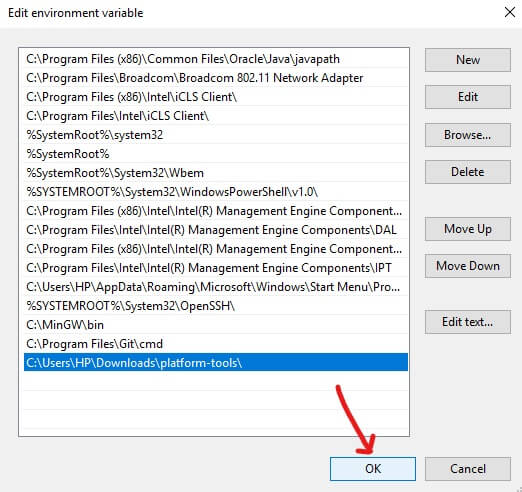
10.After completing the above process, now ADB can be accessed from the command prompt anywhere without needing to mention the whole path or directory.
سفارش کی جاتی ہے:
مجھے امید ہے کہ یہ مضمون مددگار تھا اور اب آپ آسانی سے کر سکتے ہیں۔ Install ADB on Windows 10, لیکن اگر آپ کے پاس اب بھی اس ٹیوٹوریل کے بارے میں کوئی سوال ہے تو بلا جھجھک ان سے تبصرے کے سیکشن میں پوچھیں۔


 on Windows 10)