Synchronize Windows 10 Clock with an Internet Time Server

Synchronize Windows 10 Clock with an Internet Time Server: If you have set the Clock in Windows 10 to automatically set time then you may be aware that the current time is synchronized with an Internet Time Server in order to update time. This means that the clock on your PC’s Taskbar or Windows Settings is updated at regular intervals to match the time on the time server which ensures that your clock has accurate time. You need to be connected to the internet for time to automatically synchronize with an Internet time server without which the time won’t be updated.
Now Windows 10 uses the Network Time Protocol (NTP) to connect with the Internet time servers in order to synchronize Windows Clock. If the time in Windows Clock is not accurate then you could face network issues, corrupted files, and incorrect timestamps in documents & important files. With Windows 10 you could easily change the time servers or can even add a custom time server when necessary.
So now you know it’s important for your Windows to display the correct time in order to ensure proper functioning of your PC. Without which certain applications and Windows services will start experiencing issues. So without wasting any time let’s see How to Synchronize Windows 10 Clock with an Internet Time Server with the help of the below-listed tutorial.
How to Synchronize Windows 10 Clock with an Internet Time Server
کچھ غلط ہونے کی صورت میں بحالی پوائنٹ بنانا یقینی بنائیں۔
Method 1: Synchronize Windows 10 Clock with an Internet Time Server in Internet Time Settings
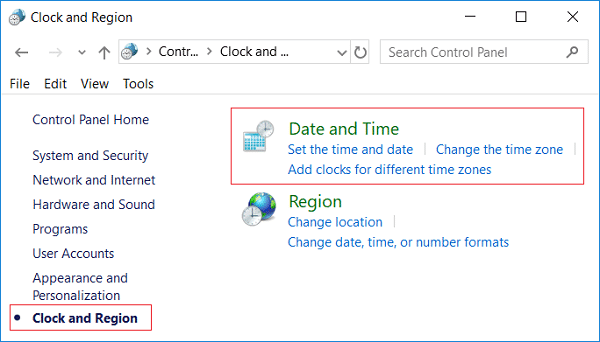
1 ٹائپ کنٹرول in Windows 10 Search then click on کنٹرول پینل تلاش کے نتائج سے

2. اب "پر کلک کریںگھڑی، زبان، اور علاقہ"پھر کلک کریں"تاریخ اور وقت".
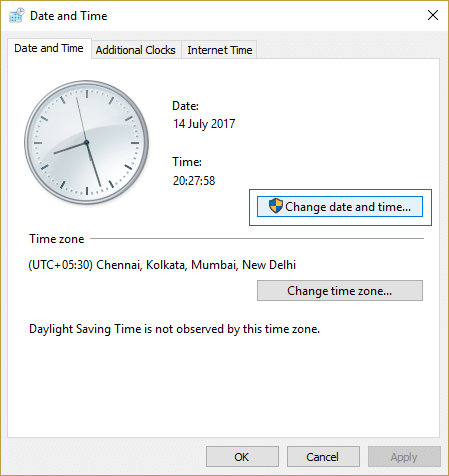
3.Under Date and Time window click “تاریخ اور وقت تبدیل کریں۔".
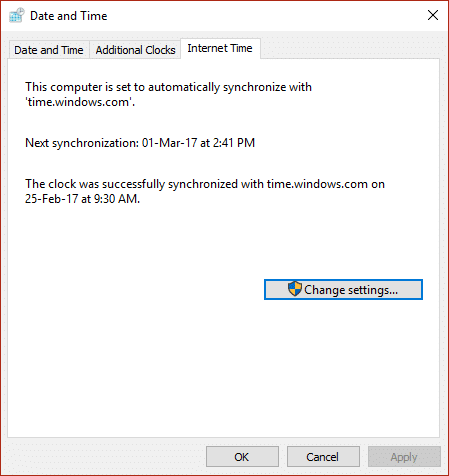
4.Switch to Internet Time then click on “سیٹنگ کو تبدیل کریں".
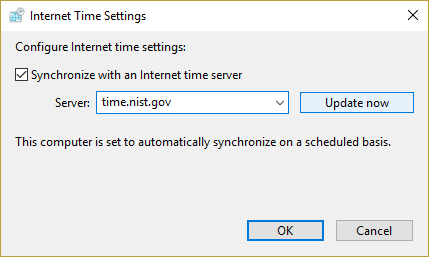
5. چیک مارک کرنا یقینی بنائیں "انٹرنیٹ ٹائم سرور کے ساتھ ہم وقت سازی کریں۔” box, then select a time server from the Server drop-down and click Update Now.
6.Click Ok then click Apply followed by OK again.
7.If the time is not updated then choose a different Internet time server and again click Update now.

8. تبدیلیوں کو بچانے کے لیے اپنے کمپیوٹر کو دوبارہ بوٹ کریں۔
Method 2: Synchronize Windows 10 Clock with an Internet Time Server in Command Prompt
1. Windows Key + X دبائیں پھر منتخب کریں۔ کمانڈ پرپیٹ (ایڈمن).

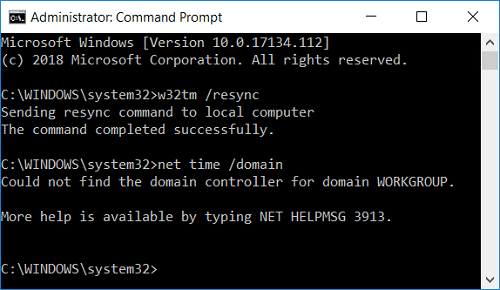
2. درج ذیل کمانڈ کو cmd میں ٹائپ کریں اور Enter دبائیں:
w32tm /resync۔
net time /domain
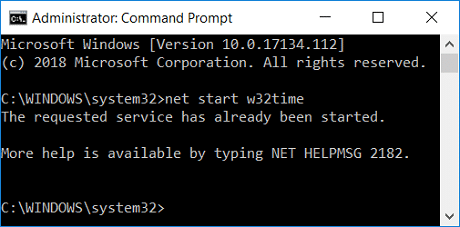
3.If you get a The service has not been started. (0x80070426) error، پھر آپ کو ضرورت ہے start Windows Time service.
4.Type the following command to start Windows Time service then again try to synchronize Windows Clock:
نیٹ اسٹارٹ ڈبلیو 32 ٹائم۔
5.Close Command Prompt and restart your PC.
Method 3: Change the Internet Time Synchronization Update Interval
1. ونڈوز کی + R دبائیں پھر ٹائپ کریں۔ کی regedit اور رجسٹری ایڈیٹر کھولنے کے لیے Enter کو دبائیں۔

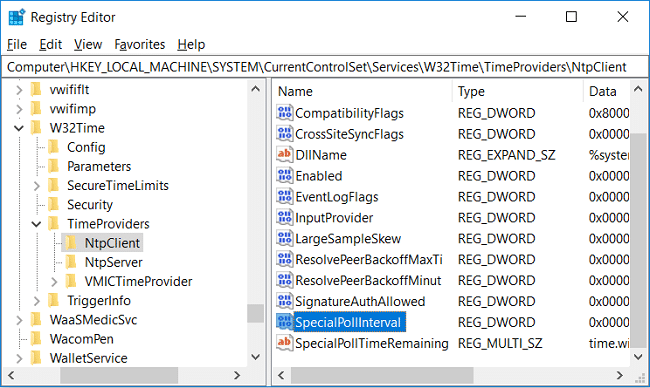
2. درج ذیل رجسٹری کلید پر جائیں:
ComputerHKEY_LOCAL_MACHINESYSTEMCurrentControlSetServicesW32TimeTimeProvidersNtpClient
3.Select NtpcClient then in right window pane double-click on اسپیشل پول انٹرول اس کی قیمت کو تبدیل کرنے کے لئے.
4.اب منتخب کریں۔ Decimal from the Base then in the Value date change the value to 86400.
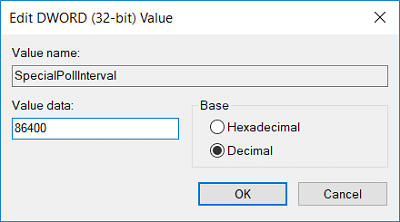
نوٹ: 86400 seconds (60 seconds X 60 minutes X 24 hours X 1 day) which means that the time will be updated every day. The default time is every 604800 seconds (7 days). Just make sure not use the time interval less than 14400 seconds (4 hours) as your computer’s IP will get banned from the time server.
5.Click Ok then close Registry Editor.
6. تبدیلیوں کو بچانے کے لیے اپنے کمپیوٹر کو دوبارہ بوٹ کریں۔
Method 4: Add a new Internet time server on Windows 10
1.Type control in Windows 10 Search then click on کنٹرول پینل تلاش کے نتائج سے
2. اب "پر کلک کریںگھڑی، زبان، اور علاقہ"پھر کلک کریں"تاریخ اور وقت".
3.Under Date and Time window click “تاریخ اور وقت تبدیل کریں۔".
4. پر سوئچ کریں۔ انٹرنیٹ کا وقت پھر "پر کلک کریںسیٹنگ کو تبدیل کریں".
5. نشان زد کریں "انٹرنیٹ ٹائم سرور کے ساتھ ہم وقت سازی کریں۔” box then under Server type the address of the time server and click تازہ ترین کریں. جدید بنایں.
نوٹ: یہاں رجوع کریں for a list of the Simple Network Time Protocol (SNTP) time servers that are available on the Internet.
6.Click Ok then click Apply followed by OK again.
7. تبدیلیوں کو بچانے کے لیے اپنے کمپیوٹر کو دوبارہ بوٹ کریں۔
Method 5: Add a new Internet time server on Windows 10 using Registry
1. ونڈوز کی + R دبائیں پھر ٹائپ کریں۔ کی regedit اور کھولنے کے لئے درج کریں پر دبائیں رجسٹری ایڈیٹر۔
2. درج ذیل رجسٹری کلید پر جائیں:
HKEY_LOCAL_MACHINESOFTWAREMicrosoftWindowsCurrentVersionDateTimeServers
3. پر دائیں کلک کریں۔ سرورز پھر منتخب کریں نیا > سٹرنگ ویلیو۔
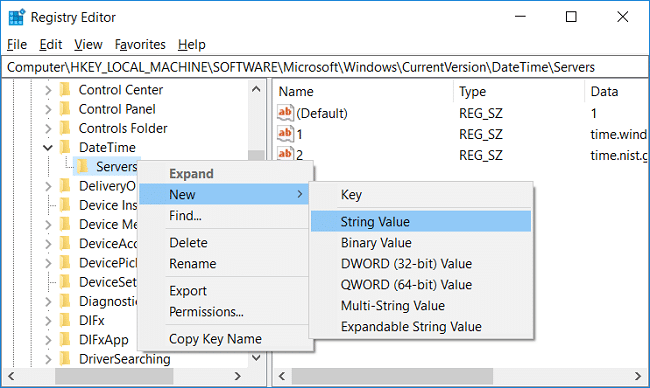
4.Type a number according to the position of the new server, for example, if there are already 2 entries then you have to name this new string as 3.
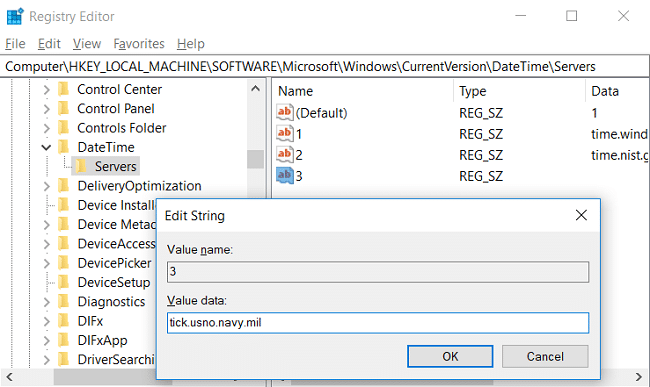
5.Now double-click on this newly created String Value to change its value.
6. اگلا، type the address of the time server then click OK. For example, if you want to use Google Public NTP server then enter time.google.com.
نوٹ: یہاں رجوع کریں for a list of the Simple Network Time Protocol (SNTP) time servers that are available on the Internet.
7. تبدیلیاں محفوظ کرنے کے لیے اپنے کمپیوٹر کو دوبارہ شروع کریں۔
If you’re still facing in synchronizing Windows 10 Clock then fix them using the below-listed steps:
نوٹ: This will remove all your custom servers from Registry.
1. Windows Key + X دبائیں پھر منتخب کریں۔ کمانڈ پرامپٹ (ایڈمن)

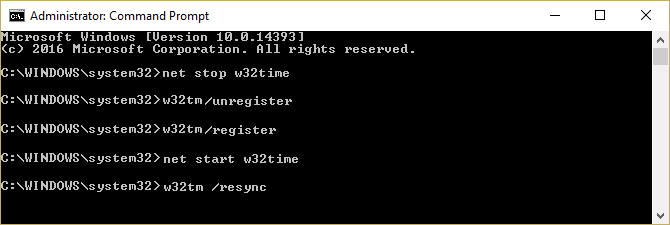
2. درج ذیل کمانڈ کو cmd میں ٹائپ کریں اور Enter دبائیں:
netstop w32time
w32tm /غیر رجسٹر
w32tm /رجسٹر
نیٹ اسٹارٹ ڈبلیو 32 ٹائم۔
w32tm /resync /nowait
3. تبدیلیاں محفوظ کرنے کے لیے اپنے کمپیوٹر کو دوبارہ شروع کریں۔
سفارش کی جاتی ہے:
یہ آپ نے کامیابی سے سیکھا ہے۔ How to Synchronize Windows 10 Clock with an Internet Time Server but if you still have any queries regarding this tutorial then feel free to ask them in the comment’s section.