- in cửa sổ by quản trị viên
Change Diagnostic and Usage Data Settings in Windows 10

Change Diagnostic and Usage Data Settings in Windows 10: You must be aware of the Diagnostic and Usage Data Settings which allows Microsoft to collect performance and usage information which helps Microsoft to troubleshoot issues with Windows and improve their product & services and resolve bugs as soon as possible. But the best part of this feature is that you can actually control the amount of diagnostic and usage data sent to Microsoft from your system.
You can select to only send basic diagnostic information which contains info about your device, its settings, and capabilities or you can select the Full diagnostic information which contains all the information about your system. You can also delete the Windows Diagnostic Data that Microsoft has collected from your device. Anyway, without wasting any time let’s see How to Change Diagnostic and Usage Data Settings in Windows 10 with the help of the below-listed tutorial.
Change Diagnostic and Usage Data Settings in Windows 10
Đảm bảo tạo điểm khôi phục đề phòng trường hợp xảy ra sự cố.
The initial settings can be configured during the Windows Setup when you get to Choose privacy settings for your device simply enable the toggle for Diagnostics to select “Full” and leave it disabled if you want to set Diagnostic and usage data collection policy to “Basic”.
Method 1: Change Diagnostic and Usage Data Settings in Settings App
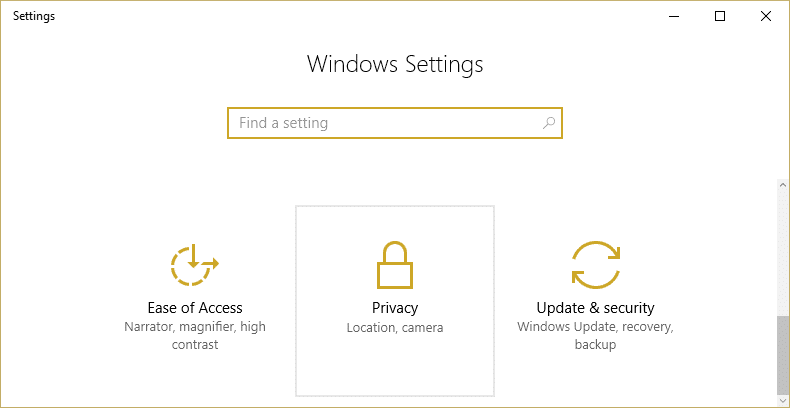
1. Nhấn phím Windows + I để mở Cài đặt sau đó bấm vào Biểu tượng quyền riêng tư.
2.Từ menu bên trái, chọn Diagnostics & feedback.
3.Now either select Basic or Full for the Diagnostic and usage data.
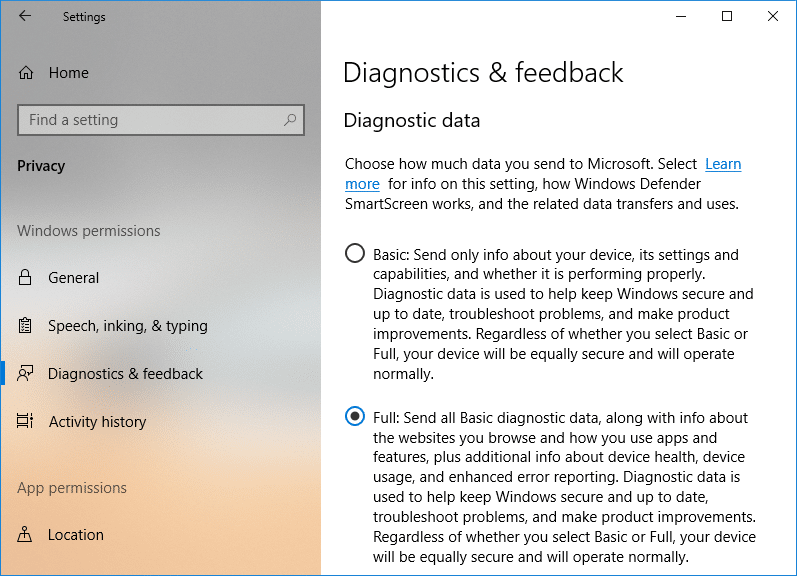
Lưu ý: By default, the setting is set to “Full”.
4.Once finished, close the setting and reboot your PC.
Cũng đọc: Quest Diagnostics có thực hiện được bước đi không?
Method 2: Change Diagnostic and Usage Data Settings in Registry Editor
1. Nhấn phím Windows + R rồi gõ regedit và nhấn Enter để mở Đăng ký biên tập.

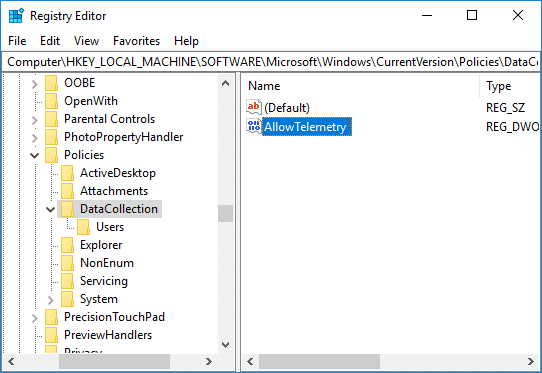
2. Điều hướng đến khóa đăng ký sau:
HKEY_LOCAL_MACHINESOFTWAREMicrosoftWindowsCurrentVersionPoliciesDataCollection
3. Đảm bảo chọn Thu thập dữ liệu sau đó trong khung cửa sổ bên phải nhấp đúp chuột vào AllowTelemetry DWORD.
4.Now make sure to change the value of the AllowTelemetry DWORD according to:
0 = Security (Enterprise and Education editions only)
1 = Basic
2 = Enhanced
3 = Full (Recommended)
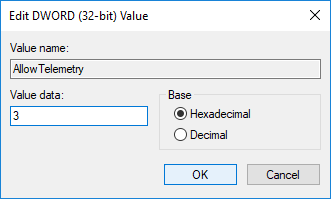
5.Once done, make sure to click OK and close registry editor.
Method 3: Change Diagnostic and Usage Data Settings in Group Policy Editor
1. Nhấn phím Windows + R rồi gõ gpedit.msc và nhấn Enter để mở Trình chỉnh sửa chính sách nhóm.
2.Điều hướng đến đường dẫn sau:
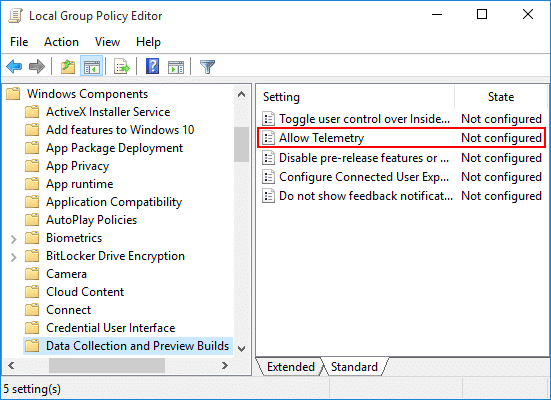
Computer ConfigurationAdministrative TemplatesWindows ComponentsData Collection and Preview Builds
3.Make sure to select Data Collection and Preview Builds then in right window pane double-click on Allow Telemetry Policy.
4.Now to restore default diagnostic and usage data collection setting simply select Not Configured or Disabled for Allow Telemetry policy and click OK.

5.If you want to force a diagnostic and usage data collection setting then chọn Đã bật for Allow Telemetry policy and then under Options select Security (Enterprise Only), Basic, Enhanced, or Full.
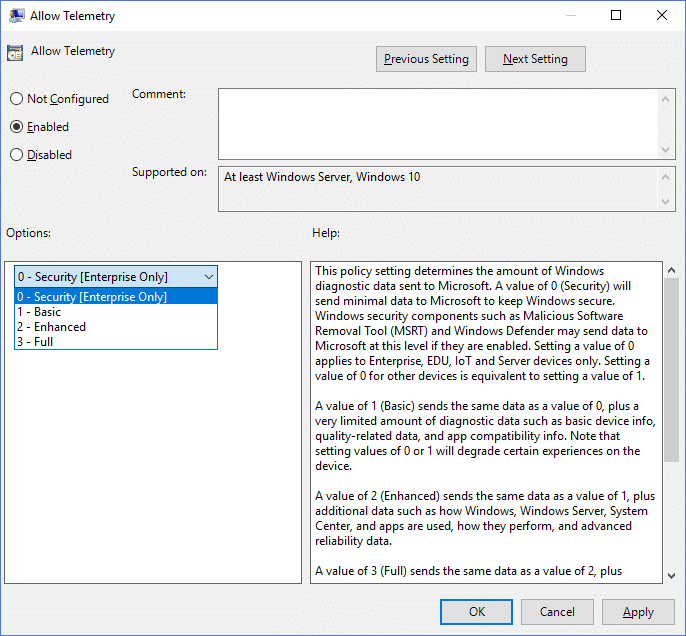
6.Nhấp vào Áp dụng theo sau là OK.
7.When finished, reboot your PC to save changes.
Đề nghị:
Thế là bạn đã học thành công How to Change Diagnostic and Usage Data Settings in Windows 10 nhưng nếu bạn vẫn có bất kỳ thắc mắc nào liên quan đến hướng dẫn này thì vui lòng hỏi họ trong phần bình luận.