- in cửa sổ by quản trị viên
How to Disable Live Tiles in Windows 10 Start Menu

Live tiles in Windows 10 Start Menu display information at a glance without opening the app. Also, Live tiles show live previews of application content and show notifications to the users. Now, many users don’t want these Live tiles in their Start Menu as they consume a lot of data to update the previews. Now Windows 10 have an option to disable particular applications Live tiles, and you just have to right-click on a tile and select “Turn live tile off” option.
But if you want to disable the Live tile preview for all the applications completely, then there are no such settings in Windows 10. But there is a registry hack through which this can be easily achieved. So without wasting any time let’s see How to Disable Live Tiles in Windows 10 Start Menu with the help of the below-listed guide.
Đảm bảo tạo điểm khôi phục đề phòng trường hợp xảy ra sự cố.
Although this will only work for a particular application, this method is sometimes useful if you want to disable the Live tiles for a particular app.
1. Nhấp vào Bắt đầu hoặc báo chí Khóa Windows trên bàn phím
2. Nhấp chuột phải vào particular app, then selects “Bỏ ghim từ Bắt đầu".

3. This will successfully remove the particular tile from the Start Menu.
Method 2: Turn Off Live Tiles
1. Nhấp vào Bắt đầu hoặc báo chí Khóa Windows trên bàn phím
2. Nhấp chuột phải vào particular app sau đó chooses More.
3. From the Choose menu, click on “Tắt Ngói sống".
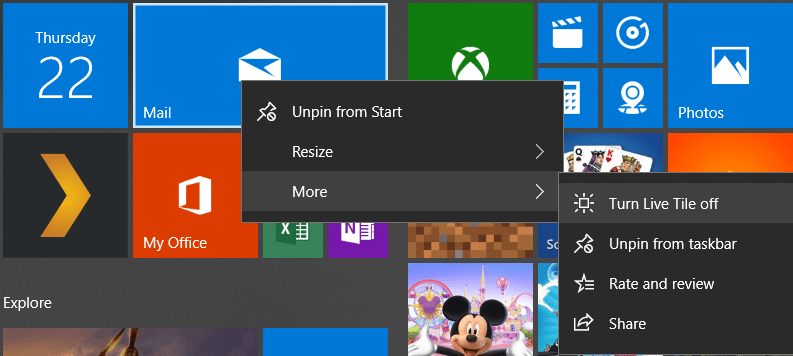
4. This will disable Live tiles in Windows 10 Start Menu for a particular app.
Method 3: Disable Live Tiles using Group Policy Editor
1. Nhấn phím Windows + R rồi gõ gpedit.msc và nhấn Enter.

2. Now, under Group Policy Editor, navigate to the following path:
User Configuration -> Administrative Templates -> Start Menu and Taskbar -> Notifications
3. Make sure to select Notifications then from right window pane double-click on “Turn off tile notifications."
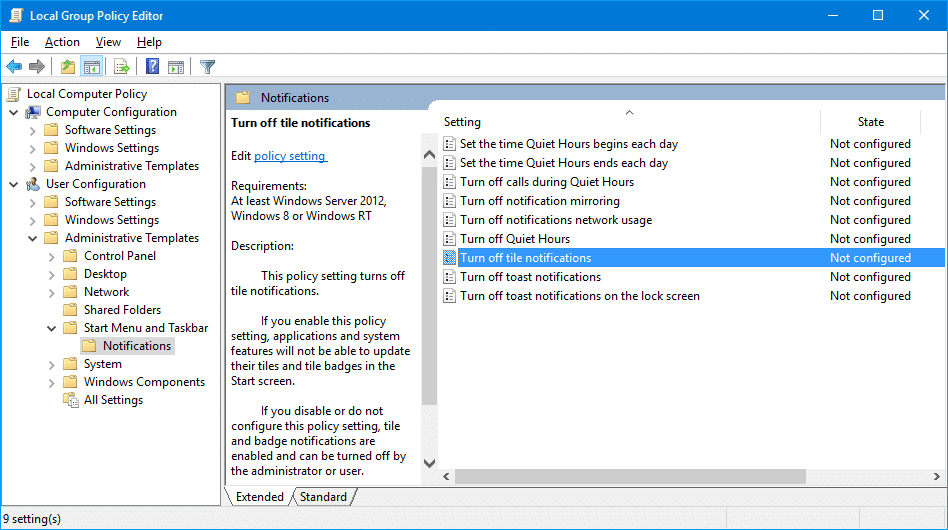
4. Make sure to set it to Enabled then click Apply followed by OK.
5. This will disable live tiles feature for all apps on Start Screen.
Method 4: Disable Live Tiles using Registry Editor
1. Nhấn phím Windows + R rồi gõ regedit và nhấn Enter.

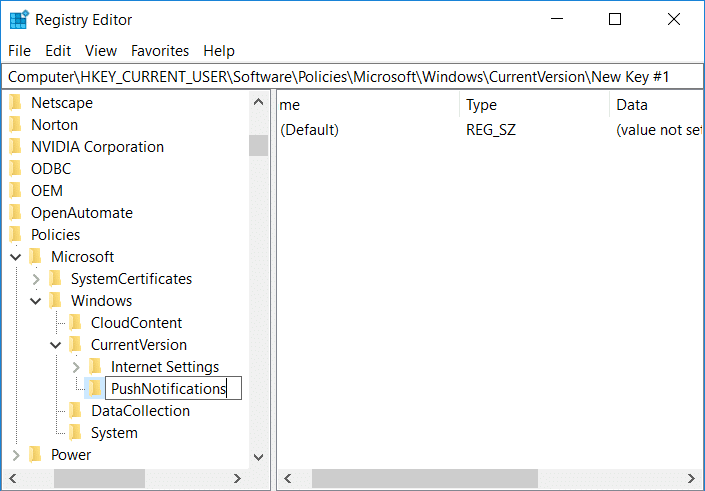
2. Bây giờ hãy điều hướng đến khóa đăng ký sau:
HKEY_CURRENT_USERSoftwarePoliciesMicrosoftWindowsCurrentVersion
3. Nhấp chuột phải vào CurrentVersion Sau đó chọn Mới> Chìa khóa and then name this key as PushNotifications.
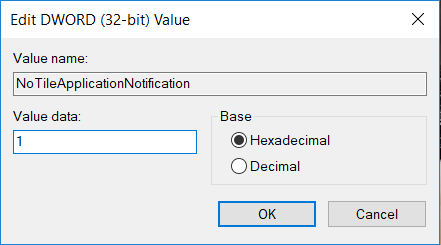
4. Now right-click on PushNotifications key and select Giá trị mới > DWORD (32-bit).
5. Đặt tên DWORD mới này là NoTileApplicationNotification rồi bấm đúp vào nó.

6. Change the value of this DWORD to 1 và nhấn OK.
7. Đóng Trình chỉnh sửa sổ đăng ký và khởi động lại PC của bạn để lưu các thay đổi.
Đề nghị:
Thế là bạn đã học thành công Làm thế nào để Disable Live Tiles in Windows 10 Start Menu but if you still have any questions regarding this post then feel free to ask them in the comment’s section.