Humans have always shown a keen interest in preserving their memories. Paintings, sculptures, monuments, epitaphs, etc. were some of the many historical means used by people to make sure that their stories aren’t forgotten and lost in oblivion. With the invention of the camera, pictures and videos became the most popular means to celebrate and commemorate the glory days. As technology became more and more advance and the world stepped into the digital age, the entire process of capturing memories in the form of photos and videos became extremely convenient.
In the present times, almost everyone owns a smartphone, and with that holds power to preserve their fond memories, capture moments of fun and frolic, and make a video of those once in a lifetime experiences. Although modern smartphones have significantly large memory storage, sometimes it just isn’t enough to store all the photos and videos that we would like to keep. This is where Google Photos comes in to play.
Cloud storage apps and services like Google Photos, Google Drive, Dropbox, OneDrive, etc. have become an absolute necessity in the present times. One of the reasons behind this is the drastic improvement of the smartphone camera. The camera on your device is capable of capturing stunning, high-resolution images that could give DSLRs a run for their money. You can also record full HD videos at a significantly high FPS (frames per second). As a result, the final size of the photos and videos are quite large.
Without a decent cloud storage drive, our device’s local memory would soon be full, and the best part is that most of the cloud storage apps offer their services for free. Android users, for example, get unlimited free storage to back up their photos and videos on Google Photos for free. However, Google Photos isn’t just a cloud storage server, and, in this article, we are going to explore the various features that Google Photos is packing and also deal with the problem of Google Photos not backing up.
זען אויך:
10 וועגן צו פאַרריכטן TikTok ווידיאס ניט פּלייַינג אַרויסגעבן
8 וועגן צו פאַרריכטן אַנדרויד טעקסט אַרטיקלען סטאַק דאַונלאָודינג טעות
פאַרריכטן Google פֿאַר אַנדרויד ווייַזן אָפפלינע אַרויסגעבן
11 Ways to Fix Desktop WhatsApp Not Opening on PC
פאַרריכטן אַנדרויד ניט אַקסעפּטינג די ריכטיק PIN
What are the various services offered by Google Photos?
Google Photos was created by Android developers to solve the lack of storage issue in Android smartphones. It is a very useful app that allows users to back up their photos and videos on the cloud. All that you need to do is sign in with your Google account, and you will be allocated a designated space on the cloud server to store your media files.
The interface of Google Photos looks like some of the best gallery apps that you can find on Android. The photos and videos are automatically arranged and sorted according to their date and time of capture. This makes it easier to find the photo that you are looking for. You can also instantly share the photo with others, do some basic editing, and also download the image on your local storage whenever you want.
ווי דערמאנט פריער, Google Photos offers unlimited storage, given that you are willing to compromise a little with the quality. The app offers a choice between 15GB of free storage space for saving uncompressed original resolution photos, and videos or unlimited storage for saving photos and videos compressed to HD quality. The other salient features of the Google Photos אַרייַננעמען.
- It automatically syncs and backs up your photos and videos to the cloud.
- If the preferred upload quality is set to HD, then the app automatically compresses files to high quality and saves them on the cloud.
- You can create an album containing any number of pictures and generate a sharable link for the same. Any user with the link and access permission can view and download the images saved in the album. This is probably the best way to share a large number of photos and videos with multiple people.
- If you have a Google Pixel, then you wouldn’t even have to compromise with the upload quality; you can save an unlimited number of photos and videos in their original quality.
- Google Photos also helps you in making collages, short video presentations, and even animations.
- Apart from that, you can also create Motion photos, use the in-built editor, use the Free Up Space feature to eliminate duplicates, and conserve space.
- With the latest Google Lens integration, you can even perform a smart visual search on photos previously saved on the cloud.
Despite being such an advanced and efficient app, Google Photos isn’t perfect. However, just like every other app, Google Photos might act out at times. One of the most concerning problems is times when it stops uploading photos to the cloud. You wouldn’t even be aware that the automatic upload feature has stopped working, and your photos aren’t getting backed up. However, there is no reason to panic just yet as we are here to provide you with a number of solutions and fixes for this problem.
How to Fix the Problem of Google Photos Not Backing Up
As mentioned earlier, sometimes Google Photos stops backing up your photos and videos on the cloud. It either get stuck on “Waiting for sync” or “Backing up 1 of XYZ” and it takes forever to upload a single photo. The reason behind this could be an erroneous change of setting on your phone or a problem with Google servers itself. Whatever may be the reason, the problem must be fixed as soon as possible, because you wouldn’t want to risk losing your precious memories. Given below is a list of solutions that you can try to fix the problem of Google Photos not backing up.
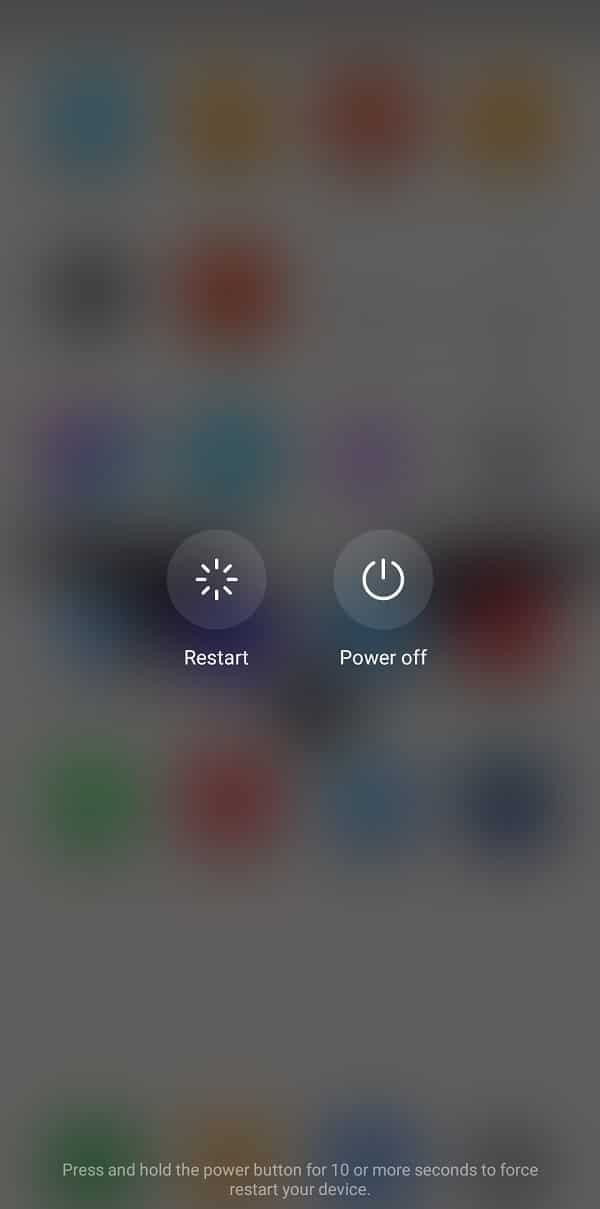
Solution 1: ריסטאַרט דיין מיטל
If your Google photos app gets stuck while uploading a photo or video, it could be the result of a technical glitch. The easiest solution to this problem is to reboot/restart your device. The simple act of turning it off and on has the potential to fix any technical problem.
That is why it is usually the first item on the list of solutions for almost every problem that might occur on an electronic device. So, without thinking too much, press and hold your power button until the power menu pops up on the screen and tap on the Restart option. See if you’re able to fix Google Photos backup stuck issue. If that doesn’t work, proceed with the other solutions.
Solution 2: Check your Backup Status
In order to fix the problem, you need to figure out what is actually preventing your photos and videos from getting backed up. To get a clear idea of the exact nature of the problem, you need to check the status of your backup. Follow the steps given below to see how:
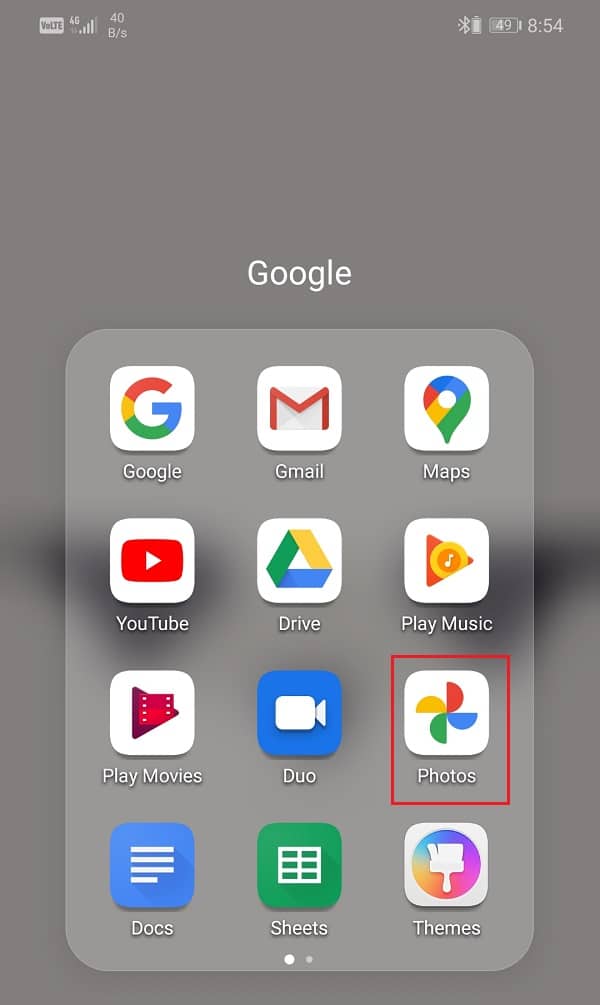
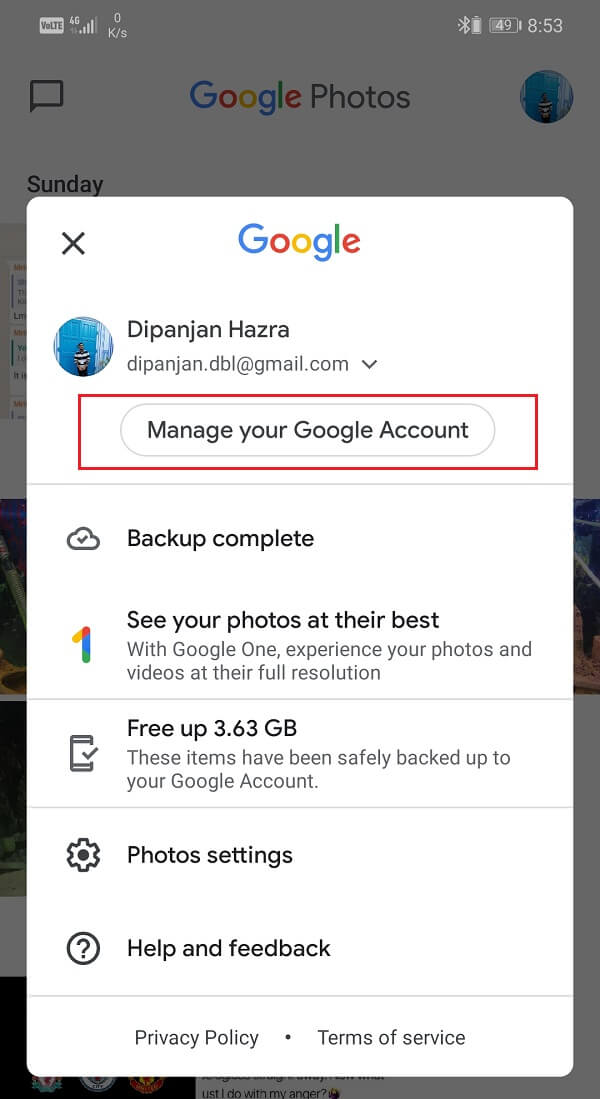
1. פירסטלי, עפענען Google Photos אויף דיין מיטל.
2. איצט צאַפּן אויף דיין profile picture on the top right-hand corner.
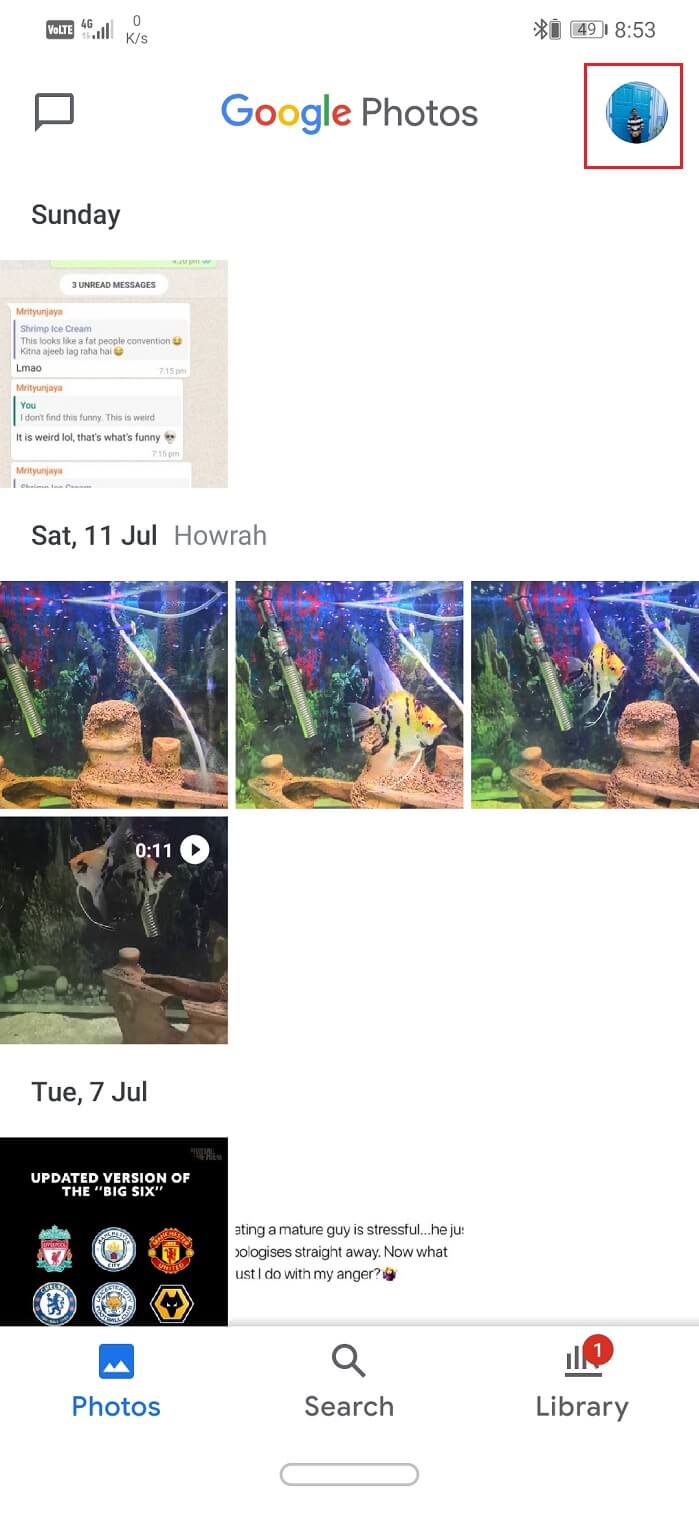
3. Here, you will find the Backup status just under the “Manage your Google Account” אָפּציע.
These are some of the messages that you can expect and the quick fix for them.
- “Waiting for connection” or “Waiting for Wi-Fi” – Try reconnecting to the Wi-Fi network or switching to your mobile data. In order to use your mobile data to upload photos and videos on the cloud, you need to enable it first. We will discuss this later in this article.
- “A photo or video was skipped” – There is an upper limit to the size of photos and videos that can be uploaded on Google Photos. Photos larger than 75 MB or 100 megapixels and videos larger than 10GB cannot be saved on the cloud. Make sure that the media files which you are trying to upload meet this requirement.
- “Back up and sync is off” – You must have accidentally disabled the auto-sync and back upsetting for Google Photos; all that you need to do is turn it back ON.
- “Backup up photos” or “Back up Complete” – Your photos are videos are getting uploaded at the moment or have already been uploaded.
Solution 3: Enable Auto-Sync Feature for Google Photos
דורך ניט ויסצאָלן, די automatic sync setting for Google Photos is always enabled. However, it is possible that you might have accidentally turned it off. This will prevent Google Photos from uploading photos to the cloud. This setting needs to be enabled in order to upload and download photos from Google Photos. Follow the steps given below to see how:
1. פירסטלי, עפענען Google Photos אויף דיין מיטל.
2. איצט צאַפּן אויף דיין פּראָפיל בילד אויף די שפּיץ רעכט-האַנט corner and דריקט אויף די פאָטאָס סעטטינגס אָפּציע.
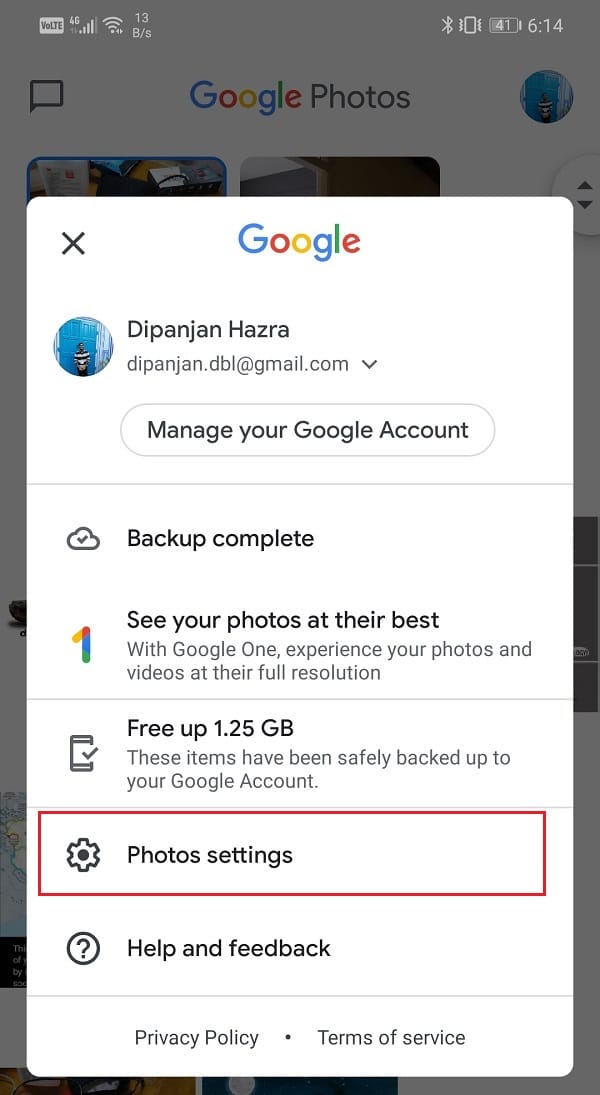
3. דאָ, צאַפּן אויף די באַקקופּ & סינק אָפּציע.
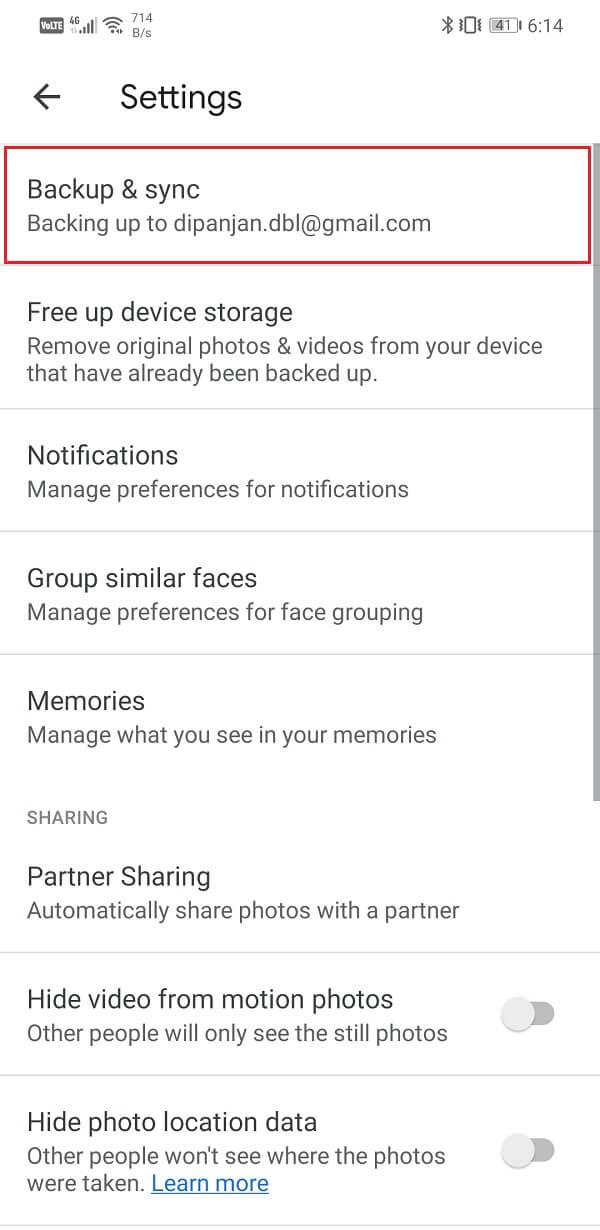
4. איצט מאַך אויף די באַשטימען ווייַטער צו די באַקקופּ & סינק באַשטעטיקן צו געבן עס.
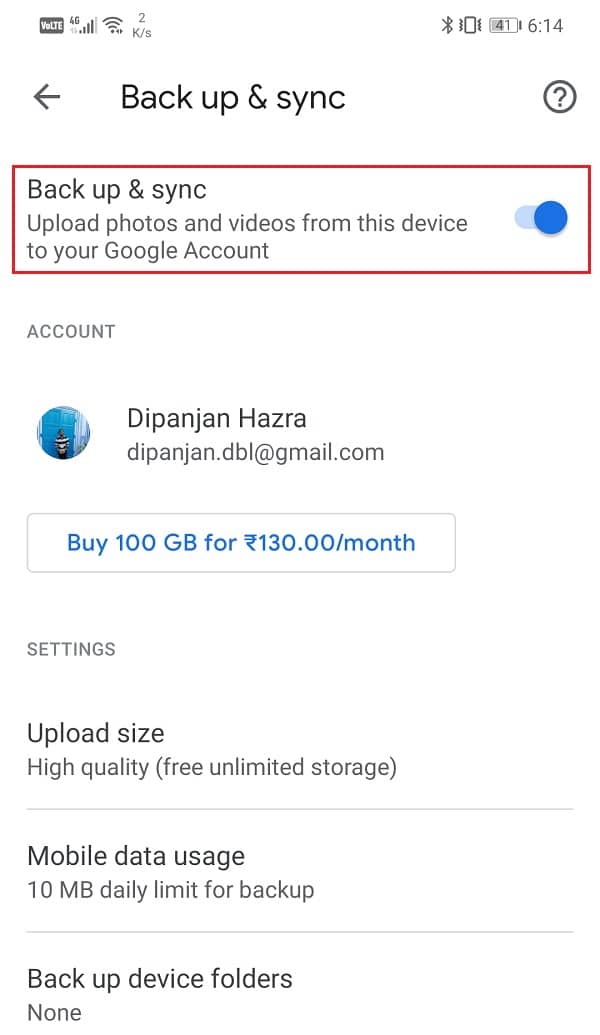
5. If this solves your problem, then you are all set, otherwise, proceed to the next solution in the list.
Solution 4: Make sure the Internet is working properly
די פֿונקציע פון Google Photos איז צו אויטאָמאַטיש יבערקוקן די מיטל פֿאַר פאָטאָס און צופֿעליקער עס אויף די וואָלקן סטאָרידזש, און עס דאַרף אַ סטאַביל אינטערנעט פֿאַרבינדונג צו טאָן דאָס. מאַכן זיכער אַז די Wi-Fi נעץ צו וואָס איר זענט קאָננעקטעד אַרבעט רעכט. די יזיאַסט וועג צו קאָנטראָלירן אינטערנעט קאַנעקטיוויטי איז צו עפֿענען יאָוטובע און זען אויב אַ ווידעא שפּילט אָן באַפערינג.
אַחוץ דעם, Google Photos האט אַ טעגלעך דאַטן שיעור פֿאַר ופּלאָאַדינג פאָטאָס אויב איר נוצן דיין סעליאַלער דאַטן. דער לימיט פון דאַטן יגזיסץ צו ענשור אַז סעליאַלער דאַטן זענען נישט קאַנסומד יבעריק. אָבער, אויב Google Photos איז נישט ופּלאָאַדינג דיין פאָטאָס, מיר וואָלט פֿאָרשלאָגן איר דיסייבאַל דאַטן ריסטריקשאַנז פון קיין מין. גיי די סטעפּס געגעבן אונטן צו זען ווי:
קסנומקס. עפענען Google Photos אויף דיין מיטל.
2. איצט צאַפּן אויף דיין פּראָפיל בילד אויף די שפּיץ רעכט-האַנט ווינקל.
3. נאָך וואָס, גיט אויף די פאָטאָס סעטטינגס אָפּציע און צאַפּן אויף די Back up & sync אָפּציע.
4. איצט סעלעקטירן דעם מאָביל דאַטן באַניץ אָפּציע.
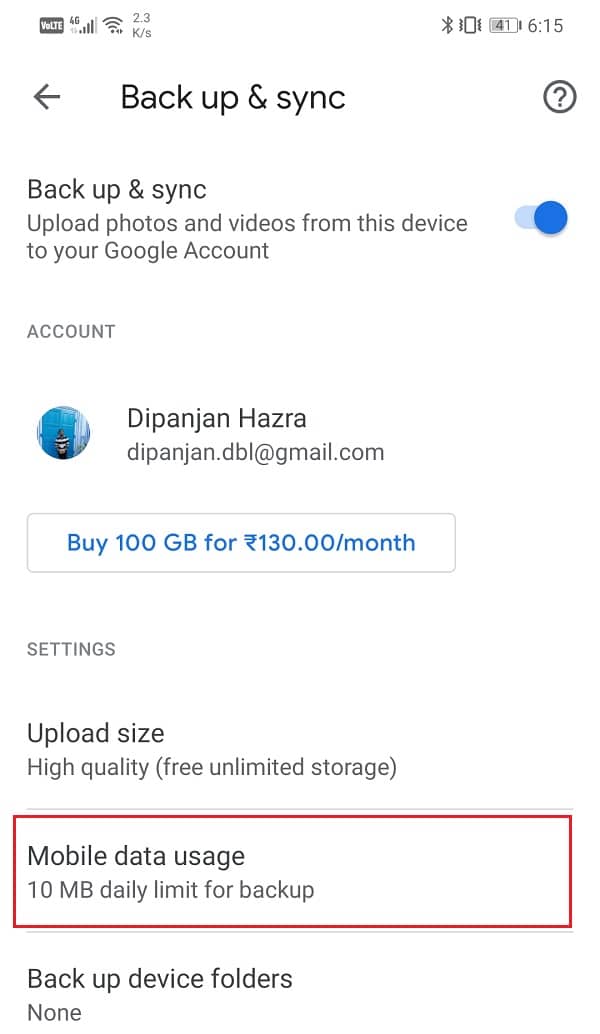
5. דאָ, אויסקלייַבן די ונלימיטעד אָפּציע אונטער די טעגלעך שיעור פֿאַר די באַקקופּ קוויטל.

Solution 5: Update the App
ווען אַ אַפּ סטאַרץ אַקטינג אויס, די גאָלדען הערשן זאגט צו דערהייַנטיקן עס. דאָס איז ווייַל ווען אַ טעות איז געמאלדן, די אַפּ דעוועלאָפּערס מעלדונג אַ נייַע דערהייַנטיקן מיט זשוק פיקסיז צו סאָלווע די פאַרשידענע טייפּס פון פּראָבלעמס. עס איז מעגלעך אַז אַפּדייטינג Google Photos וועט העלפֿן איר פאַרריכטן די אַרויסגעבן פון פאָטאָס וואָס זענען נישט ופּלאָאַדעד. גיי די סטעפּס געגעבן אונטן צו דערהייַנטיקן די Google Photos אַפּ.
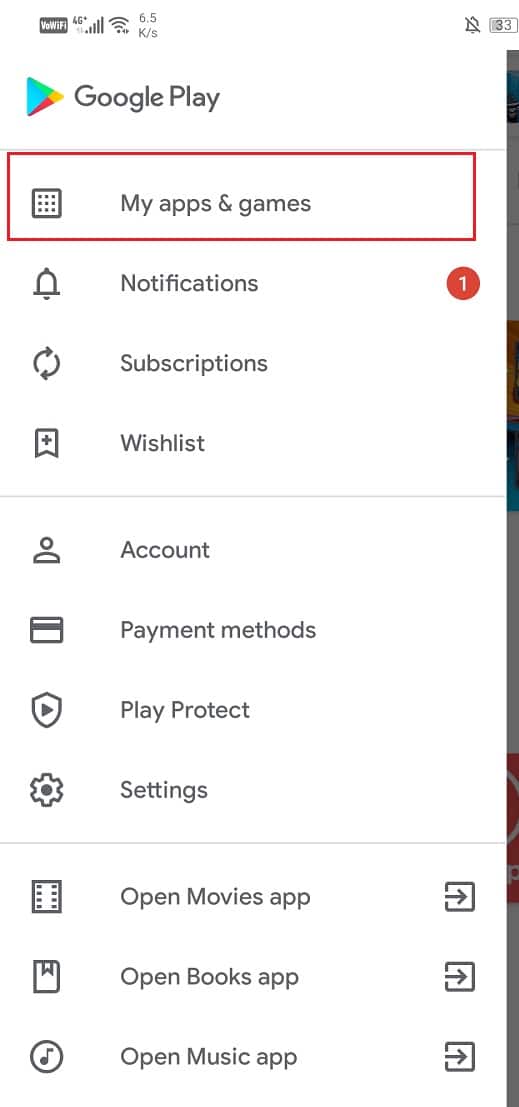
קסנומקס. גיין צו די שפּיל סטאָר.
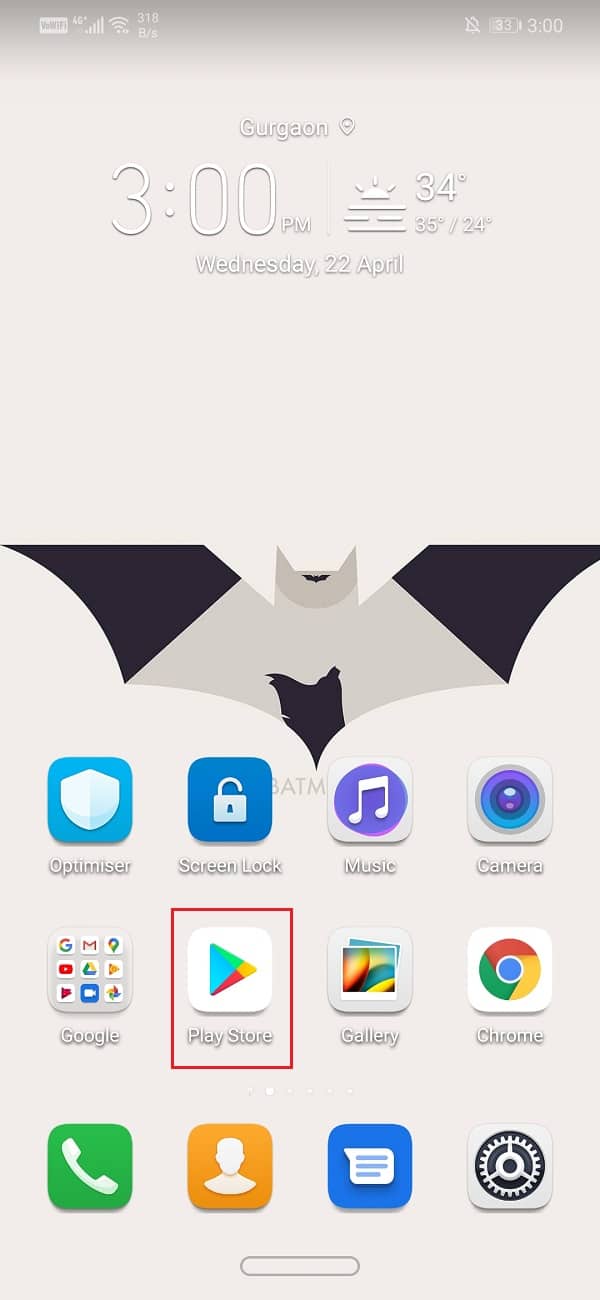
2. אויף די שפּיץ לינקס זייַט, איר וועט געפֿינען דרייַ האָריזאָנטאַל שורות. דריקט אויף זיי.
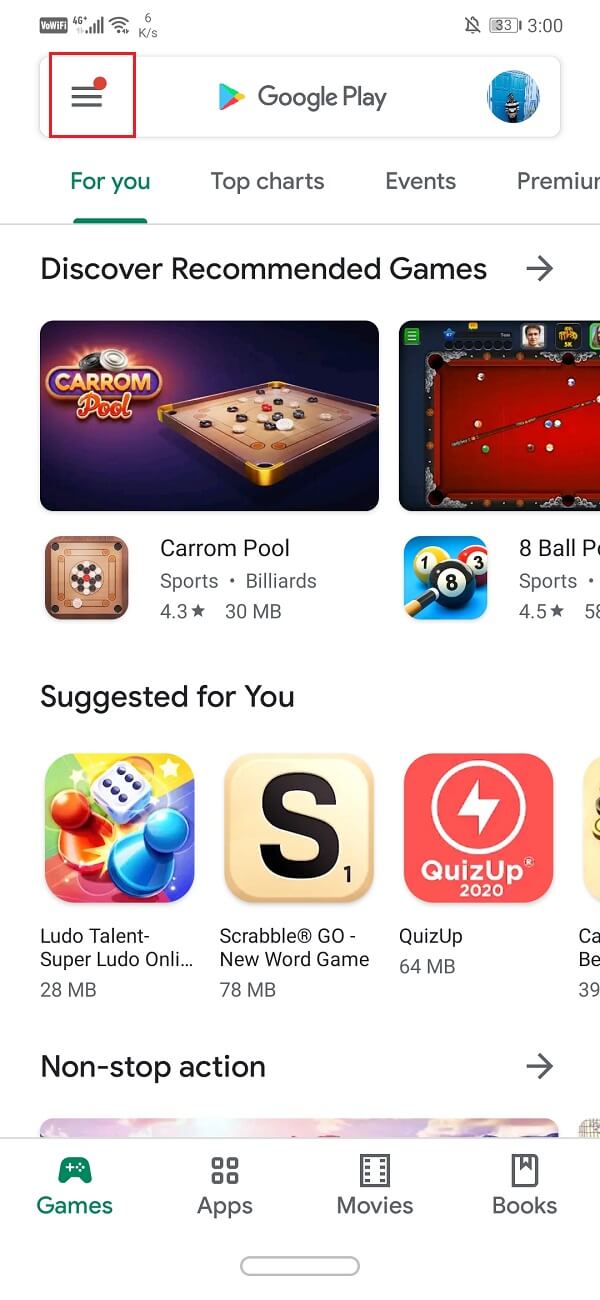
3. איצט, גיט אויף די "מייַן אַפּפּס און שפּילערייַ" אָפּציע.
4. זוכן פֿאַר Google Photos און טשעק אויב עס זענען פּענדינג דערהייַנטיקונגען.
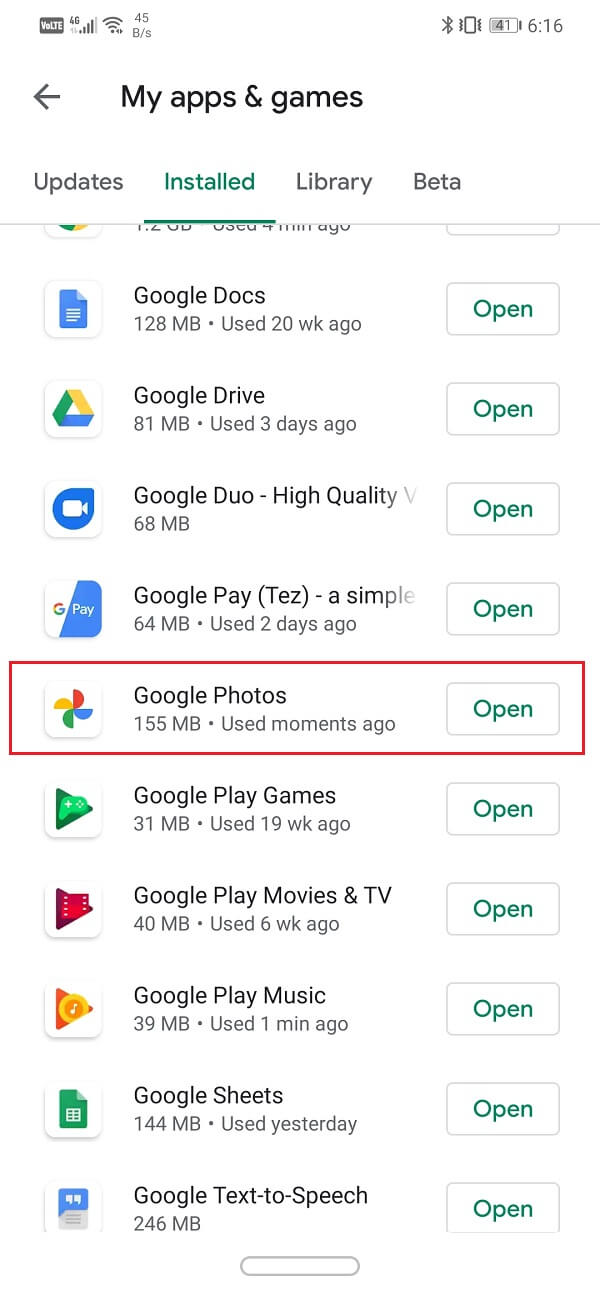
5. אויב יאָ, גיט אויף די דערהייַנטיקן קנעפּל.
6. אַמאָל די אַפּ געץ דערהייַנטיקט, טשעק אויב פאָטאָס זענען געטינג ופּלאָאַדעד ווי געוויינטלעך אָדער נישט.
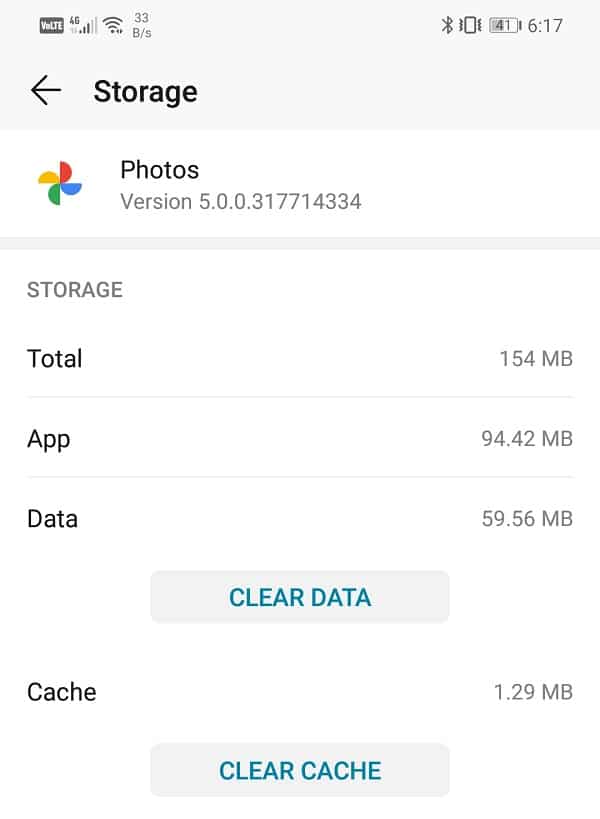
Solution 6: Clear Cache and Data for Google Photos
אן אנדער קלאַסיש לייזונג צו אַלע אַנדרויד אַפּ פֿאַרבונדענע פּראָבלעמס איז קלאָר קאַש און דאַטן פֿאַר די מאַלפאַנגקשאַנינג אַפּ. קאַש טעקעס זענען דזשענערייטאַד דורך יעדער אַפּ צו רעדוצירן די לאָודינג צייט פון די פאַרשטעלן און מאַכן די אַפּלאַקיישאַן פאַסטער עפענען. מיט צייט, די באַנד פון קאַש טעקעס איז ינקריסינג. די קאַש טעקעס אָפט ווערן פארדארבן און פאַרשאַפן די אַפּ צו מאַלפאַנגקשאַן. עס איז אַ גוטע פיר צו ויסמעקן אַלט קאַש און דאַטן טעקעס פון צייט צו צייט.
דאָס וועט נישט ווירקן דיין פאָטאָס אָדער ווידיאס געראטעוועט אויף די וואָלקן. עס וועט פשוט מאַכן וועג פֿאַר נייַ קאַש טעקעס, וואָס וועט זיין דזשענערייטאַד אַמאָל די אַלט אָנעס זענען אויסגעמעקט. גיי די סטעפּס געגעבן אונטן צו ויסמעקן די קאַש און דאַטן פֿאַר די Google Photos אַפּ.
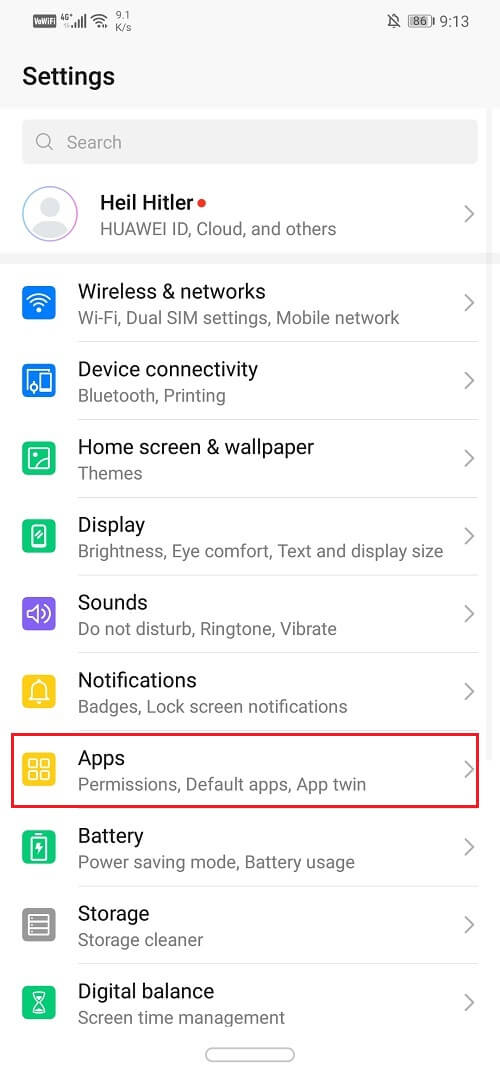
קסנומקס. גיין צו די סעטטינגס אויף דיין טעלעפאָן.
2. דריקט אויף די אַפּפּס אָפּציע צו זען די רשימה פון אינסטאַלירן אַפּפּס אויף דיין מיטל.
3. איצט זוכן פֿאַר Google Photos and tap on it to open the app settings. Then, click on the סטאָרידזש אָפּציע.
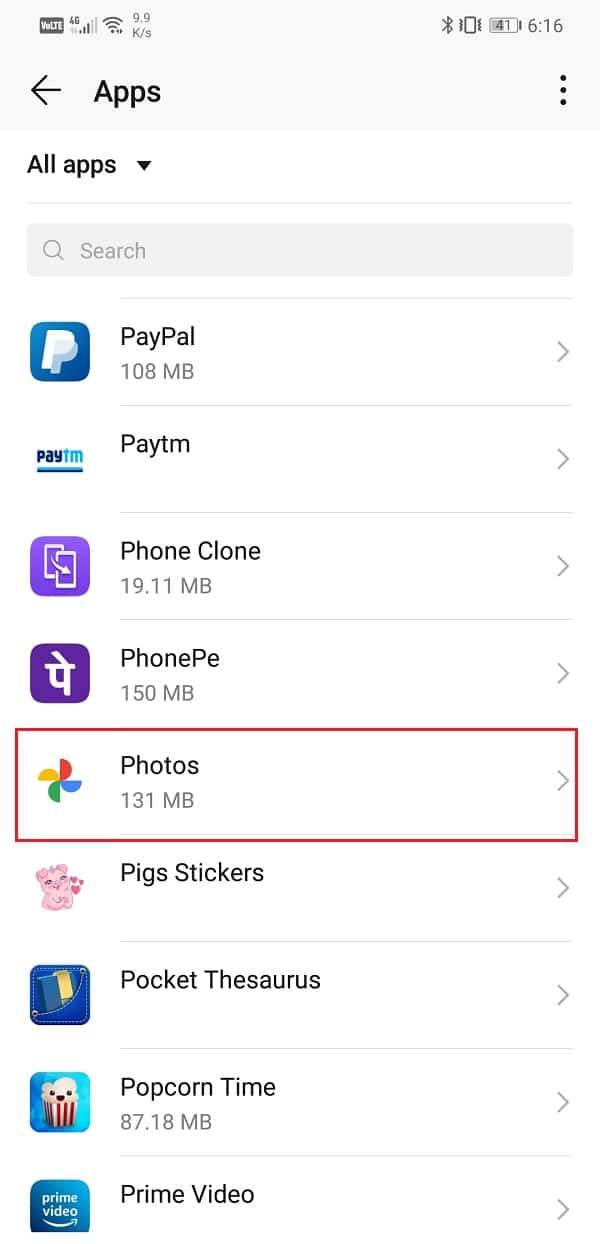
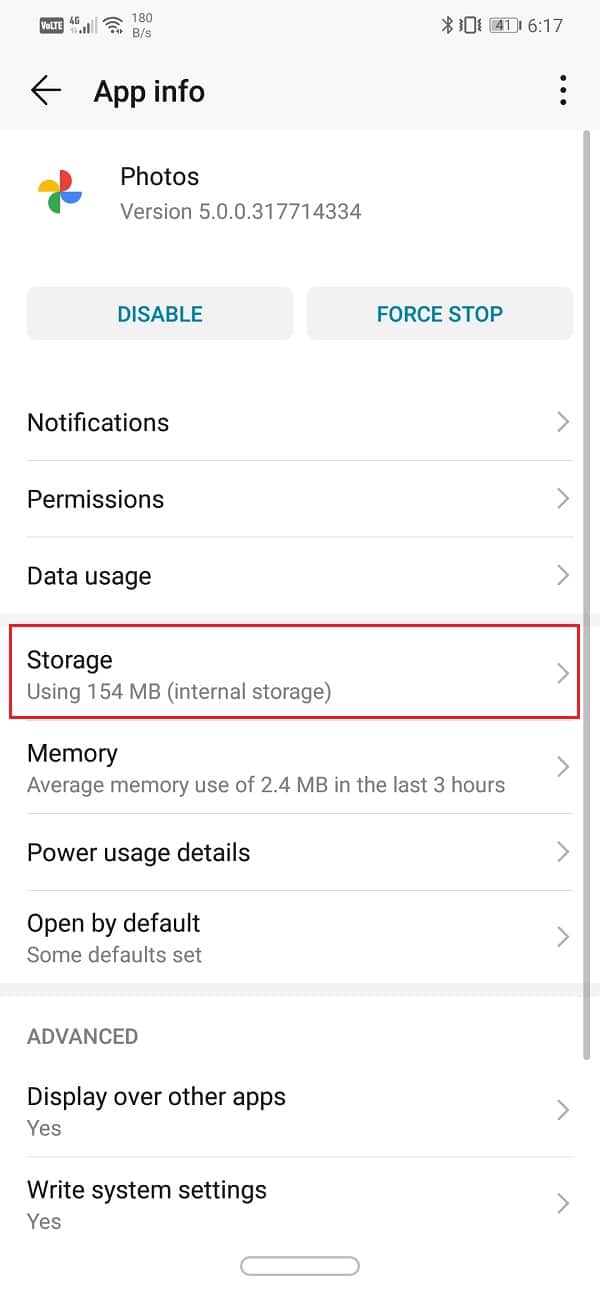
4. דאָ, איר וועט געפֿינען די אָפּציע צו ויסמעקן קאַש און קלאָר דאַטן. דריקט אויף די ריספּעקטיוו קנעפּלעך, און די קאַש טעקעס פֿאַר Google Photos וועט ווערן אויסגעמעקט.
Now again try to sync Photos to Google Photos and see if you’re able to fix Google Photos backup stuck issue.
אויך לייענען: Restore Apps and Settings to a new Android phone from Google Backup
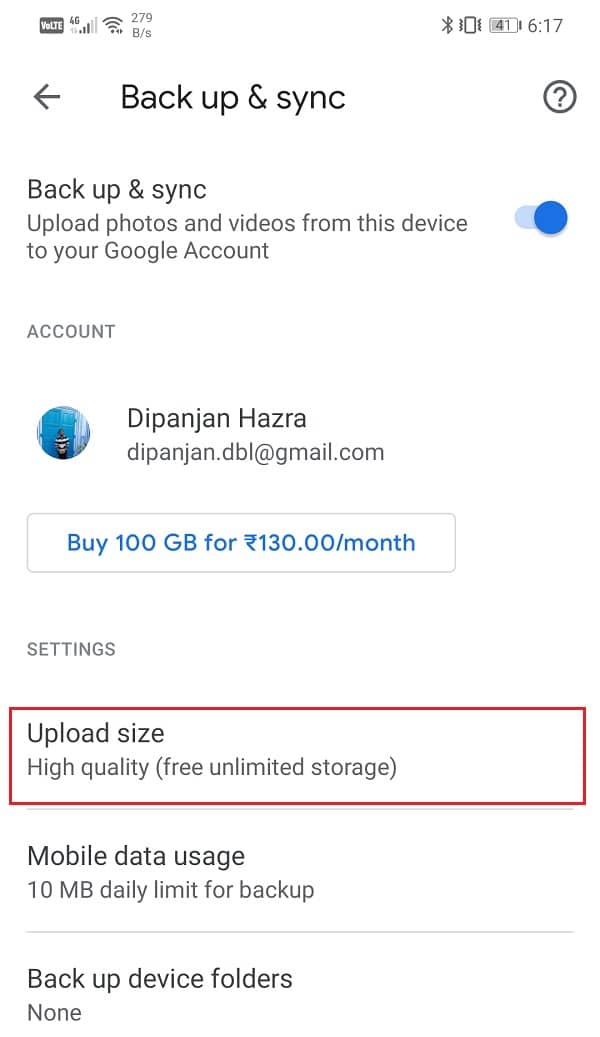
Solution 7: Change the Upload Quality of Photos
Just like every other cloud storage drive, Google Photos has certain storage restrictions. You are entitled to free 15 GB of storage space אויף די וואָלקן צו צופֿעליקער דיין פאָטאָס. אַחוץ דעם, איר דאַרפֿן צו באַצאָלן פֿאַר קיין נאָך פּלאַץ וואָס איר ווילט נוצן.
דאָס, אָבער, זענען די טערמינען און באדינגונגען פֿאַר ופּלאָאַדינג דיין פאָטאָס און ווידיאס אין זייער אָריגינעל קוואַליטעט, דאָס הייסט, די טעקע גרייס בלייבט אַנאַלטערד. די נוץ פון טשוזינג דעם אָפּציע איז אַז עס איז קיין אָנווער פון קוואַליטעט רעכט צו קאַמפּרעשאַן, און איר באַקומען די פּינטלעך זעלביקער פאָטאָ אין זיין אָריגינעל האַכלאָטע ווען איר אראפקאפיע עס פֿון די וואָלקן. עס איז מעגלעך אַז דער פריי פּלאַץ וואָס איז געווען אַלאַקייטיד צו איר איז גאָר געוויינט, און אַזוי פאָטאָס זענען ניט מער ופּלאָאַדעד.
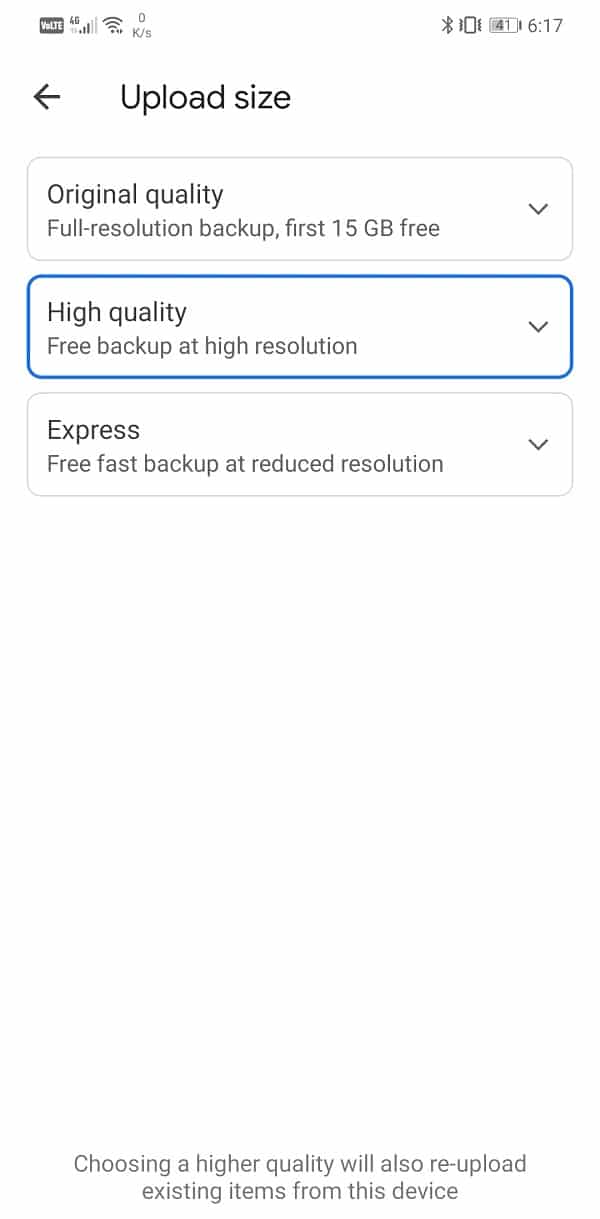
איצט איר קענט באַצאָלן פֿאַר עקסטרע פּלאַץ אָדער קאָמפּראָמיס מיט די קוואַליטעט פון די ופּלאָאַדס צו פאָרזעצן צו באַקאַפּ דיין פאָטאָס אויף די וואָלקן. Google Photos האט צוויי אַלטערנאַטיווע אָפּציעס פֿאַר די ופּלאָאַד גרייס, און דאָס זענען "הויך קוואַליטעט"און"עקספּרעסס".
The most interesting point about these options is that they offer unlimited storage space. If you are willing to compromise a little with the quality of the image, Google Photos will allow you to store as many photos or videos as you want. We would suggest you select a High-Quality option for future uploads. It compresses the image to a resolution of 16 MP, and videos are compressed to high definition.
In case you are planning to print these images, then the quality of the print would be good up to 24 x 16 in. This is quite good a deal in exchange for unlimited storage space. Follow the steps given below to alter your preference for the upload quality on Google Photos.
קסנומקס. עפענען Google Photos on your device then tap on your פּראָפיל בילד אויף די שפּיץ רעכט-האַנט ווינקל.
2. נאָך וואָס, גיט אויף די פאָטאָס סעטטינגס אָפּציע.
3. דאָ, צאַפּן אויף די באַקקופּ & סינק אָפּציע.
4. אונטער סעטטינגס, איר וועט געפֿינען די אָפּציע גערופן "אַפּלאָאַד גרייס". דריקט אויף עס.
5. איצט, פון די געגעבן אָפּציעס, אויסקלייַבן הויך קוואַליטעט ווי דיין בילכער ברירה פֿאַר צוקונפֿט דערהייַנטיקונגען.
6. דעם וועט שענקען איר אַנלימאַטאַד סטאָרידזש פּלאַץ און סאָלווע די פּראָבלעם פון פאָטאָס נישט ופּלאָאַדינג אויף Google Photos.
Solution 8: צווינגען סטאָפּ די אַפּ
Even when you exit from some app, it keeps running in the background. Especially apps like Google Photos that have auto-sync feature are constantly running in the background, searching for any new photos and videos that need to be uploaded on the cloud. Sometimes, when an app is not working properly, the best way to fix it is by completely stopping the app and then starting again. The only way to make sure that an app has been completed closed is by force stopping it. Follow the steps given below to force stop Google Photos:
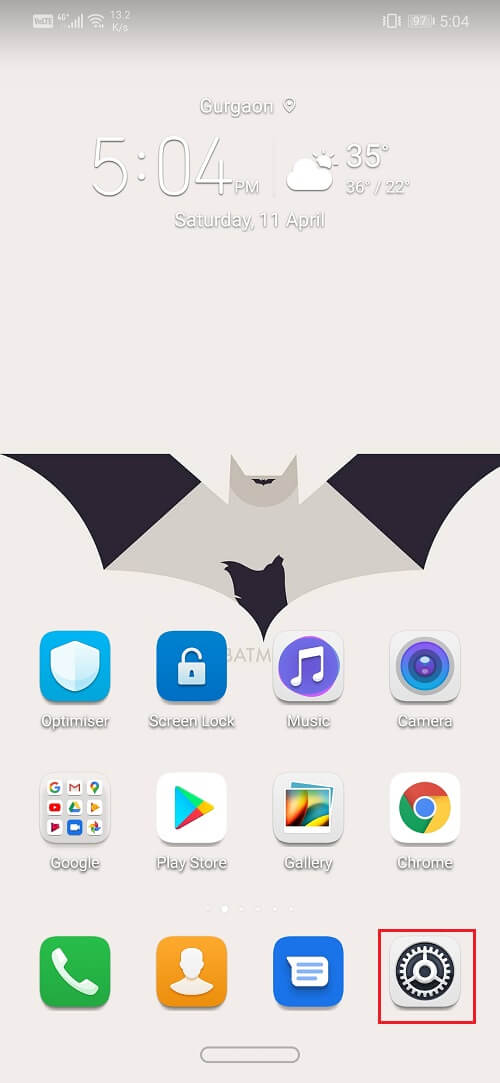
1. ערשטער, עפענען סעטטינגס on your phone then צאַפּן אויף די אַפּפּס אָפּציע.
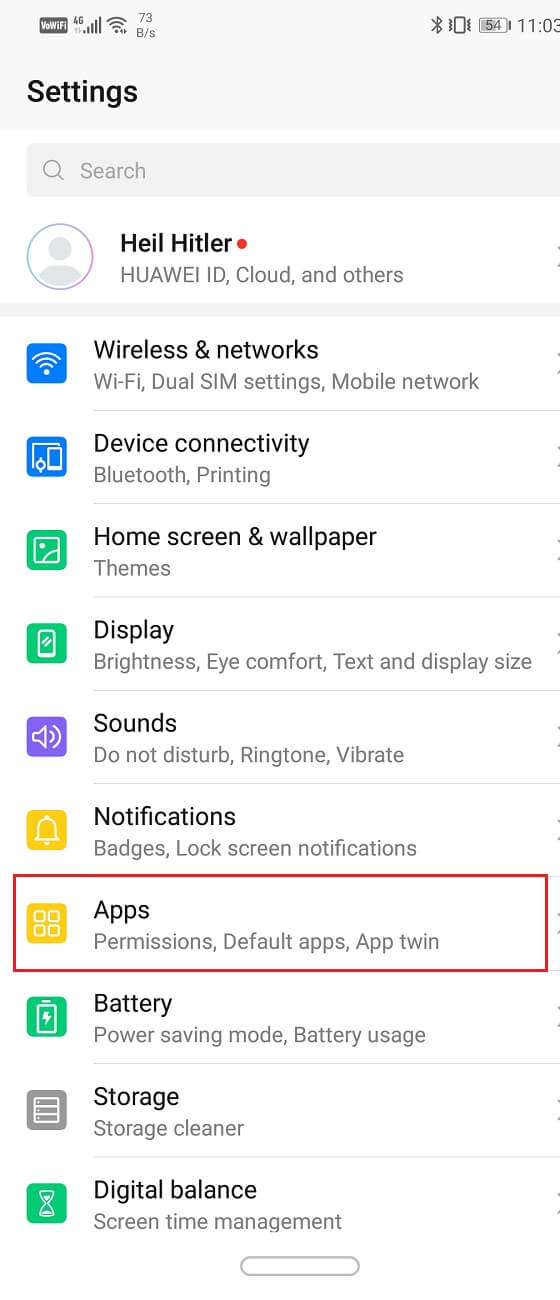
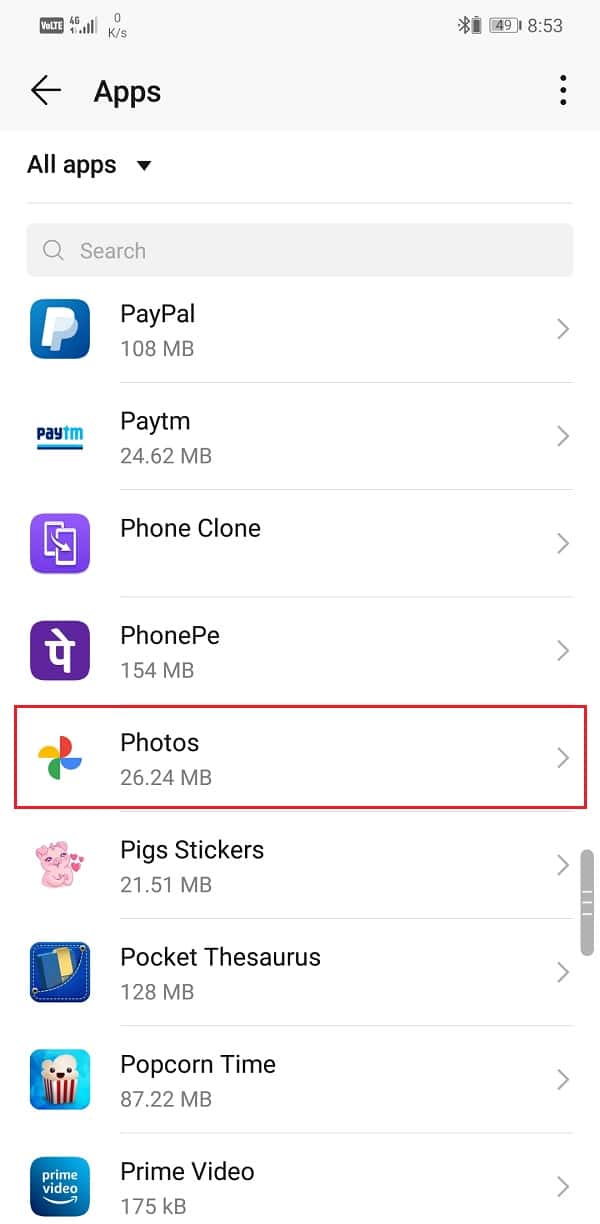
2. From the list of apps look for Google Photos און צאַפּן אויף עס.
3. דעם וועט עפענען די app settings for Google Photos. After that, tap on the קראַפט האַלטן קנעפּל.
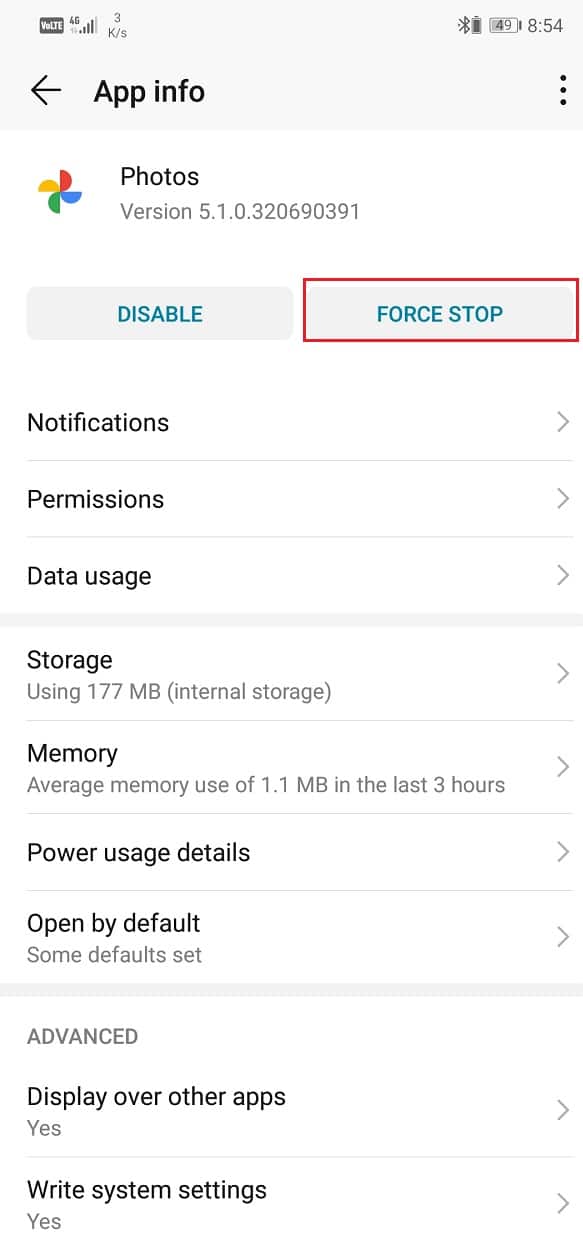
4. Now open the app again and see if you’re able to fix Google Photos not backing up issue.
Solution 9: Sign Out and then Sign In to your Google Account
If none of the above methods, try removing your Google account that is linked to Google Photos and then sign-in again after rebooting your phone. Doing so might set things straight, and Google Photos might begin backing up your photos like it used to earlier. Follow the steps given below to remove your Google Account.
קסנומקס. עפֿן די סעטטינגס אויף דיין טעלעפאָן.
2. איצט גיט אויף די וסערס & אַקאַונץ.
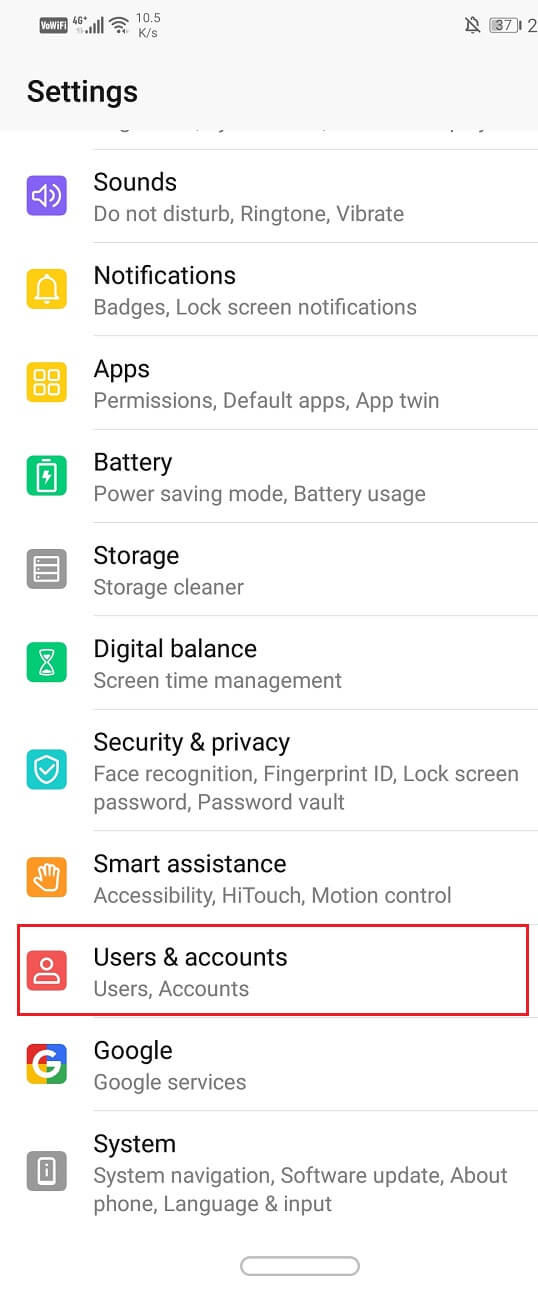
3. איצט אויסקלייַבן די גוגל אָפּציע.
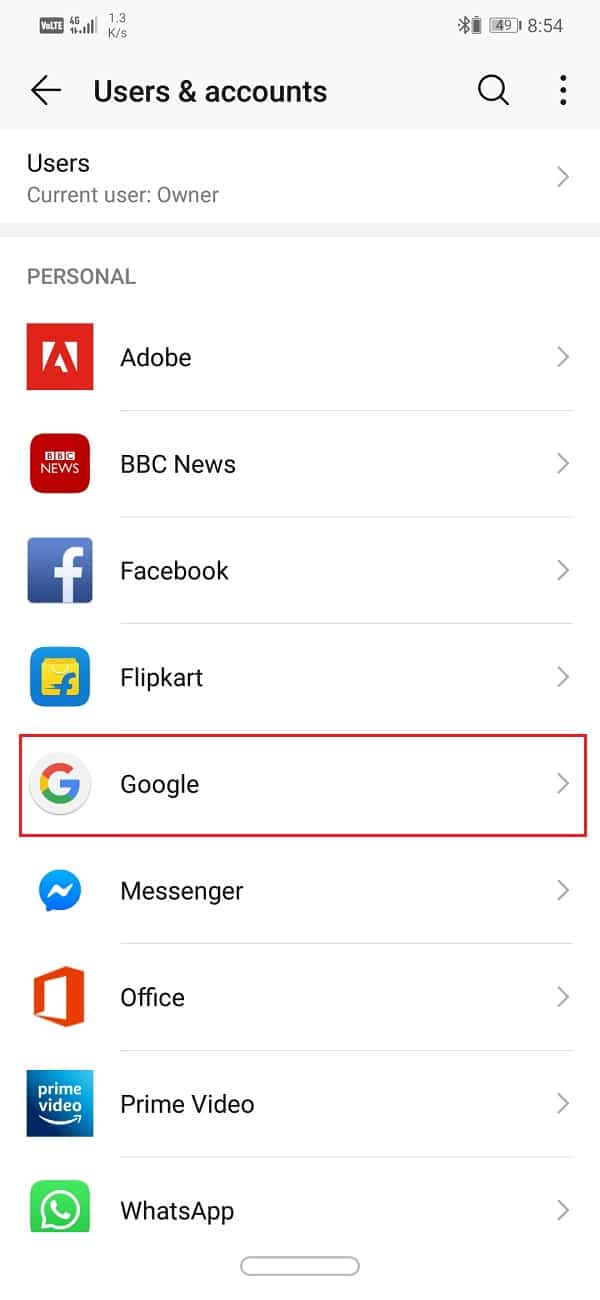
4. At the bottom of the screen, you will find the option to אַראָפּנעמען חשבון, דריקט אויף עס.
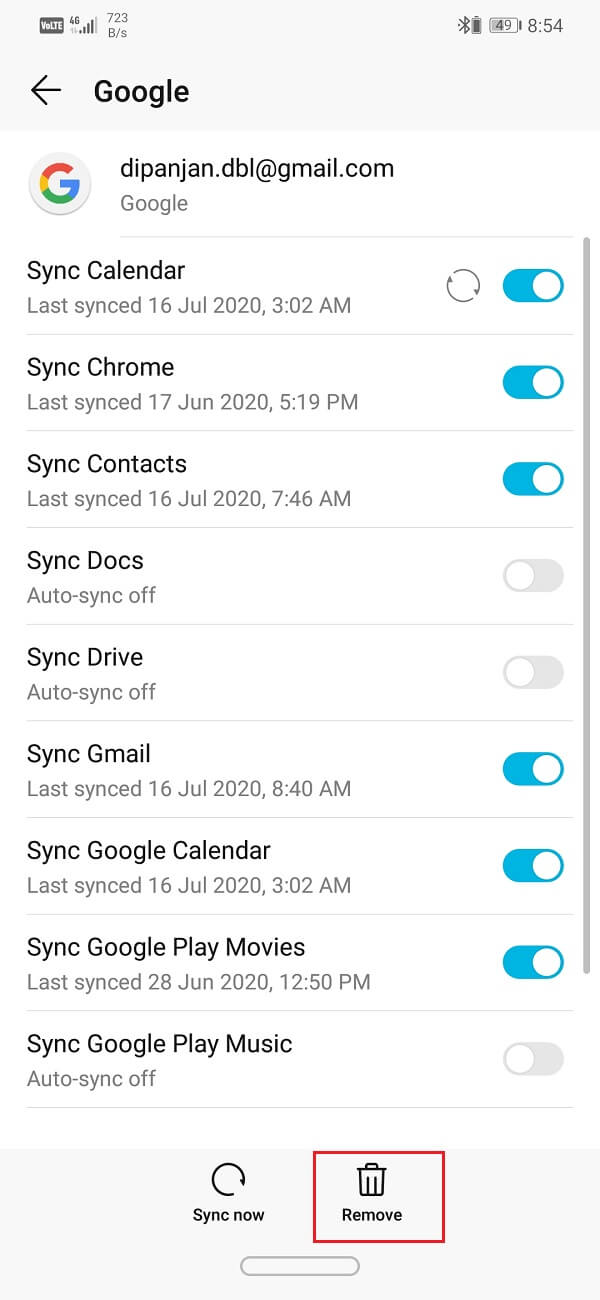
5. This will sign you out of your Gmail חשבון.
6. רעבאָאָט דיין מיטל.
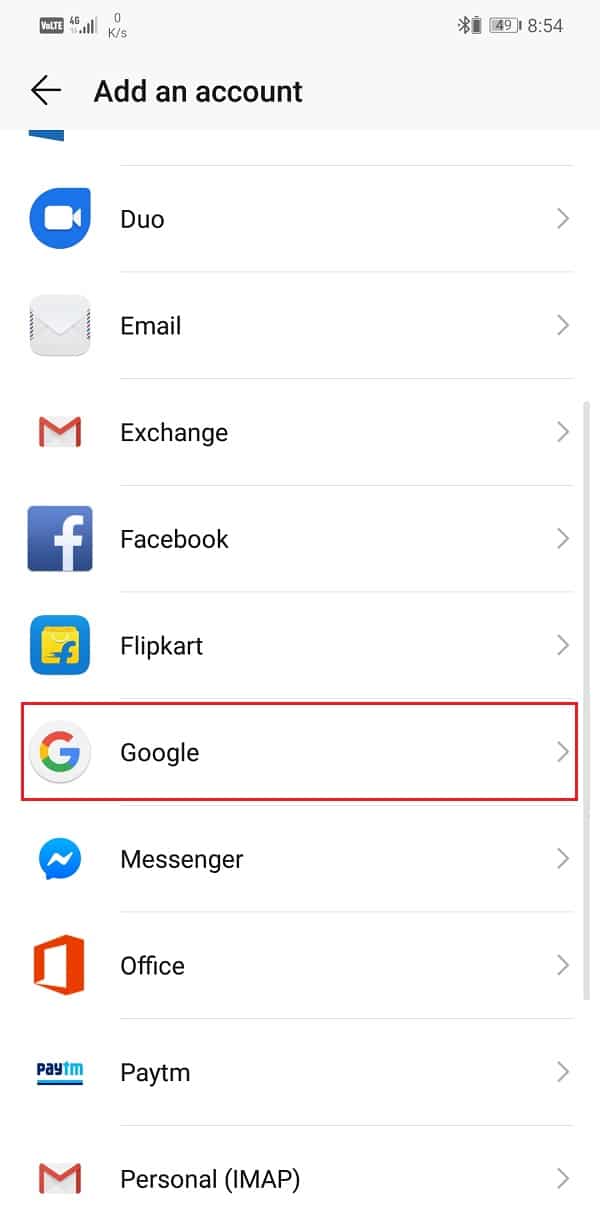
7. When your device starts again, head back to the Users and Settings section and tap on the add account option.
8. פון דער רשימה פון אָפּציעס, אויסקלייַבן Google and sign in with your username and password.
9. Once everything has been set up again, check the backup status in Google Photos, and see if you’re able to fix the Google Photos backup stuck issue.
Solution 10: Manually Upload Photos and Videos
Although Google Photos is meant to upload your media files on the cloud automatically, there is an option to do so manually as well. If none of the above methods work and Google Photos still refuses to back up your photos and videos, this is the last resort. Manually backing up your files is at least better than losing them. Follow the steps given below to upload your photos and videos to the cloud manually.
קסנומקס. עפֿן די Google Photos אַפּ.
2. איצט צאַפּן אויף די ביבליאָטעק אָפּציע אין די דנאָ פון דעם עקראַן.
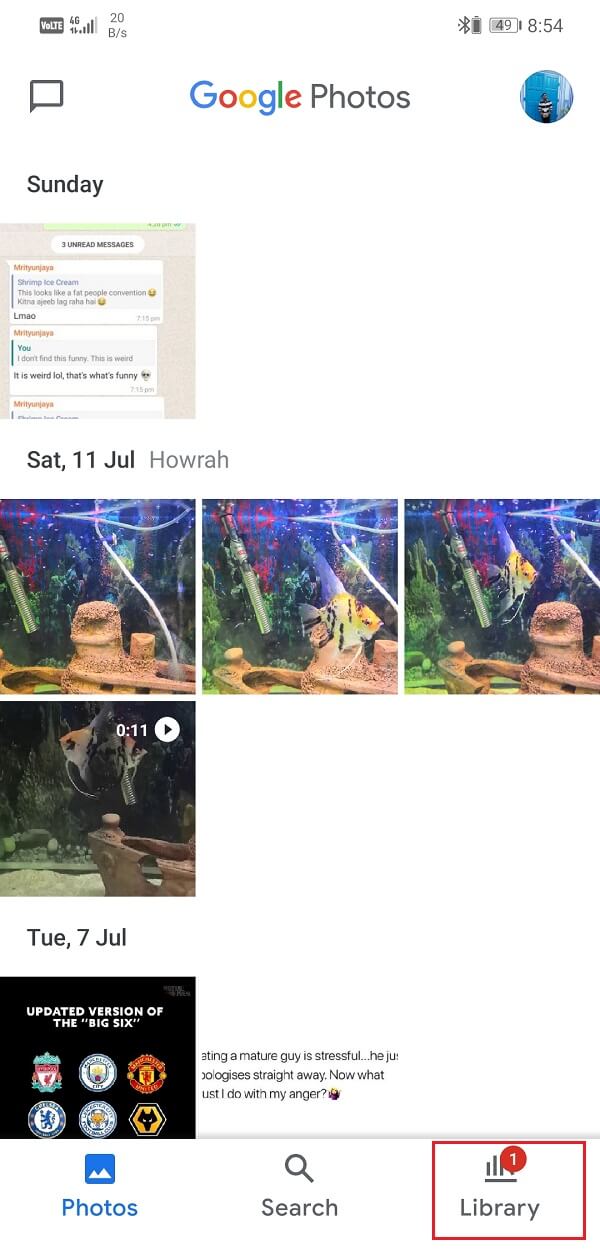
3. אונטער די “Photos on Device” tab, you can find the various folders that contain your photos and videos.
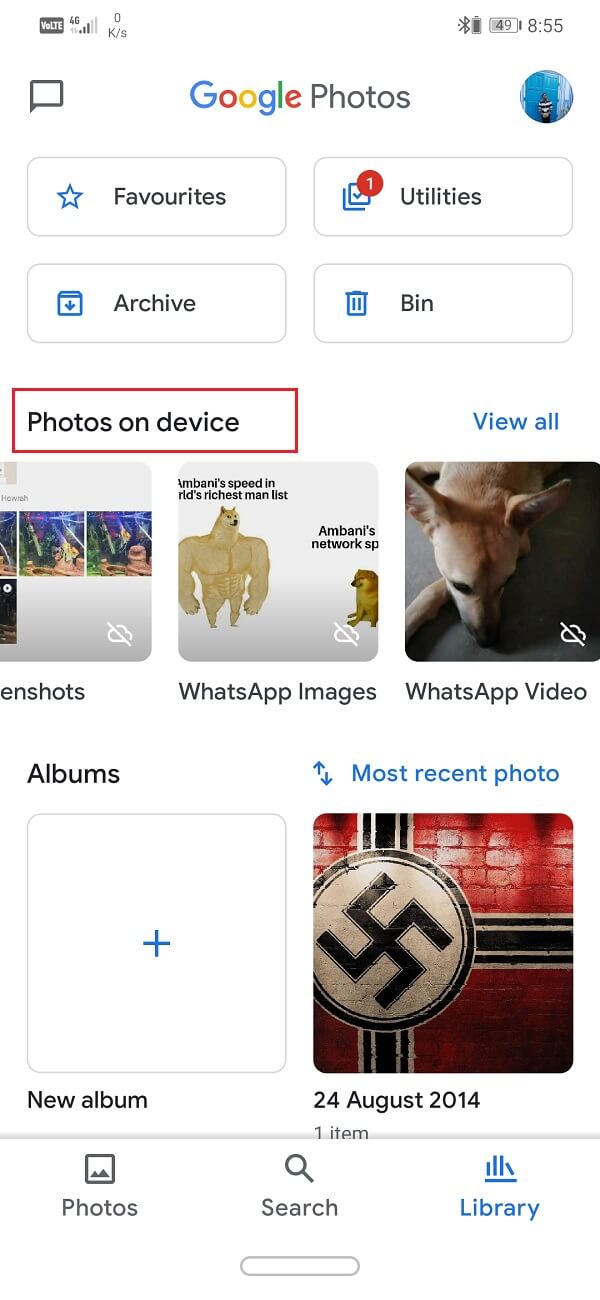
4. Look for the folder that contains the photo that you wish to upload and tap on it. You will notice an offline symbol on the bottom right corner of the folder that indicates some or all pictures in this folder has not been uploaded.
5. Now select the image that you wish to upload and then tap on the menu button (three vertical dots) on the top right corner.
6. נאָך וואָס, גיט אויף די צוריק אַרויף איצט אָפּציע.
7. Your photo will now be uploaded on Google Photos.
רעקאַמענדיד:
With that, we come to the end of this article; we hope that these solutions prove to be helpful, and the problem of Google Photos not backing up is fixed. However, as mentioned earlier, sometimes the problem lies with Google servers, and there is nothing that you can do to fix it.
All you need to do is wait as they fix the problem on their end. You can write to Google support if you want an official acknowledgment of your problem. If the issue isn’t resolved even after a long time, you can try switching to an alternate cloud storage app like Dropbox or One Drive.

