פאַרריכטן קאָמפּיוטער ניט דערקענען iPhone

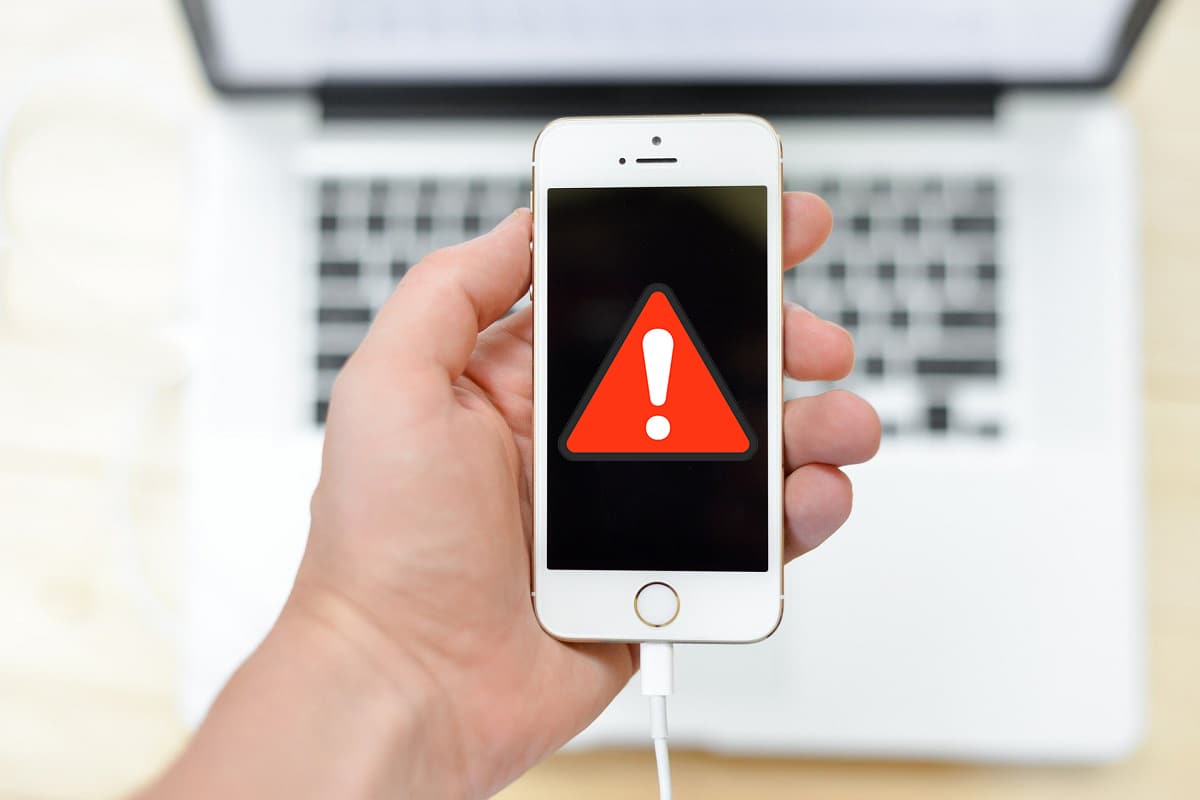
As an iOS user, you must be aware that you can’t download songs or videos on iPhones and iPads, without paying to do so. You need iTunes to transfer your favorite songs or videos to your iPhone and then, play these for free. Often, you connect your iOS device to a PC but, the computer not recognizing iPhone issue occurs. This can be caused either by a hardware defect or a software incompatibility. In this article, we have explained a few simple methods to fix iPhone not showing in my computer issue.
How to Fix iPhone Not Showing in My Computer Problem
Method 1: Perform Basic Checks
Let’s check why this error might occur and rectify hardware issues before moving onto software fixes.
- Examine Lightning cable – to check for damage. If it is damaged, try connecting your iPhone to your computer with a new/different one.
- Examine USB port – If the Lightning cable is in sound condition, link your iPhone to another USB port. Check to see if it’s recognized now.
- Disconnect, then Reconnect – Try to connect your iPhone to your computer after disconnecting it.
- הייב אן נאכאמאל די מכשירים – If the problem persists, restart your iPhone and reboot your computer to solve minor issues. Then, reconnect your iPhone.
- ופשליסן דיין יאָס מיטל – Before you attach your iPhone/iPad to your PC, make sure it is unlocked.
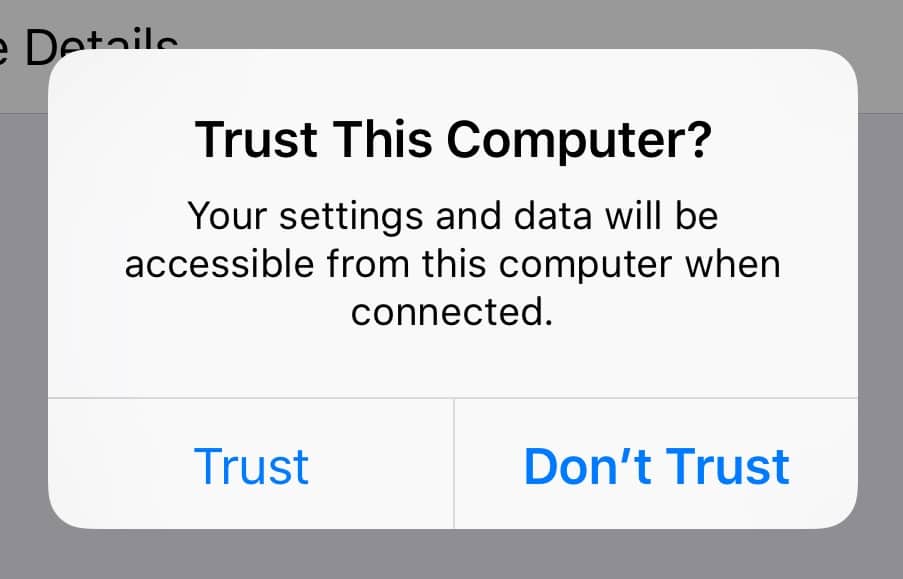
- Trust this Computer – When you pair your iPhone to any computer for the first time, you need to tap Trust this computer ווען פּראַמפּטאַד.
Method 2: Update iTunes App and Windows OS
This problem is most likely triggered by an out-of-date iTunes or Windows operating system. To resolve this problem, upgrade iTunes to the most recent version and then, run a Windows update.
- If your desktop is currently operating on Windows 10, iTunes will automatically upgrade itself whenever a new version is available.
- If you have Windows 7 or Windows 8, or Windows 8.1 computer, update iTunes and Windows by following the steps listed below.
1. Download and install iTunes for your Windows PC. Then, launch the iTunes app.
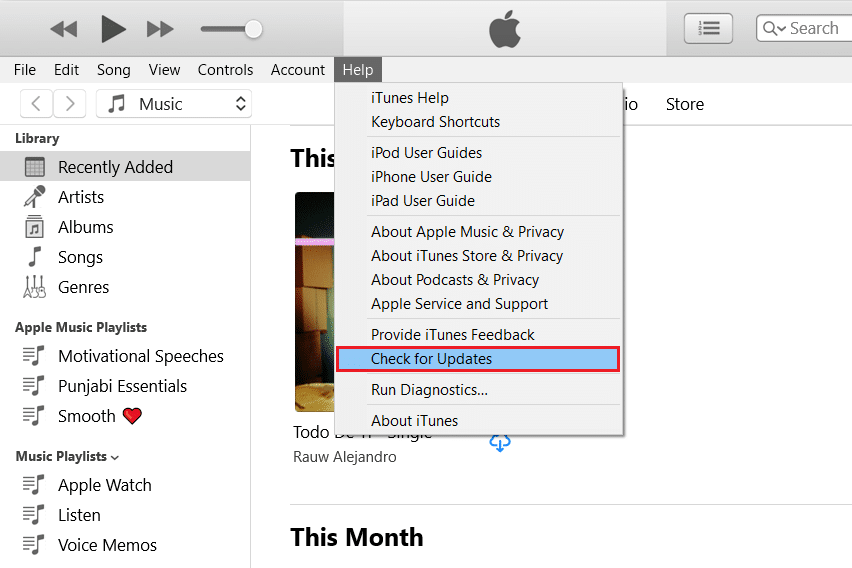
2. דריקט זוך נייע ווערסיעס פון די הילף מעניו, ווי ילאַסטרייטיד אונטן.
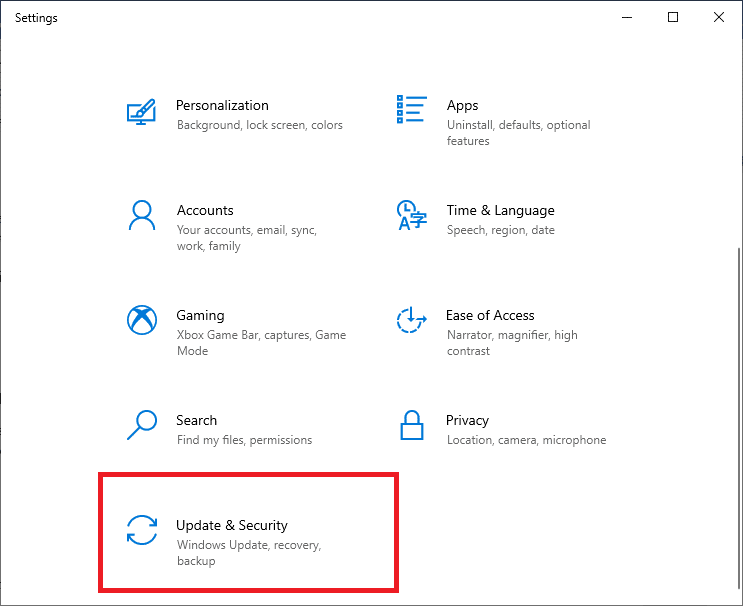
3. After upgrading iTunes to the newest edition, go to סעטטינגס> דערהייַנטיקן & זיכערהייט, ווי געוויזן.
4. Search for available updates by clicking on זוך נייע ווערסיעס, ווי געשילדערט.
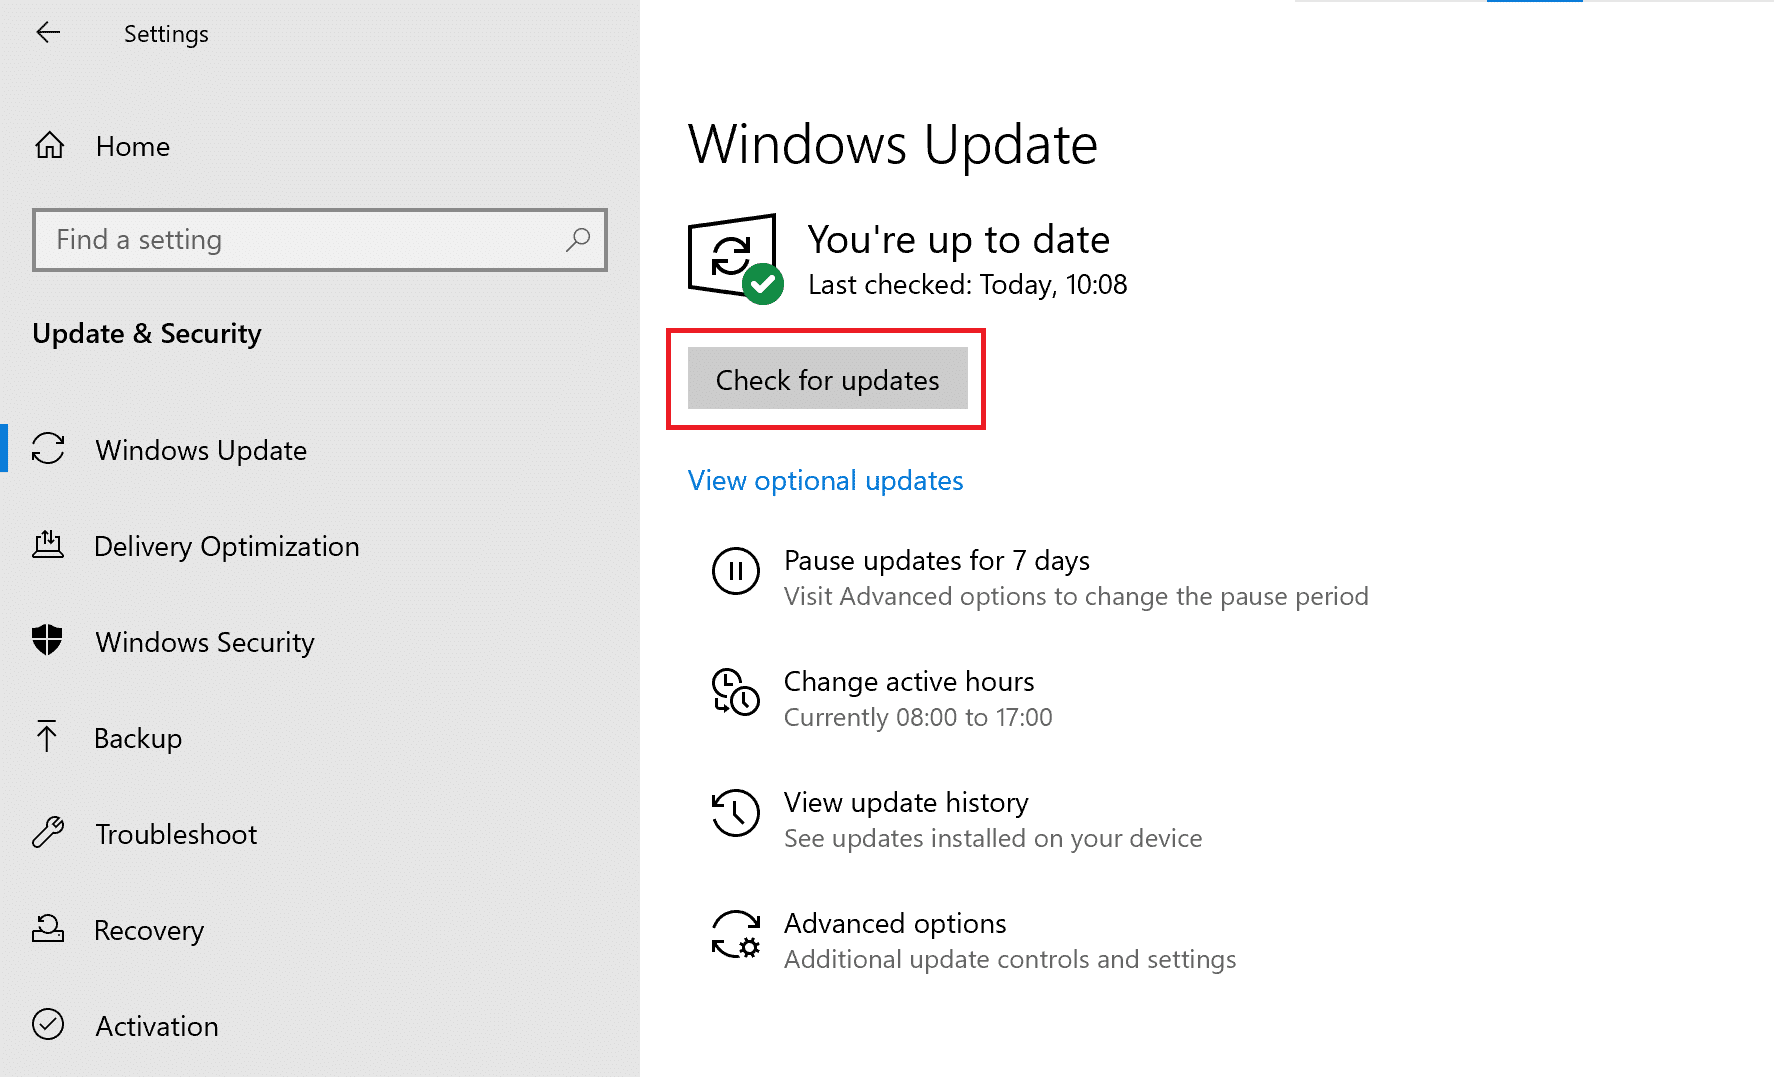
5. If any updates are available, install them and restart your PC.
Then, connect your iPhone to your Windows computer to verify if iPhone not showing in my computer issue is resolved.
אויך לייענען: פאַרריכטן Windows 10 ניט דערקענען iPhone
Method 3: Update Apple iPhone Driver
It is possible that your computer is utilizing an obsolete device driver. Hence, to fix the computer not recognizing iPhone issue, try updating the Apple iPhone driver as:
1. נאַוויגירן צו די היים סקרין אויף דיין יפאָנע.
2. פאַרבינדן your iPhone to your Windows PC.
3. Exit iTunes, if it pops up.
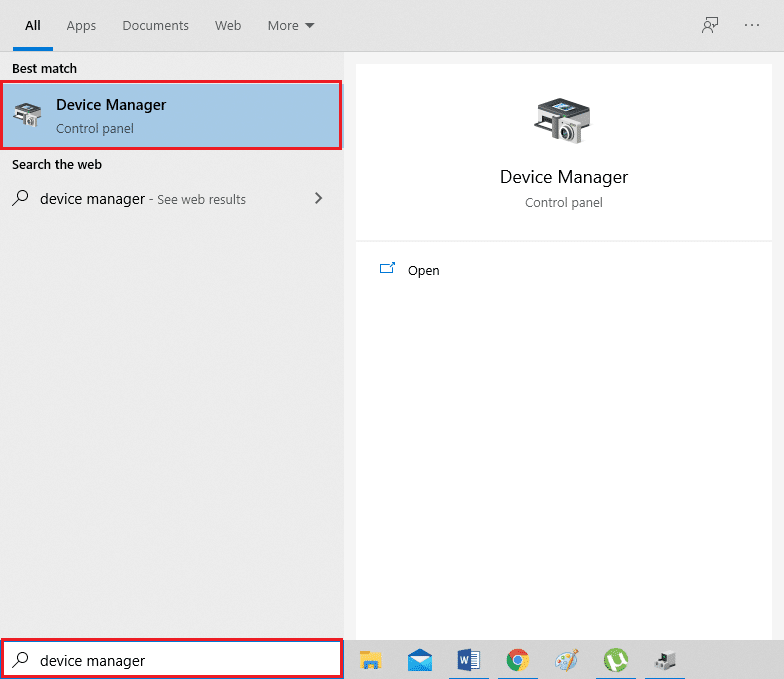
4. Launch דיווייס מאַנאַגער דורך זוכן פֿאַר עס אין די Windows זוכן box.
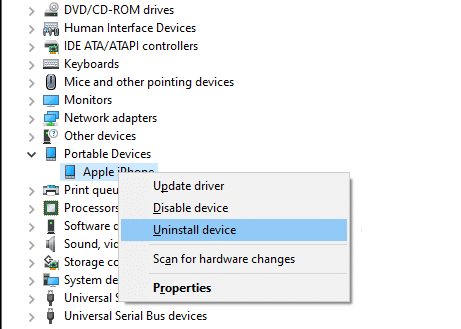
5. Here, double click on פּאָרטאַטיוו דעוויסעס צו יקספּאַנד עס.
6. דריקט דערהייַנטיקן דרייווער i.e. the first option from the menu that appears when you right-click on עפּל יפאָנע.
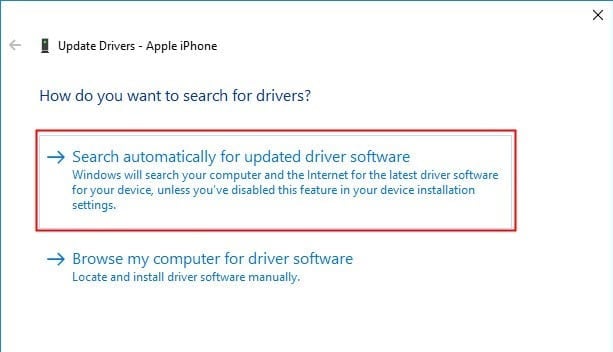
קסנומקס. קלייַבן זוכן אויטאָמאַטיש פֿאַר דערהייַנטיקט שאָפער ווייכווארג and then, follow the on-screen instructions.
8. Launch יטונעס and link your iPhone to the computer.
If this doesn’t help solve the computer not recognizing iPhone issue, we will reinstall the drivers in the next method.
Method 4: Reinstall Apple Mobile Driver (For iTunes installed from App Store)
When your computer does not recognize/remember your iPhone, you should try reinstalling the Apple Mobile Device USB driver. If you installed iTunes from Apple official website, you could install the Apple Mobile Device USB driver again by following the steps listed below:
1. נאַוויגירן צו די היים סקרין אויף דיין יפאָנע.
2. פאַרבינדן your iPhone to your Windows PC.
3. Exit iTunes if it is pops-up.
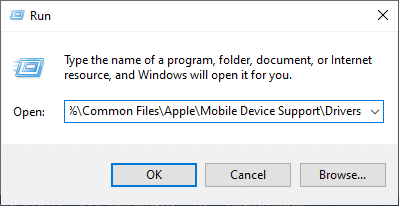
4. קאַטער די לויפן dialogue box by pressing Windows + R שליסלען אין דער זעלביקער צייַט.
5. Type the given navigation path and click OK, ווי געוויזן.
% Program Files% Common FilesAppleMobile Device SupportDrivers
6. רעכט גיט אויף usbaapl64.inf or usbaapl.inf file in the pop-up window and click ינסטאַלירן, ווי דיפּיקטיד אונטן.
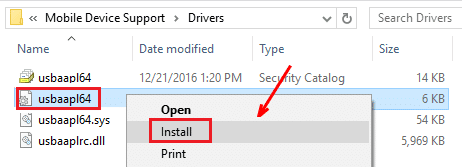
7. Disconnect your iPhone from your computer and ריסטאַרט דיין קאָמפּיוטער.
8. לעסאָף, פאַרבינדן the iPhone and launch יטונעס.
אויך לייענען: פאַרריכטן די טעקע iTunes Library.itl קענען ניט זיין לייענען
Method 5: Reinstall Apple Mobile Driver (For iTunes installed from Microsoft Store)
Alternately, you can reinstall drivers to fix computer not recognizing iPhone errors on Windows 10 PC, ווי גייט:
1. Type, search and open דיווייס מאַנאַגער, as instructed in אופֿן קסנומקס.
2. טאָפּל גיט אויף פּאָרטאַטיוו דעוויסעס צו יקספּאַנד עס.
3. רעכט גיט אויף די יאָס מיטל און גיט נעם אַוועק מיטל, ווי געוויזן אונטן.
4. Reboot the system. Now, reconnect your iPhone and allow Windows to install Apple drivers automatically.
5. If you face difficulties, then use Steps 3-5 of Method 2 to update Windows and consequently, install & update iPhone drivers on your Windows 10 laptop/desktop.
Method 6: Restart Apple Mobile Device Service
If the Apple Mobile Device Service is not installed on your computer, your iPhone will not connect to it. So, ensure that the said service is installed. If your iPhone continues to be unrecognized by your computer, restart Apple Mobile Device Service. If your computer runs on the operating system Windows 7/8/8.1, follow the given steps to restart Apple Mobile Device Service:
1. Close iTunes און אָפּגעלאָזן your iPhone from the computer.
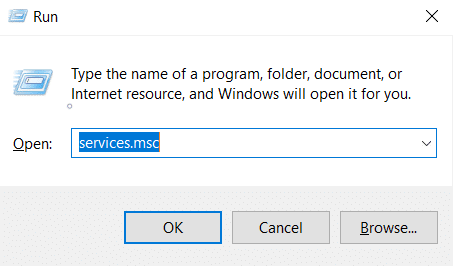
2. To open the Run dialogue box, press the Windows + R שליסלען simultaneously from your keyboard.
3. דאָ, טיפּ סערוויסעס.מסק און שלאָגן אַרייַן.
4. רעכט גיט אויף עפּל מאָביל דיווייס סערוויס און אויסקלייַבן פּראָפּערטיעס.
קסנומקס. קלייַבן אָטאַמאַטיק ווי די סטאַרטאַפּ טיפּ.
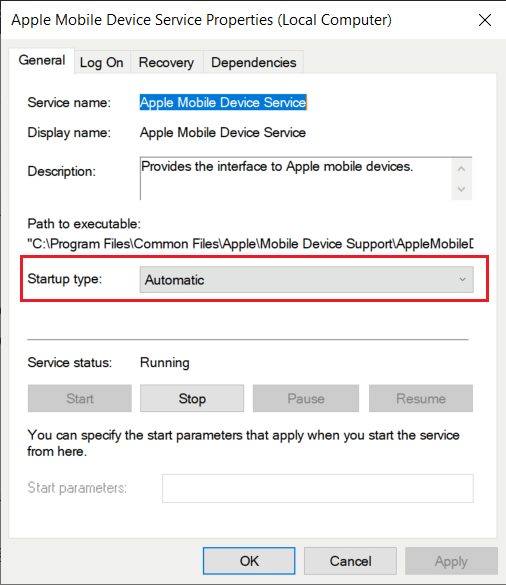
6. דריקט האַלטן to terminate the operation.
7. Once the operation has been halted, click אָנהייב to restart it. Then, click on the OK קנעפּל.
8. רעבאָאָט your Windows computer. Link your iPhone to your device using iTunes.
אויך לייענען: Fix Android Phone Not Recognized On Windows 10
How do I avoid iPhone not showing in my computer?
When connecting your iPhone to the Windows system for the first time, you can utilize the AutoPlay feature and easily avoid the computer not recognizing iPhone issue. Here are the steps to do the same:
1. פאַרבינדן your iPhone with your Windows 10 computer.
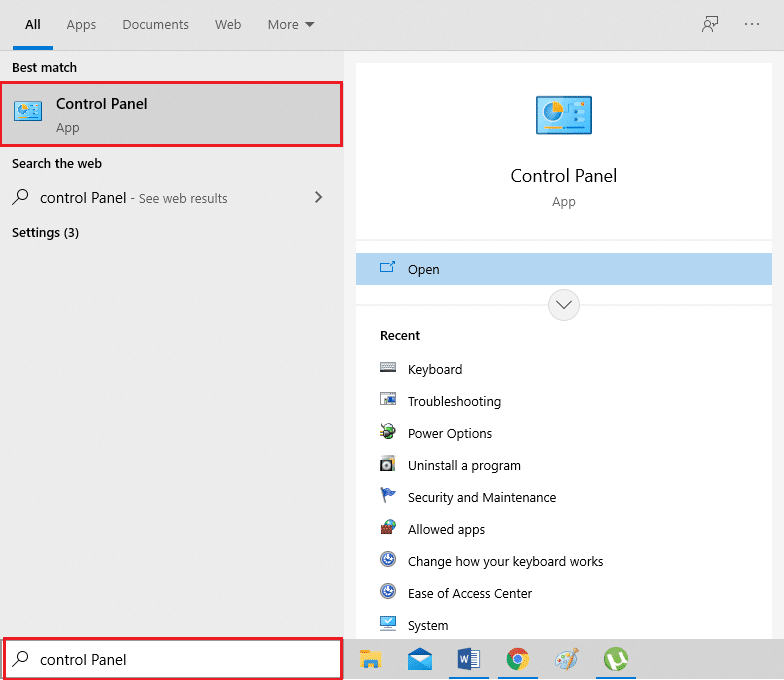
2. Launch קאָנטראָל פּאַנעל by searching for it, as shown.
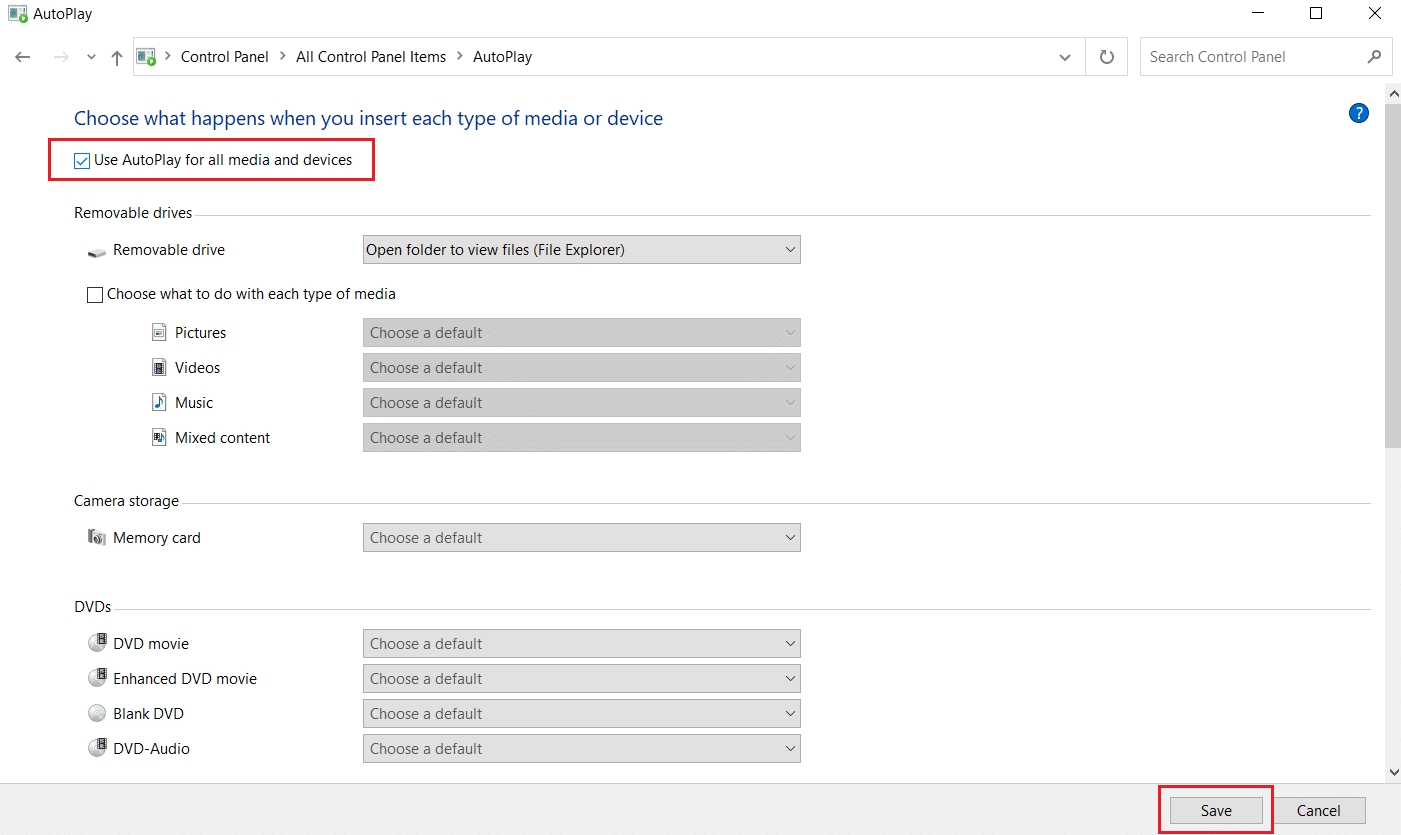
3. אויסקלייַבן View by > Small icons. דערנאך, גיט אויף אַוטאָפּלייַ.
4. Check the box next to the Use Autoplay on both media and devices אָפּציע. דריקט היט. Refer highlighted section of the given pic.
5. געפינען די יפאָנע device and click on Ask me every time פון די געגעבן מעניו.
רעקאַמענדיד:
מיר האָפן אַז דער פירער איז געווען נוציק און איר קען fix computer not recognizing iPhone issue using the given easy-to-understand methods. Let us know which method worked for you best. If you have any queries/comments regarding this article, then feel free to drop them in the comments section. For ore iPhone problem fixes, check out our other articles in the iOS category.