How to Convert Your Facebook Profile to a Business Page

Convert Your Facebook Profile to Facebook Business Page: As you all know that Facebook is one of the most popular social networking sites that provide individual identity in digital form. At the same time, Facebook also provides pages for promoting business and organization. This is because there are more stout features available on Facebook pages for enterprises and organizations and are appropriate enough to meet business needs. But it can be still seen that various companies and recruiting agencies use a personal Facebook profile for business promotion.
How to convert your Facebook Profile to a Business Page
If you come under such category, then you need a change or else there will be a risk of losing your profile as stated clearly by Facebook. In this article, you will learn about the steps to convert your personal Facebook profile into a business page. This conversion will also eliminate the restriction of having 5000 friend connections and will allow you to have followers if you change it to a Business Facebook page.
Step 1: Make a Backup of Your Profile Data
Before you convert your Facebook page to a business page make sure you understand that only your profile photo and friends (which will be converted to likes) will be migrated to your business page. No other data will migrate to your new page. So you need to make sure to download all your Facebook data before you convert your profile to a page.
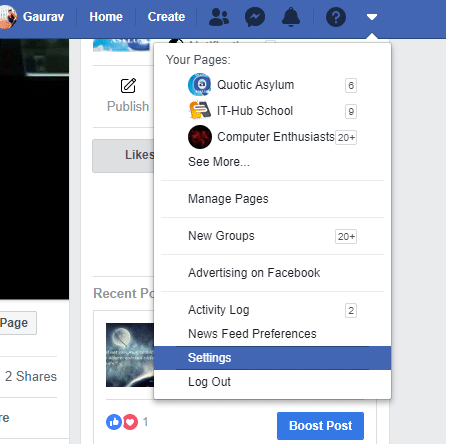
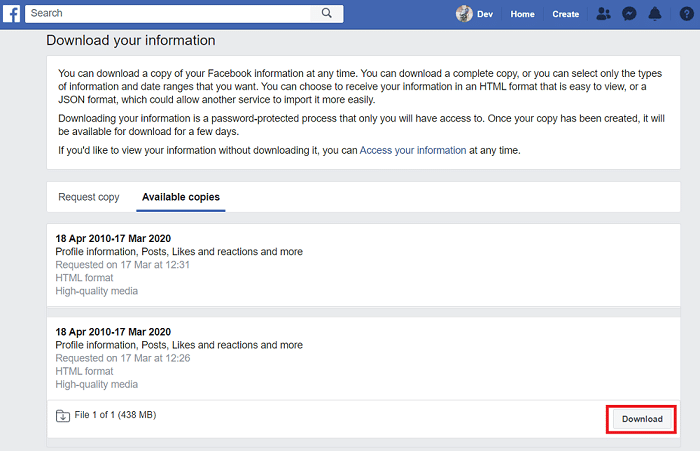
1. גיין צו דיין אַקאַונט מעניו from the top right section of the Facebook page and choose the סעטטינגס אָפּציע.
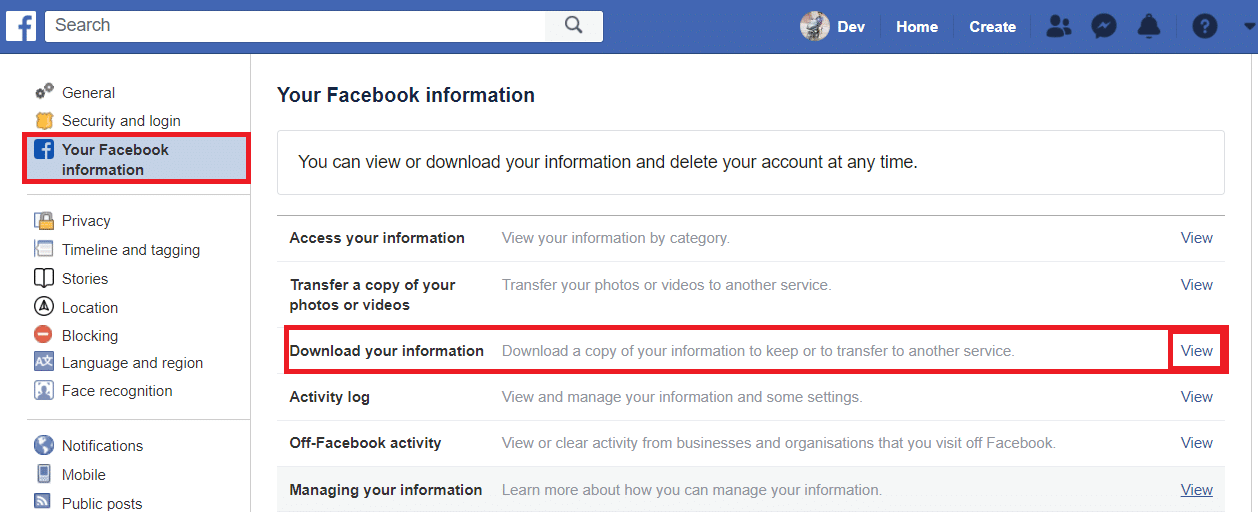
2. Now, click on the “דיין פאַסעבאָאָק אינפֿאָרמאַציע” link on the left-hand Facebook page section, then click on קוק אָפּציע אונטער די אראפקאפיע דיין אינפֿאָרמאַציע אָפּטיילונג.
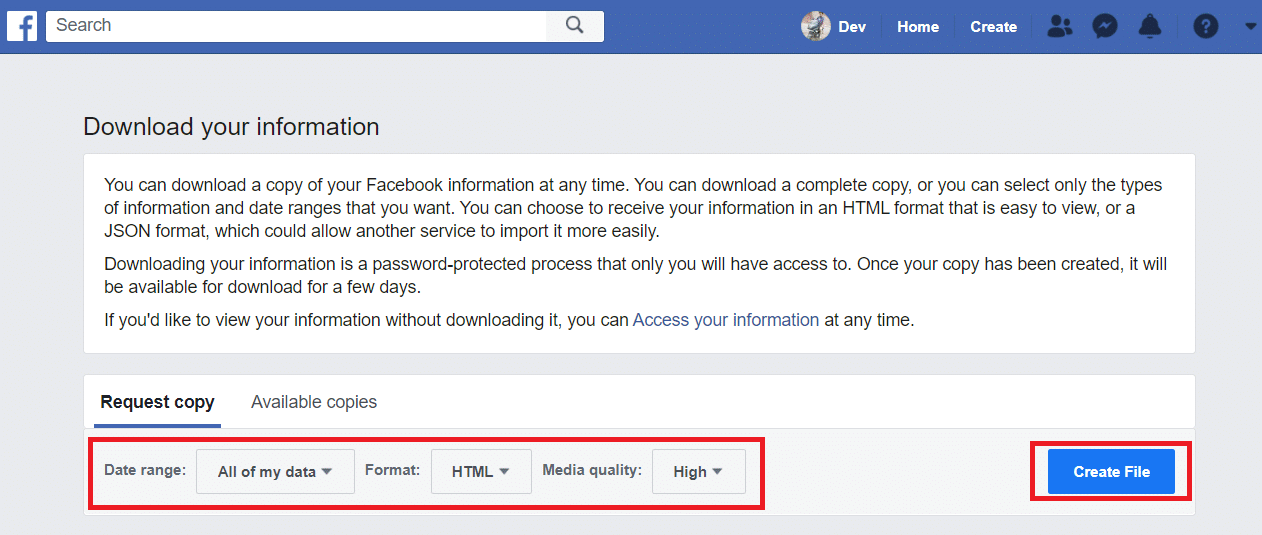
3. איצט אונטער Request copy, קלייַבן די טאָג ראַנגע or keep the default options autoselected. Then click on שאַפֿן טעקע קנעפּל.
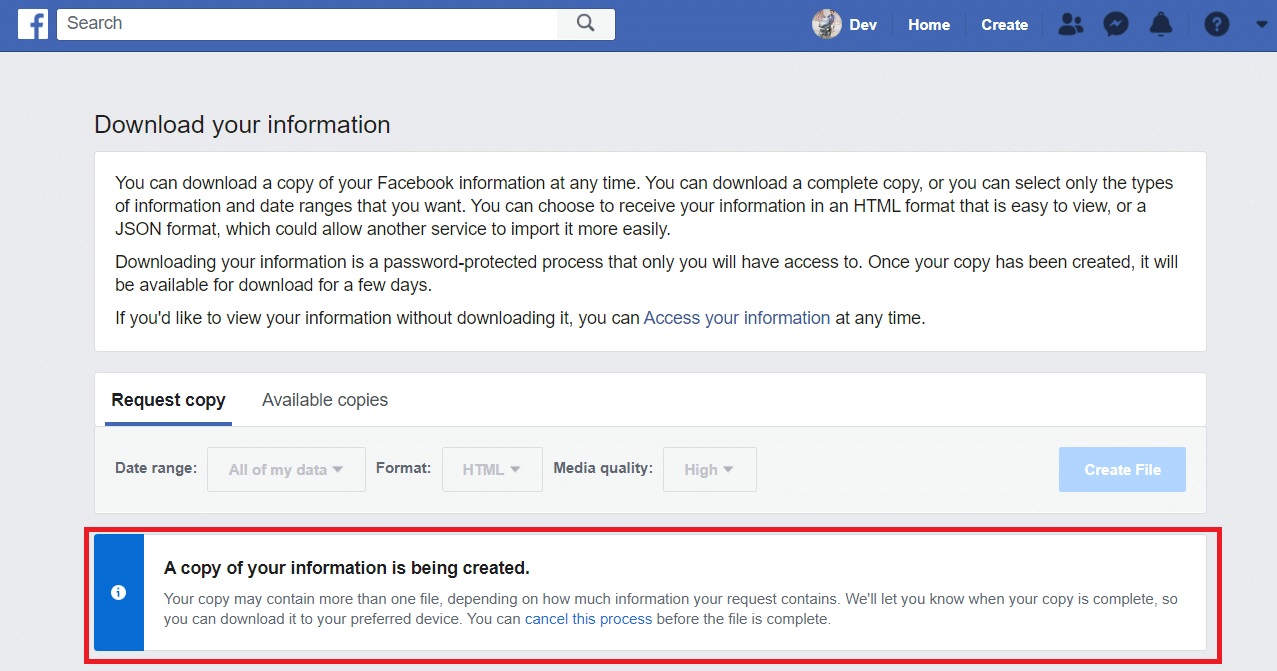
4. A dialogue box will appear informing "A copy of your information is being created". Thus, wait for the file to be created.
5. Once the file is created, Download the data by navigating to Available Copies און דעמאָלט גיט אויף דאַונלאָוד.
אויך לייענען: 5 Ways to Delete Multiple Facebook Messages
Step 2: Modify the Profile Name & Address
נאטיץ: The new business page converted from your Facebook profile will have the same name as your profile.
If your Facebook profile has more than 200 friends then you won’t be able to change the name of the business page once it gets converted. So if you need to alter the name, make sure you change the name of your Profile page before the conversion.
To Change Profile Name:
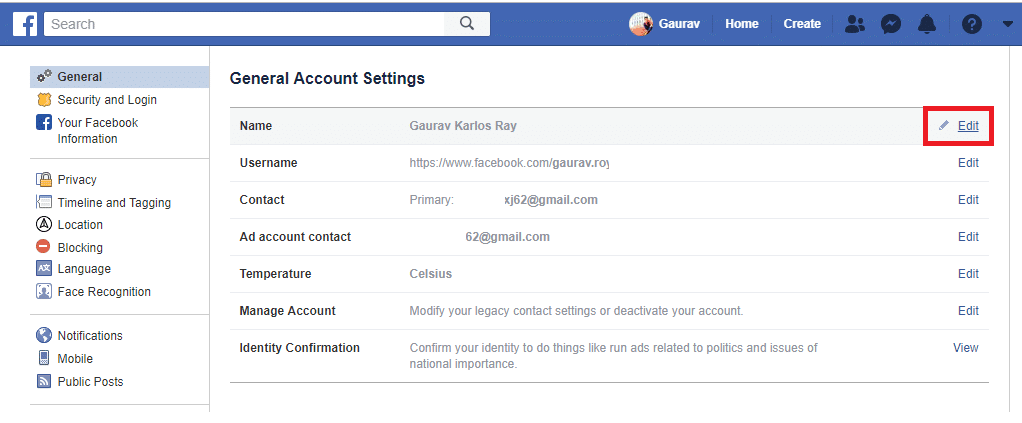
קסנומקס. גיין צו די Accounts menu from the top-right corner of the Facebook page then choose סעטטינגס.
2. Now, in the “אַלגעמיין” tab click on the “ויסרעדאַגירן"קנעפּל פֿאַר נאָמען אָפּציע.
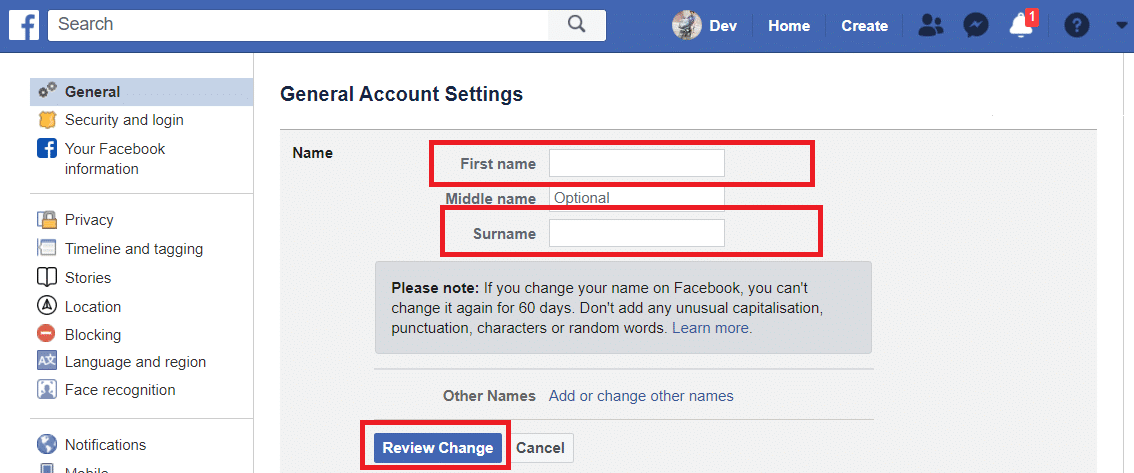
3. Type a suitable First name, Middle name, Surname & דריקט אויף די איבערבליק טשאַנגע קנעפּל.
To Change Address:
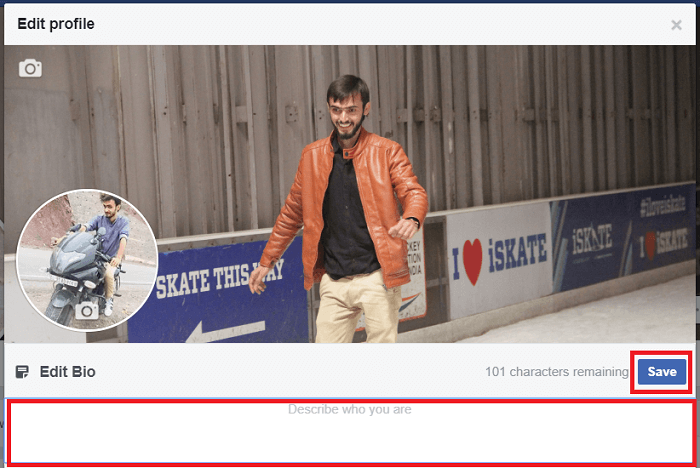
1. Under your cover photo, click the “רעדאַגירן פּראָופייל” button on the timeline.
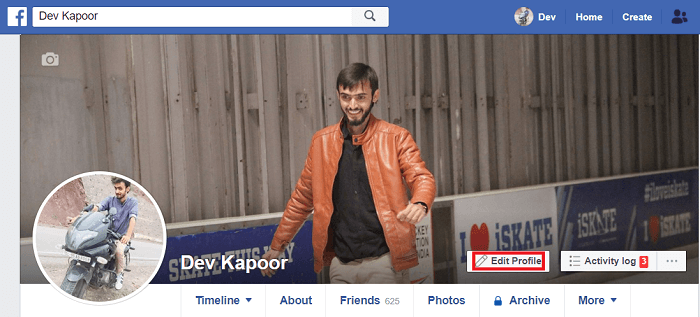
2. A pop-up will appear, click on Edit Bio and add information of your business and click on the שפּאָרן קנעפּל צו ראַטעווען דיין ענדערונגען.
אויך לייענען: ווי צו מאַכן דיין Facebook חשבון מער זיכער?
Step 3: Convert your Personal Profile to Business Page
From your profile page, you can manage Other Pages or Groups.
נאטיץ: Before you convert your profile to a business page, assign a new admin to all your existing Facbook pages.
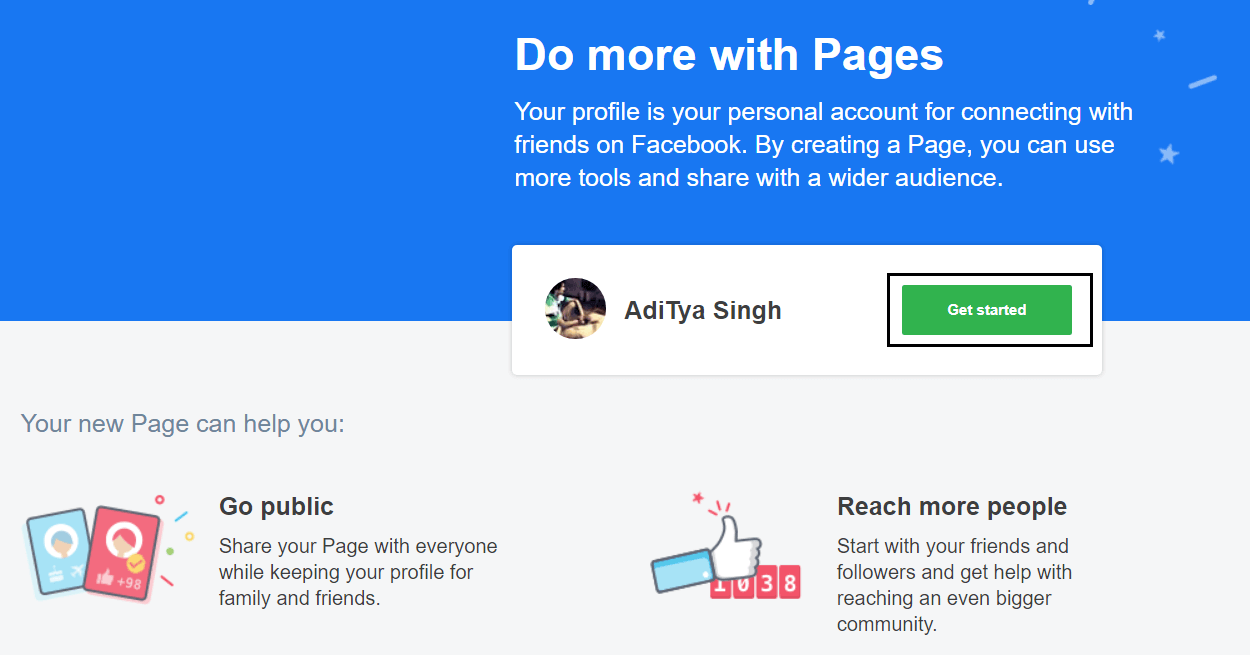
1. To start with the conversion, באַזוכן דעם לינק.
נאטיץ: The said link seems to be broken temporarily.
2. On the next page click on the “באַקומען אנגעהויבן” button shown highlighted.
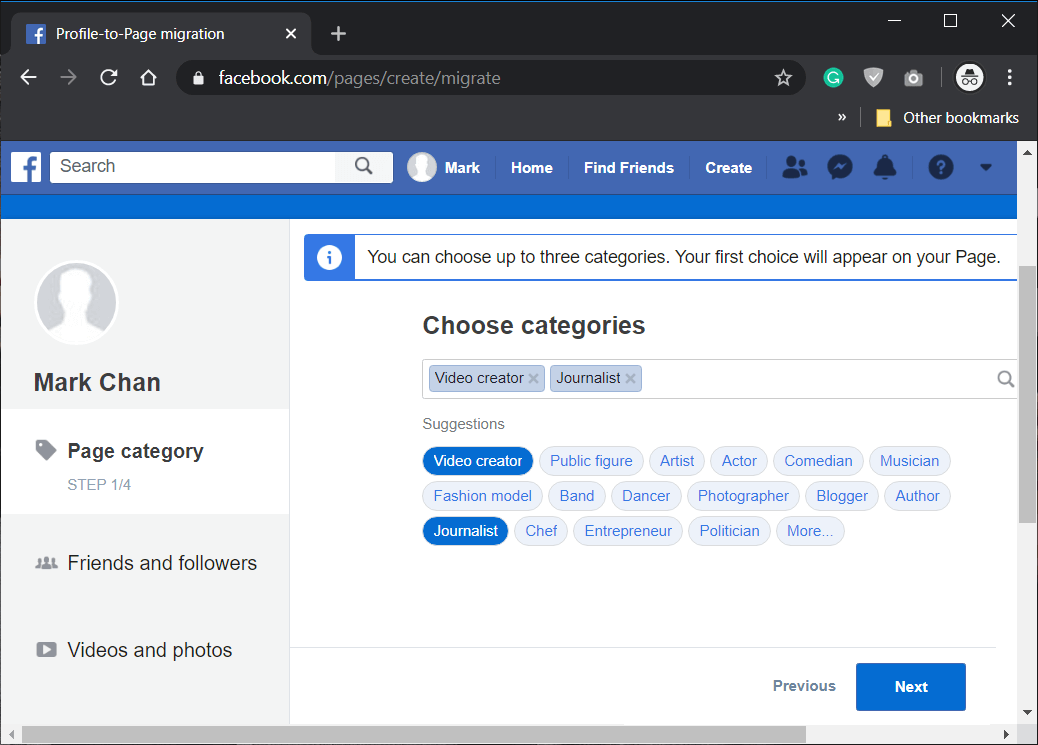
3. On the Page category step, Choose categories for your Business page and click ווייַטער.
4. אויף Friends and followers בלאַט, אויסקלייַבן די פריינט which would like your page & click ווייַטער.

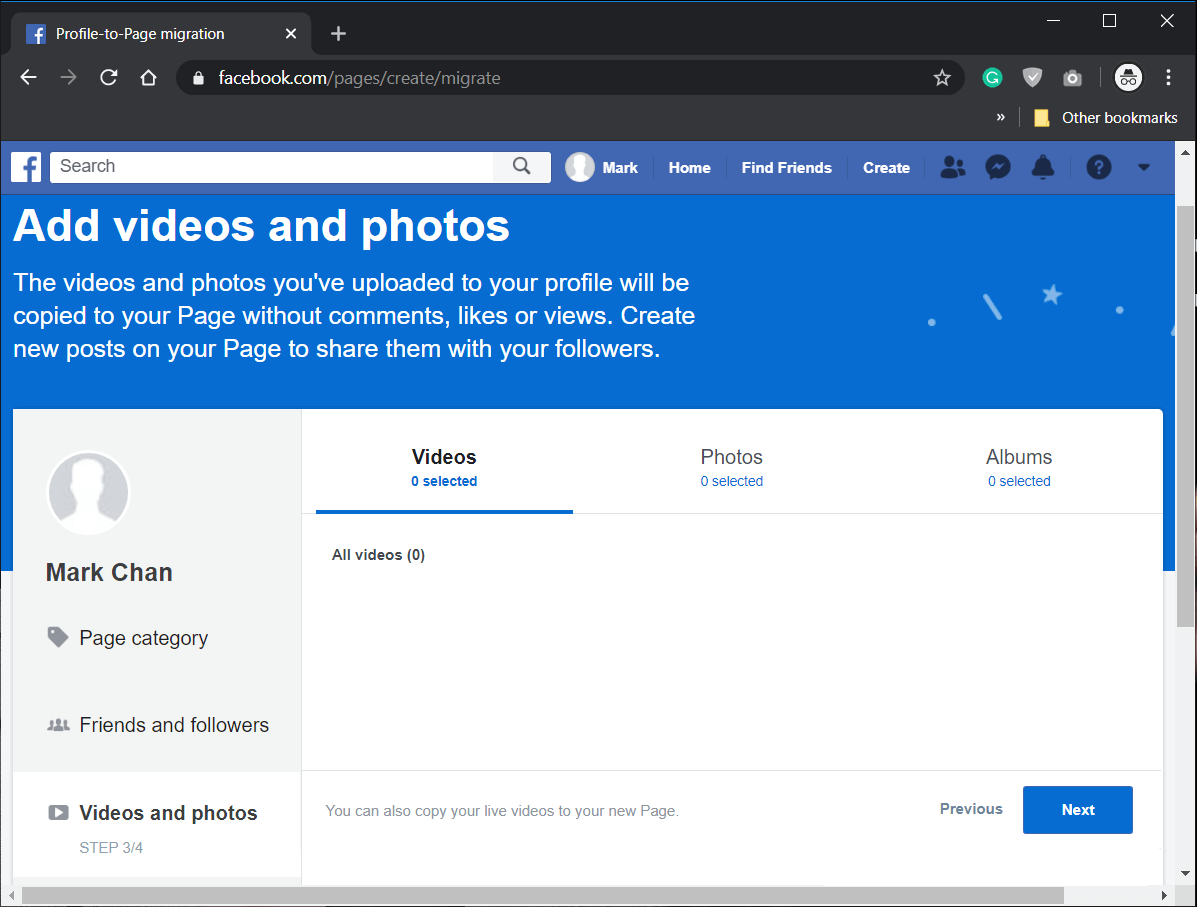
4. ווייַטער, אויסקלייַבן Videos, Photos, or Albums to be copied on your new page & click ווייַטער.
5. Finally, review your choices and click on the “שאַפֿן Page" קנעפּל.
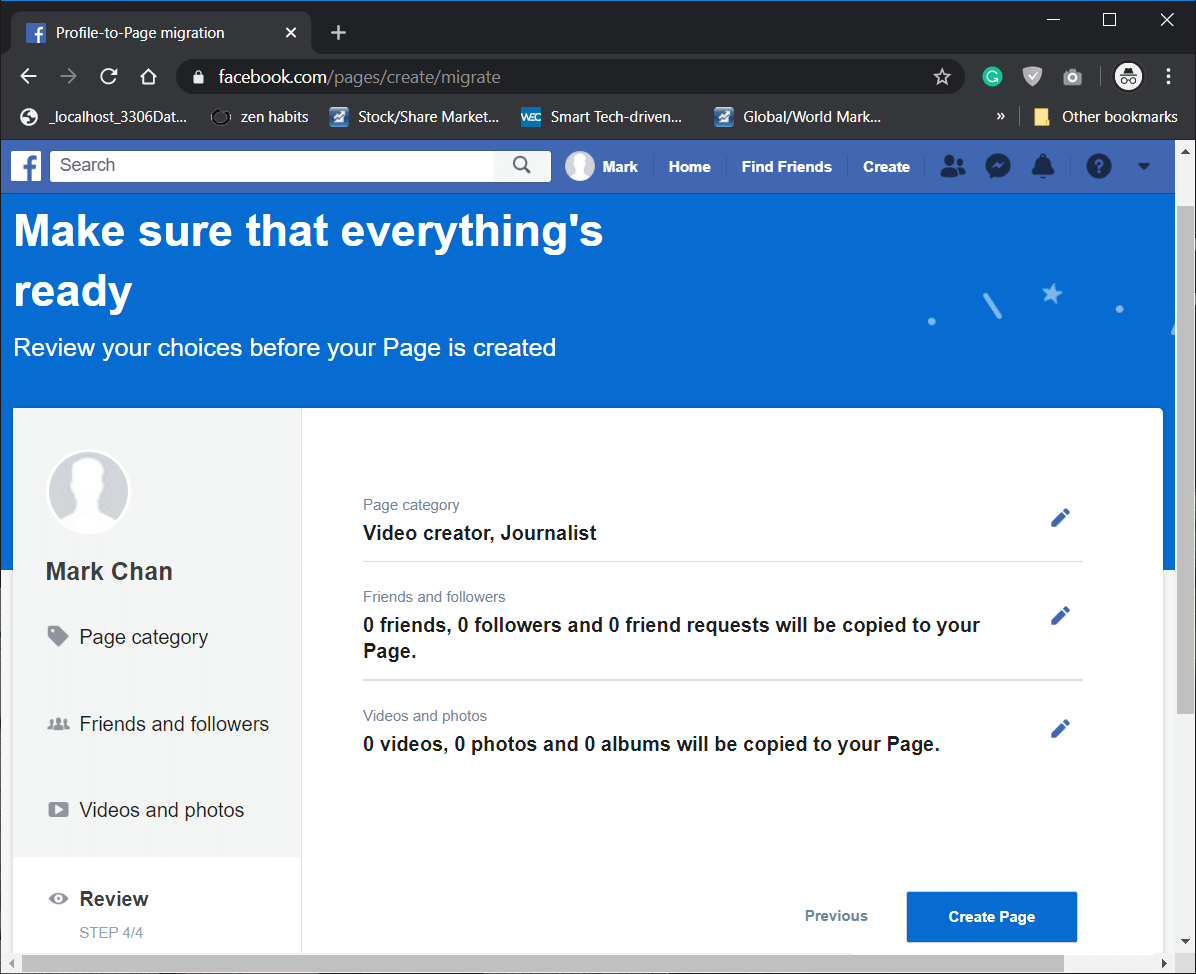
You will note that your Business page has been created.
אויך לייענען: די לעצט גייד צו פירן דיין פאַסעבאָאָק פּריוואַטקייט סעטטינגס
Step 4: Merge Duplicate Pages
If you have any business page that you would like to merge with your new Business page then read Facebook guide here and follow the below steps:
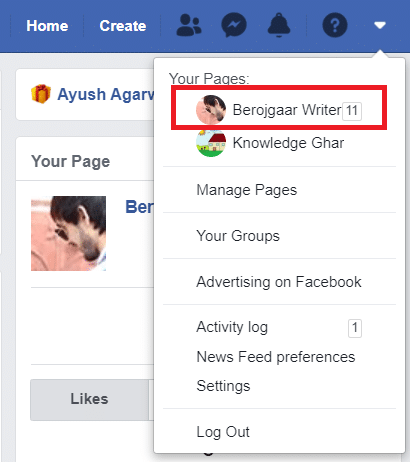
קסנומקס. גיין צו די Accounts menu from the top-right corner of the Facebook page then select the בלאַט איר ווילן צו צונויפגיסן.
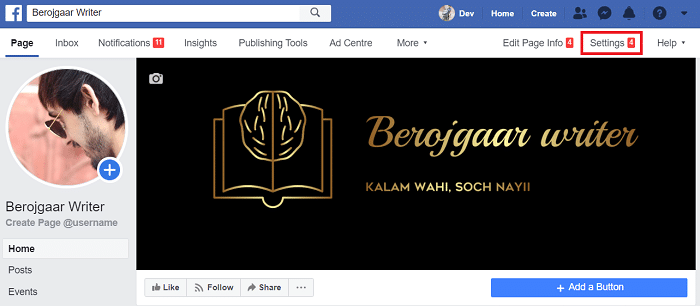
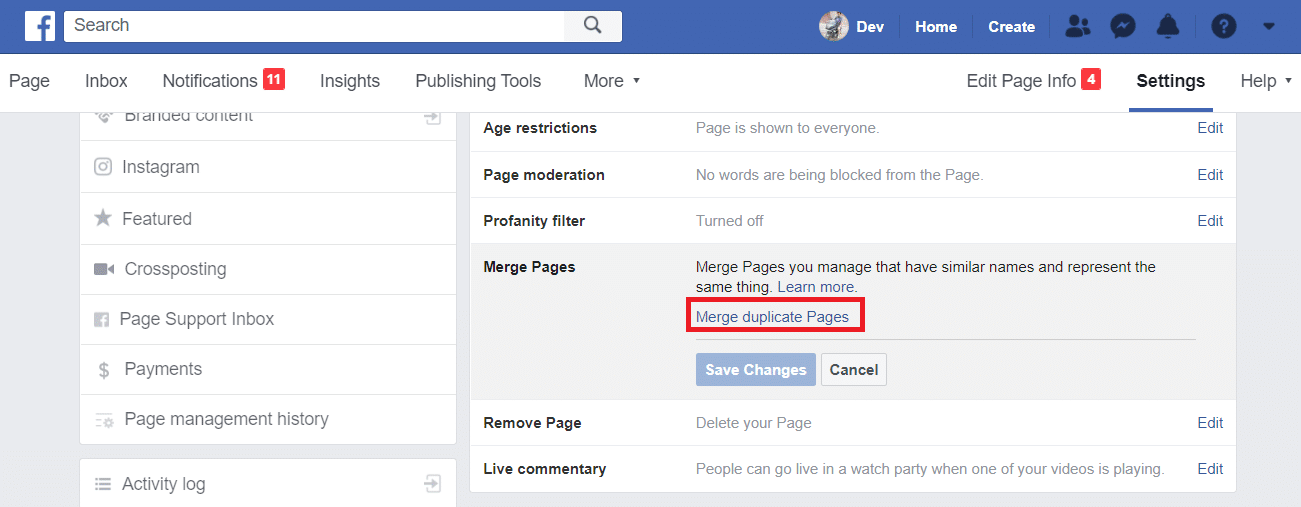
2. איצט גיט אויף סעטטינגס which you will find at the top of your Page.
3. Scroll down and look for the צונויפגיסן בלעטער אָפּציע און גיט אויף רעדאַגירן.
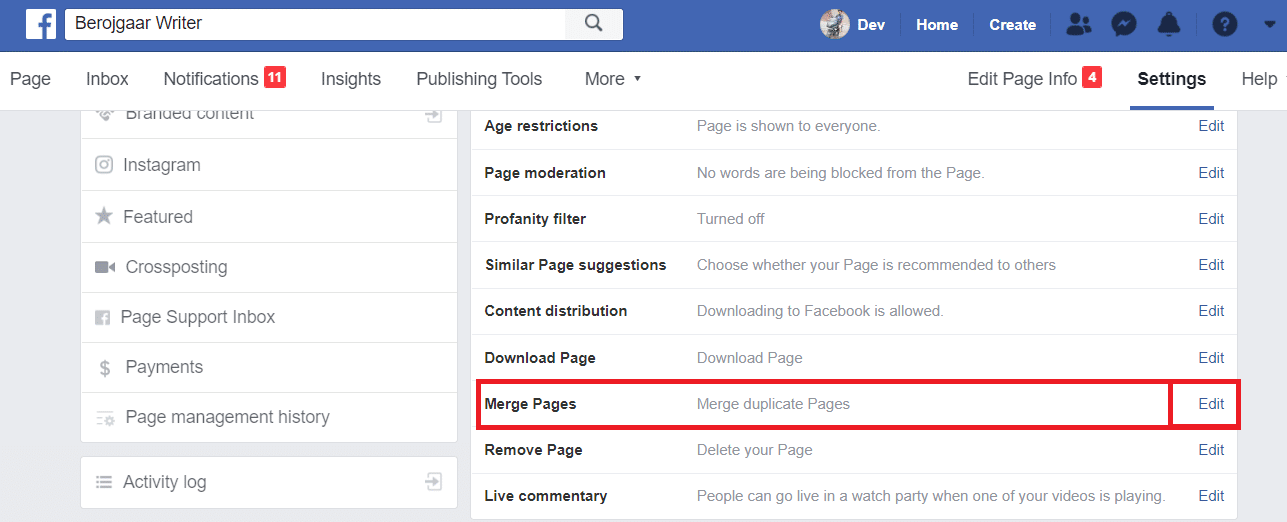
3. A menu will appear then click on Merge Duplicate Pages link shown highlighted below.
נאטיץ: Type the password of your Facebook account to verify your identity.
4. On the next page, enter the names of two pages you want to Merge and click on פאָרזעצן.
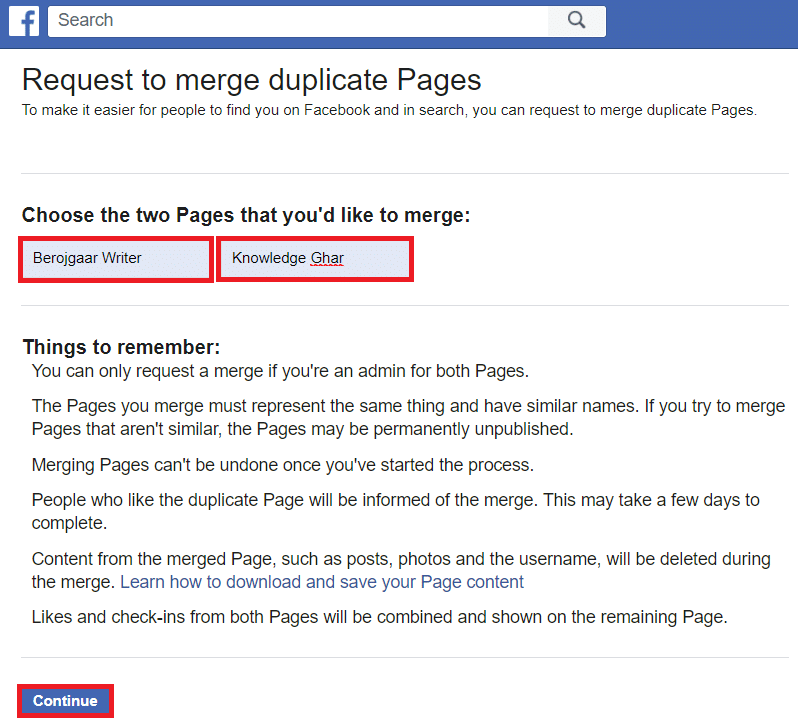
After completing all the above steps, your pages will be merged.
נאטיץ: דו קענסט merge two business pages as well. Unfortunately, the said link seems to be broken temporarily.
רעקאַמענדיד:
That’s all you need to know how to convert Facebook Profile to a Business Page. But if you still think that this guide is missing something or you like to ask something, please feel free to ask your queries in the comment section.