How to Crop a Screenshot on Mac

In 2007, the screenshot option was introduced to the iPhone. For the old versions of iOS, one was required to press the volume up and power buttons simultaneously to take a screenshot. The first computer screenshots were created in 1980, and the first mac screenshots were taken on the first mac computer in 1984. Since then, taking screenshots has only simplified. With just the click of a few buttons and a few milliseconds, one can screenshot anything present on the screen. If you want to learn how to crop a screenshot on Mac, stay tuned till the end of this article. You will get to learn how to crop a Mac screenshot with the detailed steps and illustrations to your aid.
How to Crop a Screenshot on Mac
You can crop any screenshot on Mac from the Preview app. Keep reading to find out the detailed steps later in this article with the illustrations to understand the procedure better.
Is There a Snip Tool on Mac?
יאָ, there is a snipping tool on מעק. The flexibility and versatility of that snipping tool make it very user-friendly, even for beginners who have just started learning the features of their MacBook. It easily allows you to drag the crosshair and snip as per your wish. Just by pressing Shit + Command +4, you can drag and select the area of the screenshot, picture, or webpage you want to snip or crop.
What is Mac Screenshot Shortcut?
The mac screenshot shortcuts make it very convenient to take screenshots with the snap of a finger. There are basically three shortcuts פֿאַר די זעלבע:
- דרוק שיפט + קאַמאַנד + 3 at the same time to take a screenshot of the whole screen.
- שפּונט אויף שיפט + קאַמאַנד + 4 to take a screenshot of a small portion of the screen.
- קלייַבן Shift+Command+4+Space Bar simultaneously to take a screenshot of a window or menu.
Where Do Cropped Screenshots Go?
Screenshots are saved to your דעסקטאַפּ as image files in the .png format. Those screenshots are saved as Screen Shot [date] at [time].png by default. Once they are edited and cropped, they can be saved anywhere. And like other files, be renamed as per your liking.
Can I Edit a Mac Screenshot?
יאָ, you can edit a mac screenshot with great efficiency and very little time. You have to press שיפט + קאַמאַנד + 3 צו נעמען א סקרעענשאָט. This screenshot will get saved to your desktop as Screen Shot [date] at [time].png, by default. You can open the file from there in Default Preview און צאַפּן אויף מכשירים to edit the screenshot.
אויך לייענען: How to Take an iPhone Screenshot Without Buttons
How to Crop a Screenshot on Mac? How to Crop a Mac Screenshot on Macbook Pro & Macbook Air?
Cropping a screenshot is simple and time-efficient, irrespective of your Macbook Pro or Macbook Air. The steps to take and edit a screenshot remain the same. Follow the steps below to crop a full screenshot with a specific key combination.
1. To take a screenshot, press the שיפט + קאַמאַנד + 3 at the same time from the keyboard.
טאָן: The screenshot will be saved on your דעסקטאַפּ דורך פעליקייַט.
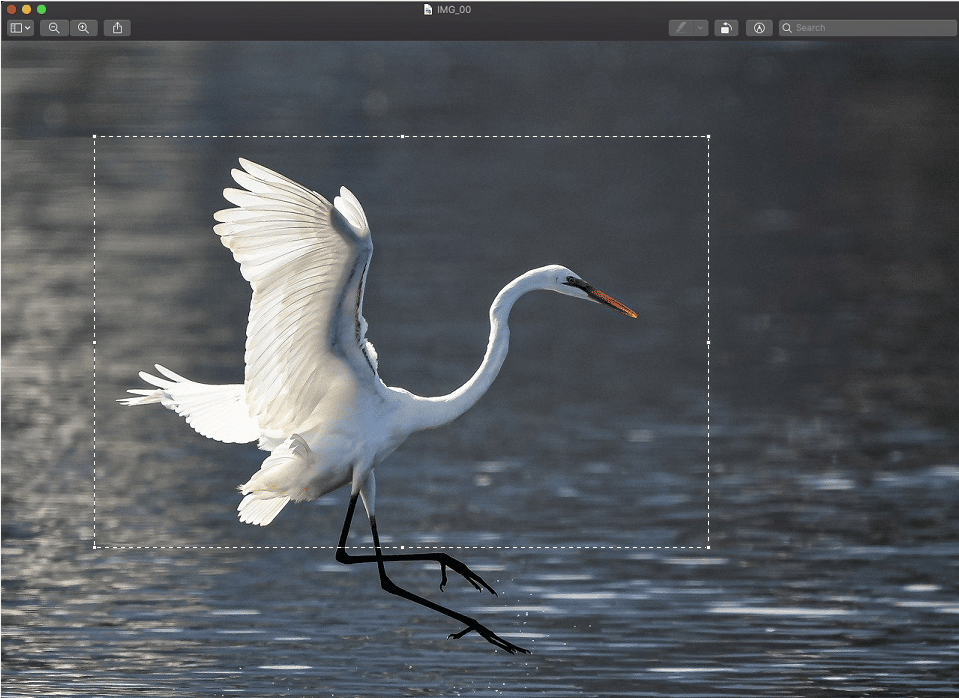
2. Once saved on your desktop, double click on the desired saved screenshot to open it in the פאָרויסיקע ווייַזונג אַפּ.

3. Now with the help of the Precision Pointer, select the געוואלט געגנט to crop the screenshot.
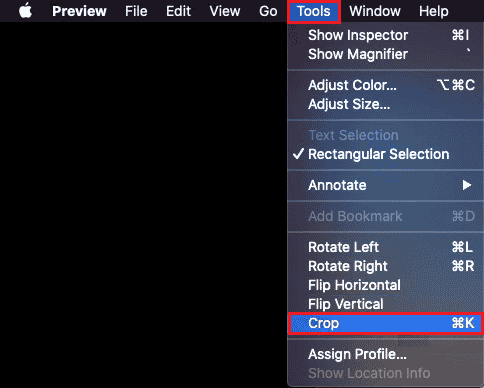
4. דריקט אויף די מכשירים option from the top bar, as shown below.
5. From the drop-down menu, click on גערעטעניש.
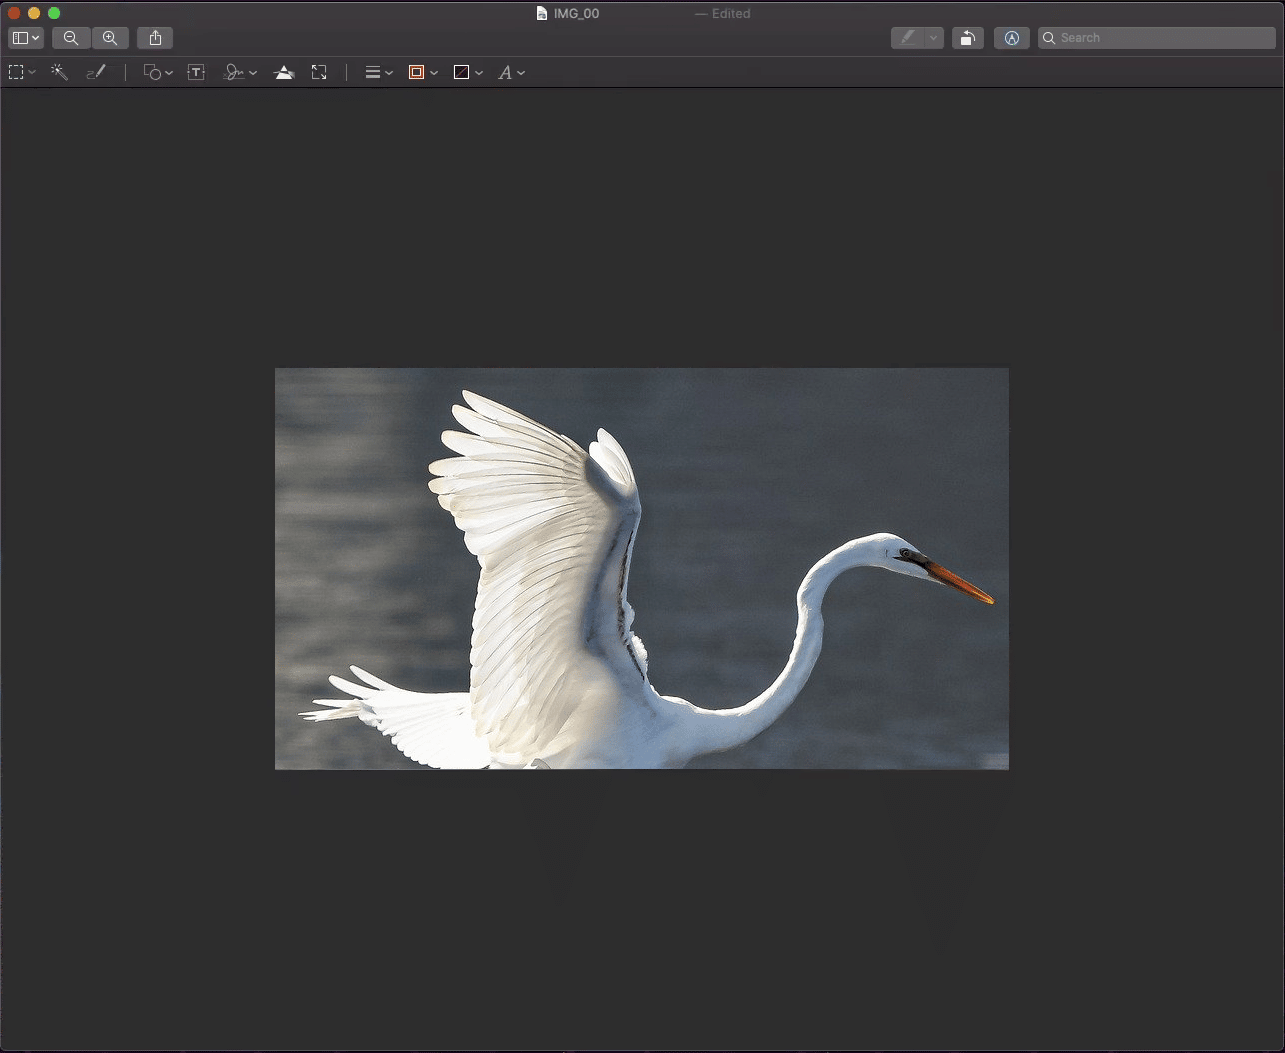
6. The screenshot will get cropped according to the selected area.
אויך לייענען: How to Convert Image to Grayscale Paint
How Do I Crop a Screenshot on Mac After Saving It?
If you want to know how to crop a screenshot on Mac, follow our step-by-step guide underneath:
1. דרוק די שיפט + קאַמאַנד + 3 simultaneously from the keyboard to take a screenshot.
טאָן: איר קענען אויך נוצן די שיפט + קאַמאַנד + 4 or Shift+Command+4+Space באַר shortcuts to take different types of screenshots.
2. טאָפּל גיט אויף די desired screenshot from the desktop.
3. אין די פאָרויסיקע ווייַזונג app, use the Precision Pointer to select the געוואלט געגנט of the screenshot image.
קסנומקס. דריקט אויף Tools > Crop, ווי געוויזן אונטן.
You will get the cropped screenshot saved on your Mac desktop.
אויך לייענען: ווי צו ויסמעקן קייפל iMessages אויף מעק
Why Can’t I Crop a Screenshot on Mac?
Below are some of the reasons why you can’t crop the screenshots on Mac:
How to Crop a Screenshot on iPhone?
Cropping a screenshot on the iPhone is child’s play. Follow the steps below to do that:
1. דרוק די Power + Home button סיימאַלטייניאַסלי צו נעמען אַ סקרעענשאָט.
טאָן: דרוק די באַנד אַרויף + Power buttons together to take a screenshot that doesn’t have the home button.
2. שפּונט אויף דעם פאָרויסיקע ווייַזונג of the screenshot immediately after taking it from the bottom left corner, as shown below.
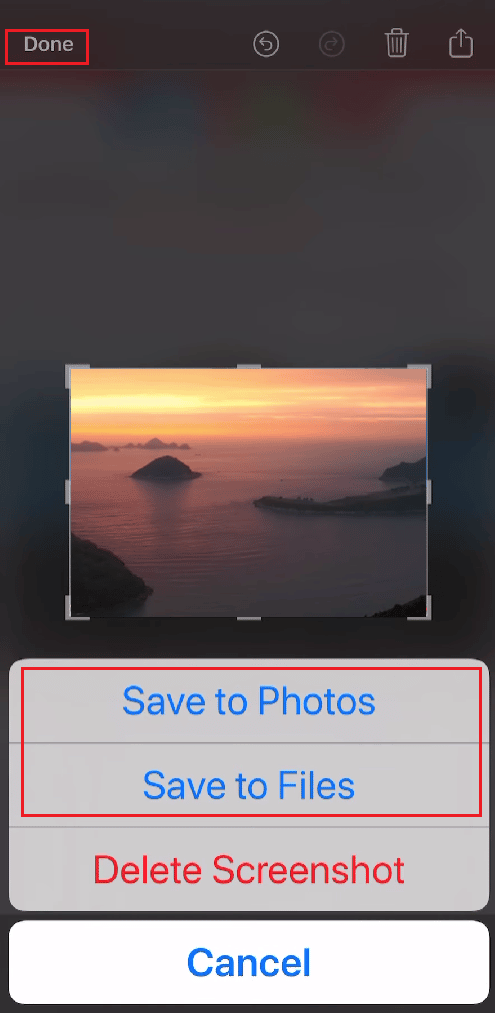
3. Select and adjust the געוואלט געגנט you want to crop from that screenshot. Then, tap on געטאן.
4. שפּונט אויף היט צו פאָטאָס or היט צו פילעס to save the cropped screenshot in the Gallery.
רעקאָממענדעד:
מיר האָפן אַז דער פירער איז געווען נוציק און איר קענען לערנען how to crop a screenshot on Mac. פילן פריי צו קאָנטאַקט אונדז מיט דיין פֿראגן און פֿירלייגן דורך די באַמערקונגען אָפּטיילונג אונטער. לאָזן אונדז וויסן וואָס טעמע איר ווילן צו לערנען אין אונדזער ווייַטער אַרטיקל.