ווי צו דיסייבאַל לעבן טילעס אין Windows 10 אָנהייב מעניו

Live tiles in Windows 10 Start Menu display information at a glance without opening the app. Also, Live tiles show live previews of application content and show notifications to the users. Now, many users don’t want these Live tiles in their Start Menu as they consume a lot of data to update the previews. Now Windows 10 have an option to disable particular applications Live tiles, and you just have to right-click on a tile and select “Turn live tile off” option.
But if you want to disable the Live tile preview for all the applications completely, then there are no such settings in Windows 10. But there is a registry hack through which this can be easily achieved. So without wasting any time let’s see How to Disable Live Tiles in Windows 10 Start Menu with the help of the below-listed guide.
מאַכן זיכער צו שאַפֿן אַ ומקערן פונט, נאָר אויב עפּעס גייט פאַלש.
Although this will only work for a particular application, this method is sometimes useful if you want to disable the Live tiles for a particular app.
קסנומקס. דריקט אויף אָנהייב אָדער דרוק Windows key אויף די קלאַוויאַטור.
2. רעכט גיט אויף די particular app, then selects “אַנפּין פון אָנהייב. "

3. This will successfully remove the particular tile from the Start Menu.
Method 2: Turn Off Live Tiles
קסנומקס. דריקט אויף אָנהייב אָדער דרוק Windows key אויף די קלאַוויאַטור.
2. רעכט גיט אויף די particular app דעמאָלט chooses More.
3. From the Choose menu, click on “Turn Live Tile Off".
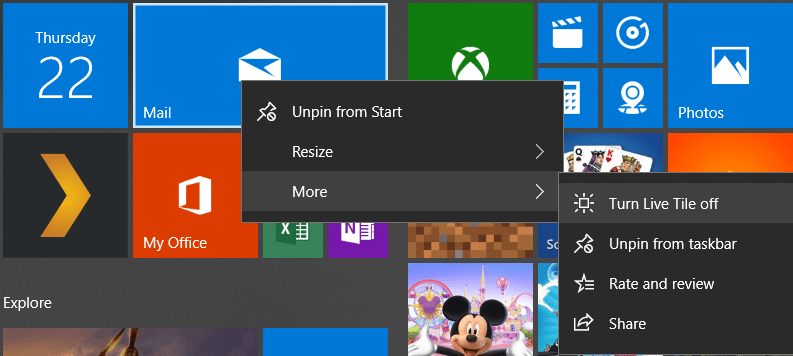
4. This will disable Live tiles in Windows 10 Start Menu for a particular app.
Method 3: Disable Live Tiles using Group Policy Editor
1. דרוק Windows Key + R דעמאָלט טיפּ גפּעדיט.מסק און קלאַפּ אַרייַן.

2. איצט, אונטער גרופע פּאָליטיק עדיטאָר, נאַוויגירן צו די פאלגענדע דרך:
User Configuration -> Administrative Templates -> Start Menu and Taskbar -> Notifications
3. Make sure to select Notifications then from right window pane double-click on “Turn off tile notifications."
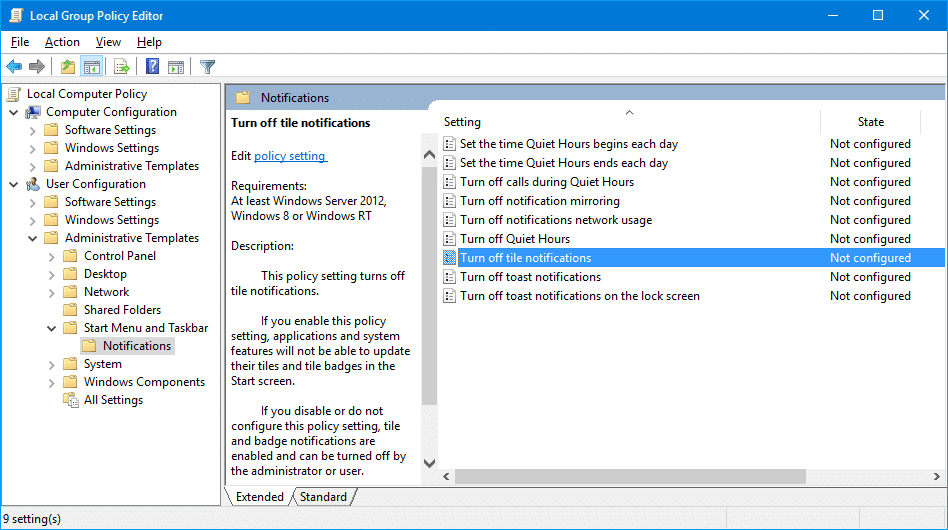
4. Make sure to set it to Enabled then click Apply followed by OK.
5. This will disable live tiles feature for all apps on Start Screen.
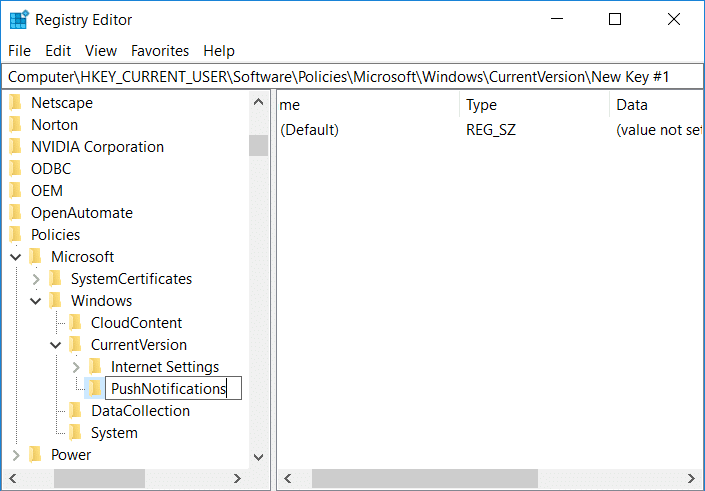
Method 4: Disable Live Tiles using Registry Editor
1. דרוק Windows Key + R דעמאָלט טיפּ רעגעדיט און קלאַפּ אַרייַן.

2. איצט נאַוויגירן צו די פאלגענדע רעגיסטרי שליסל:
HKEY_CURRENT_USERSoftwarePoliciesMicrosoftWindowsCurrentVersion
3. רעכט גיט אויף קוררענטווערסיאָן דעמאָלט אויסקלייַבן נייַ> דורכפֿאַל and then name this key as PushNotifications.
4. Now right-click on PushNotifications key and select נייַ > DWORD (32-ביסל) ווערט.
5. נאָמען דעם נייַ DWORD ווי NoTileApplicationNotification and then double-click on it.

6. Change the value of this DWORD to 1 און גיט OK.
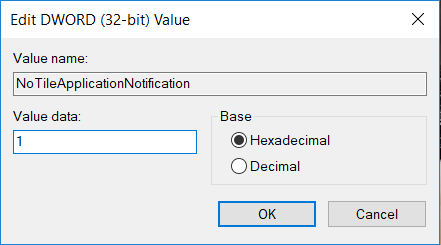
7. נאָענט רעגיסטרי עדיטאָר און רעבאָאָט דיין פּיסי צו ראַטעווען ענדערונגען.
רעקאַמענדיד:
אַז ס עס איר האָבן הצלחה געלערנט ווי צו Disable Live Tiles in Windows 10 Start Menu but if you still have any questions regarding this post then feel free to ask them in the comment’s section.