Mu Anti-Spoofing Mu Imudara ṣiṣẹ fun Ijeri Oju oju Windows Hello

Enable Enhanced Anti-Spoofing for Windows Hello Face Authentication: Windows 10 PC allows you to sign-in using fingerprint, face recognition, or iris scan using Windows Hello. Now Windows hello is a biometrics-based technology which enables users to authenticate their identity in order to access their devices, apps, networks etc using any one of the above methods. Now face detection in Windows 10 works well, but it can’t differentiate between a photo of your face inside your mobile or the actual user face.
The potential threat because of this issue is that someone with your photo could unlock your device by using their mobile. To overcome this difficulty, the anti-spoofing technology comes into actions and once you have enabled the anti-spoofing for Windows Hello Face Authentication, a photo of the authentic user cannot be used to login into the PC.
Once the enhanced anti-spoofing is enabled, Windows will require all users on the device to use anti-spoofing for facial features. This policy is not enabled by default and users have to manually enable anti-spoofing feature. Anyway, without wasting any time let’s see How to Enable Enhanced Anti-Spoofing for Windows Hello Face Authentication with the help of the below-listed tutorial.
Mu Anti-Spoofing Mu Imudara ṣiṣẹ fun Ijeri Oju oju Windows Hello
Rii daju pe o ṣẹda aaye imupadabọ kan ti nkan kan ba jẹ aṣiṣe.
Method 1: Disable or Enable Enhanced Anti-Spoofing for Windows Hello Face Authentication in Group Policy Editor
1.Tẹ Windows Key + R lẹhinna tẹ gpedit.msc ki o lu Tẹ lati ṣii Ẹgbẹ Afihan Olootu.

2.Navigate to the following location:
Computer ConfigurationAdministrative TemplatesWindows ComponentsBiometricsFacial Features
3. Yan Awọn ẹya Oju then in right window pane double-click on the “Tunto imudara egboogi-spoofing” imulo.
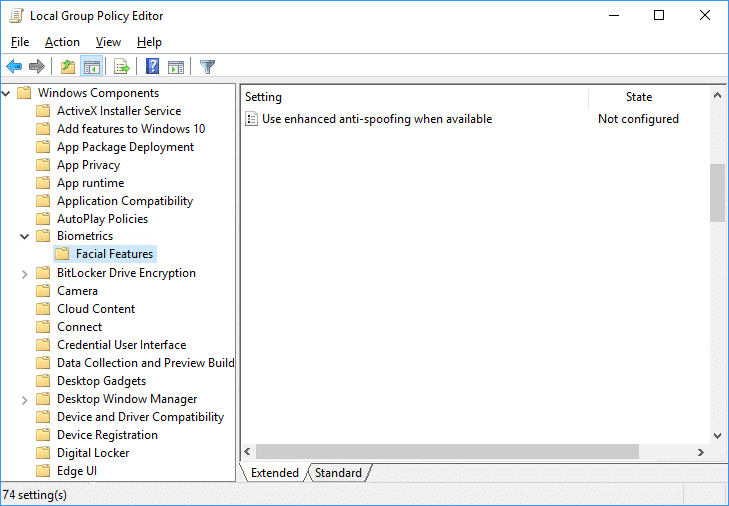
4.Now change the settings of the Configure enhanced anti-spoofing policy according to:
To Enable Enhanced Anti-Spoofing for Windows Hello Face Authentication: Select Not Configured or Disabled
To Disable Enhanced Anti-Spoofing for Windows Hello Face Authentication: Select Enabled

5.Click Apply followed by OK then close Group Policy Editor.
6.Reboot PC rẹ lati fi awọn ayipada pamọ.
Method 2: Disable or Enable Enhanced Anti-Spoofing for Windows Hello Face Authentication in Registry Editor
1.Tẹ Windows Key + R lẹhinna tẹ regedit ki o lu Tẹ lati ṣii Olootu Iforukọsilẹ.

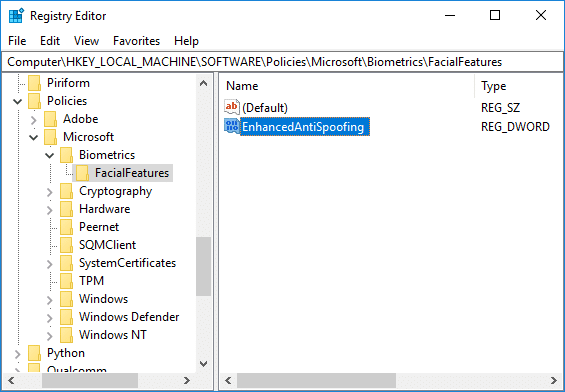
2.Lilö kiri si bọtini iforukọsilẹ atẹle:
HKEY_LOCAL_MACHINESOFTWAREPoliciesMicrosoftBiometricsFacialFeatures
3.Ọtun-tẹ lori FacialFeatures lẹhinna yan Tuntun> DWORD (32-bit) Iye.
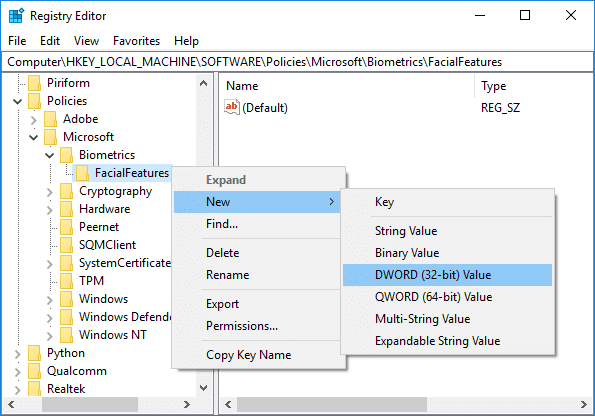
4. Daruko DWORD tuntun ti a ṣẹda bi EnhancedAntiSpoofing ki o si tẹ Tẹ.

5.Double-click on EnhancedAntiSpoofing DWORD and change it’s value to:
Enable Enhanced Anti-Spoofing: 1
Disable Enhanced Anti-Spoofing: 0
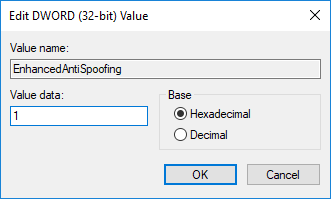
6.Once you have typed the correct value simply click OK.
7.Close registry editor and reboot your PC to save changes.
niyanju:
Iyẹn ni o ti kọ ni aṣeyọri How to Enable Enhanced Anti-Spoofing for Windows Hello Face Authentication in Windows 10 ṣugbọn ti o ba tun ni awọn ibeere eyikeyi nipa ifiweranṣẹ yii lẹhinna lero ọfẹ lati beere lọwọ wọn ni apakan asọye naa.