推迟 Windows 10 中的功能和质量更新

If you use Windows 10 Pro, Education, or Enterprise Edition, you can easily defer feature and quality updates on Windows 10. When you defer updates, new features won’t be downloaded or installed. Also, one essential thing to note here is that this doesn’t affect security updates. In short, your computer security won’t be compromised, and you will still be able to defer upgrades without any issues.
推迟 Windows 10 中的功能和质量更新
请注意: This tutorial only works if you have Windows 10专业版, 企业或 教育 edition PC. Make sure to create a restore point just in case something goes wrong.
Method 1: Defer Feature and Quality Updates in Windows 10 Settings
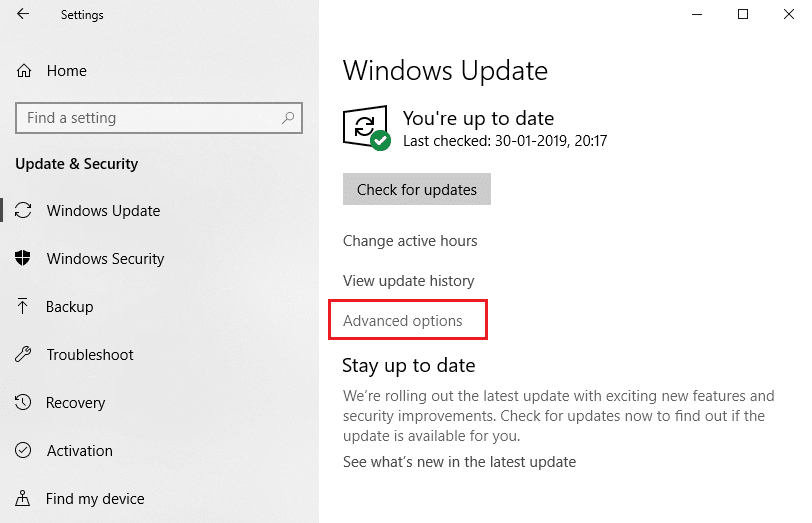
1。 按 Windows键+ I 打开“设置”,然后单击 更新和安全性。
![]()
2. From the left-hand window pane click on Windows更新。
3. Now in the right window pane click on 高级选项 底部的链接。
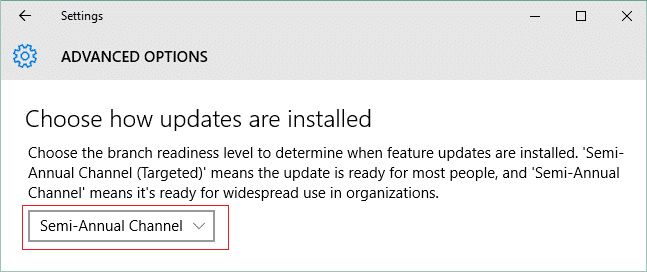
4.在“选择何时安装更新“ 选择 半年度频道(有针对性) or 半年度频道 从下拉。
5. Similarly, under “A feature update include new capabilities and improvements. It can be deferred for this many days” select to defer the feature updates for 0 – 365 days.
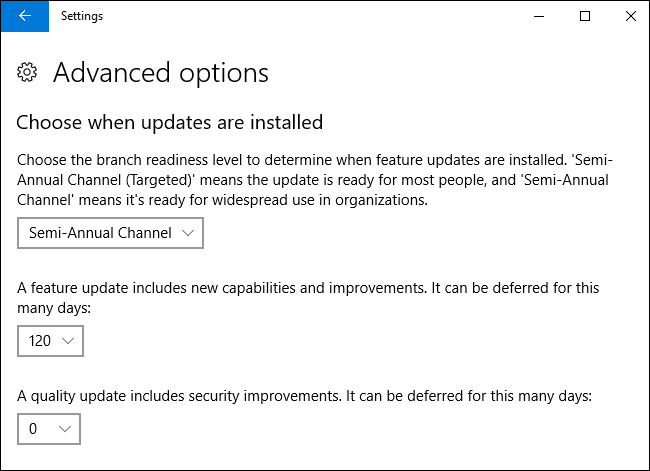
请注意: 默认值为 0 天。
6.现在在“A quality updates include security improvements. It can be deferred for this many days” select to defer the quality update for 0 – 30 days (the default is 0 days).
7. Once finished, you can close everything and reboot your PC.
这就是你的方式 Defer Feature and Quality Updates in Windows 10, but if the above settings are greyed out, follow the next method.
Method 2: Defer Feature and Quality Updates in Registry Editor
1. 按 Windows 键 + R,然后输入 注册表编辑器 并按 Enter 打开注册表编辑器。

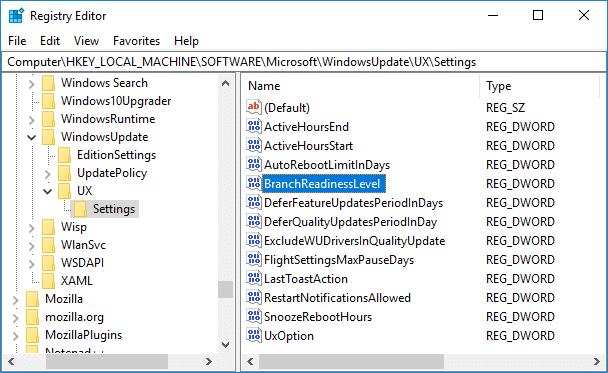
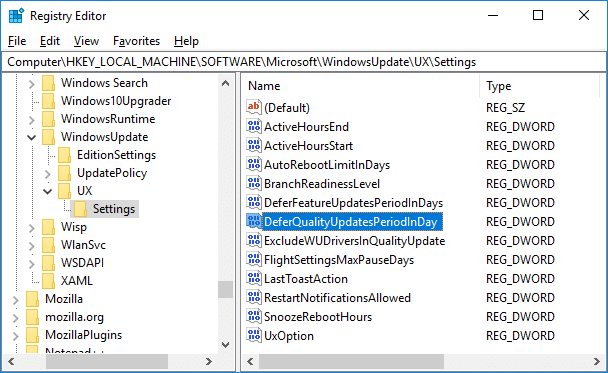
2. 现在导航到以下注册表项:
HKEY_LOCAL_MACHINESOFTWAREMicrosoftWindowsUpdateUXSettings
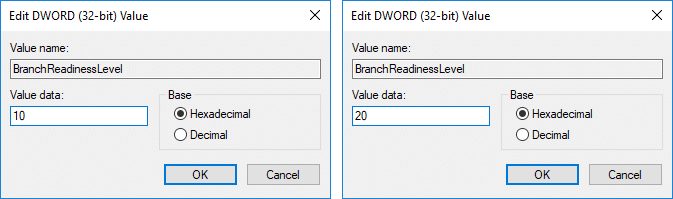
3. Select Settings then in the right window pane double-click on BranchReadinessLevel DWORD.
4. Type the following in the Value data field and click OK:
| “数值数据” | Branch Readiness Level |
| 10 | 半年度频道(有针对性) |
| 20 | 半年度频道 |
5. Now to set the number of days you want to defer the feature updates double-click on
DeferFeatureUpdatesPeriodInDays DWORD.

6. In the value data field type the value between 0 – 365 (days) for how many days you want to defer feature updates 并点击 OK.

7. Next, again in the right window pane double-click on DeferQualityUpdatesPeriodInDays DWORD.
8. Change the value in the Value data field between 0 – 30 (days) for how many days you want to defer quality updates and click OK.

9. Once finished close everything and rebooted your PC to save changes.
推荐:
这就是你已经成功学会的了 如何在 Windows 10 中推迟功能和质量更新 但如果您对本教程仍有任何疑问,请随时在评论部分提问。