Enable Enhanced Anti-Spoofing for Windows Hello Face Authentication

Enable Enhanced Anti-Spoofing for Windows Hello Face Authentication: Windows 10 PC allows you to sign-in using fingerprint, face recognition, or iris scan using Windows Hello. Now Windows hello is a biometrics-based technology which enables users to authenticate their identity in order to access their devices, apps, networks etc using any one of the above methods. Now face detection in Windows 10 works well, but it can’t differentiate between a photo of your face inside your mobile or the actual user face.
The potential threat because of this issue is that someone with your photo could unlock your device by using their mobile. To overcome this difficulty, the anti-spoofing technology comes into actions and once you have enabled the anti-spoofing for Windows Hello Face Authentication, a photo of the authentic user cannot be used to login into the PC.
Once the enhanced anti-spoofing is enabled, Windows will require all users on the device to use anti-spoofing for facial features. This policy is not enabled by default and users have to manually enable anti-spoofing feature. Anyway, without wasting any time let’s see How to Enable Enhanced Anti-Spoofing for Windows Hello Face Authentication with the help of the below-listed tutorial.
Enable Enhanced Anti-Spoofing for Windows Hello Face Authentication
确保创建一个还原点,以防出现问题。
Method 1: Disable or Enable Enhanced Anti-Spoofing for Windows Hello Face Authentication in Group Policy Editor
1.按Windows键+R然后输入 输入gpedit.msc 然后按Enter打开 组策略编辑器。

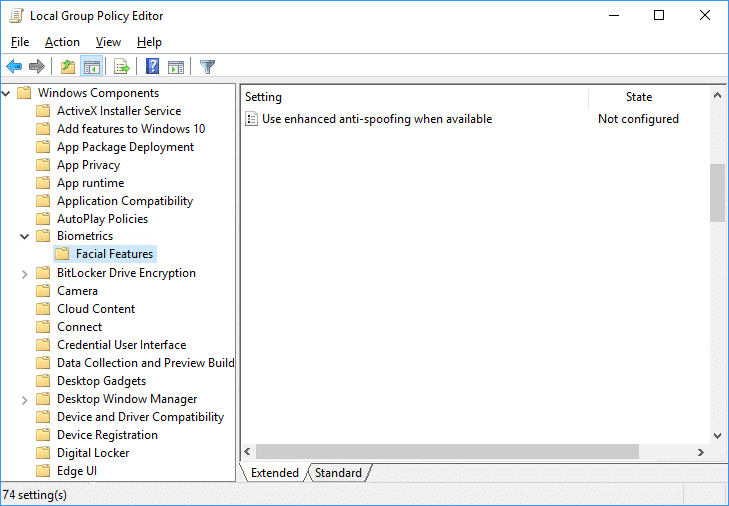
2.Navigate to the following location:
Computer ConfigurationAdministrative TemplatesWindows ComponentsBiometricsFacial Features
3.Select 面部特征 then in right window pane double-click on the “配置增强型反欺骗“政策。
4.Now change the settings of the Configure enhanced anti-spoofing policy according to:
To Enable Enhanced Anti-Spoofing for Windows Hello Face Authentication: Select Not Configured or Disabled
To Disable Enhanced Anti-Spoofing for Windows Hello Face Authentication: Select Enabled

5.Click Apply followed by OK then close Group Policy Editor.
6.重新启动您的电脑以保存更改。
Method 2: Disable or Enable Enhanced Anti-Spoofing for Windows Hello Face Authentication in Registry Editor
1.按Windows键+R然后输入 注册表编辑器 然后按Enter打开 注册编辑器。

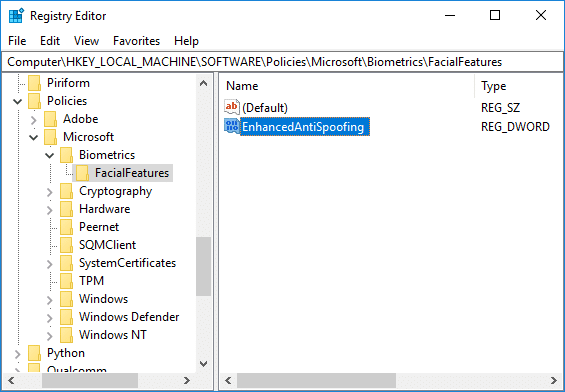
2.导航到以下注册表项:
HKEY_LOCAL_MACHINESOFTWAREPoliciesMicrosoftBiometricsFacialFeatures
3.右键单击 FacialFeatures 然后选择 新建 > DWORD(32 位)值。
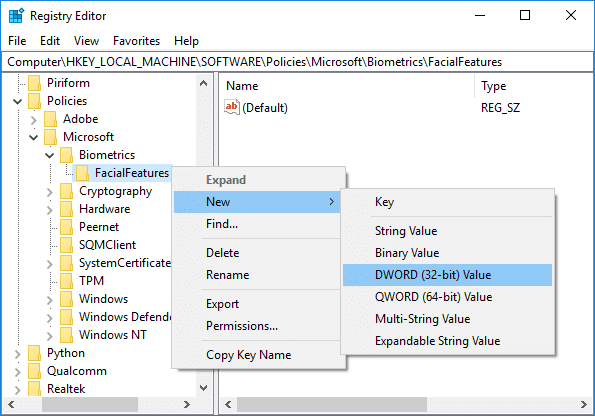
4.将此新创建的 DWORD 命名为 EnhancedAntiSpoofing 并按Enter键。

5.Double-click on EnhancedAntiSpoofing DWORD and change it’s value to:
Enable Enhanced Anti-Spoofing: 1
Disable Enhanced Anti-Spoofing: 0
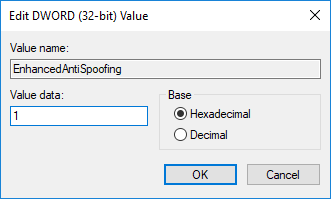
6.Once you have typed the correct value simply click OK.
7.Close registry editor and reboot your PC to save changes.
推荐:
这就是你已经成功学会的了 How to Enable Enhanced Anti-Spoofing for Windows Hello Face Authentication in Windows 10 但如果您对这篇文章仍有任何疑问,请随时在评论部分询问他们。