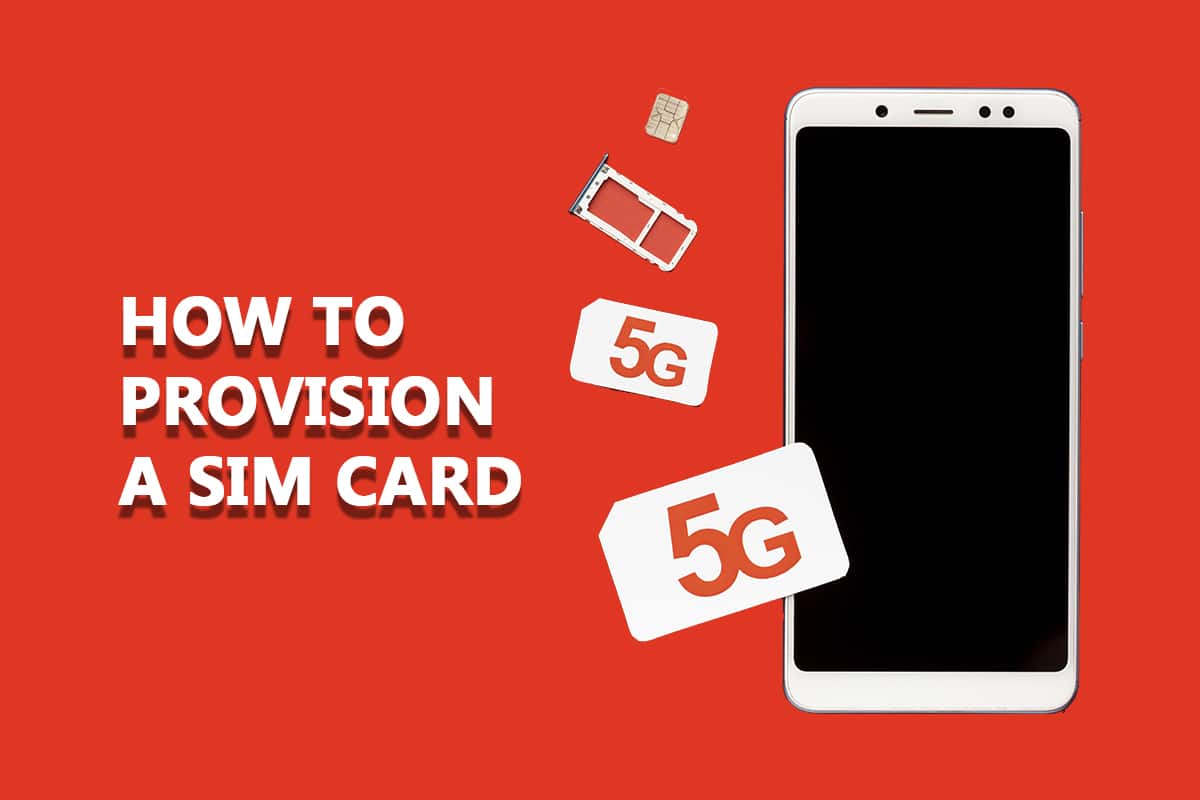
如何配置 SIM 卡

SIM card or Subscriber Identify Module card stores all your user identity data, mobile number, contacts, security keys, messages, and all saved authorization data. This smart card allows you to make calls, send messages, connect to the internet, and a lot more. When you buy a new phone or insert a new SIM card, you may face a SIM card not provisioned MM#2 error in your Android device. If your SIM cannot transfer any information between your provider and Android, this means SIM is not provisioned in your device. If you are also facing SIM not provisioned Android error, this guide will help you a lot. So, continue reading.
如何配置 SIM 卡
In this article, we have shown how to provision a SIM card. But before going through the troubleshooting methods, let us go through some points given below.
- SIM not provisioned MM#2 error means, your SIM card is not authorized to work in your network.
- All the SIM cards must be activated before you use them. But, if you have activated the SIM card, but still facing the error, then something else has affected your Android.
- If you are using dual SIM Android phones, the SIM not provisioned MM error will be more specific in numbers. That is, SIM 1 is not provisioned or SIM 2 is not provisioned. This is not much complicated all you have to do is to repeat the troubleshooting methods for both the SIM cards.
- SIM not provisioned Android may be due to carrier side issues, damaged SIM card slot, or the SIM card itself. Nevertheless, this guide will help you understand how to provision a SIM card. Move ahead to the next section to find out the circumstances, where you face the error.
另见:
如何清除 Android 和 iOS 上的 Instagram 缓存
How to Clear Cache on Facebook
Reasons for SIM Not Provisioned Android
You will face SIM not provisioned MM error in any one of these following instances. Analyze them deeply so you can follow the troubleshooting steps accordingly.
- SIM card provider or carrier network has blocked your SIM card.
- Buying a new phone with a new SIM, and facing the error while transferring the contacts.
- Mobile network provider server is unavailable or offline.
- Misplaced your SIM card in the slot.
- Carrier network may experience downtime, particularly during SIM card activation.
- Using the SIM card in an unsupported location or if the SIM card is out of the network provider’s area.
- Software issues and hardware problems in your Android device.
In case, if you have not bought any new SIM card, but face SIM not provisioned Android error, the most possible reasons are listed below:
- Your SIM card has got too old or damaged. Consider replacing it.
- Dirt accumulation in the SIM card slot or you have not placed the SIM card properly 在其插槽中。
How to Provision a SIM card to Fix SIM Card Not Provisioned MM#2 Error
In this section, you will learn simple hacks to deal with SIM card not provisioned MM#2 error, and thereby you can learn how to provision a SIM card properly. Follow the below-mentioned methods to understand the steps involved in how to provision a SIM card in your Android mobile. If you have dual slots, follow the steps for all of them.
请注意: Every Android has its unique settings and so the steps concerning how to provision a SIM card may differ accordingly. Users are advised to follow the instructions as per their phone settings. In this guide, the 一加9R 为例。
Method 1: Enable then, Disable Airplane Mode
All the radios and transmitters will be turned off if you enable airplane mode on your Android mobile. To enable airplane mode in your Android device, follow the below-mentioned instructions:
1. 向下滚动 通知抽屉 在主屏幕上。
2。 点击 飞行模式 图标。
![]()
3. Wait for a few seconds and again tap the 飞行模式 图标将其关闭。
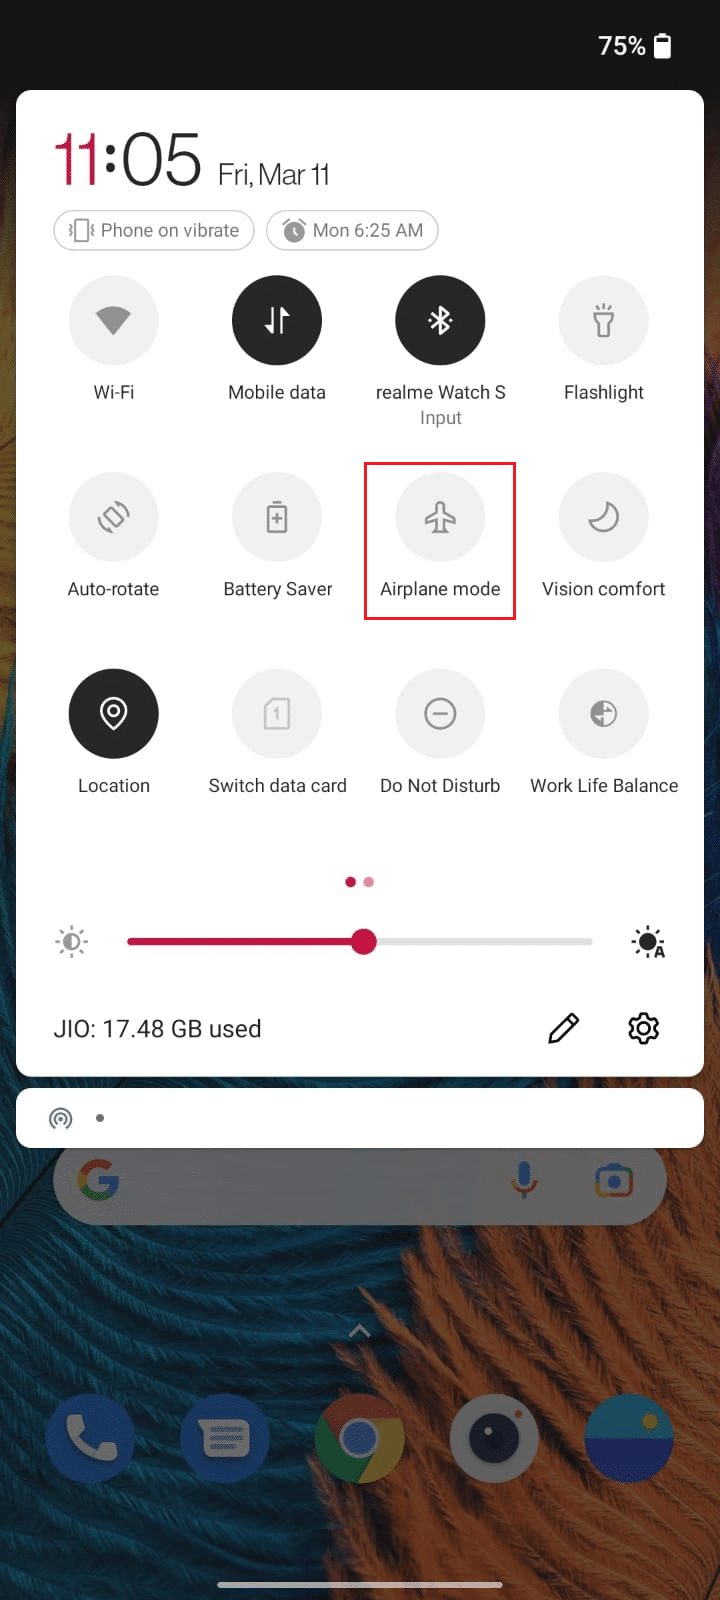
4. Check if you can access your SIM card now.
方法一:重启手机
Although this method might seem unlikely, restarting your Android will help you fix all the temporary glitches associated with it. This can overcome SIM not provisioned Android error. See: How to Restart or Reboot Your Android Phone?
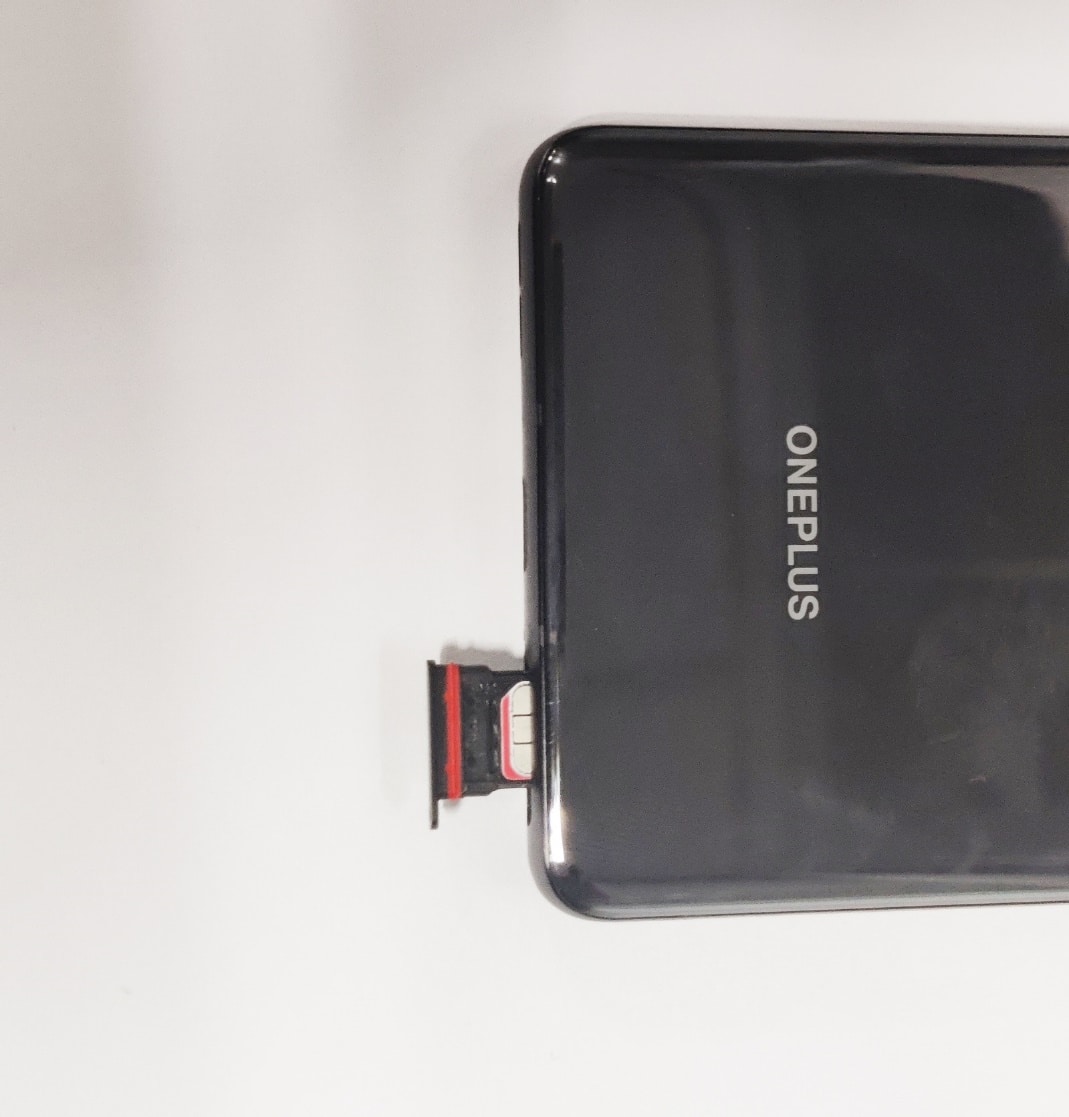
Method 3: Replace Damaged SIM Card
As a primary check for how to provision a SIM card, you have to check whether the SIM card is broken or is physically damaged. If your TruConnect SIM card is activated, but it if has any trouble of SIM not provisioned Android error, then ensure the condition of SIM.
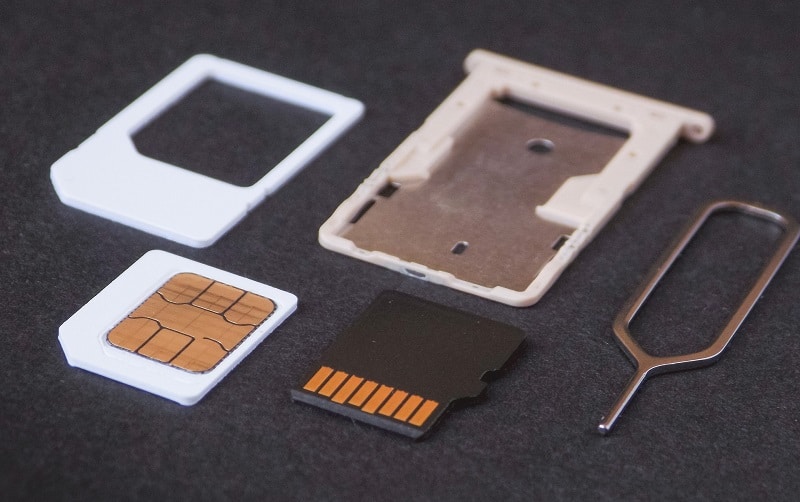
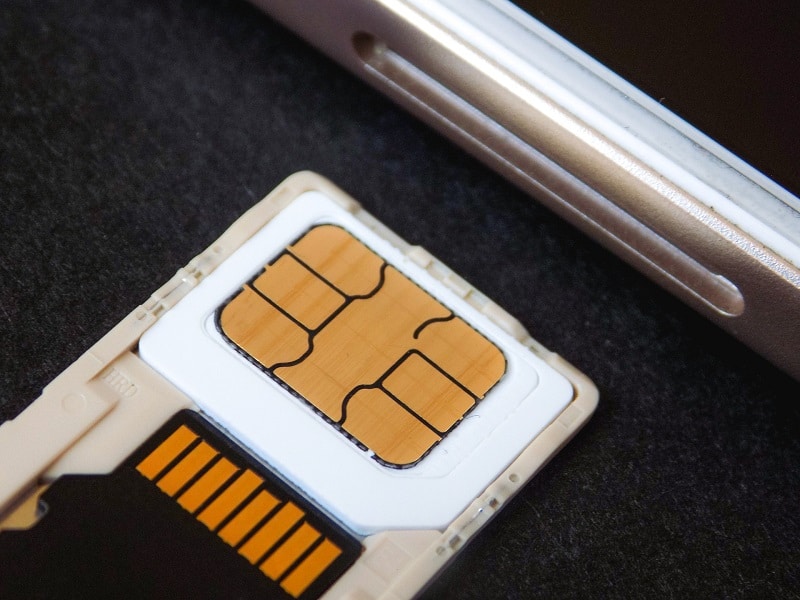
1. 插入 SIM 弹出工具 into its slot and pull the SIM卡托 out of your phone.

2。 除掉 SIM卡 from the tray and inspect it carefully.
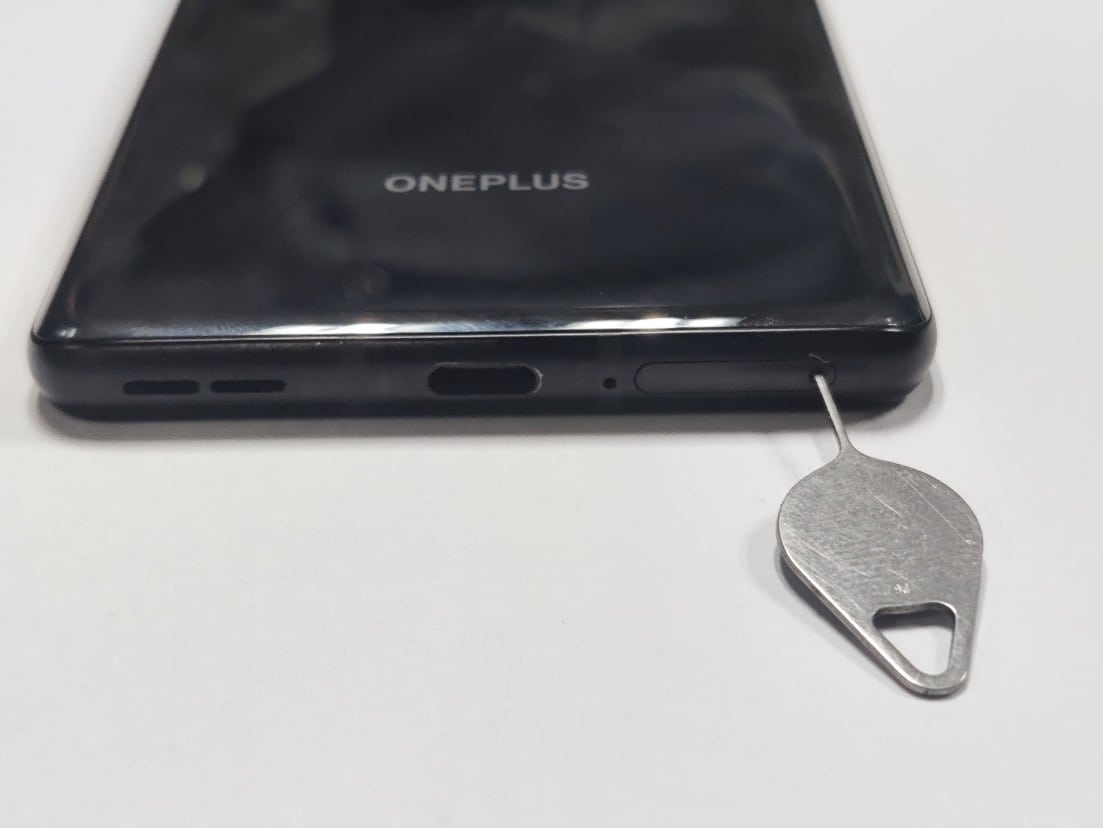
3A. Make sure your SIM card is not broken and free of scratch. If you find any physical damage or if it is broken, consider replacing it.
3B. If the SIM card is completely fine and looks good, continue reading below to fix SIM card not provisioned MM#2 error.
另请参阅: 8 个最佳 Android 手机清理应用程序
Method 4: Clean SIM Card & SIM Slot
Dirt accumulation in SIM and SIM card slots will cause detection problems in your Android device. Any foreign materials like water, moisture, dust, dirt, and grime may block the connection between your SIM card and the peripherals.
1. Turn off your device and remove the SIM卡 from its slot. Make sure you do not damage it.
2A. If your mobile phone has an open SIM card slot, use a dry earbud, microfiber cloth, and smooth fabric to clean the dust and dirt.
2B. If your mobile phone has a hollow SIM card slot, use compressed air to clean the slots.
请注意: Never blow air into the SIM card slots since it introduces moisture and can damage the ports easily.
3. Reinsert the SIM card in its slot and make sure the SIM card sits firmly in its slot.
4. Check if you have fixed SIM not provisioned MM error.
Method 5: Make sure SIM Card is Activated
Your SIM card gets activated whenever you insert it into your Android. But, it doesn’t work in some cases. You have to activate it manually. The steps to activate your SIM card may differ according to your carrier and whether it is a prepaid or post-paid connection. Here, steps to activate a ATT prepaid SIM card are demonstrated. Follow the steps according to your carrier.
1. An agent will perform a wireless KYC (Know Your Customer) process after buying a SIM card from a mobile store.
2. 等待 30-60 分钟 after the KYC process (verifying your identity when you open a new account) is digitally completed.
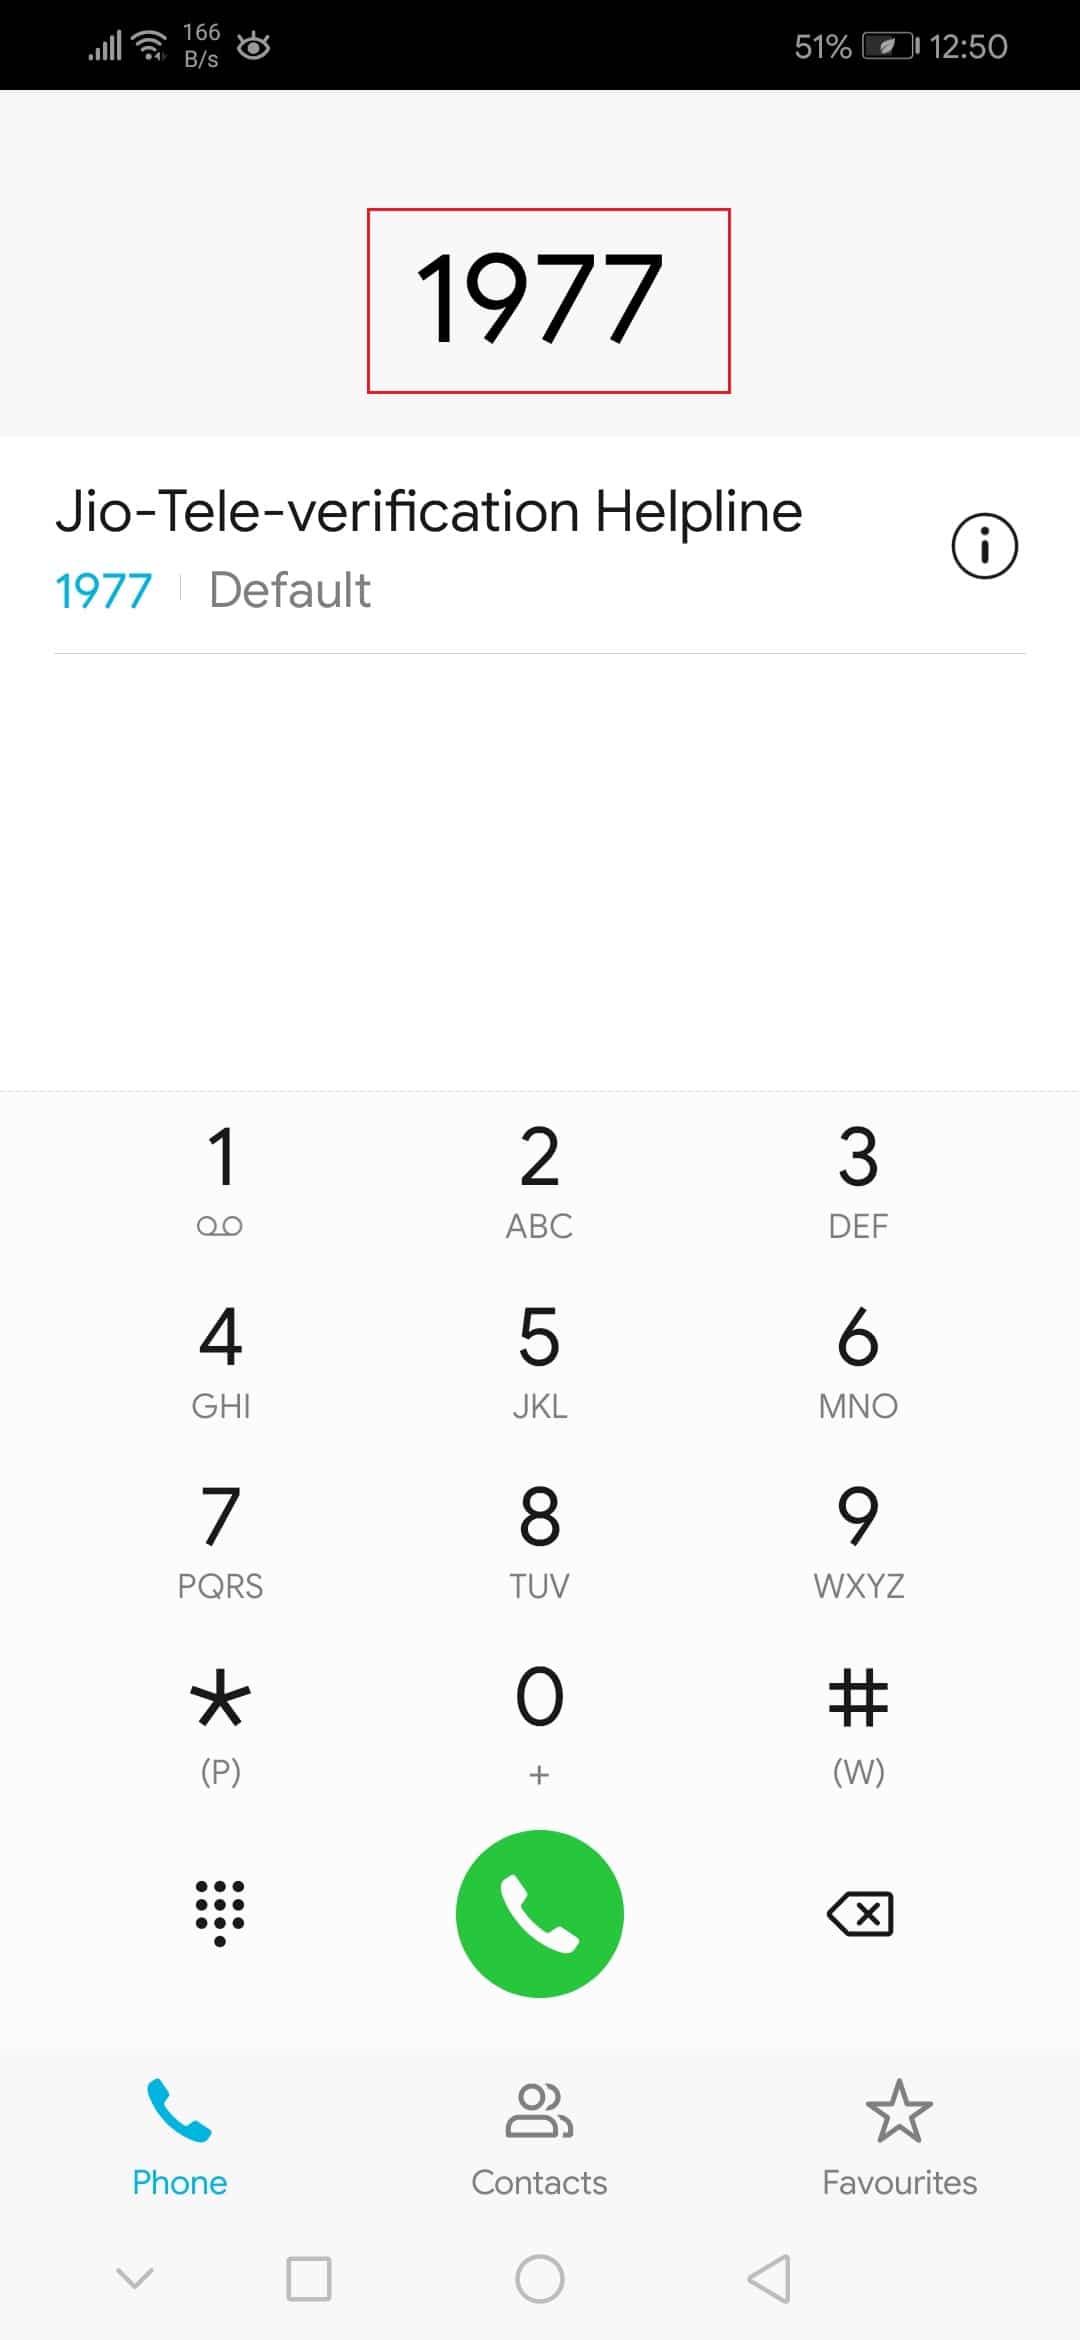
3. Proceed with telephonic verification on your current mobile number after receiving notifications. To tele-verify your mobile number, dial the following numbers with respect to the SIM manufacturer.
- Airtel:59059
- BSNL: 1507
- Jio: 1977
- Vodafone Idea: 59059
4. Now, you will be connected to an auto-recorded call. Follow the instructions as per the recorded voice and you can tele verify your new number by,
- Using 5 digit PIN sent to your alternative number.
- Using the last four digits of your Aadhaar card number.
5. After completing the tele-verification process, please proceed with your first recharge. And, now you have activated your SIM card.
请注意: If you are trying to access your SIM card within a few hours of activating it, you will face SIM not provisioned MM error. So, wait for at least 24 hours.
也可以参考: 如何在 Android 上查找您的电话号码
Method 6: Use SIM Card in Different Phone
If you are facing a SIM card not provisioned MM#2 error even after activating it, check if there is a problem with the SIM card slot. This helps you understand whether there is an issue with the SIM card slot or the carrier.
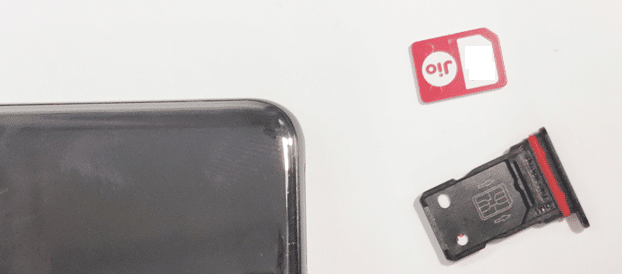
1. Turn off your mobile phone and remove the SIM卡 从它的插槽。
2. Insert the SIM card into an alternate slot provided on the phone.
3A. Check if you face the error in another slot of your mobile. If you did not face any error in the new slot, then it might be due to damage in the SIM card slot.
3B. If you face the same error even in another slot of your mobile, then insert your SIM card in another phone.
4. Wait and check if the error recurs.
Method 7: Update Android Device
If your Android runs outdated software, you may face SIM not provisioned Android error. Always check if your device runs the latest version and if not, you can update the same by following the below-mentioned instructions:
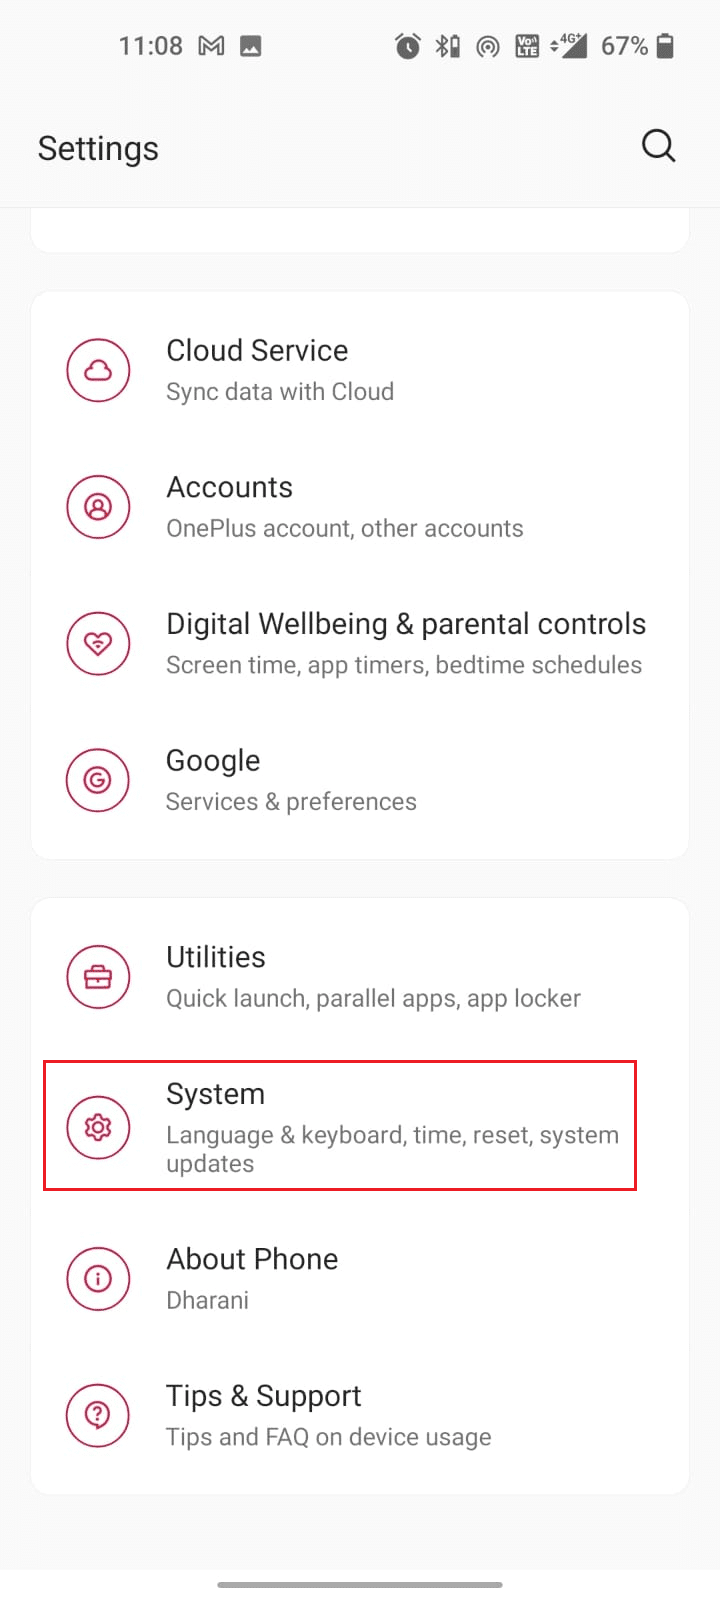
1。 点击 个人设置 上的图标 主屏幕.
![]()
2。 点击 系统 选项。
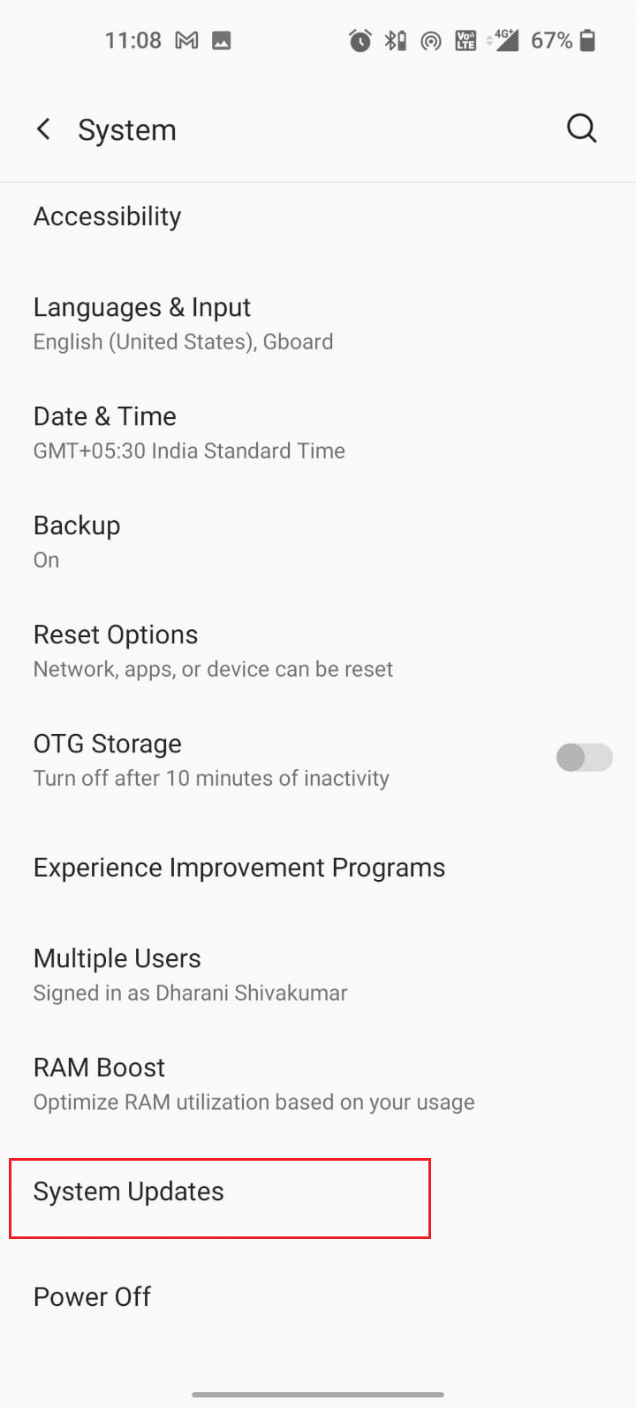
3. Scroll down the screen and tap the 系统升级 选项。
4. Wait until your Android checks for any updates. It may take only a few seconds.

5. If any updates are pending in action, follow the on-screen instruction to update the software. Make sure you receive 您的系统是最新的 屏幕上提示。

6. After updating your device, check if you have fixed the SIM card not provisioned MM#2 error.
Also read: How To Manually Update Android To Latest Version
方法 8:执行恢复出厂设置
If nothing works, you can try resetting your Android to its factory settings. If there are any corrupt or incompatible settings interfering with the SIM, you can resolve the same by resetting your mobile phone.
请注意: When you perform a factory reset on your Samsung Galaxy or any other Android phone, all the application, their data, photos, videos will be deleted from your device. Hence, you are advised to back up the necessary data and then factory reset your device. Read our guide to Back Up Your Android Phone Data.
Then, follow the below-mentioned instructions to factory reset Android mobile:
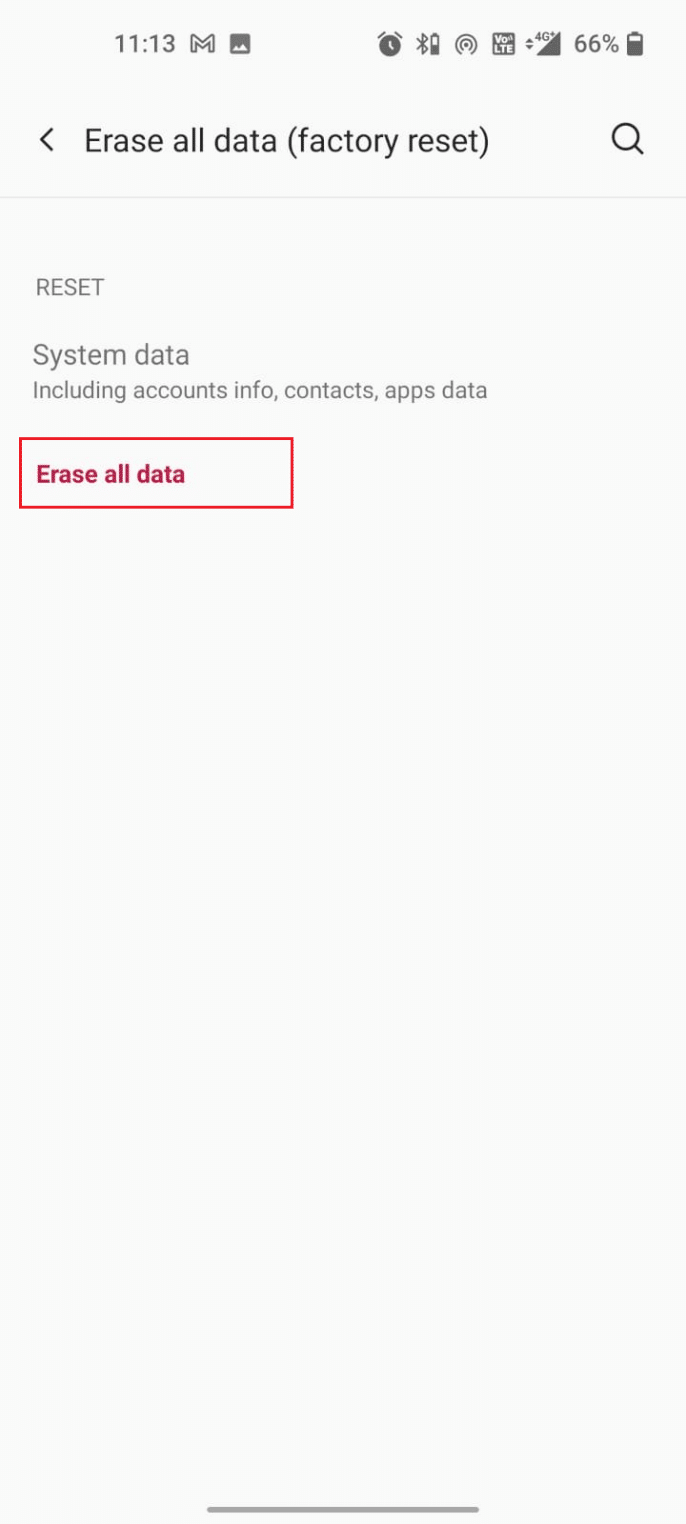
1。 导航到 个人设置 你的手机。
2。 点击 系统 图标。
![]()
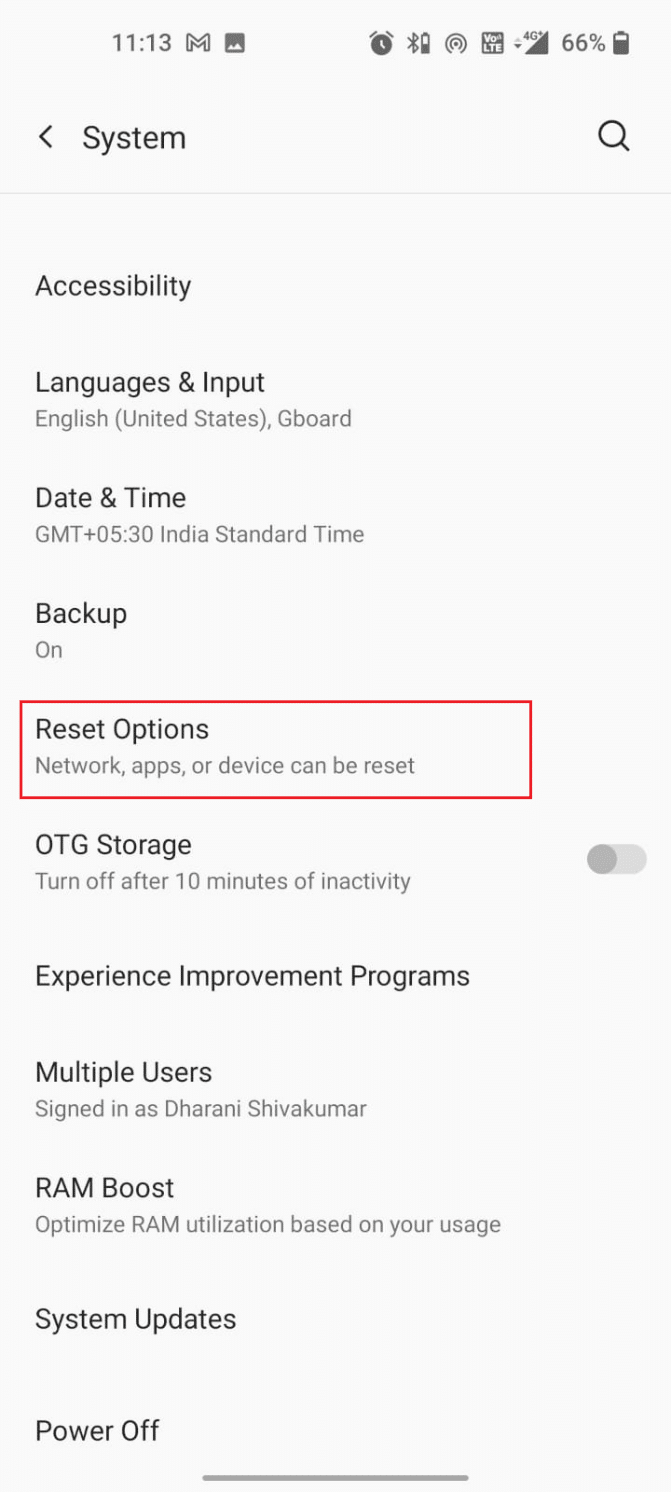
3。 龙头 重置选项.
4。 龙头 删除所有数据(恢复出厂设置) 选项。
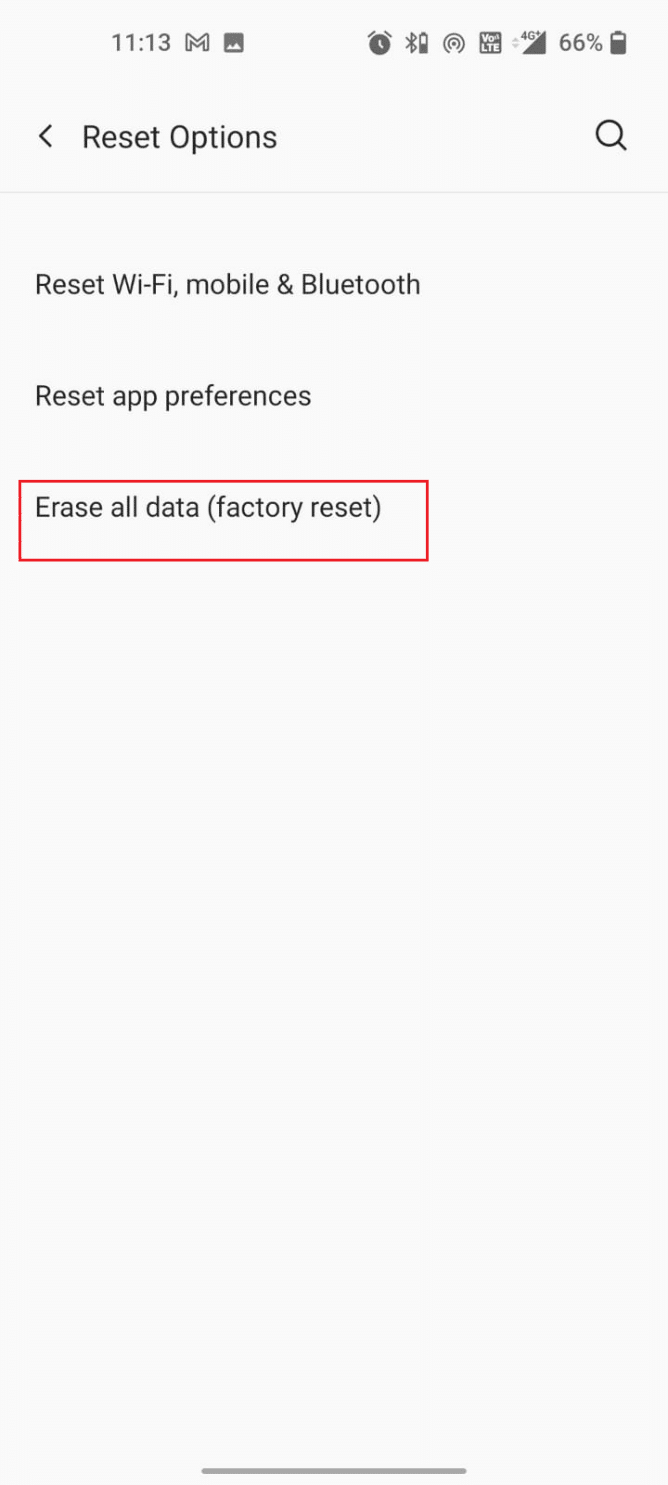
5. In the next pop screen, tap 删除所有数据 选项。
Also Read: Fix No SIM Card Detected Error On Android
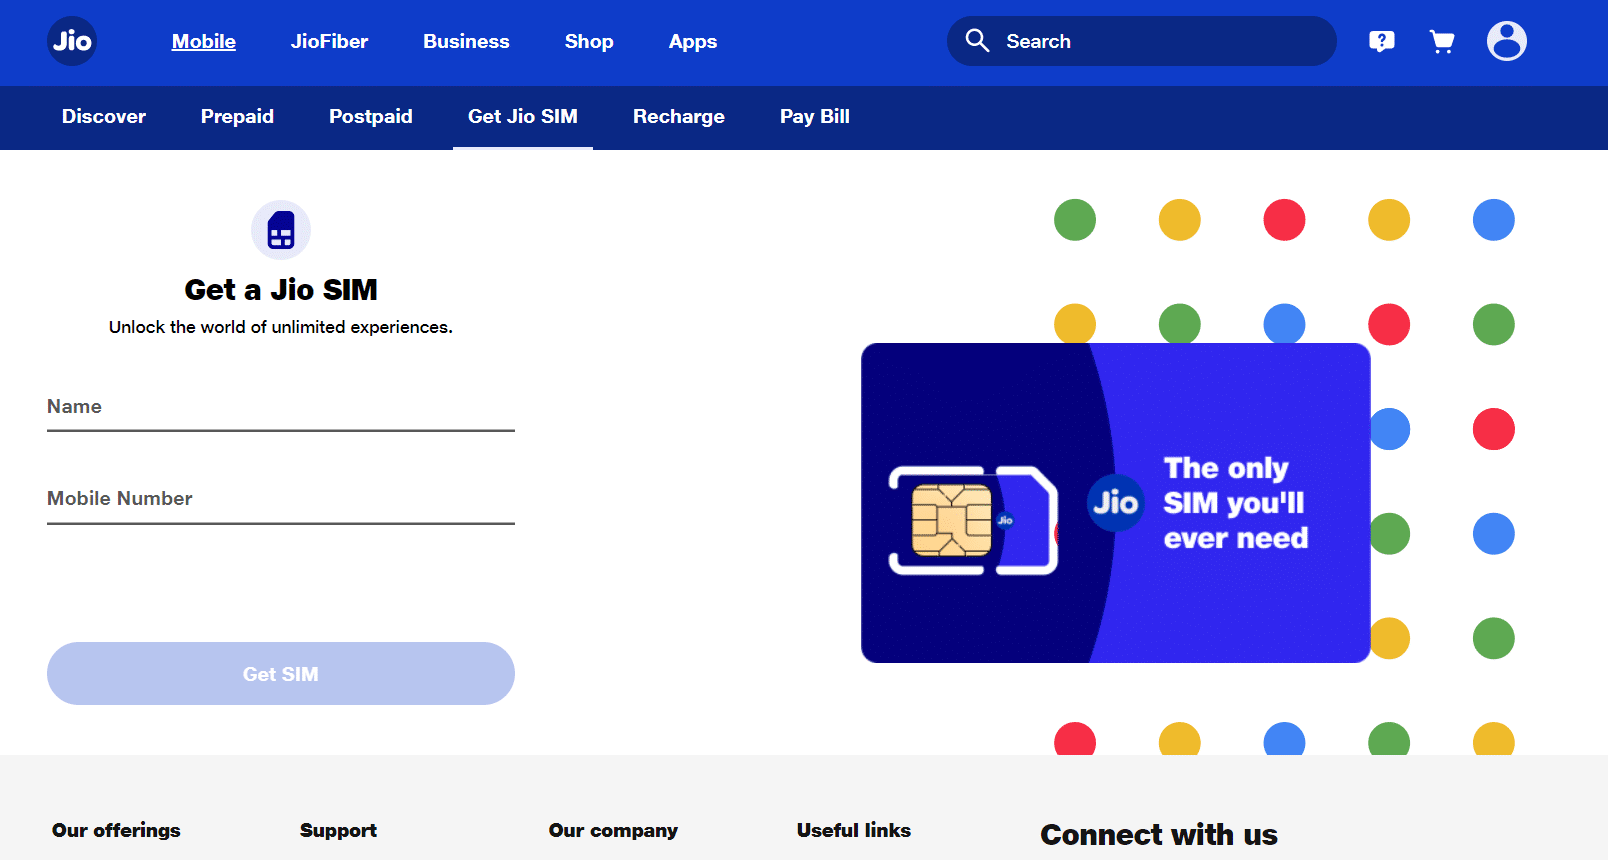
Method 9: Contact SIM Card Provider
There is one last try to learn how to provision a SIM card in your Android device. If you have not attained any fix for SIM not provisioned MM error in your mobile even after trying all the above methods, you can try contacting your SIM card provider (e.g. JIO)
- You may face SIM not provisioned Android error when you have an old SIM card. If your SIM card is too old, your carrier may discontinue it from service. And so, the company itself can shut down the service support for your SIM.
- Go to the store where you have bought the SIM and enquire them about your carrier network. If there is a chance to get a new SIM card with the same number, back up and transfer the data you needed.
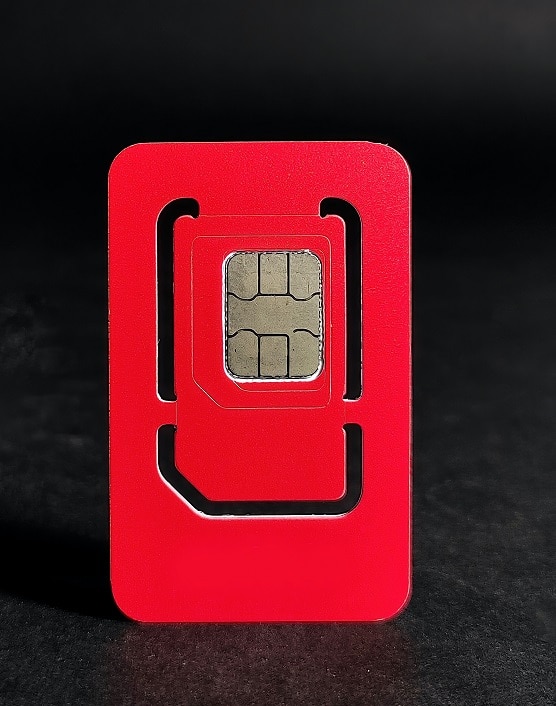
Method 10: Replace SIM Card
You must try SIM card replacement once if all these methods fail to work. Firstly reach out to your carrier store or outlet. They will check if your SIM card is fit for troubleshooting or it must be replaced. If the retail person informs you to go for the replacement, don’t worry! This situation can be handled easily by SIM swapping techniques and you be back to your network very soon. So, don’t care about buying a new SIM card or buying a SIM with the same mobile number.
推荐:
We hope that this guide was helpful and you have learned how to provision a SIM card 以及 how to fix SIM not provisioned issue on Android smartphones. Feel free to reach out to us with your queries and suggestions via the comments section below. Let us know which topic you want us to explore next.