Synchronize Windows 10 Clock with an Internet Time Server

Synchronize Windows 10 Clock with an Internet Time Server: If you have set the Clock in Windows 10 to automatically set time then you may be aware that the current time is synchronized with an Internet Time Server in order to update time. This means that the clock on your PC’s Taskbar or Windows Settings is updated at regular intervals to match the time on the time server which ensures that your clock has accurate time. You need to be connected to the internet for time to automatically synchronize with an Internet time server without which the time won’t be updated.
Now Windows 10 uses the Network Time Protocol (NTP) to connect with the Internet time servers in order to synchronize Windows Clock. If the time in Windows Clock is not accurate then you could face network issues, corrupted files, and incorrect timestamps in documents & important files. With Windows 10 you could easily change the time servers or can even add a custom time server when necessary.
So now you know it’s important for your Windows to display the correct time in order to ensure proper functioning of your PC. Without which certain applications and Windows services will start experiencing issues. So without wasting any time let’s see How to Synchronize Windows 10 Clock with an Internet Time Server with the help of the below-listed tutorial.
How to Synchronize Windows 10 Clock with an Internet Time Server
确保创建一个还原点,以防出现问题。
Method 1: Synchronize Windows 10 Clock with an Internet Time Server in Internet Time Settings
1.类型 控制 in Windows 10 Search then click on 控制面板 从搜索结果中。

2.现在点击“时钟,语言和区域”,然后点击“日期和时间“。
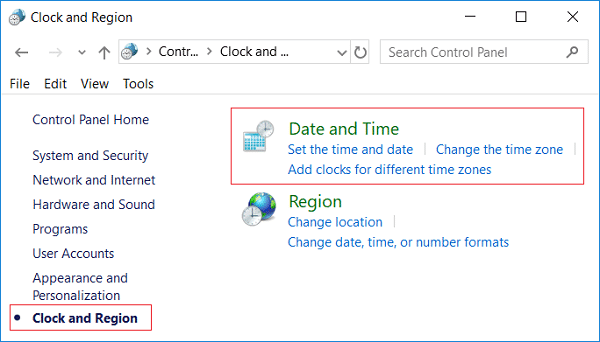
3.Under Date and Time window click “更改日期和时间“。
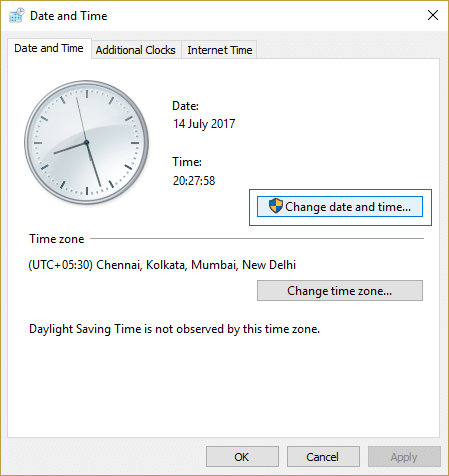
4.Switch to Internet Time then click on “更改设置“。
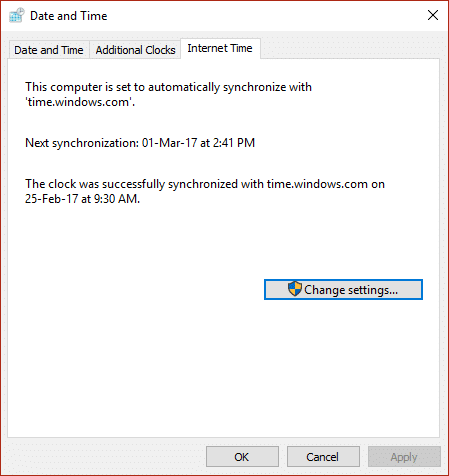
5.确保勾选“与Internet时间服务器同步” box, then select a time server from the Server drop-down and click Update Now.
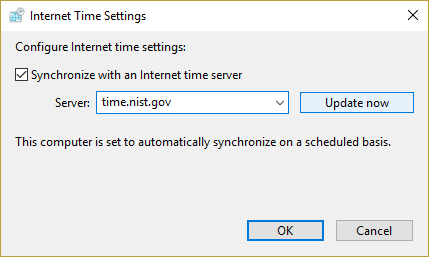
6.Click Ok then click Apply followed by OK again.
7.If the time is not updated then choose a different Internet time server and again click 现在更新。

8.重新启动您的电脑以保存更改。
Method 2: Synchronize Windows 10 Clock with an Internet Time Server in Command Prompt
1.按 Windows 键 + X,然后选择 命令提示符(管理员)。

2.在cmd中输入以下命令并按Enter键:
w32tm /重新同步
net time /domain
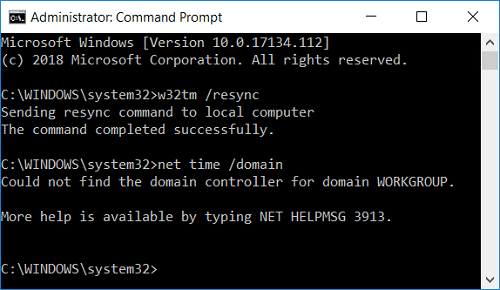
3.如果你得到一个 The service has not been started. (0x80070426) error,那么你需要 start Windows Time service.
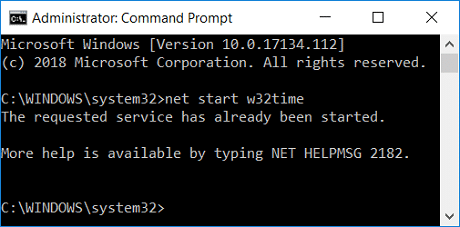
4.Type the following command to start Windows Time service then again try to synchronize Windows Clock:
净启动w32time
5.Close Command Prompt and restart your PC.
Method 3: Change the Internet Time Synchronization Update Interval
1.按Windows键+R然后输入 注册表编辑器 并按 Enter 打开注册表编辑器。

2.导航到以下注册表项:
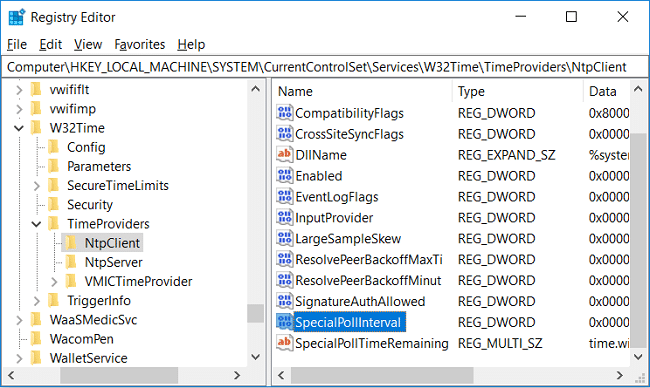
ComputerHKEY_LOCAL_MACHINESYSTEMCurrentControlSetServicesW32TimeTimeProvidersNtpClient
3.Select NtpcClient then in right window pane double-click on 特别轮询间隔 来改变它的价值。
4.现在选择 Decimal from the Base then in the Value date change the value to 86400.
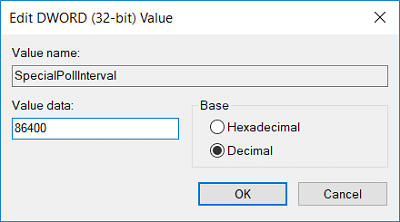
请注意: 86400 seconds (60 seconds X 60 minutes X 24 hours X 1 day) which means that the time will be updated every day. The default time is every 604800 seconds (7 days). Just make sure not use the time interval less than 14400 seconds (4 hours) as your computer’s IP will get banned from the time server.
5.Click Ok then close Registry Editor.
6.重新启动您的电脑以保存更改。
Method 4: Add a new Internet time server on Windows 10
1.Type control in Windows 10 Search then click on 控制面板 从搜索结果中。
2.现在点击“时钟,语言和区域”,然后点击“日期和时间“。
3.Under Date and Time window click “更改日期和时间“。
4.切换到 互联网时间 然后点击“更改设置“。
5. 勾选“与Internet时间服务器同步” box then under Server type the address of the time server and click 现在更新。
请注意: 请参考这里 for a list of the Simple Network Time Protocol (SNTP) time servers that are available on the Internet.
6.Click Ok then click Apply followed by OK again.
7.重新启动您的电脑以保存更改。
Method 5: Add a new Internet time server on Windows 10 using Registry
1.按Windows键+R然后输入 注册表编辑器 然后按Enter打开 注册编辑器。
2.导航到以下注册表项:
HKEY_LOCAL_MACHINESOFTWAREMicrosoftWindowsCurrentVersionDateTimeServers
3.右键单击 服务器 然后选择 新建 > 字符串值。
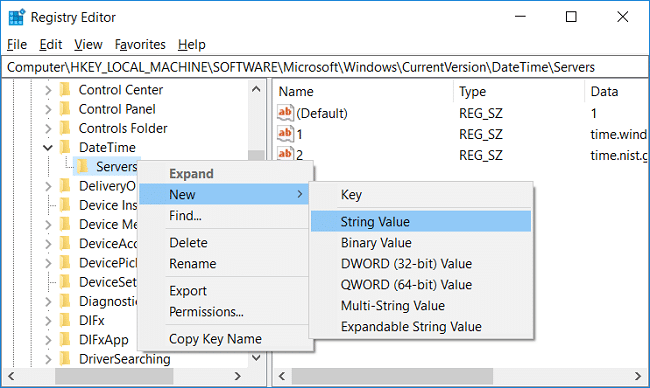
4.Type a number according to the position of the new server, for example, if there are already 2 entries then you have to name this new string as 3.
5.Now double-click on this newly created String Value to change its value.
6.接下来, type the address of the time server then click OK. For example, if you want to use Google Public NTP server then enter time.google.com.
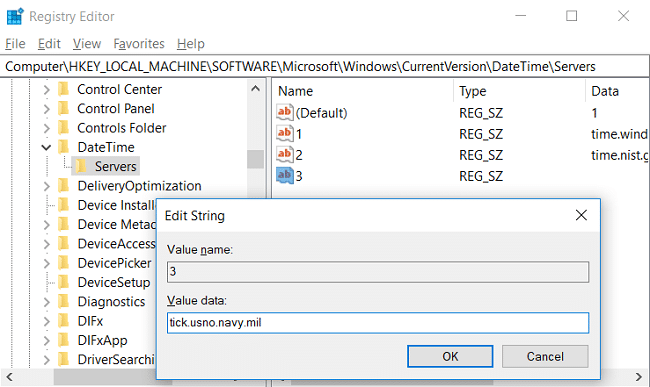
请注意: 请参考这里 for a list of the Simple Network Time Protocol (SNTP) time servers that are available on the Internet.
7.重新启动电脑以保存更改。
If you’re still facing in synchronizing Windows 10 Clock then fix them using the below-listed steps:
请注意: This will remove all your custom servers from Registry.
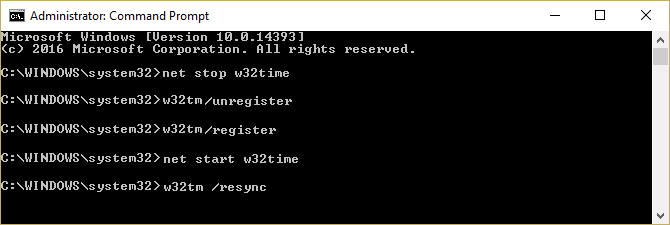
1.按 Windows 键 + X,然后选择 命令提示符 (行政)。

2.在cmd中输入以下命令并按Enter键:
净停止w32time
w32tm /取消注册
w32tm /注册
净启动w32time
w32tm /resync /nowait
3.重新启动电脑以保存更改。
推荐:
这就是你已经成功学会的了 How to Synchronize Windows 10 Clock with an Internet Time Server but if you still have any queries regarding this tutorial then feel free to ask them in the comment’s section.