USB 设备在 Windows 10 中无法工作 [已解决]

USB Device not working in Windows 10 is a common problem that arises when dealing with USB. Typically USB Device not working error is shown after a USB device such as a printer, scanner, External drive, Hard disk, or Pen drive is connected to the computer. Sometimes when this error occurs, the Device Manager may list an “Unkown Device” in Universal Serial Bus controllers.
In this guide, you can find all information regarding the USB Device not working in Windows 10 issue. After spending a lot of time we have come up with these few working solutions on how to fix USB Device not working issue. Please try all the methods listed below, before you come to any conclusion.
Different types of error you may receive when dealing with USB Device not working:
- USB设备无法识别
- Unrecognized USB device in Device Manager
- USB Device driver software was not successfully installed
- Windows has stopped this device because it has reported problems (Code 43).
- Windows can’t stop your “Generic volume” device because a program is still using it.
![Fix USB Device Not Working in Windows 10 [SOLVED]](https://lbsite.org/wp-content/uploads/2023/01/Fix-USB-not-working-Windows-10.png)
Fix USB Device Not Working in Windows 10 [SOLVED]
Common Causes of the USB Device not working error:
- Corrupted or outdated USB drivers.
- The USB device may have malfunctioned.
- Host controller hardware malfunction.
- The computer does not support USB 2.0 or USB 3.0
- USB Generic Hub drivers are not compatible or are corrupted.
Now let’s see How to Fix USB Device Not Working in Windows 10 借助下面列出的故障排除指南。
Method 1: Disable EnhancedPowerManagementEnabled
1. Press Windows Key + R and type “输入devmgmt.msc”然后按 Enter 键打开设备管理器。

2. Now expand 通用串行总线控制器.
3. Next, plug in your USB device which is experiencing a problem, and notice the change in the Universal Serial Bus controllers i.e. you will see the list updated with your Device.
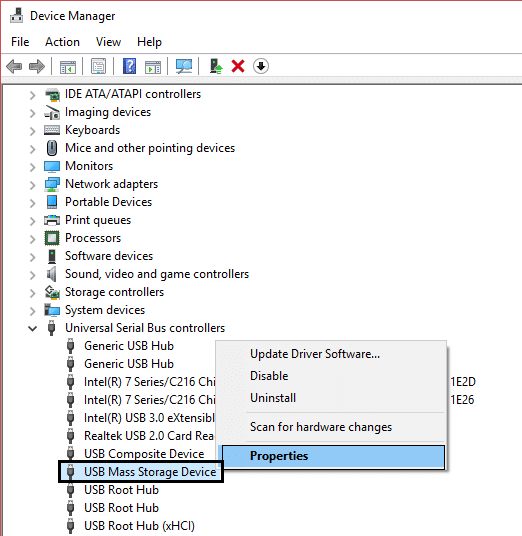
请注意: You may have to use hit and trial in order to identify your device and in doing so you have to connect/disconnect your USB device multiple times. Always use the “Safely remove” option when disconnecting your USB device.
4. After you have identified your device in Universal Serial Bus controllers, right-click on it and select 属性。
5. Next switch to Details tab and from Property drop-down select “Device instance path.“
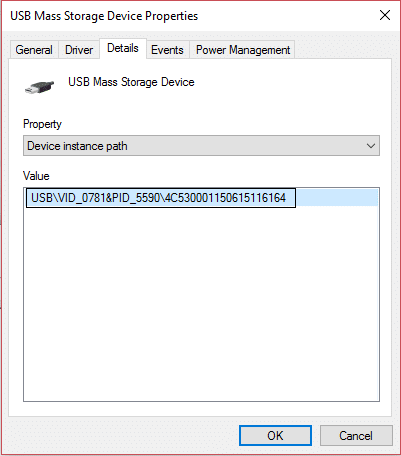
6. 记下 value of the Device instance path because we will need it further or right-click and copy it.
7。 按 Windows Key + R 然后输入“注册表编辑器” then hit enter to open Registry Editor.

8. Navigate to the following:
HKEY_LOCAL_MACHINESYSTEMCurrentControlSetEnumUSB<Device Instance Path>Device Parameters
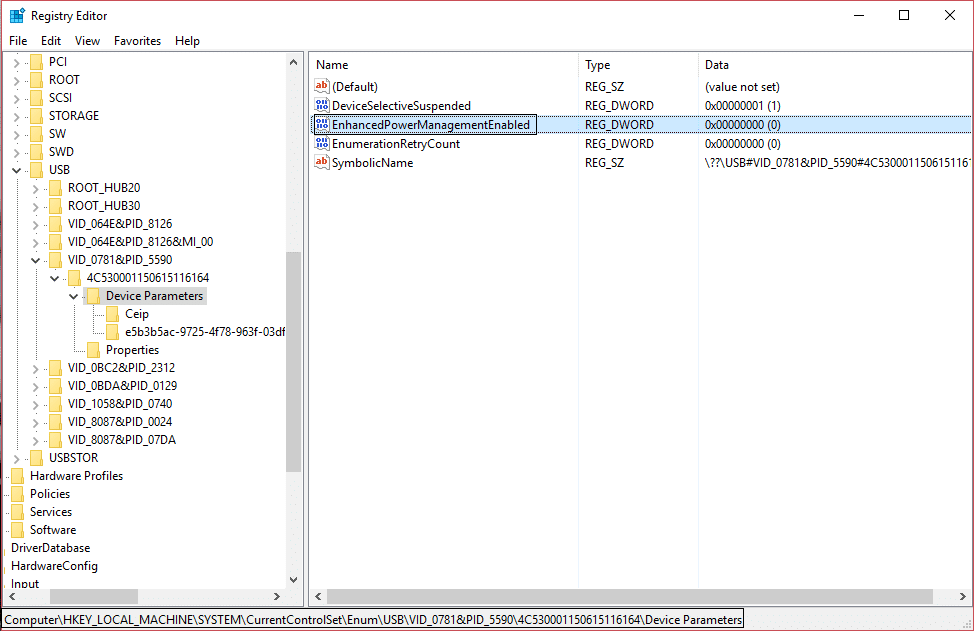
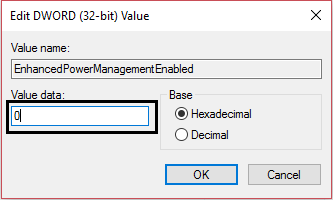
9. Now search for the DWORD EnhancedPowerManagementEnabled and Double click on it.
请注意: If you couldn’t find the DWORD create one by right-click, then select New and then DWORD (32-bit) value. And name the DWORD as “EnhancedPowerManagementEnabled” then enter 0 in the value and click OK.
10. 将其值更改为 1到0 并点击确定。
11. You may now close the Registry Editor as well as Device Manager.
12. Reboot your PC to apply changes and this may be able to fix USB Device Not Working in Windows 10 issue.
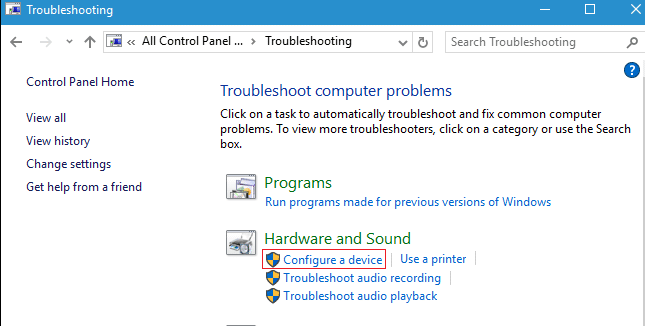
Method 2: Run Hardware and Device Troubleshooter
1. Open Control Panel using the Windows search bar.
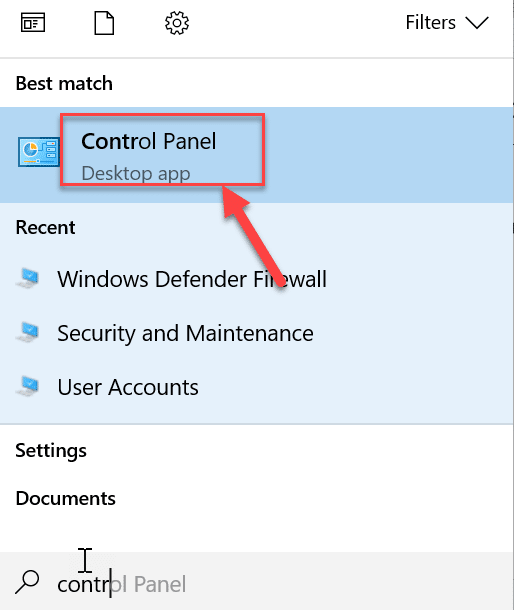
2。 选择 控制面板 from the search list. The Control Panel window will open up.
3。 搜索 疑难解答 using the search bar on the top right corner of the Control Panel screen.

4。 点击 故障排除 从搜索结果中。
5. The troubleshooting window will open up.
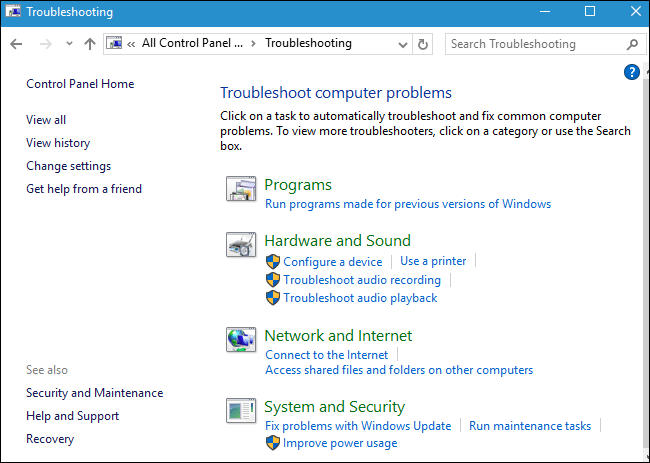
6。 点击 Hardware and Sound option.
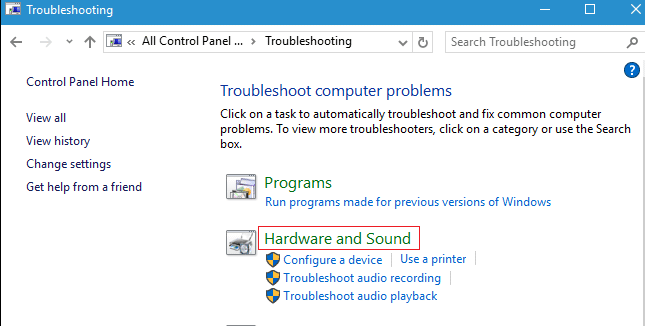
7. Under Hardware and Sound, click on Configure a device option.
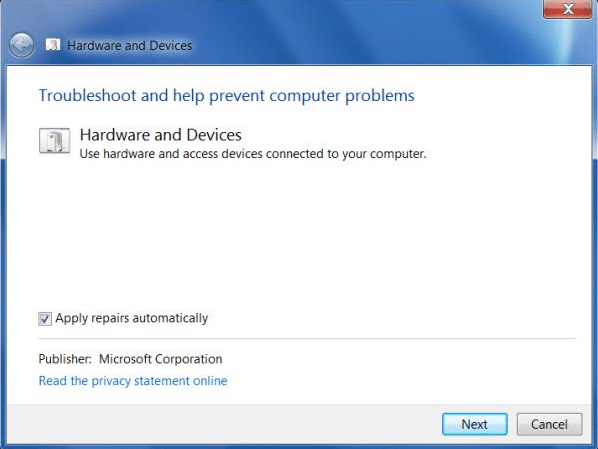
8. You will be prompted to find and enter the administrator password. Enter the password and then click on the confirmation.
9. The Hardware and Devices Troubleshooter window will open up.
10。 点击 下一步按钮 that will be on the bottom of the screen to run the Hardware and Devices troubleshooter.
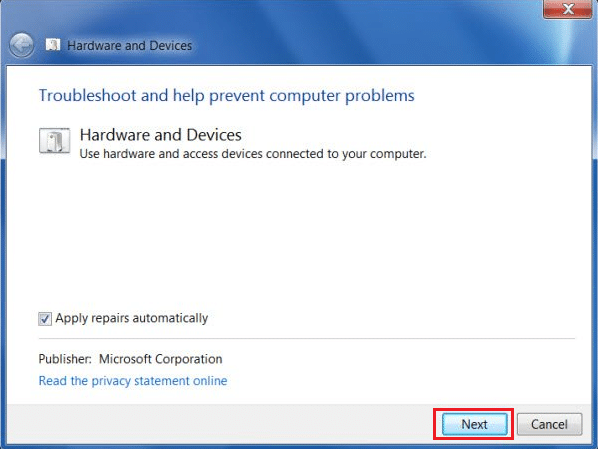
11. The troubleshooter will start detecting issues. If issues are found on your system, then you will be prompted to fix the issues.
Method 3: Update your Device Driver
1。 按 Windows Key + R 然后输入“输入devmgmt.msc”然后按 Enter 键打开设备管理器。
2. Now expand 通用串行总线控制器.
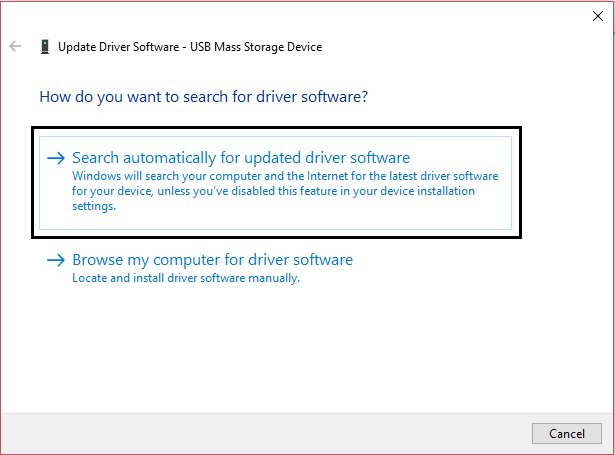
3. Next right-click on the device which you earlier identified in Method 1 and select “更新驱动程序软件。“
4。 选择 ”自动搜索更新的驱动程序软件。“

5. Let the process finish and see if you’re able to fix the issue.
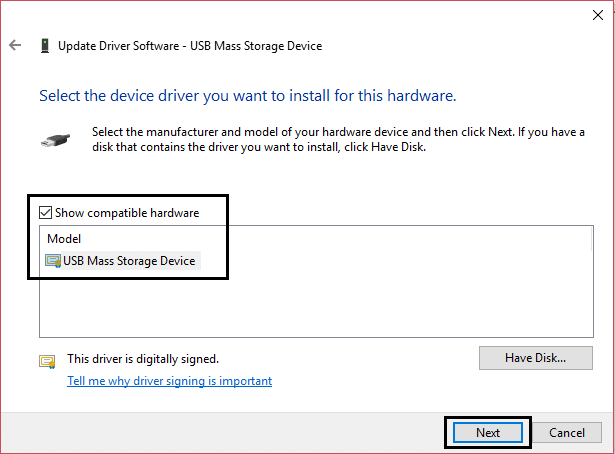
6. If not, then again repeat step 3. This time select “浏览我的电脑以获取驱动软件。“
7。 选择 ”让我从计算机上的设备驱动程序列表中进行选择。“
8.接下来,选择 USB大容量存储设备 并点击下一步。
请注意: Make sure Show compatible hardware is checked.
9. Click close and also close the Device Manager.
10. Reboot to apply your changes and this may be able to Fix USB Device Not Working in Windows 10.
Method 4: Automatically diagnose and fix Windows USB problems
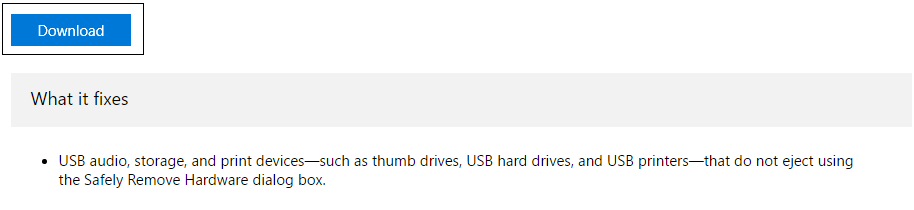
1. Navigate to this link 然后点击下载按钮。
2. When the page has finished loading, scroll down, and click 下载。
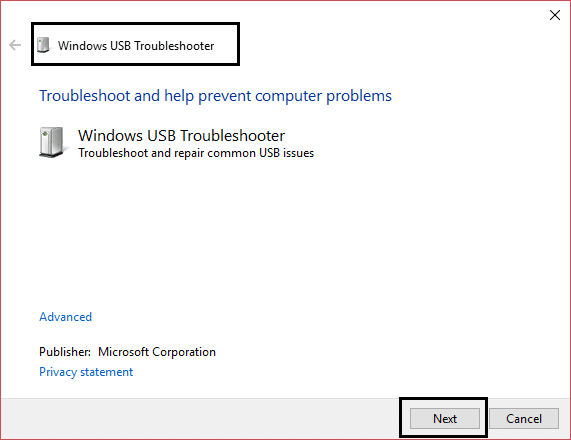
3. Once the file is downloaded, double-click the file to open the Windows USB Troubleshooter.
4. Click next and let Windows USB Troubleshooter run.
5. IF you have any attached devices then USB Troubleshooter will ask for confirmation to eject them.
6. Check the USB device connected to your PC and click Next.
7. If the problem is found, click on 应用此修复。
8。 重启你的电脑。
Method 5: Install the latest Intel device drivers.
2. 运行驱动程序更新实用程序并单击下一步。
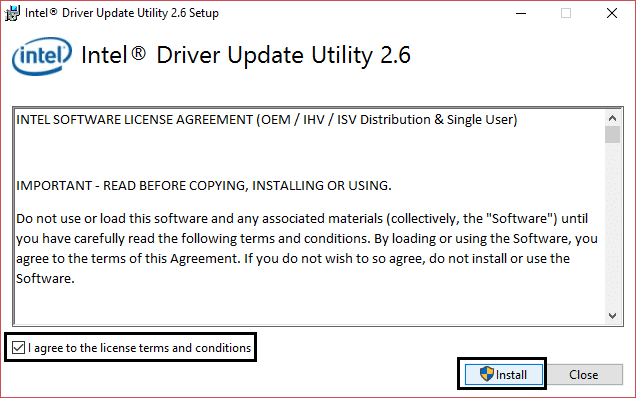
3. 接受许可协议 并单击安装。
4. Wait for Intel Driver Update Utility to initialize and install all required programs and files.
5. After System Update has finished click 发射。
6. 现在选择 开始扫描 and when the driver scan is completed, click on 下载。
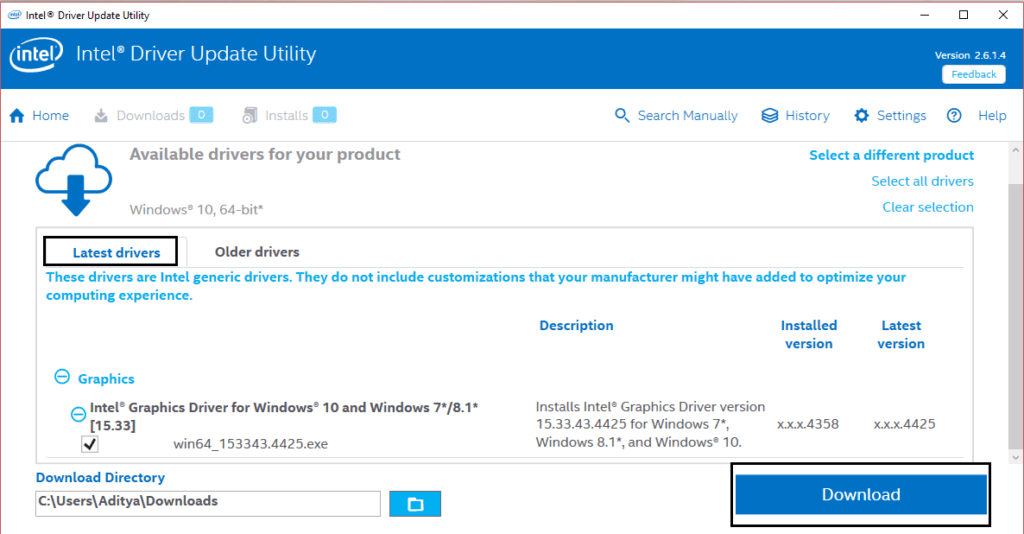
7. All the Drivers will be downloaded to your default download directory mentioned in the bottom left.
8.最后,点击 Install 安装 to install the latest Intel drivers for your PC.
9. When the driver installation is completed, reboot your computer.
看看你是否能够 fix USB Device Not Working in Windows 10 issue,如果没有,则继续下一个方法。
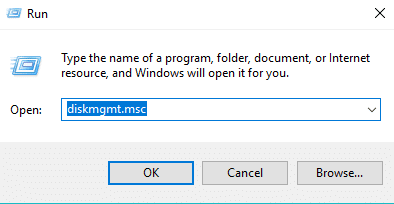
Method 6: Run Windows Disk Error Checking
1。 按 Windows Key + R 然后输入 diskmgmt.msc 并按Enter键。
2. Next right-click on your USB驱动器 并选择 属性。
3。 现在去吧 工具标签 inside properties.
4。 点击 Check-in Error Checking.
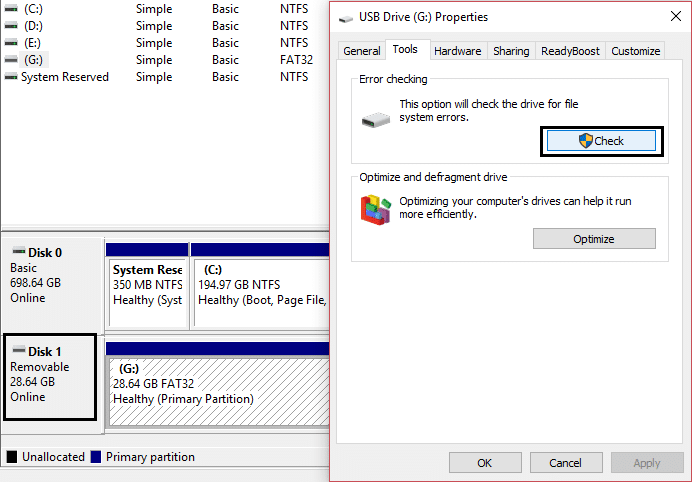
5. When the USB Error Checking is completed, close everything, and Reboot.
为你推荐:
That’s it, you have successfully Fix USB Device Not Working in Windows 10 issue. I hope one of the above-listed methods has fixed your problem/issue successfully and if you still have any queries regarding this guide feel free to ask them in comments. And share this post with your family or friends to help them in dealing with USB errors.