The Start Menu is one of the most used features on Windows computers as it hosts options to access your files and apps. You can actually customize the Windows 10 Start Menu if you don’t like the default tiles, layouts, or even the color of the menu. Windows gives you the ability to change the look and feel of the menu to your liking.
This gives you an opportunity to remove unwanted items from the menu and make it decluttered, add your most useful apps to the list, get rid of app suggestions, and even enlarge the menu to cover your entire screen.

Resize The Start Menu
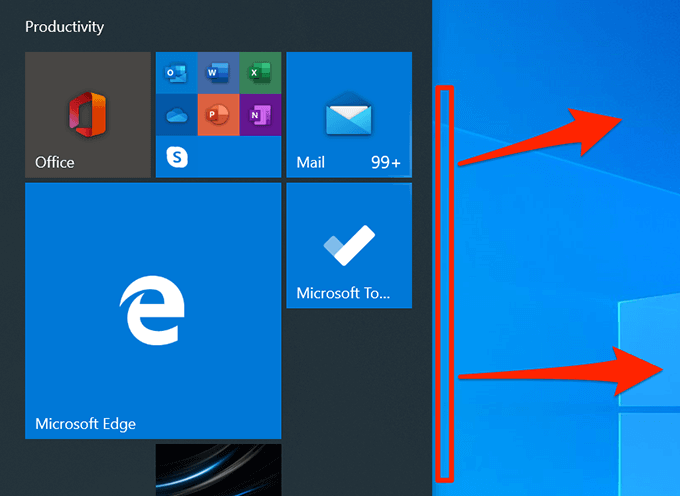
On most computers, the Windows 10 Start Menu only occupies a part of your screen real estate. If you want it to stretch and cover more area on your screen, you can customize the Windows 10 start menu in this way by dragging it to whatever direction you want it to stretch into.
- 打開 開始菜單 在你的電腦上。
- Bring your cursor to the edges of the menu and your cursor will turn into arrows.
- Drag the arrows in the direction you want the menu to stretch.
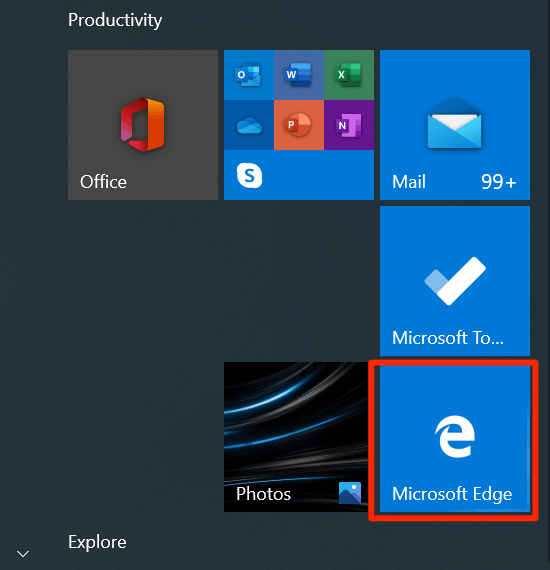
Add & Remove App Tiles
The Start Menu doesn’t have a tile for each app installed on your computer. However, you can add tiles for your chosen apps to the menu if you like. You can also remove existing app tiles if you don’t want to keep them there.
Add An App Tile
- Open the menu and find the app you want to add a tile for.
- Right-click on the app and select 腳開始.
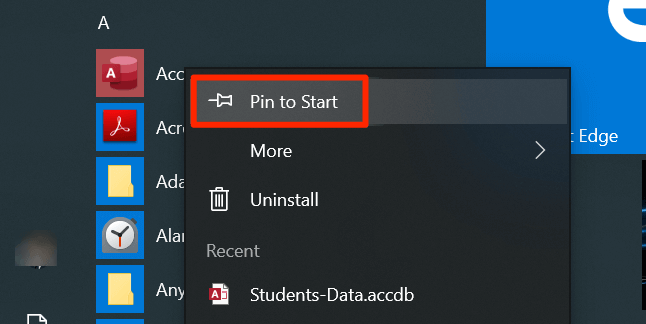
- A tile for your app will be added to the menu.
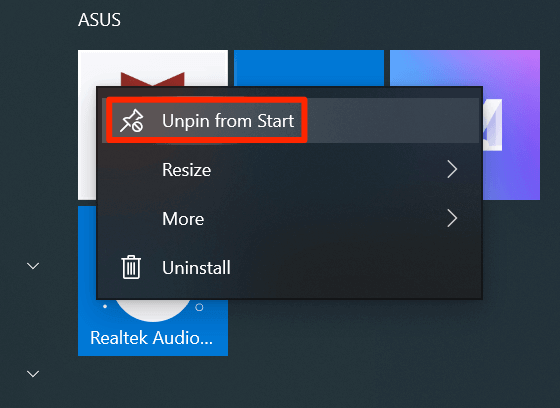
Remove An App Tile
Right-click on the tile you want to remove and select 從開始取消固定.
Rearrange Tiles In The Menu
Windows arranges the tile icons by itself but you can manually arrange them to give priority to your most used tiles. You can change the order of the tiles and your apps will appear accordingly.
- Find the tile that you want to change the position for.
- Click and hold down on the tile and move it to its new position.
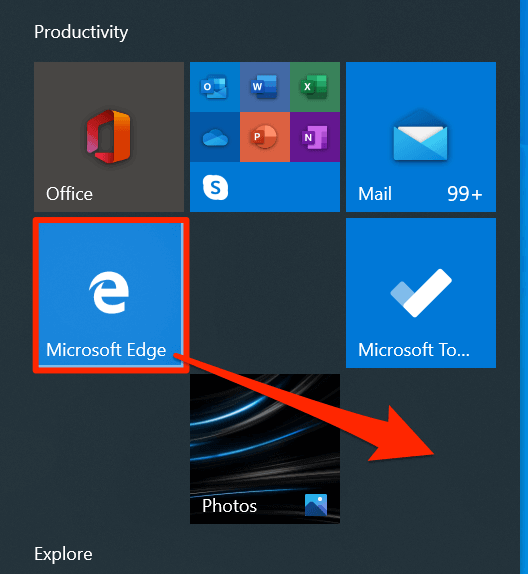
- The tile will take its new position.
禁用動態磁貼
有一定的 tiles in your menu that show live information such as real-time weather data. If you don’t use those tiles, you can turn them off so they aren’t live anymore.
- Find the live tile you want to disable in your 開始菜單.
- Right-click on the tile and select 更多 其次是 Turn Live Tile off.

- You can turn it back on anytime by right-clicking on it and selecting 更多 其次是 Turn Live Tile on.
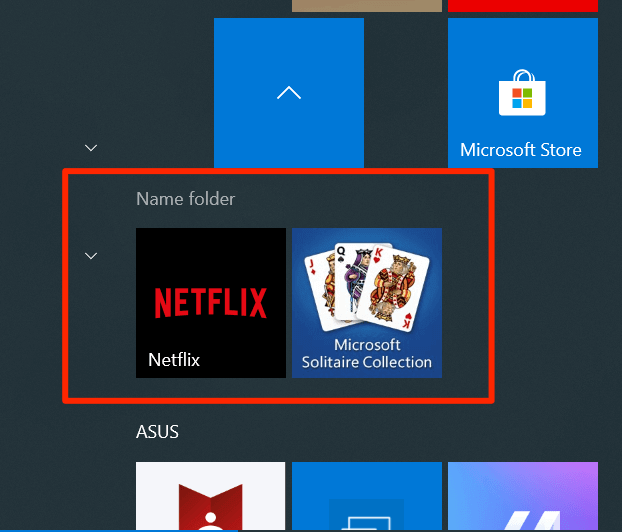
Add Tiles Into Folders
If you’ve added more tiles to your menu than it can accommodate on a single screen, you can group your tiles so they all appear in a single folder-like structure. You may want to use it for the tiles that are related to each other (such as entertainment apps).
- 打開 開始菜單 and find the tiles you want to merge.
- Drag one tile and drop it onto the other tile. It’ll create a folder for your tiles.
- It’ll optionally ask you to enter a name for your folder.
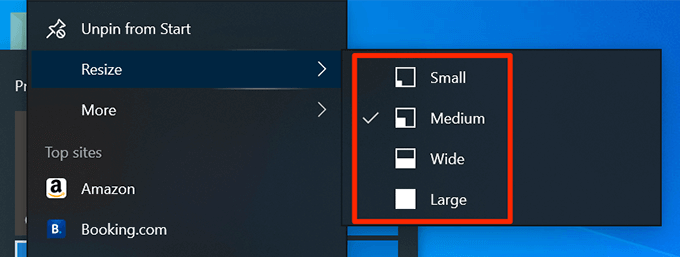
Change The Tile Size
Like the Start Menu, you can change the size of individual tiles as well. This way your chosen tiles can appear larger or smaller than any other tiles in the menu. You may want to do it for your frequently used tiles so they’re easy to locate in the menu.
- Find the tile you want to change the size for.
- Right-click on the tile and select 調整大小.
- You now have four size options to choose from for your tile.
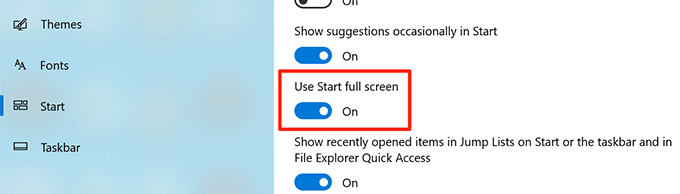
Enable Full-Screen Menu
If you often pick items from the Start Menu, its default size might not be convenient for you. Luckily, you can customize the Windows 10 Start Menu to go full-screen. It then covers your entire screen when you launch it.
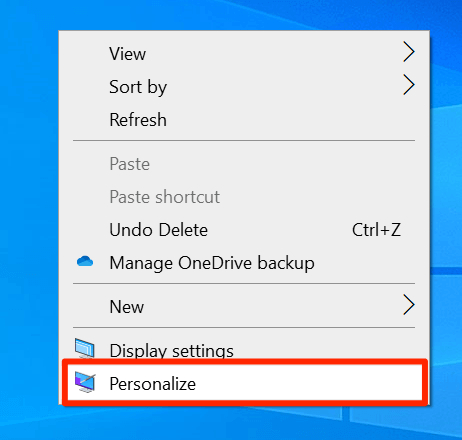
- Right-click anywhere blank on your desktop and choose 個性化.

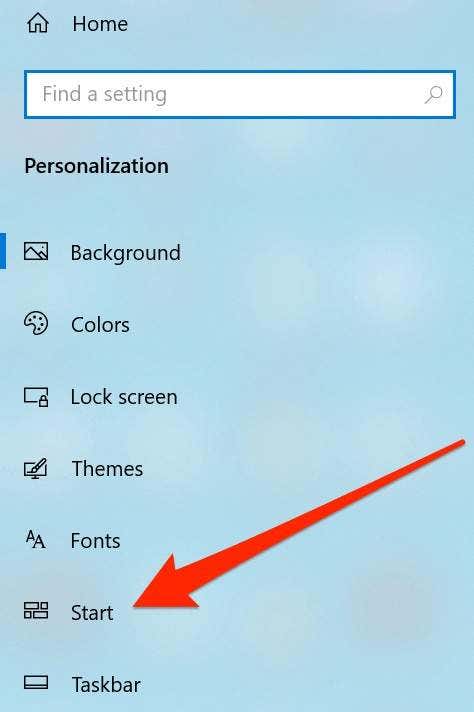
- 選擇 開始 從左側邊欄中的可用選項中進行選擇。

- On the right-hand side, you’ll find an option saying 使用全屏啟動. Enable the option to make your Start Menu always open covering your entire screen.
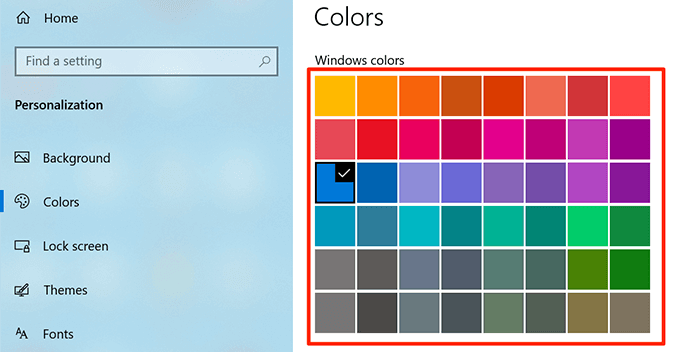
Change Start Menu Color
The Start Menu adapts the default color of your system, and if you don’t like the current color, you can change it fairly easily. All the tiles and the icons in the menu will then use your chosen color.
- 右鍵點擊您的桌面,然後選擇 個性化.

- 選擇 顏色 from the left sidebar on the following screen.
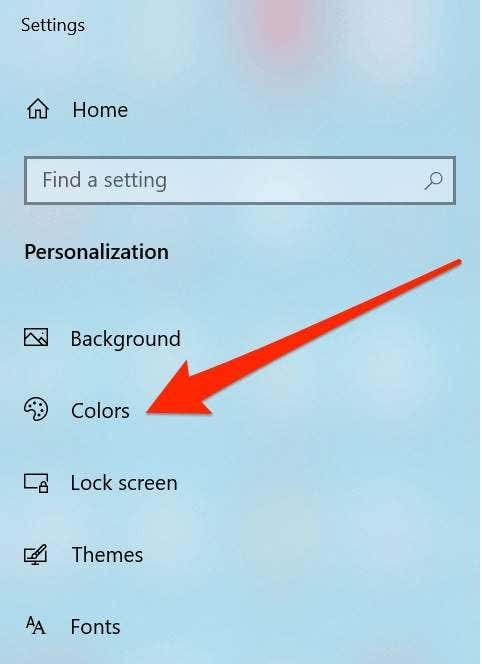
- 向下滾動,直到看到 窗戶顏色 section. Select a new color for your Start Menu and it’ll be instantly applied to it.
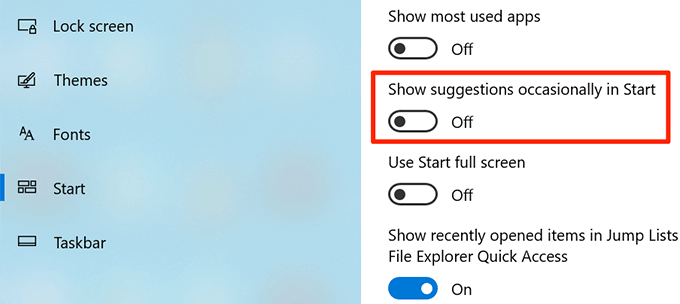
Disable App Suggestions
Sometimes Windows suggests you apps that you should be installing on your computer in the Start Menu. If you don’t like it, you can disable an option and it’ll hide app suggestions in the menu.
- Right-click on your desktop and choose 個性化.
- 點擊 開始 在左側邊欄。
- 關閉顯示以下內容的選項 偶爾在“開始”中顯示建議 在右側窗格中。
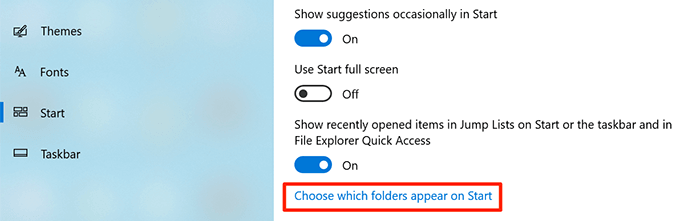
Change The Folders That Appear In The Menu
Windows shows certain folders of yours in the Start Menu by default but it gives you the option to hide and unhide these folders. This way you can customize the Windows 10 Start Menu and only keep your chosen folders in the list.
- 啟動 設定 應用程序,然後單擊 個人化定制服務.

- 找到說的選項 開始 在左側邊欄中,然後單擊它。

- On the right-hand side pane, scroll all the way down and click on the option that says 選擇開始時顯示哪些文件夾.
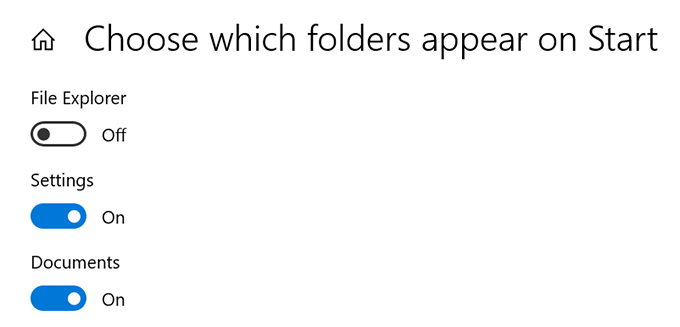
- The following screen lets you enable and disable various folders in the Start Menu. You can turn the toggle for each of these folders to the ON or OFF position to hide or unhide them in the menu.
Have you ever customized your Windows 10 Start Menu? If so, what changes did you make to it? We’d like to know your personal experience tweaking the menu and let us know in the comments below.

