連接滑鼠時自動停用觸控板

If you use a traditional mouse over Touchpad, you could automatically disable touchpad when you plug in the USB Mouse. This can be easily done via Mouse Properties in Control Panel where you have a label called “Leave touchpad on when a mouse is connected”, so you need to uncheck this option and you’re good to go. If you have Windows 8.1 with the latest update, you could easily configure this option right from PC settings.
This option makes it easier for users to navigate and you don’t need to worry about accidental touch or click over touchpad when using a USB Mouse. So without wasting any time let’s see How to Automatically disable Touchpad when Mouse is Connected in Windows 10 with the help of the below-listed guide.
連接滑鼠時自動停用觸控板
確保建立一個還原點,以防出現問題。
Method 1: Disable Touchpad when Mouse is connected via Settings
1.按Windows鍵+ I打開 設定 然後點擊 設備。

2. 從左側菜單中,選擇 觸控板。
3. Under Touchpad 取消選中 “連接滑鼠時保持觸控板打開“。
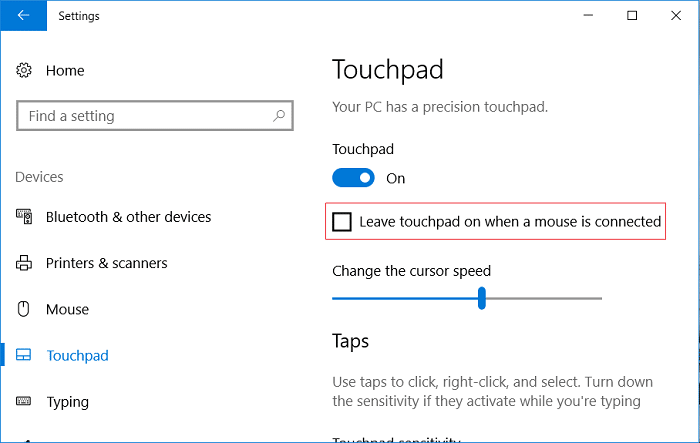
4. 重新啟動您的 PC 以保存更改。
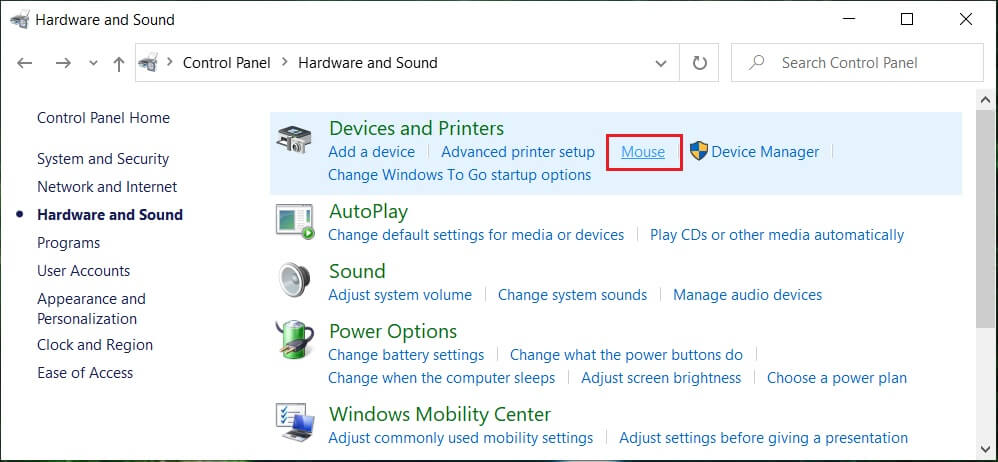
Method 2: Disable Touchpad when Mouse is connected via Mouse Properties
1. 按 Windows 鍵 + Q 調出搜索,輸入 控制, 並點擊 控制面板 來自搜索結果。

2。 接下來,單擊 硬件和聲音。

3. Under Devices and Printers click on 老鼠。
4.切換到 ELAN or Device Settings tab then 取消選中 “Disable internal pointing device when the external USB pointing device is attached“ 選項。
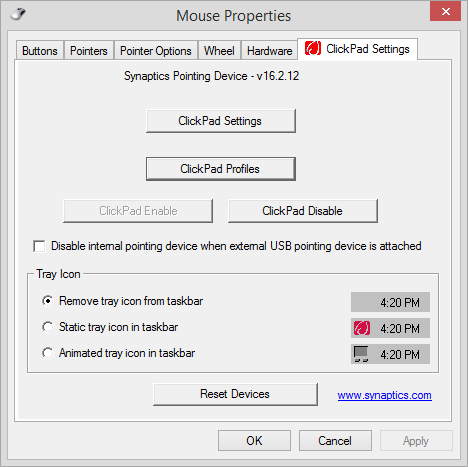
5. 按一下應用,然後按一下 確定。
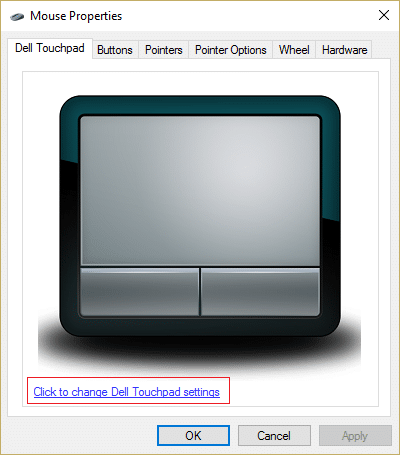
Method 3: Disable Dell Touchpad when Mouse is connected
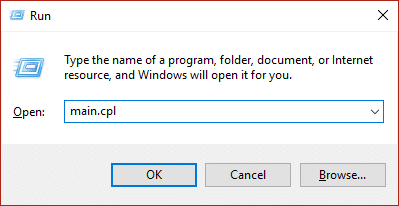
1. 按 Windows 鍵 + R 然後輸入 main.cpl 然後按Enter打開 滑鼠屬性。
2. Under Dell Touchpad tab, click on “Click to change Dell Touchpad settings“。
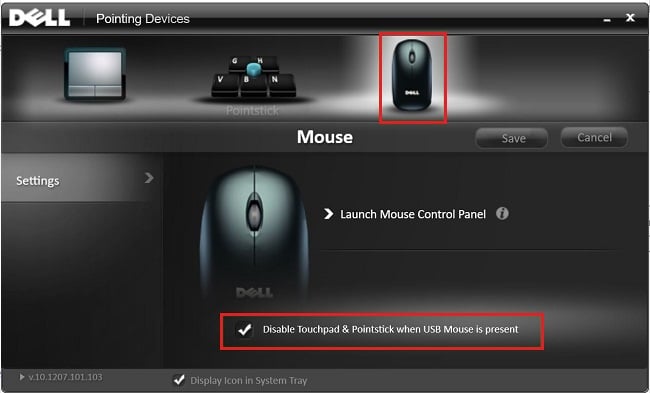
3. From Pointing Devices, select the Mouse picture from the top.
4. 勾選“Disable Touchpad when USB mouse is present“。
5. 重新啟動您的 PC 以保存更改。
Method 4: Disable Touchpad when Mouse is connected via Registry
1. 按 Windows 鍵 + R 然後輸入 註冊表編輯器 並按 Enter 打開註冊表編輯器。

2. 導覽至以下註冊表項:
HKEY_LOCAL_MACHINESOFTWARESSynapticsSynTPEnh
3。 右鍵單擊 SynTPEnh 然後選擇 新 > DWORD(32 位)值。
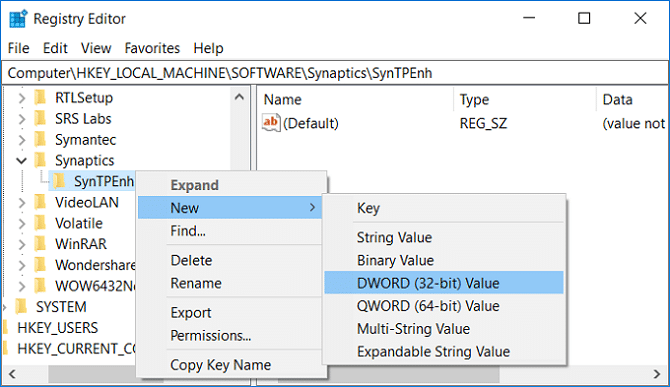
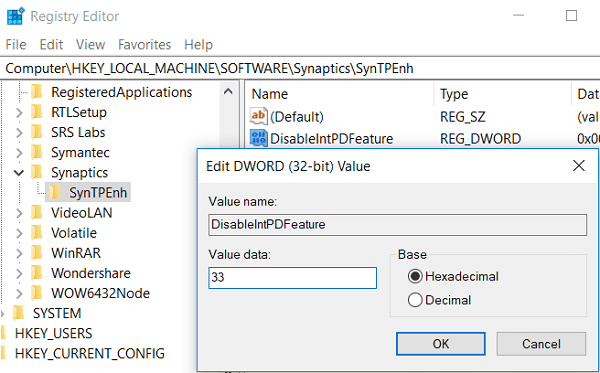
4. 將此 DWORD 命名為 禁用IntPDF功能 and then double click on it to change its value.
5.確保 Hexadecimal is selected under Base then change its value to 33 並點擊確定。
6. 重新啟動您的 PC 以保存更改。
Method 5: Disable Touchpad when Mouse is Connected in Windows 8.1
1. Press Windows Key + C key to open 設定 魅力。
2。 選擇 修改PC設置 than from the left-hand menu click on PC and Devices.
3.然後點擊 鼠標和触摸板, then from the right window look for an option labelled as “連接滑鼠時保持觸控板打開“。
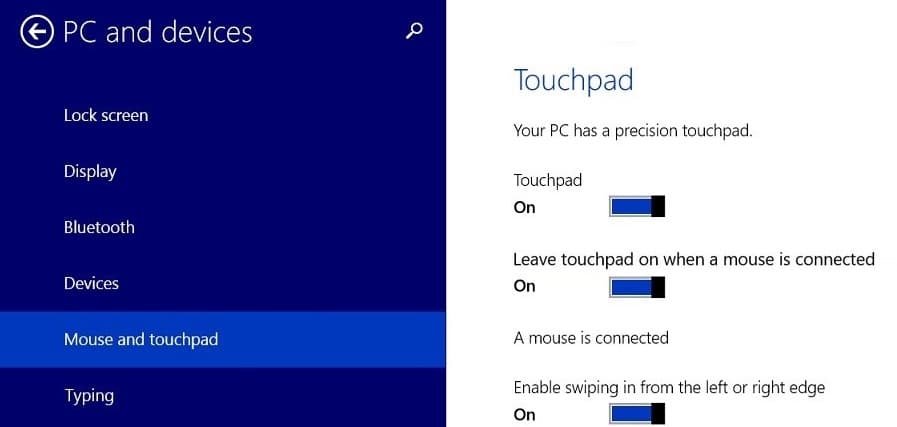
4. 確保 disable or turn off the toggle for this option.
5. Reboot your PC to save changes, and this will automatically disable Touchpad when Mouse is connected.
推薦:
這樣你就成功了 Disable Touchpad when Mouse is Connected in Windows 10 但如果您對本指南仍有任何疑問,請隨時在評論部分提出。