Microsoft added a useful tool missing from the earlier versions of Windows and even some older versions of Windows 10. The MBR2GPT tool enables Windows 10 users to convert Legacy BIOS to UEFI without reinstalling Windows 10.
You can invoke the MBR2GPT tool using Command Prompt, and two commands later, you’ll have switched from Legacy BIOS to UEFI.
哪個更好:傳統 BIOS 與 UEFI
BIOS(基本輸入/輸出系統)是您的微處理器在按下計算機電源按鈕後啟動所需的一段代碼。 BIOS 很久以前就首次出現並且運行良好。 BIOS 確實有一些限制。
例如,BIOS 使用主引導記錄 (MBR) 來定義最大分區容量為 2.2 TB。 過去 XNUMX 年的硬件發展保證了新固件的出現。 然後是 UEFI(統一可擴展固件接口)。
UEFI 與 BIOS 非常相似,是您的計算機在按下電源按鈕和啟動操作系統之前運行的低級軟件。 UEFI 更加健壯並且消除了與 BIOS 相關的限制。
例如,UEFI 支持高達 9 ZB 的分區,提供更快的啟動時間,並提供“安全啟動”等安全功能。
Getting Ready to Convert Legacy BIOS to UEFI
You need to get a few things in order before we talk about changing BIOS from Legacy to UEFI.
Check Your BIOS Version
Verify that you’re currently using Legacy BIOS. You don’t want to have to go through the entire process only to find out you were using UEFI the whole time.
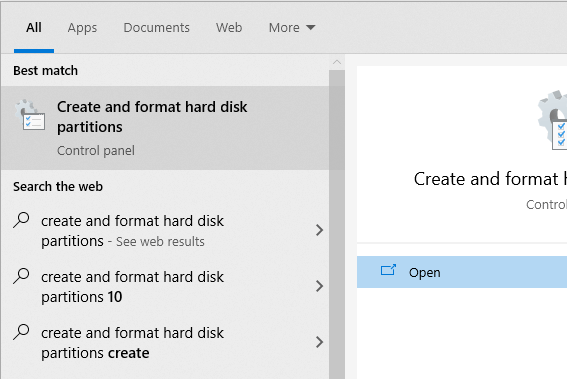
Open the Disk Management app to verify which BIOS version you’re running. Search for 創建和格式化硬盤分區 in the Start Menu and open the 最佳匹配. This will take you to the Disk Management app.
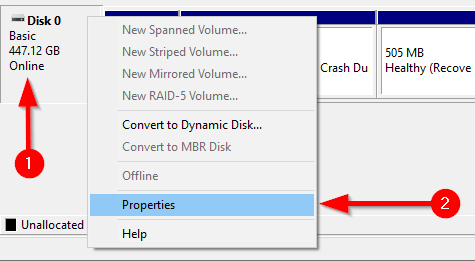
In the app, right-click on the disk on which you’ve installed Windows and select 氟化鈉性能.
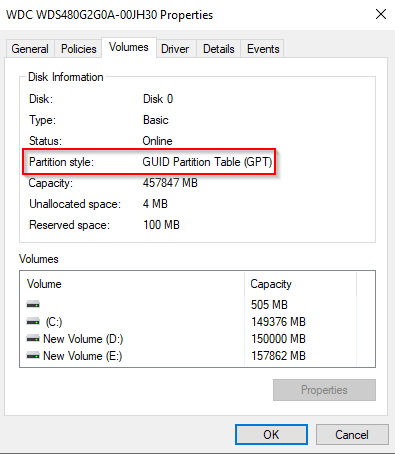
Next, you want to check your disk partition style to confirm whether you’re running the Legacy BIOS or UEFI. If you’re using BIOS, your disk partition style will be MBR. If you’re already on UEFI, the disk partition style will be GPT.
You can check the disk partition style under the 卷 tab in Properties. Search for 分區樣式 下 Disk information.
Check Your Windows Version
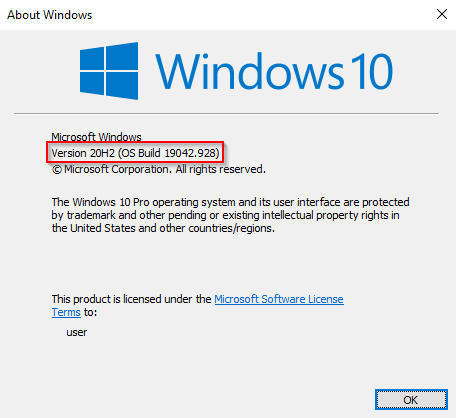
The MBR2GPT tool is available on Windows 10 version 1703 and later. Verify that you have the right version before starting the process by searching for WINVER in the Start Menu and opening the Best match. The new window that opens will display the version in the second line.
Legacy BIOS to UEFI Conversion Prerequisites
Assuming you’ve verified that you’re using the Legacy BIOS, there are a few other things you need to check, and in some cases, change.
- Ensure that the target disk (i.e., the Windows drive) has three or fewer partitions (drive C, D, etc., are all partitions). You can view the partitions by pressing WIN + R 並運行 diskmgmt.msc. If you see more than three partitions, you’ll need to merge the partitions 或刪除它們。
- If you’ve encrypted the target disk using BitLocker, this will interfere with the conversion process. Since Windows won’t convert an encrypted disk, you’ll need to disable BitLocker before you begin the conversion.
- After conversion, you can’t boot into Windows until you change the motherboard’s firmware settings from Legacy BIOS to UEFI. Take a quick tour of the firmware and look for the setting that allows you to switch between BIOS and UEFI before starting the conversion. The process differs across manufacturers, so you may need to look around a little. If you can’t find the setting, use the manual.
- Create a precautionary backup.
如何將 BIOS 從舊版更改為 UEFI
一旦您確定一切都井井有條,就該使用 MBR2GPT 工具了。
- 搜索 CMD in the Start Menu, right-click, and select 以管理員身份運行。
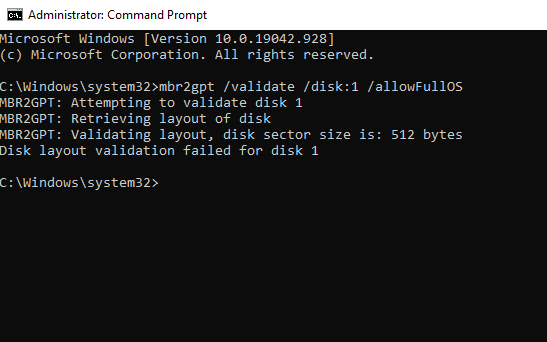
- 您的磁盤必須滿足 MBR2GPT 工具的轉換要求才能進行轉換。 通過使用以下命令驗證磁盤來檢查它是否存在:
mbr2gpt /validate /disk:0 /allowFullOS
如果要轉換的磁盤不是磁盤 0,請將 0 替換為相應的磁盤號。
如果您的磁盤不符合轉換要求,您將看到錯誤。 例如,以下錯誤是由於驗證 USB 驅動器而導致的。
- 如果驗證成功,請運行以下命令開始轉換:
mbr2gpt /convert /disk:0 /allowFullOS
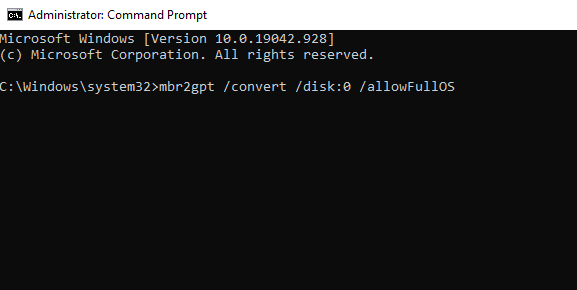
讓轉換運行,它應該只需要幾秒鐘。
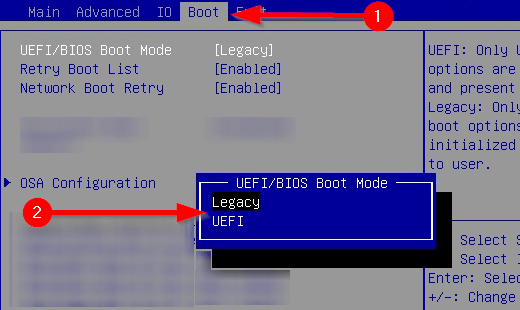
- 重新啟動 PC 並進入主板固件以更改設置。 假設您在開始該過程之前已經知道如何進入 BIOS,這應該只需要幾秒鐘。 在大多數情況下,您會在固件的“引導”選項卡/部分下看到選擇引導模式的選項。
- 啟動到 Windows。
- 驗證您是否已使用之前使用的相同過程成功轉換了分區。 前往磁盤管理應用程序,右鍵單擊轉換後的磁盤,選擇 氟化鈉性能 > 體積,而這一次 分區樣式 應該 GUID分區表(GPT).
享受您的現代化 BIOS
UEFI 具有很多功能。 鑑於大多數現代系統都使用 UEFI,將 Legacy BIOS 轉換為 UEFI 是很自然的。 好了,你們都完成了。 幸運的是,您也不必重新安裝 Windows。

