With an earlier version of Windows, users could only track their Wireless (Wi-Fi) or Ethernet Adapter data usage. Still, with the Windows 10 April 2018 Update version 1803, you can now set a data limit for Ethernet, Wi-Fi, and mobile networks. Although you could set Ethernet or Wi-Fi connections as metered, you couldn’t restrict the data usage by any of these networks.
This feature works best for those who use a limited data broadband plan; in such cases keeping track of your data usage becomes difficult, and this is where the new feature of Windows 10 comes into action. Once you reach your data limit, Windows will notify you regarding the same. You can also restrict the network’s background data usage, and once you reach within the 10% of the data limit, background data usage will be restricted. Anyway, without wasting any time, let’s see How to set Data Limit for WiFi and Ethernet in Windows 10 with the help of the below-listed tutorial.
How to set Data Limit for WiFi and Ethernet in Windows 10
確保建立一個還原點,以防出現問題。
Method 1: Set Data Limit for WiFi and Ethernet in Windows 10 Settings
1.按Windows鍵+ I打開 設定 然後點擊 Network & Internet icon.

2. Now, from the left-hand menu, select 數據使用。
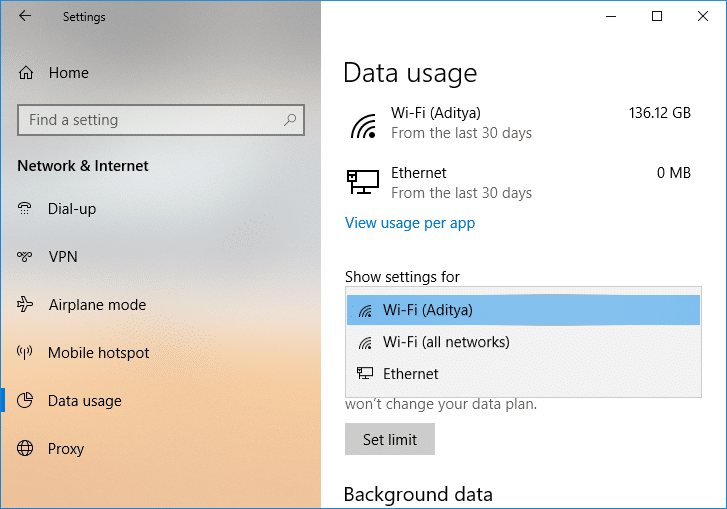
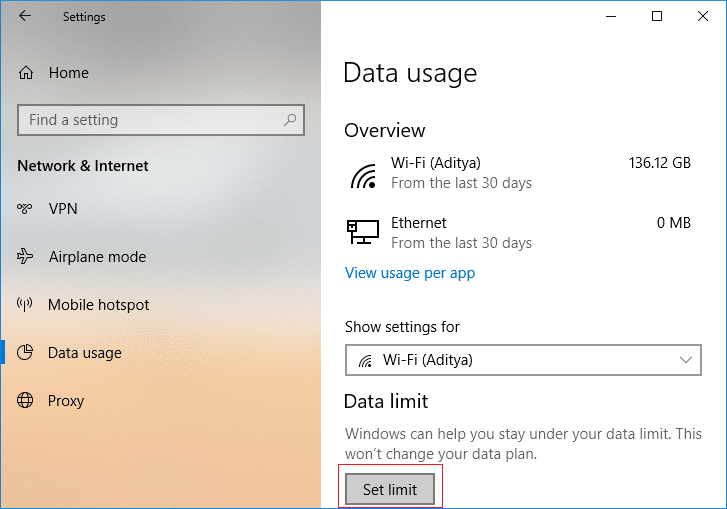
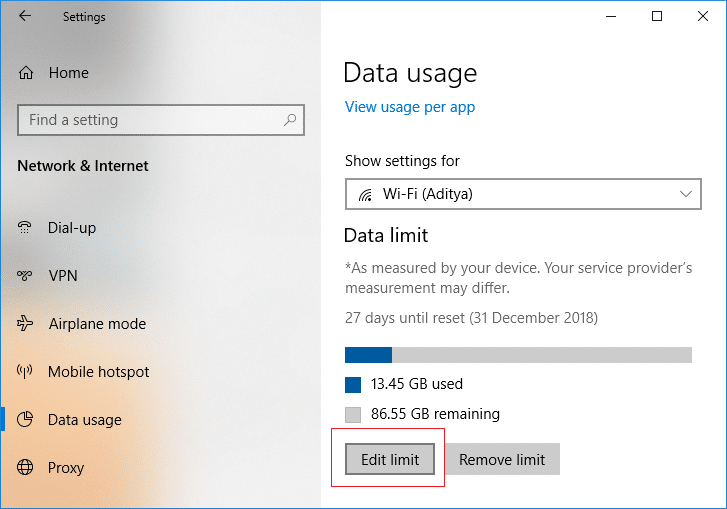
3. In the right-hand side window, from the “Show settings for” dropdown select the network connection you want to set a data limit for and then click on “設置限制“按鈕。
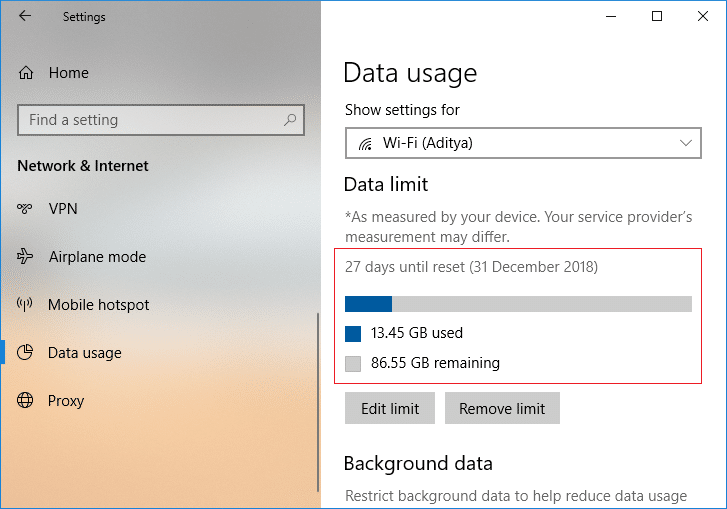
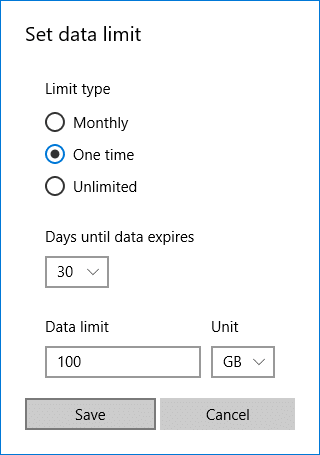
4。 下一個, specify the limit type, monthly reset date, data limit, etc. 然後單擊 保存。

注意: Once you click Save, it will detail how much your data has been consumed till now as the data has already been tracked.
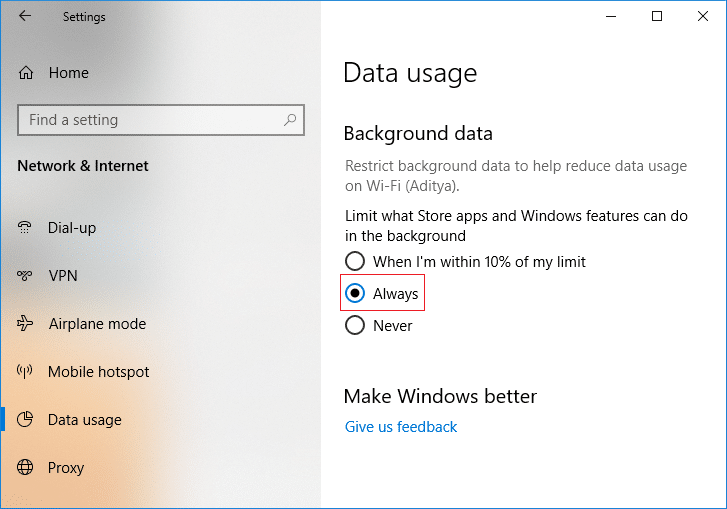
Method 2: Set Background Data Limit for WiFi and Ethernet in Windows 10 Settings
1.按Windows鍵+ I打開 設定 然後點擊 Network & Internet icon.
2. Now, from the left-hand menu, select 數據使用。
3。 下一個, select the network connection for which you want to set the data limit from the “Show settings for” drop-down then under 後台數據 either select “總是“或”決不“。
Method 3: Edit Data Limit for WiFi and Ethernet in Windows 10 Settings
1.按Windows鍵+ I打開 設置s then click on the Network & Internet icon.
2. Now, from the left-hand menu, select 數據使用。
3. In the right-hand side window, from the “Show settings for” dropdown select the network connection you want to edit the data limit for and then to click on “修改限制“按鈕。
4.再次 specify the data limit you want to set for this network connection and then 單擊“保存”。
Method 4: Remove Data Limit for WiFi and Ethernet in Windows 10 Settings
1.按Windows鍵+ I打開 設定 然後點擊 Network & Internet icon.
2. Now, from the left-hand menu, select 數據使用。
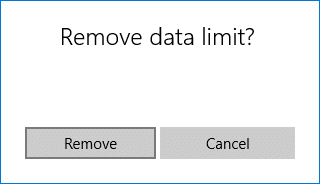
3。 下一個, select the network connection for which you want to remove the data limit from the “Show settings for” drop-down then click on “取消限制“按鈕。
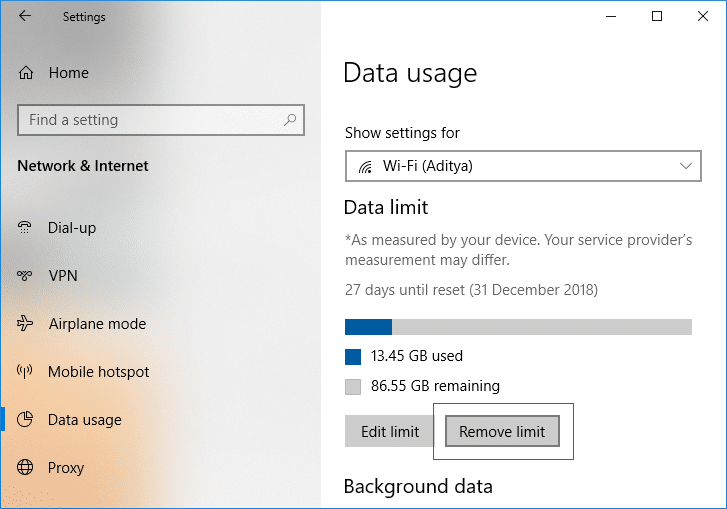
4. Again click on 清除 來確認您的操作。
5. Once finished, you can close the Settings window.
推薦:
這樣你就成功學會了 How to set Data Limit for WiFi and Ethernet in Windows 10 但如果您對這篇文章仍有任何疑問,請隨時在評論部分詢問。
")
