Do you share your work or home computer with others? Do apps and files from guest accounts consume an insane amount of disk space? Windows has a quota system that grants administrators more control over storage management. You can use the tool to set disk usage quota for both internal and external storage devices.
We’ll walk you through the steps to control data users can store on your PC by setting disk quota limits. Before jumping to the steps, note that the Windows Quota Management tool only works on drives formatted using the NTFS文件系統.

Configure Disk Quota via File Explorer
There are several ways to enable the quota management system in Windows 11. You can do so via File Explorer, Registry Editor, or the 組策略編輯器. However, the File Explorer route is the easiest.
- Open File Explorer and select 這台電腦 在側邊欄上。

- Scroll to the “Devices and drives” section, right-click the disk you want to limit, and select 氟化鈉性能.

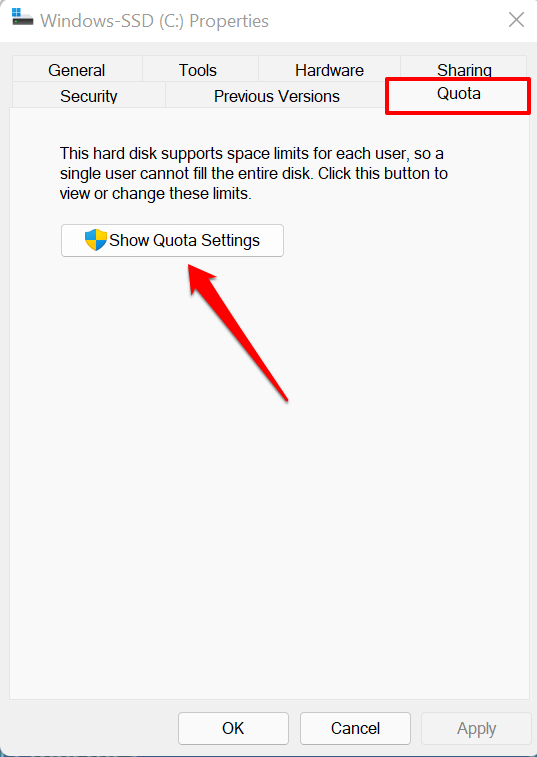
- Head to the Quota tab and select Show Quota Settings.
- Check the 啟用配額管理 框。
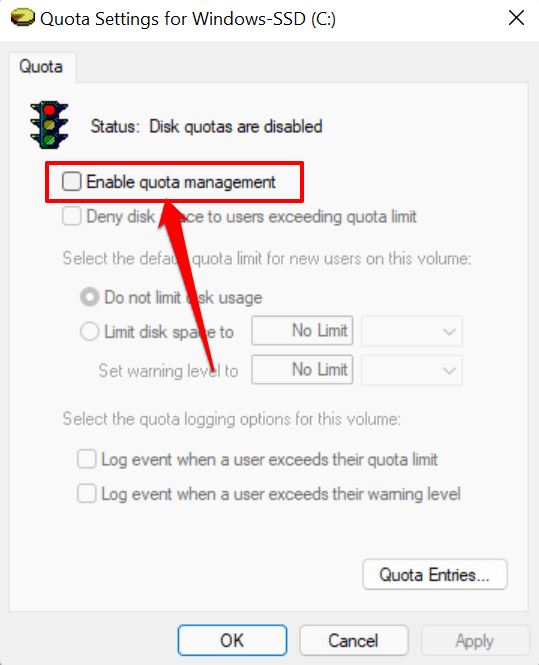
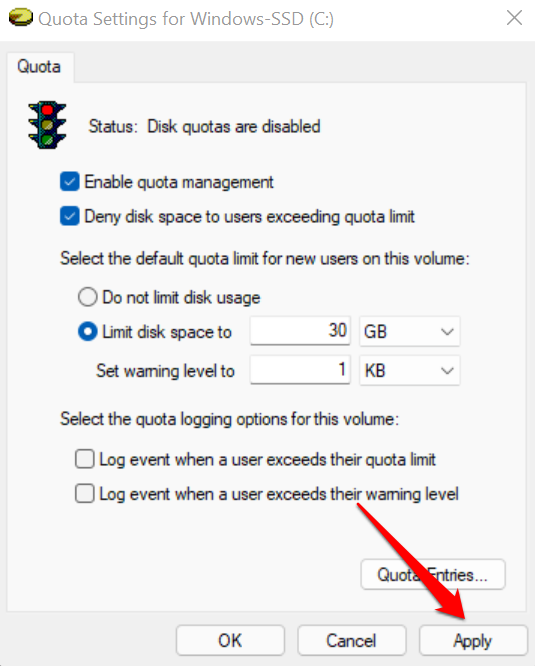
- 接下來,檢查 Deny disk space to users exceeding quota limit box. That will enforce the limitation and ensure any user who reaches the quota limit can no longer write data to the disk.

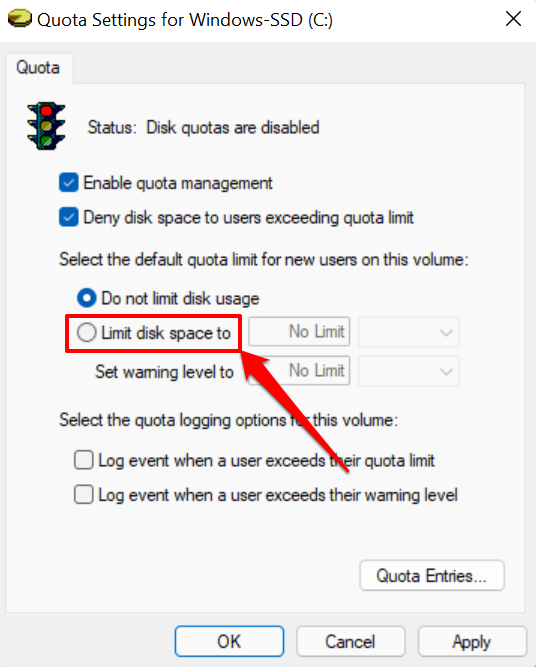
- 選擇 Limit disk space to.
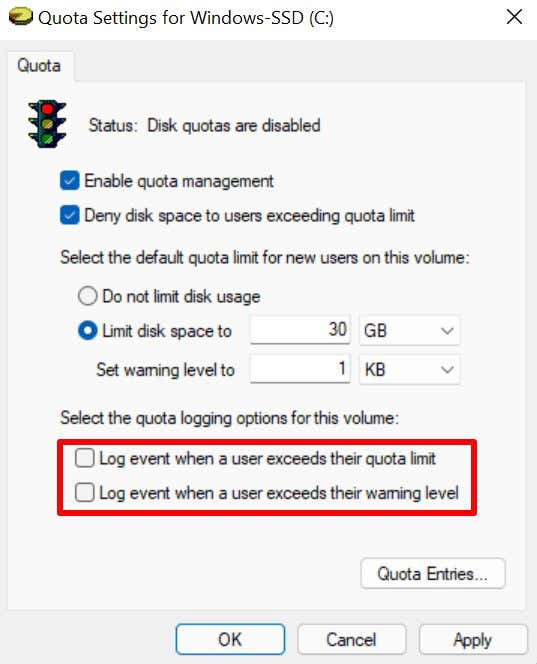
- The next step is to set the disk limit. Say you want to set a 30GB disk quota, enter the digit (30) in the first dialog box and select the storage unit (GB) in the adjacent drop-down box.

You should also set a warning level that’s slightly lower than the disk limit. For a 30GB disk limit, setting a 25GB warning level is ideal. When users hit or exceed the warning limit, Windows sends a reminder that they’re close to exhausting the disk space allocated to them.
- If you want Windows to record an event log (in the Windows事件查看器) when users excess their disk quotas or hit storage limit, check Log event when a user exceeds their quota limit 和 Log event when a user exceeds their warning level.
- 選擇 登記 繼續。
- 選擇 OK on the warning prompt to enable the quota system you configured.

- 選擇 OK in the Quota Settings window.

Note that you might have to restart your computer for these changes to take effect. We should also mention that disk quota configurations are drive-specific. If your PC has multiple disk partitions (separate from your C: drive), quota limits on the local disk don’t apply to other partitions.
View and Adjust Disk Quota Limit
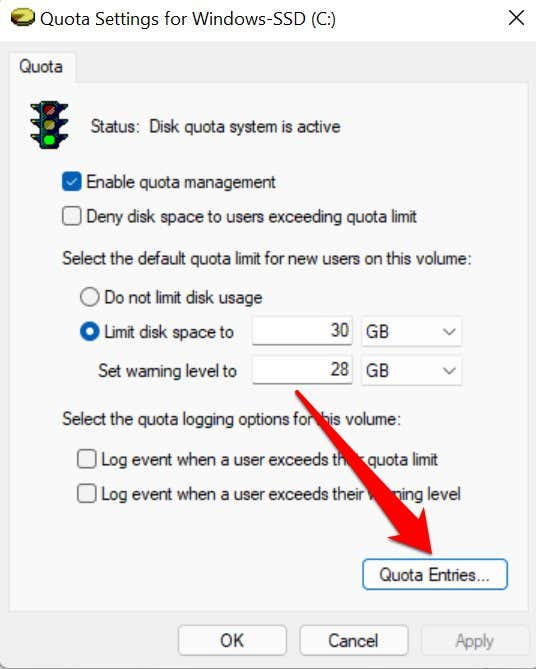
When you set a storage quota limit for disk, Windows applies the limit to all users on your computer. There’s a “Quota Entries” tool in the Quota Settings window that lets you adjust or disable the disk quota limit for specific users. You can also use the tool to check the current disk space usage for all user accounts against the set quota.
- Open the Quota Settings window for the drive and tap the Quota Entries 按鈕。
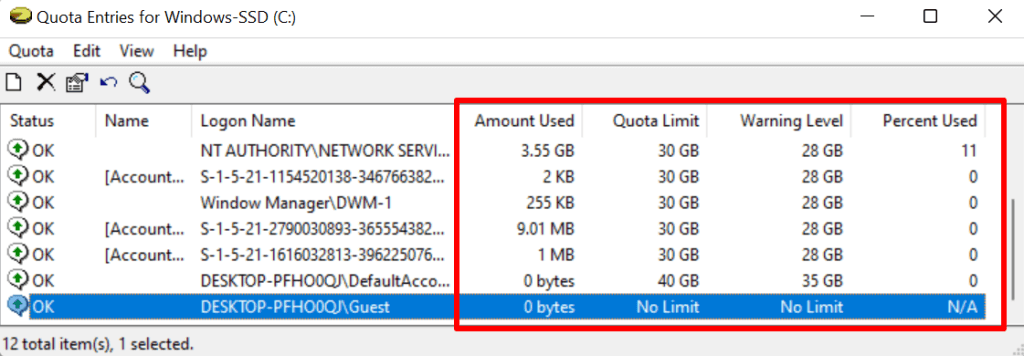
- The “Amount Used” and “Quota Limit” columns show how much disk space a user has consumed against their allotted quota limit.
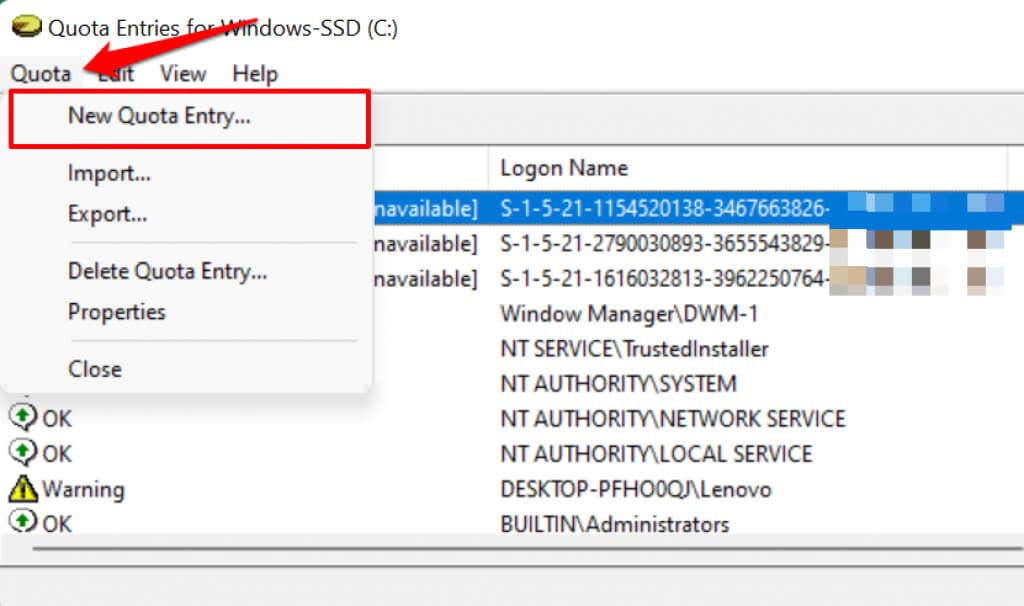
If you don’t find an account in the “Name” or “Logon Name” columns, proceed to add the user to the list manually. Tap 引用 在菜單欄上,然後選擇 New Quota Entry.
- 選擇 高級 在左下角。
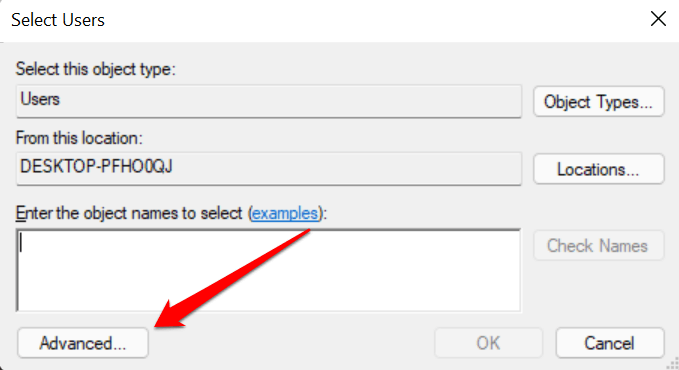
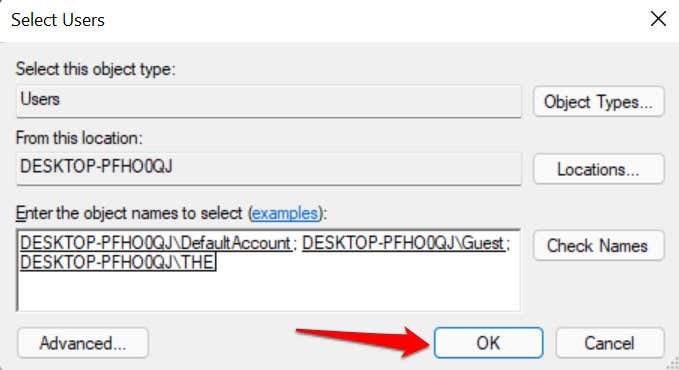
- 點擊 立即查找 button and double-click the account you want to include in the storage quota limitation.

- 選擇 OK 繼續。
- Set the quota limit and warning level for the user and select OK.

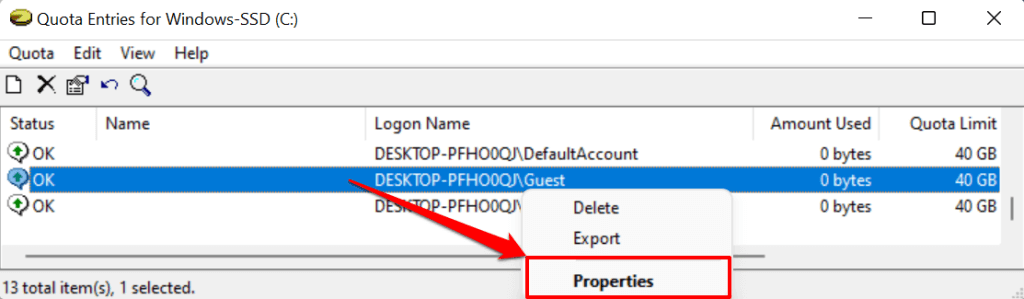
- To adjust or disable disk quota for a user, right-click the account and select 氟化鈉性能.
- Adjust the user’s disk quota in the Limit disk space to 和 Set warning level to dialog boxes. Select 登記 進而 OK.
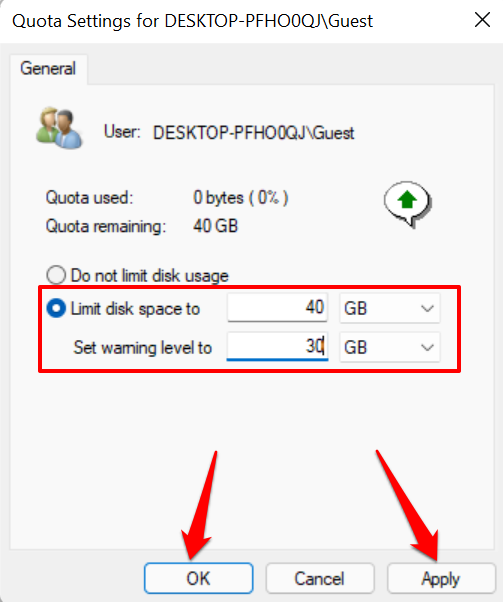
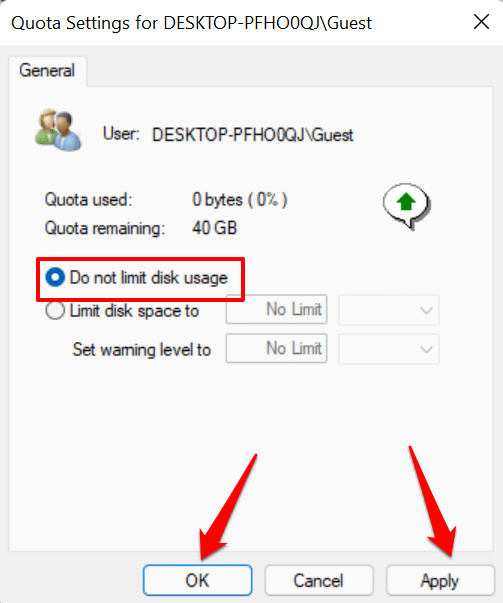
- 點擊 Do not limit disk usage radio button if you want to delete or remove the quota limit. Select 登記 和 OK 繼續。
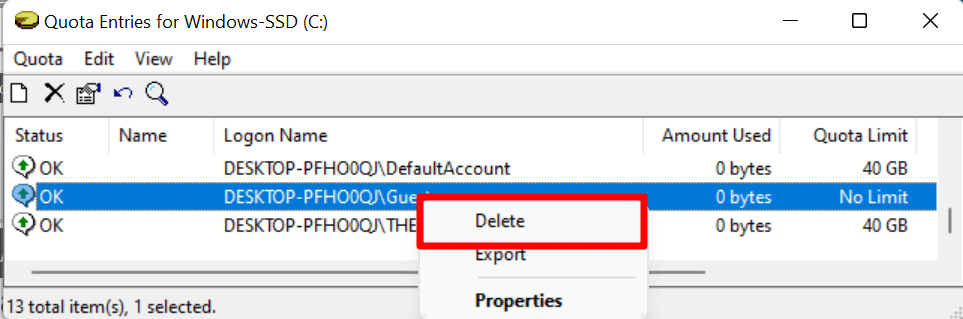
Another way to disable quota limits is to right-click the account name in the “Quota Entries” window and select 刪除.
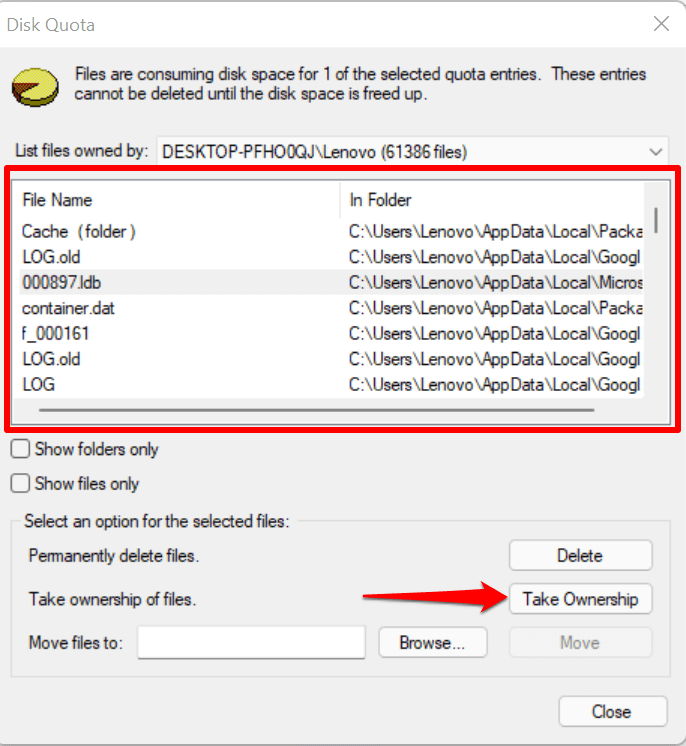
選擇 取得所有權 on the next page to save files in the disk space you allotted to the user account. Select 刪除 if you don’t need the files.
Set Disk Quotas Using Group Policy Editor
There are instances when Windows fails to enforce the storage quota limit configured via File Explorer. If that happens, modify or re-enable the disk quota in the Group Policy Editor.
Note that the Group Policy Editor is only available in Windows 11 Pro, Education, and Enterprise. If you use Windows 11 Home edition, try re-enabling the storage quota in the Registry Editor instead.
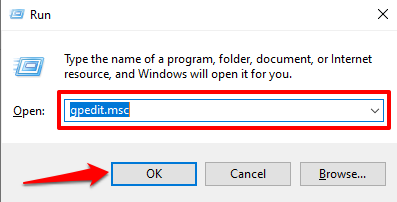
- 使用 窗口鍵 + R keyboard shortcut to open the Windows Run box. Type GPEDIT 在對話框中,然後按 Enter.
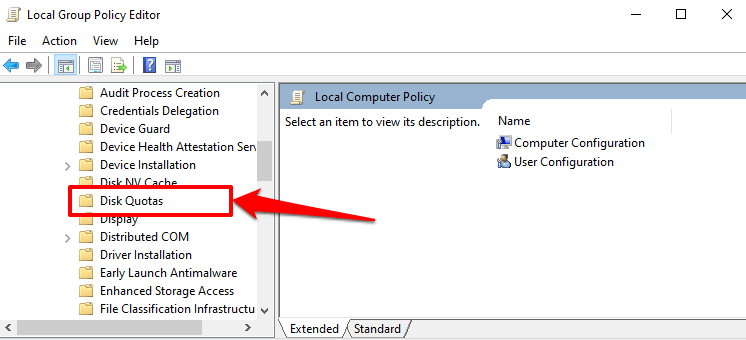
- On the sidebar, go to “計算機配置” > “管理模板” > 系統 並選擇 Disk Quotas 文件夾中。
- 雙擊 Enable disk quotas.

- 點擊 啟用 單選按鈕,選擇 登記,然後選擇 OK 繼續。

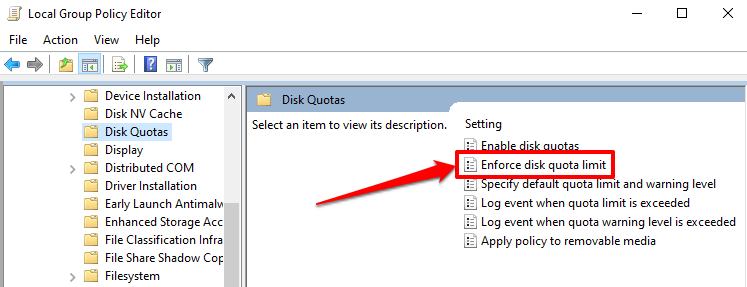
- One more thing: configure Windows to enforce the disk quota settings. Double-click Enforce disk quota limit.
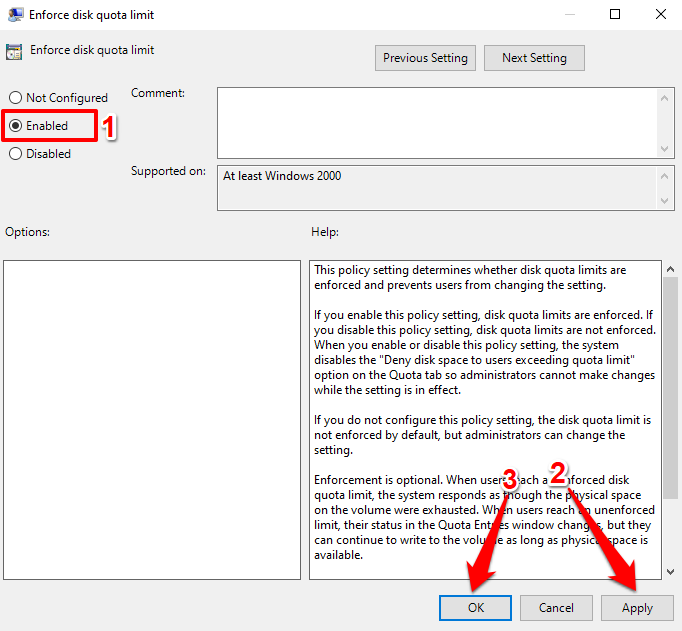
- 選擇 啟用 並選擇 登記 to save the changes. Afterward, select OK 關閉該窗口。
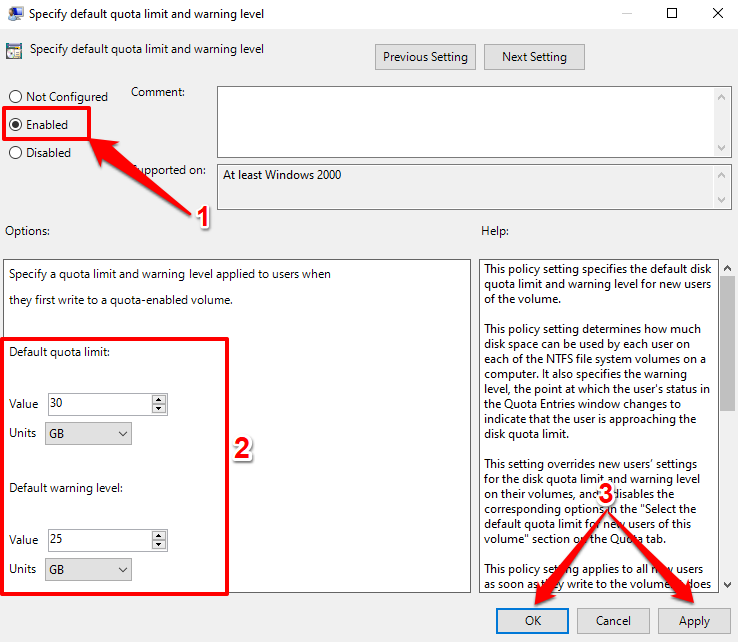
- The next and most crucial step is to specify your quota limit. Double-click Specify default quota limit and warning level.

- 選擇 啟用, enter the quota limit and warning level values and units, select 申請, 進而 OK.
- If you want the disk quota configuration applied to removable or external drives, double-click Apply policy to removable media 並將其設置為 啟用.

Set Disk Quota via Registry Editor
You can also force-enable a disk quota limit on Windows 11 devices via the Registry Editor. Ensure you make a backup of your PC’s registry files before proceeding, so you don’t damage any critical file that could corrupt Windows or break your PC.
- 媒體推薦 Windows鍵 + R to open the Windows Run box. Enter 註冊表編輯器 在對話框中並選擇 OK.
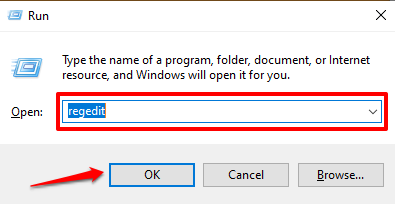
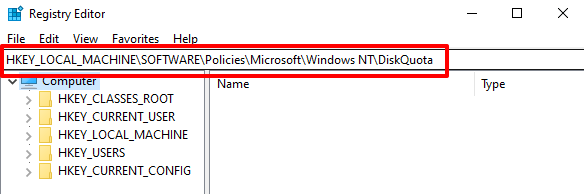
- 貼 HKEY_LOCAL_MACHINESOFTWARE策略MicrosoftWindows NTDiskQuota 在地址欄中按 Enter.
確保 啟用 和 執行 registry keys and their values are set to 1 (i.e., enabled). They both enable and enforce the disk quota limit in Windows.
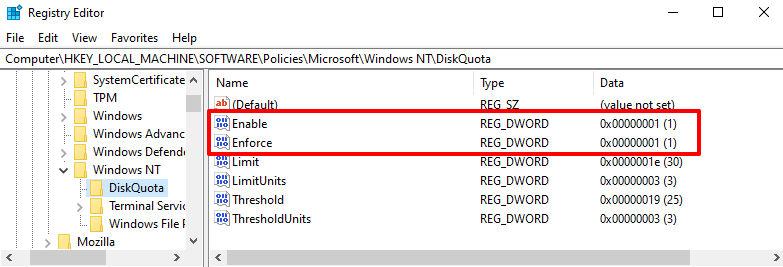
- Double-click the “Enable” or “Enforce” registry keys, enter 1 in the “Value data” dialog box and select OK.

Automate Storage Management
With the steps in this tutorial, you can set up a disk quota management system in Windows 11. These methods are backward compatible with older versions of the Windows operating system. That is, you can adopt these steps to set disk quotas in Windows 10, Windows 8, and Windows 7.

