Did you recently face the Blue Screen of Death error? But couldn’t understand why the error occurs? Don’t worry, Windows saves the BSOD log file in a specific location. In this guide, you will find where is the BSOD log file located in Windows 10 and how to access & read the log file.
A Blue Screen Of Death (BSOD) is a splash screen that displays information about a system crash for a short while and proceeds to restart your computer. In the process, it saves the crash log files in the system before performing the restart. The BSOD happens due to a variety of factors, including incompatible software interfering with operating system processes, memory overflow, overheating of hardware, and failed system modifications.
The BSOD captures essential information regarding the crash and stores it on your computer so that it can be retrieved and sent back to Microsoft to analyze the cause of the crash. It has detailed codes and information that allows the user to diagnose issues with their computer. These files cannot be retrieved in a human-readable format, but it can be read using specific software that is present within the system.
Most of them might not be aware of the BSOD log files since you might not get enough time to read the text that appears during a crash. We can solve this issue by finding the location of the BSOD logs and viewing them to find problems and the time when it occurred.
Windows 10 中的 BSOD 日誌檔案位於哪裡?
To find the location of Blue Screen of Death, BSOD error log file on Windows 10, follow the below method:
Access the BSOD log files using the Event Viewer Log
The Event Viewer Log is used to view the content of event logs – files that store information about the start and stop of services. It can be used to diagnose issues related to the system and functions, just like the BSOD log. We can use the Event Viewer Log to search and read the BSOD log files. It accesses the memory dumps and collects all the logs stored on your computer.
Event Viewer Log also provides vital information regarding troubleshooting any issues that happen when the system encounters a Blue Screen of Death. Let’s see how to access the BSOD log files using the Event Viewer Log:
1。 類型 事件檢視器 and click on it from the search results to open it.

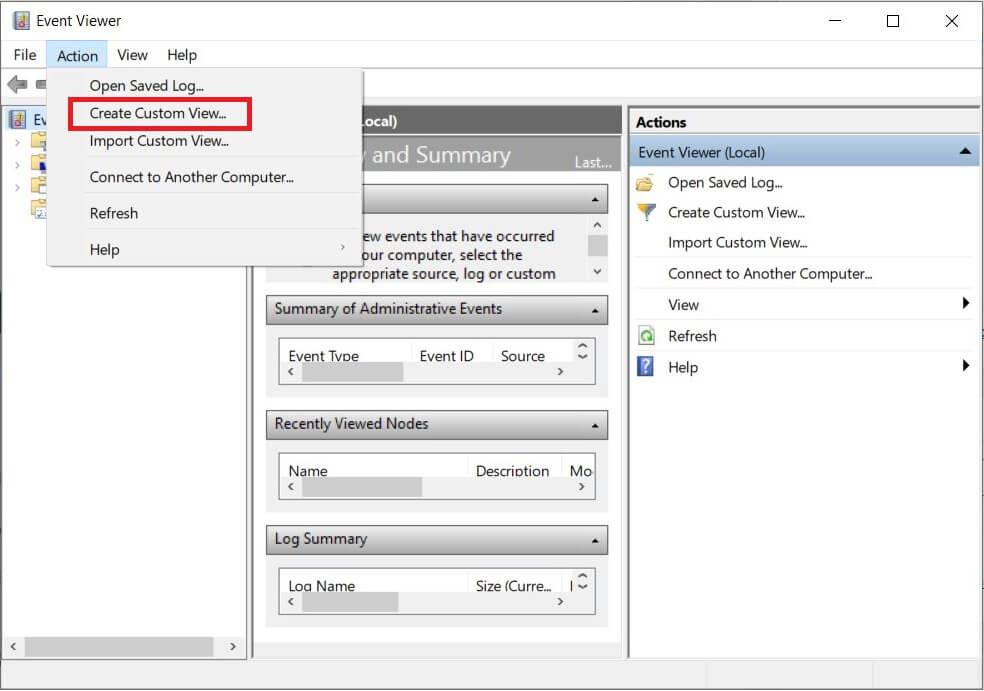
2. 現在,單擊 行動 tab. Select “Create custom view”從下拉菜單中。
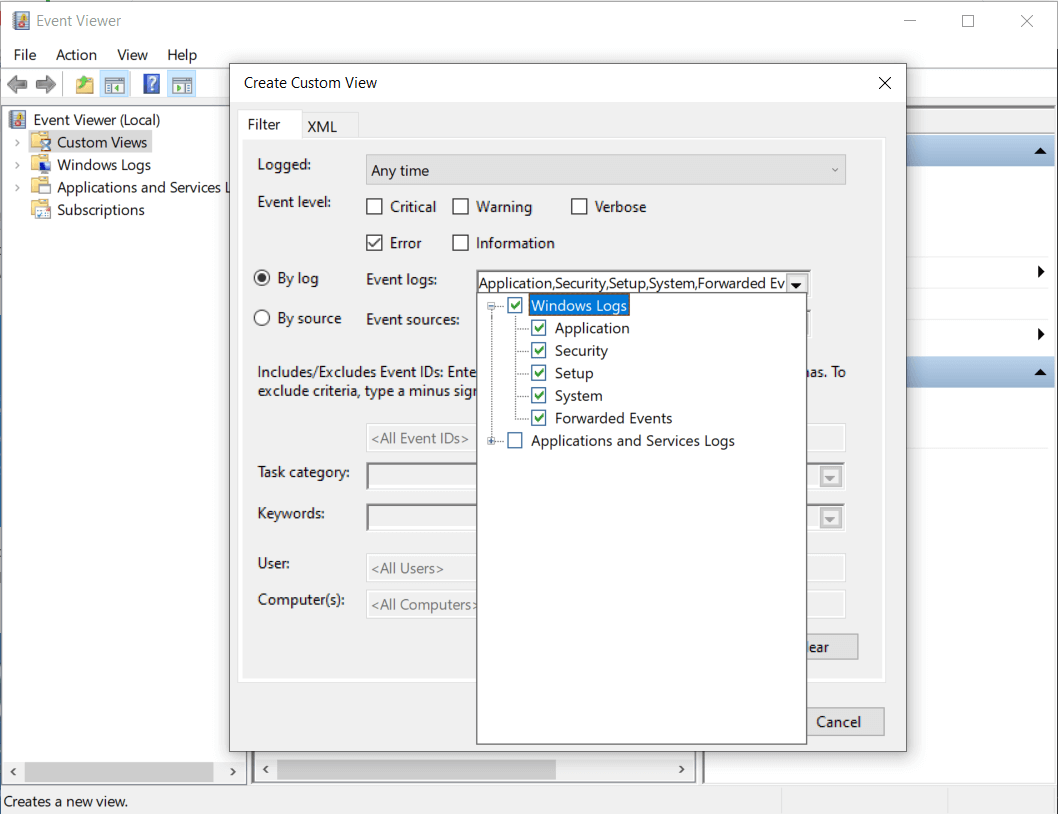
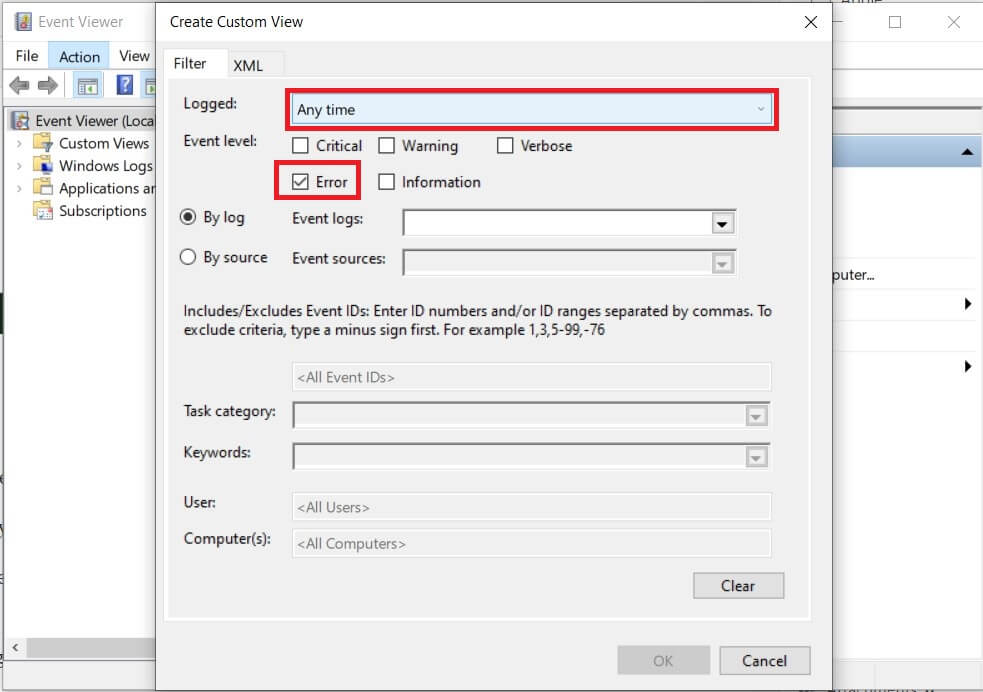
3. Now you will be presented with a screen to filter the event logs according to different attributes.
4. In the Logged field, choose the 時間範圍 from which you need to get the logs. Select the Event level as 錯誤.
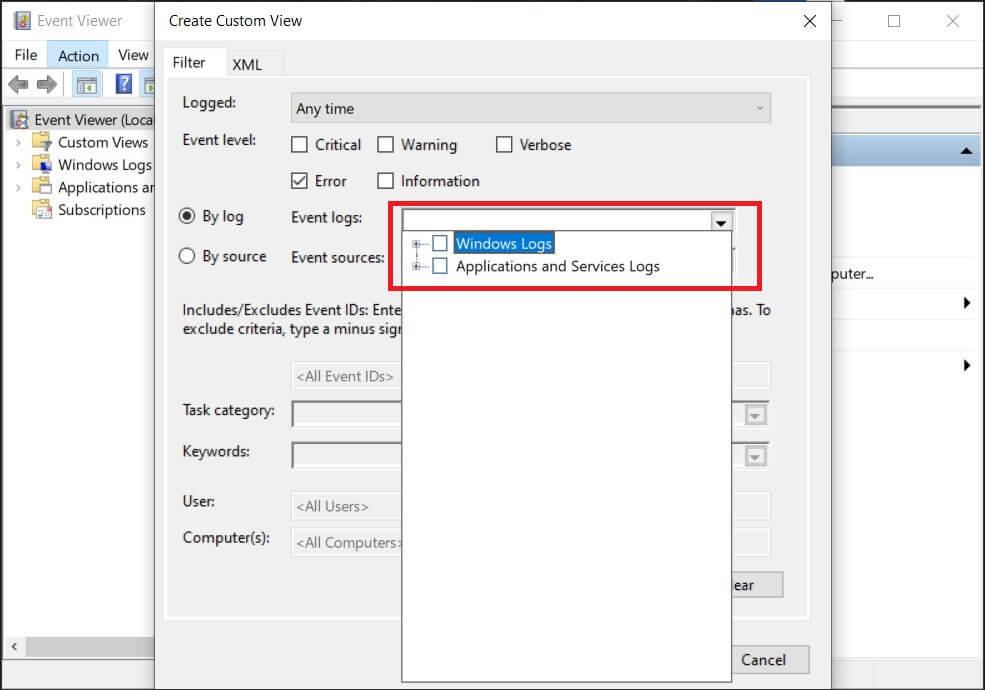
5。 選擇 Windows日誌 from the Event log type dropdown and click OK.
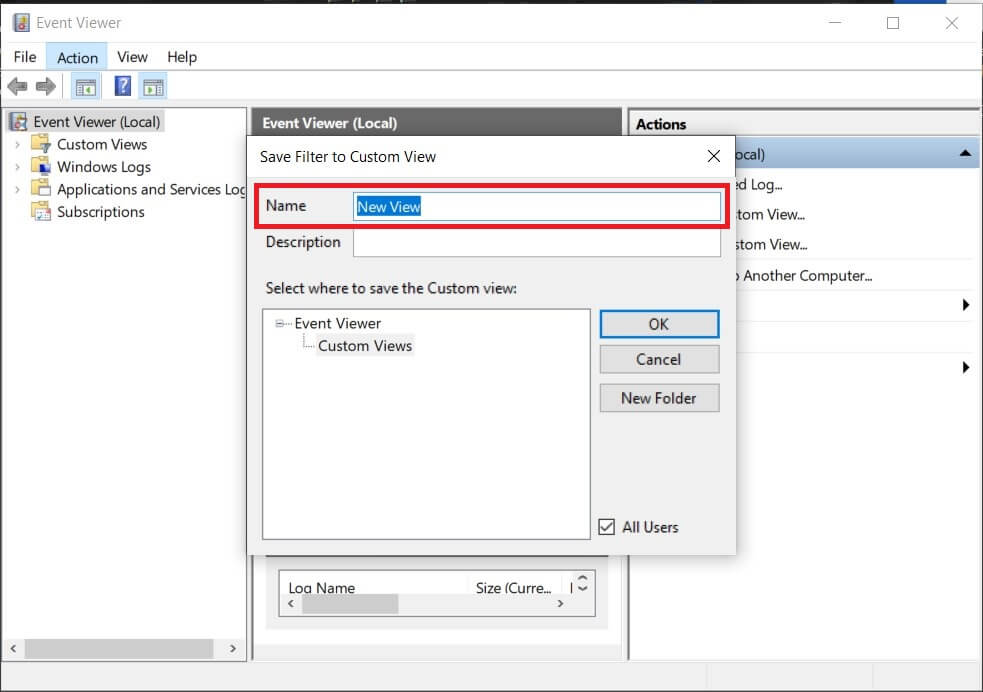
6. 重命名 your view to anything you like and 單擊確定。
7. Now you can see the Error events listed in the Event Viewer.

8. Select the most recent event to see the BSOD log details. Once selected, go to the 更多資訊 tab to get more information regarding the BSOD error logs.
Use Windows 10 Reliability monitor
Windows 10 Reliability Monitor is a tool that enables users to know their computer’s stability. It analyzes the application crashing or not responding issues to create a chart about the stability of the system. The Reliability Monitor rates the stability from 1 to 10, and the higher the number – the better the stability. Let us see how to access this tool from the Control Panel:
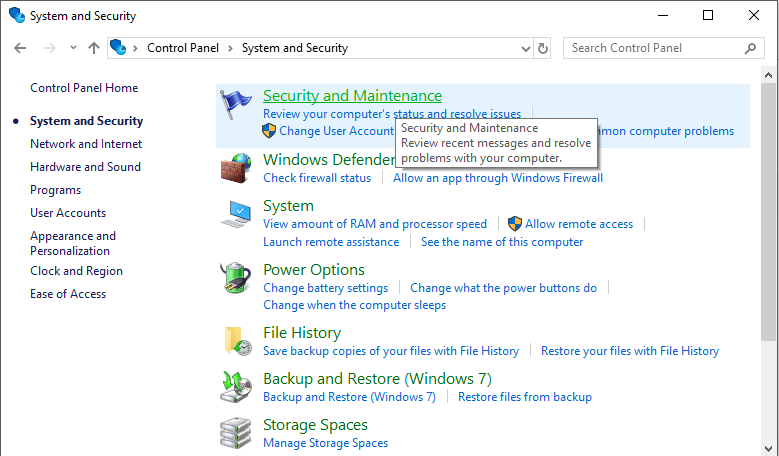
1。 按 Windows鍵+ S to open Windows Search Bar. Type Control Panel in the search box and open it.
2。 現在點擊 系統和安全 然後點擊 安全和維護 選項。
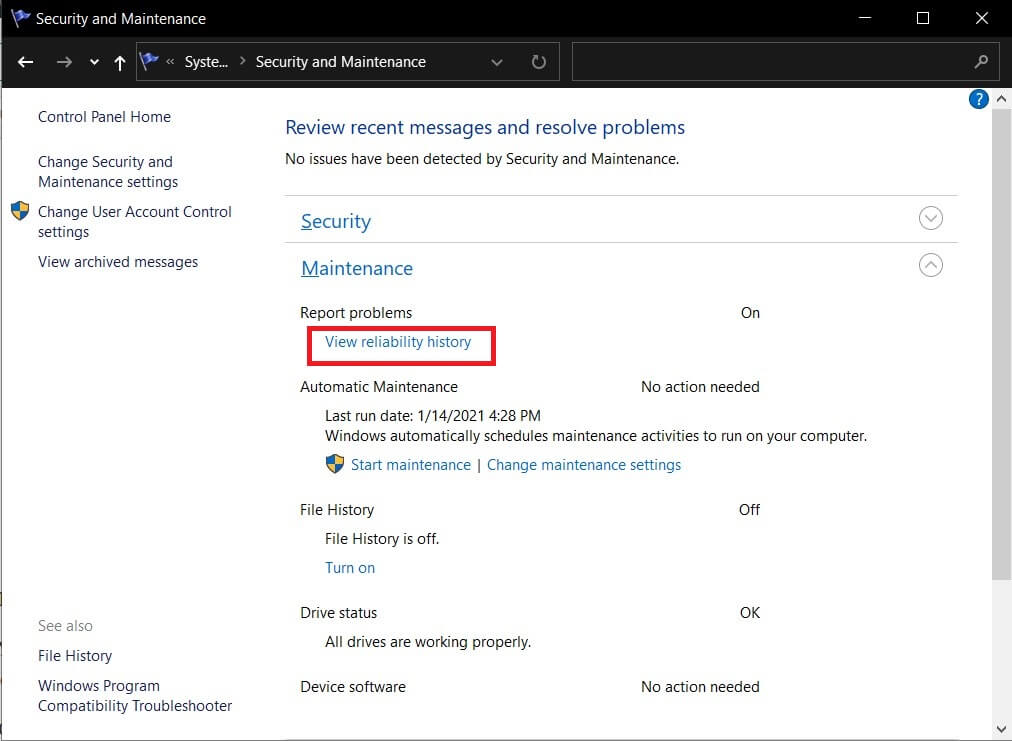
3。 展開 保養 section and click on the option “查看可靠性歷史記錄“
4. You can see that the reliability information is displayed as a graph with the instabilities and errors marked on the graph as points. The 紅色圓圈 代表一個 error和 the “i” represents a warning or notable event that occurred in the system.
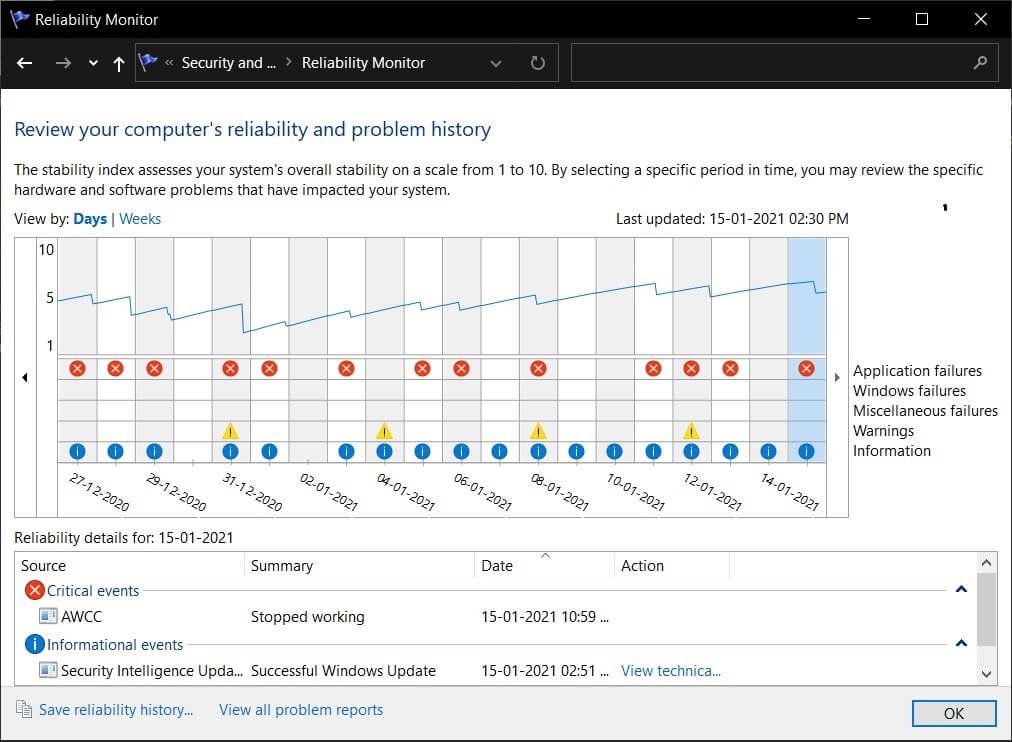
5. Clicking on the error or warning symbols displays detailed information regarding the problem along with a summary and the exact time when the error occurred. You can expand the details to get more details about the BSOD crash.
Disable or Enable Memory Dump Logs in Windows 10
In Windows, you can disable or enable memory dump and kernel dump logs. It is possible to change the storage space allocated to these dumps to store logs reading system crashes. By default, the memory dump is located at “C:Windowsmemory.dmp”. You can easily change the default location of the memory dump files and enable or disable the memory dump logs:
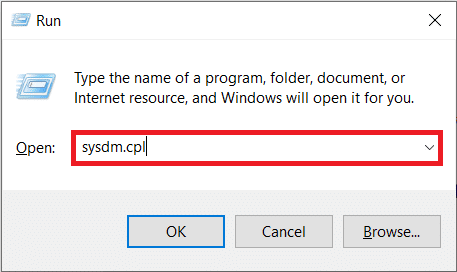
1。 按 的Windows + R 提出 跑 window. Type “SYSDM.CPL” in the window and hit Enter.
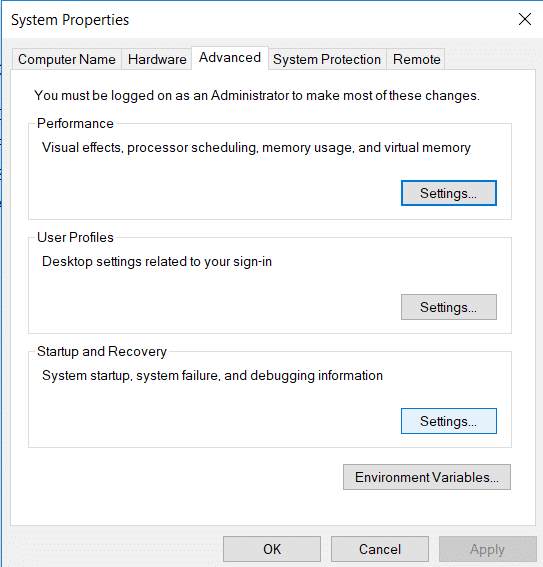
2。 轉到 高級 選項卡並單擊 設定 button under Startup and Recovery.
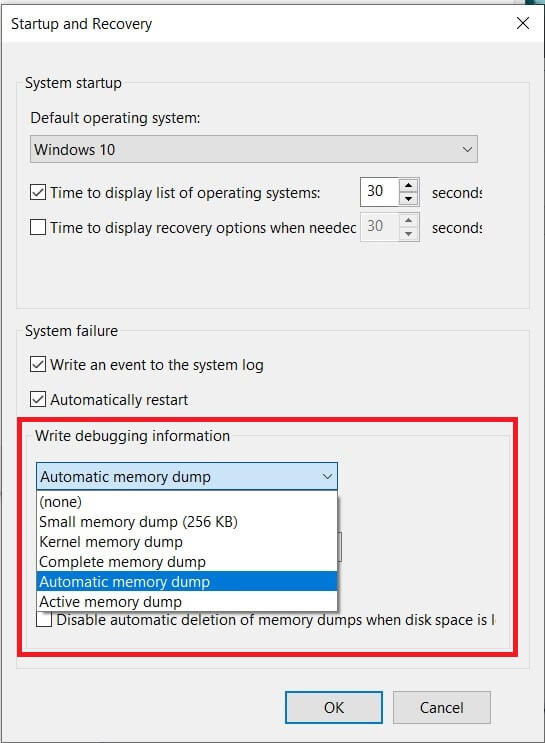
3.現在在 Write Debugging information, select the appropriate option from Complete memory dump, Kernel memory dump, Automatic memory dump.
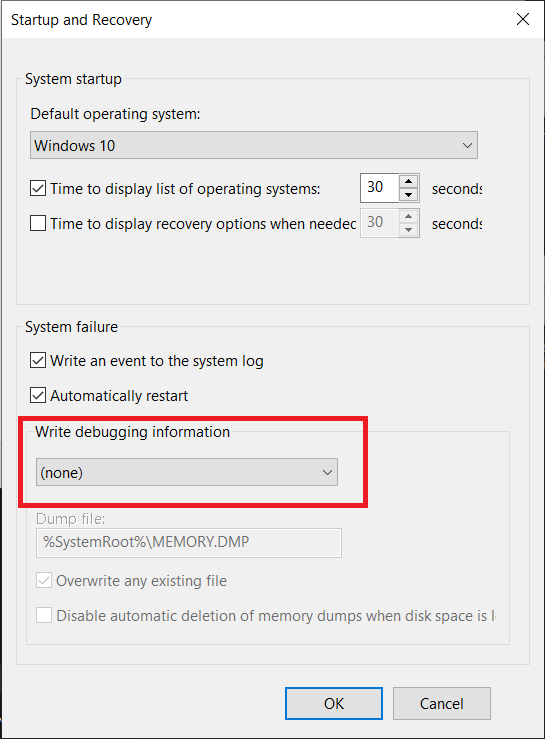
4. You can also disable the dump by selecting 與機身相同顏色 from the dropdown. Note that you will not be able to report errors as the logs will not be stored during a system crash.
5. It is possible to change the location of the dump files. First, select the appropriate memory dump then under the “Dump file” field then type in the new location.
6。 點擊 OK 進而 重新啟動 your computer to save changes.
Memory dumps and BSOD log files help the user fix different issues on the Windows-based computer. You can also check the error using the QR code displayed during the BSOD crash on Windows 10 computer. Microsoft has a Bug check page that lists such error codes and their possible meanings. Try these methods and check whether you can find the solution for the system instability.
推薦:
我們希望這篇文章對您有所幫助,並且您能夠 find the BSOD log file location in Windows 10. If you still have any questions or confusion regarding this topic then feel free to ask them in the comment section below.

