Convert MBR to GPT Disk Without Data Loss in Windows 10

GUID stands for GUID Partition Table which was introduced as a part of the Unified Extensible Firmware Interface (UEFI). In contrast, MBR stands for Master Boot Record, which uses the standard BIOS partition table. There are many advantages of using GPT over MBR such as you can create more than four partitions on each disk, GPT can support disk larger than 2 TB where MBR can’t.
MBR only stores the boot sector at the beginning of the drive. If anything happens to this section, you won’t be able to boot to Windows unless you repair the boot sector where GPT stores the backup of the partition table at the various other places on disk and emergency backup is loaded. You can continue using your system without any issues.
Furthermore, GPT disk provides greater reliability due to replication and cyclical redundancy check (CRC) protection of the partition table. The only problem which you can face while converting from MBR to GPT is that the disk should not contain any partitions or volumes which means it would be impossible to convert from MBR to GPT without data loss. Fortunately, some 3rd party software can help you convert your MBR disk into GPT disk without data loss in Windows 10.
If you’re using Windows Command Prompt or Disk Management to convert MBR Disk to GPT Disk then there would be data loss; therefore it is advised that you must make sure to backup all of your data before using any one of the below-listed methods. Anyway, without wasting any time, let’s see How to Convert MBR to GPT Disk Without Data Loss in Windows 10 with the help of the below-listed tutorial.
Convert MBR to GPT Disk Without Data Loss in Windows 10
Make sure to create a restore point just in case something goes wrong.
Method 1: Convert MBR to GPT Disk in Diskpart [Data Loss]
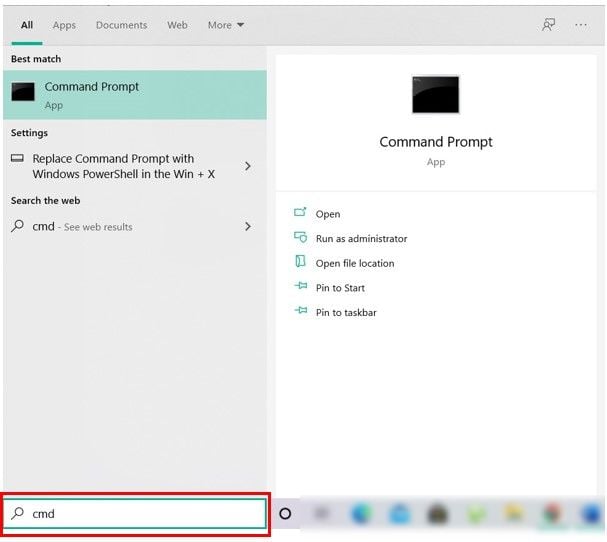
1. Open Command Prompt. The user can perform this step by searching for ‘cmd’ and then press Enter.
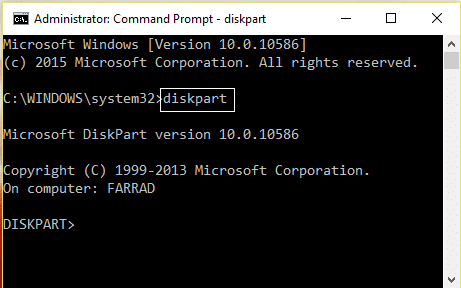
2. Type Diskpart and hit Enter to open Diskpart utility.
3. Now type the following command one by one and hit Enter after each one:
list disk (Note down the number of the disk which you want to convert from MBR to GPT)
select disk # (Replace the # with the number which you noted down above)
clean (Running the clean command will delete all partitions or volumes on the disk)
convert gpt
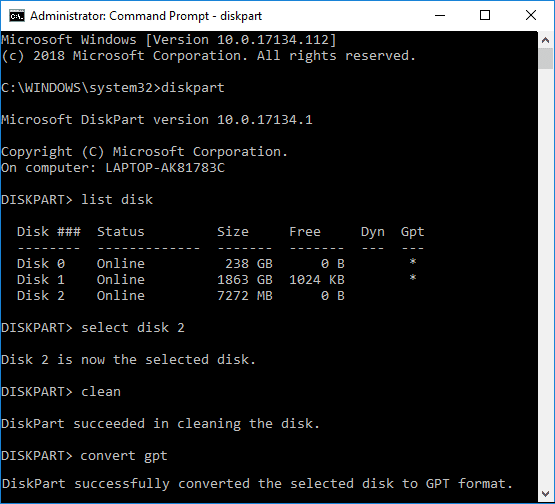
4. The “convert gpt” command will convert an empty basic disk with the Master Boot Record (MBR) partition style into a basic disk with the GUID Partition Table (GPT) partition style.
5.Now it would be best if you created a New Simple Volume on the unallocated GPT disk.
Method 2: Convert MBR to GPT Disk in Disk Management [Data Loss]
1. Press Windows Key + R then type diskmgmt.msc and hit Enter to open Disk Management.

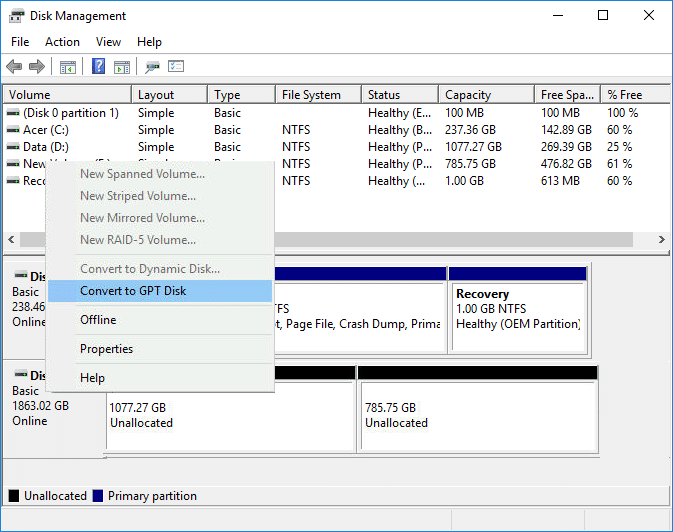
2. Under Disk Management, select the Disk you want to convert then make sure right-click on each of its partitions and select Delete Partition or Delete Volume. Do this until only unallocated space is left on the desired disk.
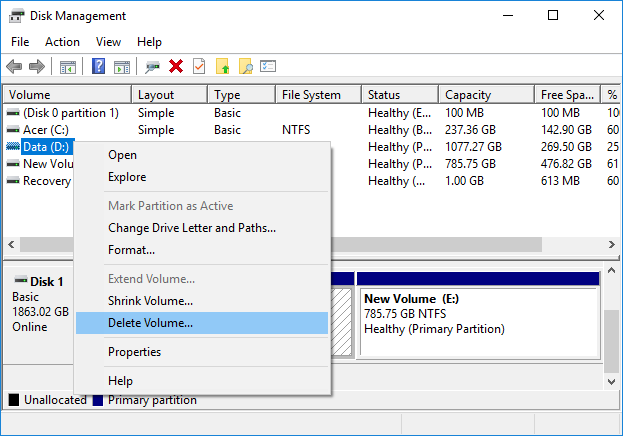
Note: You will be only able to convert an MBR disk to GPT if the disk does not contain any partitions or volumes.
3. Next, right-click on the unallocated space and select “Convert to GPT Disk” option.
4. Once the disk is converted to GPT, and you can create a New Simple Volume.
Method 3: Convert MBR to GPT Disk Using MBR2GPT.EXE [Without Data Loss]
Note: MBR2GPT.EXE Tool is only available to Windows users who have installed Creators update or have Windows 10 build 1703.
The main advantage of using MBR2GPT.EXE Tool is that it can convert an MBR Disk to GPT Disk without any data loss and this tool is inbuilt in Windows 10 version 1703. The only problem is that this tool is designed to run from a Windows Preinstallation Environment (Windows PE) command prompt. It can also be run from Windows 10 OS by using the /allowFullOS option, but it’s not recommended.
Disk Prerequisites
Before any change to the disk is made, MBR2GPT validates the layout and geometry of the selected disk to ensure that:
The disk is currently using MBR
There is enough space not occupied by partitions to store the primary and secondary GPTs:
16KB + 2 sectors at the front of the disk
16KB + 1 sector at the end of the disk
There are at most 3 primary partitions in the MBR partition table
One of the partitions is set as active and is the system partition
The disk does not have any extended/logical partition
The BCD store on the system partition contains a default OS entry pointing to an OS partition
The volume IDs can be retrieved for each volume which has a drive letter assigned
All partitions on the disk are of MBR types recognized by Windows or have a mapping specified using the /map command-line option
If any of these checks fails, the conversion will not proceed, and an error will be returned.
1. Press Windows Key + I to open Settings then click on Update & Security icon.
![]()
2. From the left-hand menu, select Recovery, then click on “Restart now” under Advanced startup.
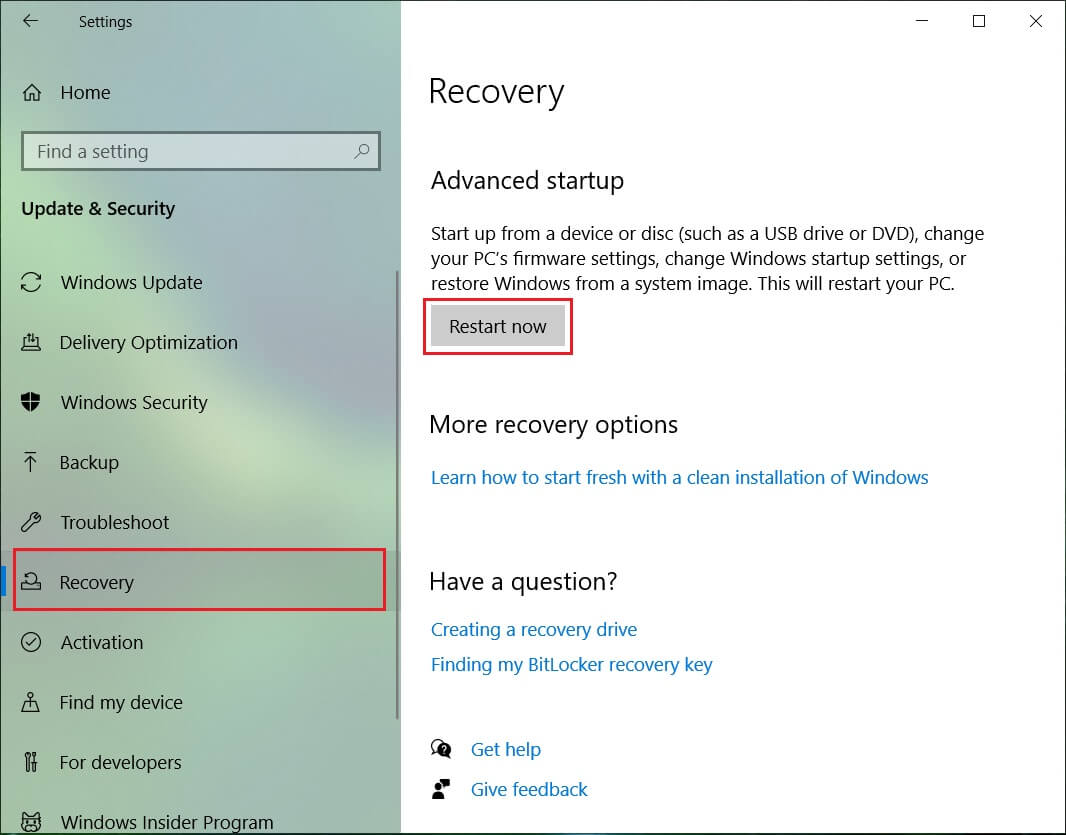
Note: If you can’t access your Windows, use the Windows Installation Disk to open an Advanced Startup.
3. As soon as you click on “Restart now” button, Windows will restart and take you to the Advanced Startup menu.
4. From the list of options navigate to:
Troubleshoot > Advanced options > Command Prompt
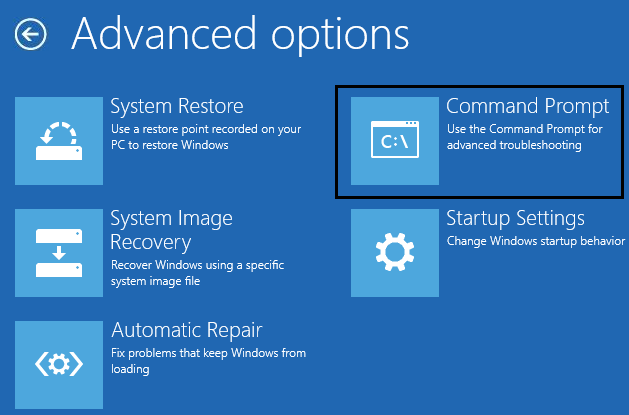
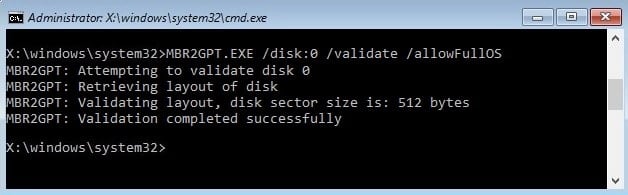
5. Once the Command Prompt opens, type the following command and hit enter:
mbr2gpt /validate
Note: This will let MBR2GPT validates the layout and geometry of the selected disk if any errors are found then conversion would not take place.
6. If you don’t encounter any errors using the above command, then type the following and hit Enter:
mbr2gpt /convert
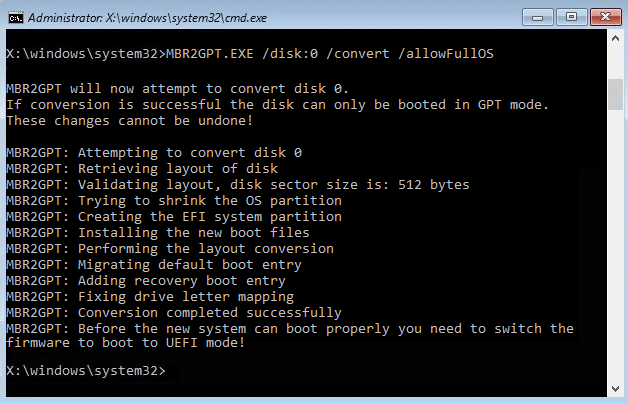
Note: You can also specify which disk you want by using the command mbr2gpt /convert /disk:# (replace # with the actual disk number, e.g. mbr2gpt /convert /disk:1).
7. Once the above command completes your disk will be converted from MBR to GPT. But before the new system can boot properly, you need to switch the firmware to boot to UEFI mode.
8. To do that you need to enter BIOS setup then change the boot to UEFI mode.
This is how you Convert MBR to GPT Disk Without Data Loss in Windows 10 without the help of any third-party tools.
Method 4: Convert MBR to GPT Disk Using MiniTool Partition Wizard [Without Data Loss]
MiniTool Partition Wizard is a paid tool, but you can use the MiniTool Partition Wizard Free Edition to convert your disk from MBR to GPT.
1. Download and install MiniTool Partition Wizard Free Edition from this link.
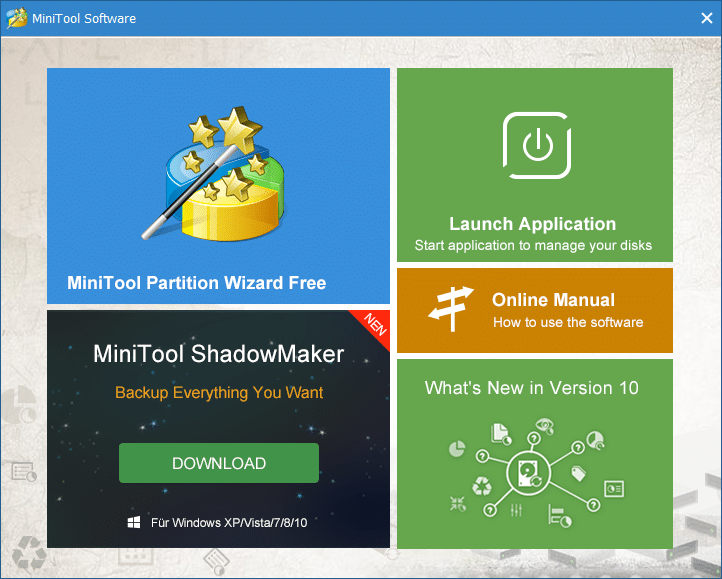
2. Next, double-click on the MiniTool Partition Wizard application to launch it then click on Launch Application.
3. Now from the left-hand side click on “Convert MBR Disk to GPT Disk” under Convert Disk.
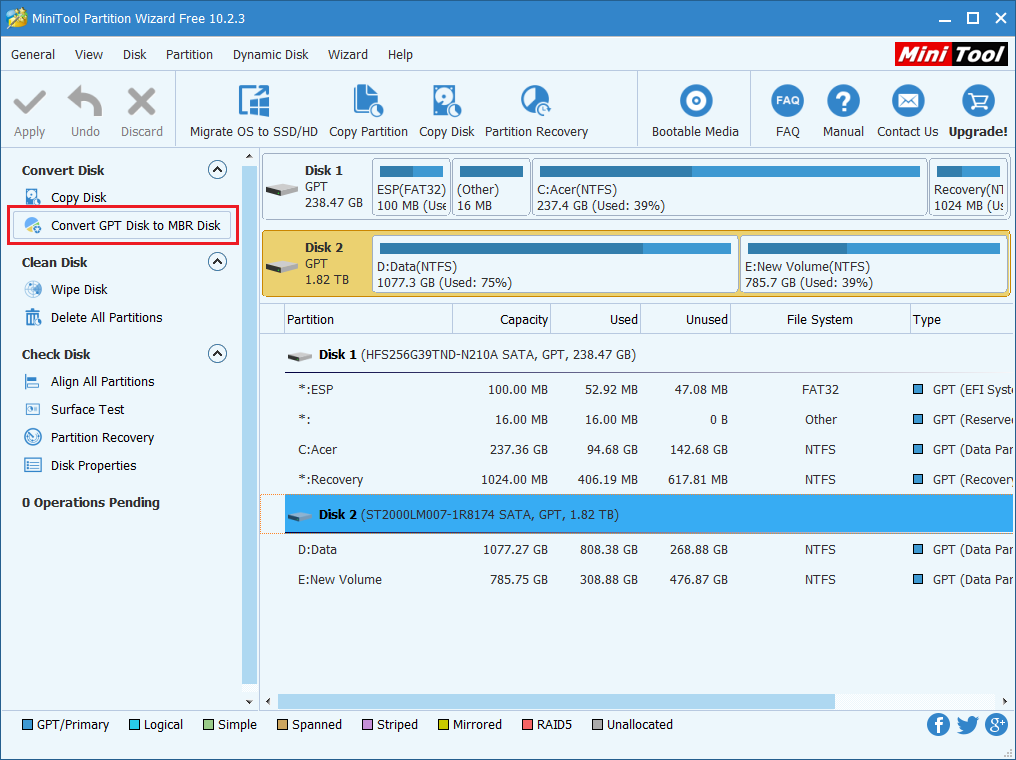
4. In the right window, select the disk # (# being the disk number) which you want to convert then click on the Apply button from the menu.
5. Click Yes to confirm, and the MiniTool Partition Wizard will start converting your MBR Disk to GPT Disk.
6. Once finished, it will show the successful message, click Ok to close it.
7. You can now close MiniTool Partition Wizard and restart your PC.
This is how you Convert MBR to GPT Disk Without Data Loss in Windows 10, but there is another method you can use.
Method 5: Convert MBR to GPT Disk Using EaseUS Partition Master [Without Data Loss]
1. Download and Install EaseUS Partition Master Free Trial from this link.
2. Double-click on EaseUS Partition Master application to launch it and then from the left-hand side menu click on “Convert MBR to GPT” under Operations.
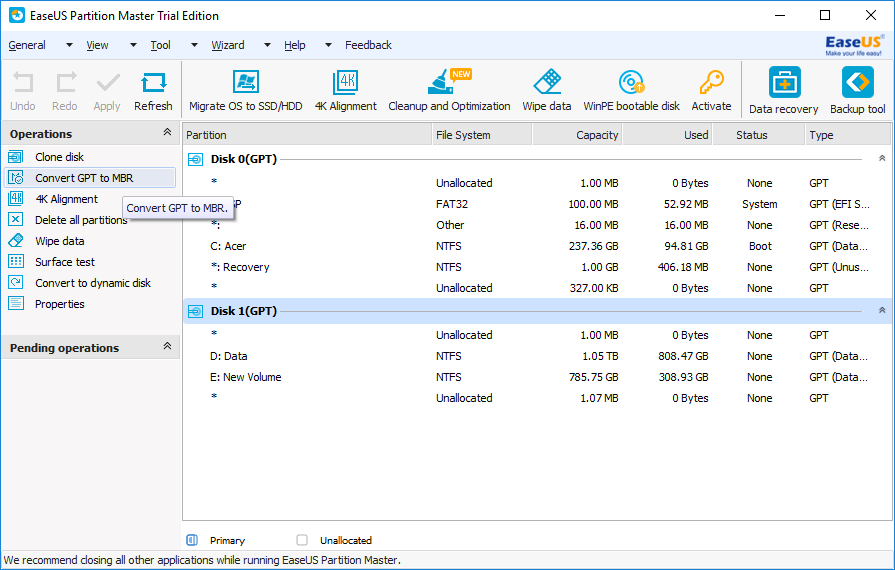
3. Select the disk # (# being the disk number) to convert then click on Apply button from the menu.
4. Click Yes to confirm, and the EaseUS Partition Master will start converting your MBR Disk to GPT Disk.
5. Once finished, it will show the successful message, click Ok to close it.
Recommended:
That’s it you have successfully learned How to Convert MBR to GPT Disk Without Data Loss in Windows 10 but if you still have any questions regarding this tutorial then feel free to ask them in the comment’s section.