How to Format a Disk or Drive in Windows 10

If you want to install Windows or you got a new hard drive, it’s important to format the drive before using it to store your important data. Formatting means deleting any existing data or information on your drive and setting up the file system so that your Operating System, in this case, Windows 10, can read and write data to the drive. Chances are the drive might be used with another file system in which case you won’t be able to install Windows 10 because it won’t be able to understand the file system and therefore, can’t read or write data to the drive.
To solve this problem, you need to format your drive with the proper file system, and then your drive will be ready to use with Windows 10. While formatting the drive, you can select from these file systems, FAT, FAT32, exFAT, NTFS, or ReFS file system. You also have the option to do a quick format or a full format. In both these cases, files are erased from the volume or disk, but the only difference is that the drive is also scanned for bad sectors in a full format.
The time required to format any drive depends mostly on the size of the disk. Still, you can be sure of one thing that is quick format will always complete quickly compared to full format, you can also say that full format almost takes twice as much longer to complete than quick format. Anyway, without wasting any time, let’s see How to Format a Disk or Drive in Windows 10.
How to Format a Disk or Drive in Windows 10
Make sure to create a restore point just in case something goes wrong.
Method 1: Format a Disk or Drive in File Explorer
1. Press Windows Key + E to open File Explorer then open This PC.
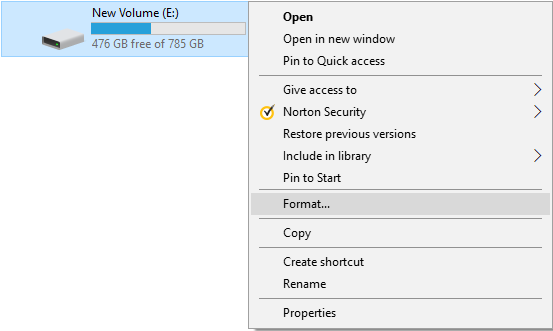
2. Now right-click on any drive you want to format (except the drive where Windows is installed) and select Format from the context menu.
Note: If you format the C: Drive (typically where Windows is installed), you won’t be able to access the system, as your operating system would also be deleted if you format this drive.
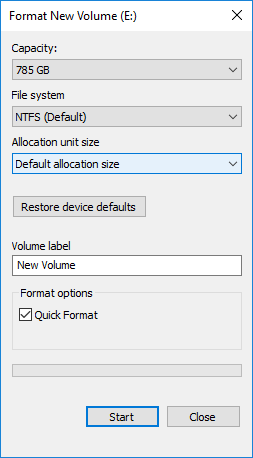
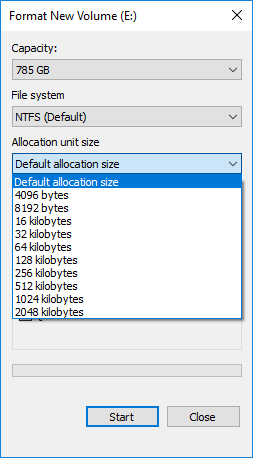
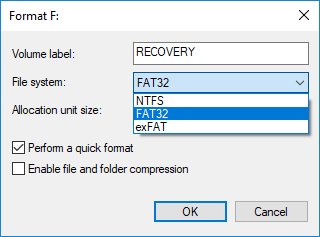
3. Now from the File system drop-down select the supported file system such as FAT, FAT32, exFAT, NTFS, or ReFS, you can select anyone according to your use.
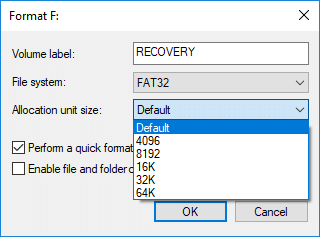
4. Make sure to leave the allocation unit size (Cluster size) to “Default allocation size“.
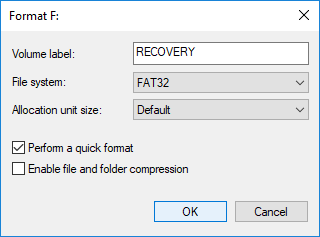
5. Next, you can name this drive anything you like by giving it a name under “Volume label” field.
6. Now depending on whether you want quick format or full format, check or uncheck the “Quick Format” option.
7. Finally, when you ready, you can review your choices once more, then click Start. Click on OK to confirm your actions.

8. Once the format is complete, and a pop-up will open with “Format Complete.” message, click OK.
Method 2: Format a Disk or Drive in Windows 10 Using Disk Management
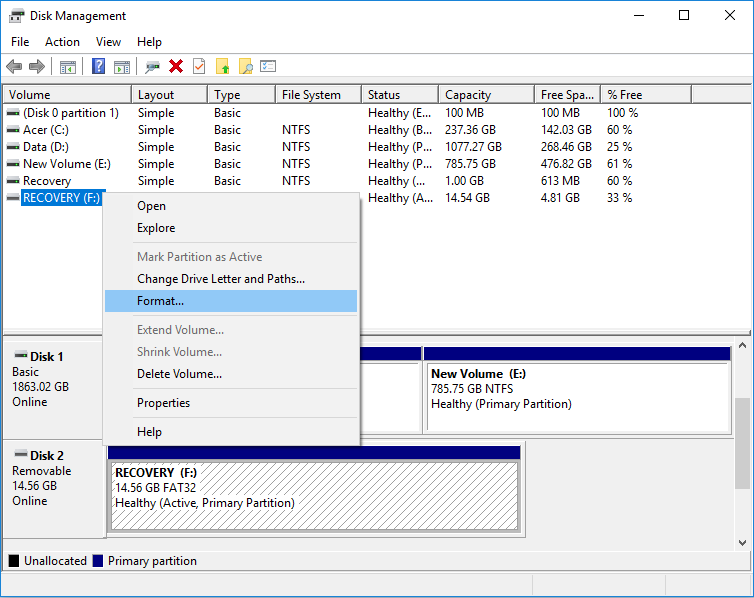
1. Press Windows Key + R then type diskmgmt.msc and hit Enter to open Disk Management.

2. Right-click on any partition or volume you want to format and select Format from the context menu.
3. Type any name which you want to give your drive under Volume label field.
4. Select the file systems from FAT, FAT32, exFAT, NTFS, or ReFS, according to your use.
5. Now from Allocation unit size (Cluster size) drop-down make sure to select Default.
6. Check or uncheck “Perform a quick format” options depending on whether you want to do a quick format or full format.
7. Next, check or uncheck “Enable file and folder compression” option according to your preference.
8. Finally, review all your choices and click OK and click on OK to confirm your actions.
9. Once the format is complete, and you can close Disk Management.
This is How to Format a Disk or Drive in Windows 10, but if you can’t access Disk Management, then don’t worry, follow the next method.
Method 3: Format a Disk or Drive in Windows 10 Using Command Prompt
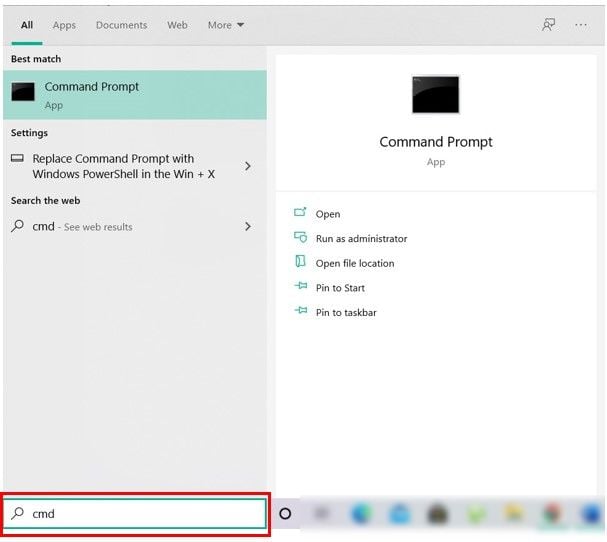
1. Open Command Prompt. The user can perform this step by searching for ‘cmd’ and then press Enter.
2. Type the following in command in cmd one by one and hit Enter after each one:
diskpart
list volume (Note down the volume number of the disk which you want to format)
select volume # (Replace the # with the number which you noted down above)
3. Now, type the below command to either do a full format or a quick format on the disk:
Full format: format fs=File_System label=”Drive_Name”
Quick format: format fs=File_System label=”Drive_Name” quick
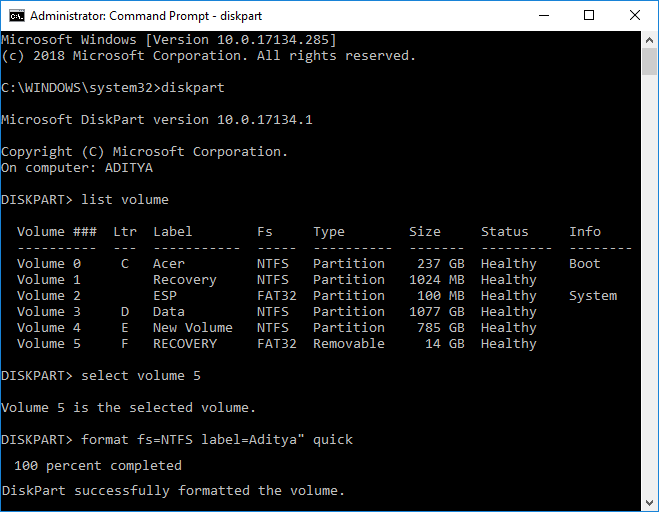
Note: Replace the File_System with the actual file system you want to use with the disk. You can use the following in the above command: FAT, FAT32, exFAT, NTFS, or ReFS. You need to also replace Drive_Name with any name you want to use for this disk such as Local Disk. For example, if you want to use NTFS file format, then the command would be:
format fs=ntfs label=”Aditya” quick
4. Once the format is complete, and you can close Command Prompt.
Recommended:
That’s it you have successfully learned How to Format a Disk or Drive in Windows 10 but if you still have any questions regarding this tutorial then feel free to ask them in the comment’s section.