Change from Public to Private Network in Windows 10

Whenever you connect to a wireless network, either you connect on Private network or Public network. Private network refers to your home or work network where you trust all the other available devices to be connected while public networks are anywhere else, such as coffee shops, etc. Depending on your connection, Windows determine the network. Your network connection determines how your PC will interact with others on the same network.
Here the important point to note is that whenever you first time connects, Windows pops up a box showing you options to choose a public or private network. In that case, sometimes you accidentally choose the wrong label, which can cause security issues for your device. Therefore, it is always necessary to configure the network as per your requirement. So without wasting any time, let’s see How to Change Network Profile in Windows 10 with the help of the below-listed guide.
Change from Public to Private Network in Windows 10
Make sure to create a restore point just in case something goes wrong.
Method 1: Change Network Profile on Windows 10
Much before starting the configuration steps, we need to identify the current network type in Windows 10. If you are unaware of the network connection on your system, you need to follow the below-mentioned steps.
1. Check your Network Type in Windows 10
2. You need to navigate to Settings > Network & Internet

3. Once you will click on the Network & Internet option, you will see another window where you need to click on the Status option available on the screen’s sidebar.
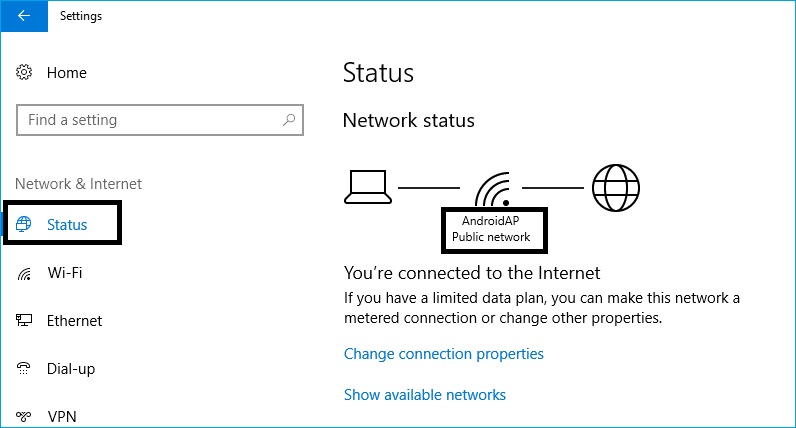
Here on the above image, you can see that the public network is showing. Since this is the home network, it should be changed to the private network.
Change from Public to Private Network in Windows 10
1. In order to change the network type from Public to Private (or Vice Versa), you need to remain on the same Network & Internet window. On the sidebar of the window, you need to find out the Network connection (Ethernet, Wi-Fi, Dial-up).
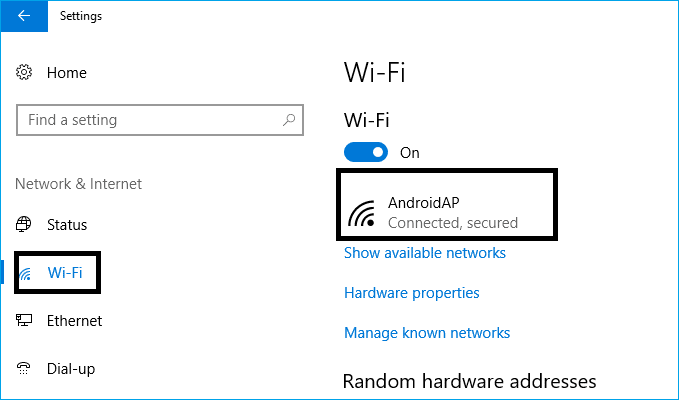
2. Here as per current image, we have selected current network connection: Wi-Fi
3. Since Microsoft keeps on adding a new feature in Windows, these tips and screenshots reference the most updated version of the Windows.
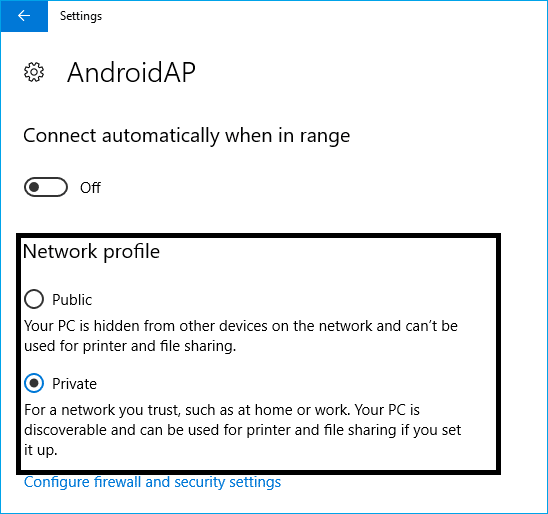
4. Once you select the current network connection, you will see a new window with options to choose Private or Public Network.
5. Now you can choose either Private or Public Network according to your preference and close the setting tab or go back and confirm the status of a change on the connection tab.
Method 2: Change Network Profile on Windows 7
When it comes to Windows 7, you have to follow the below-mentioned steps to identify and change your system’s network profile.
1. Navigate to control panel from the start menu and click on the “Network & Sharing center”
2. Under the Network & Sharing tab, you will see your active network connection under “View Your Active Networks” tab.
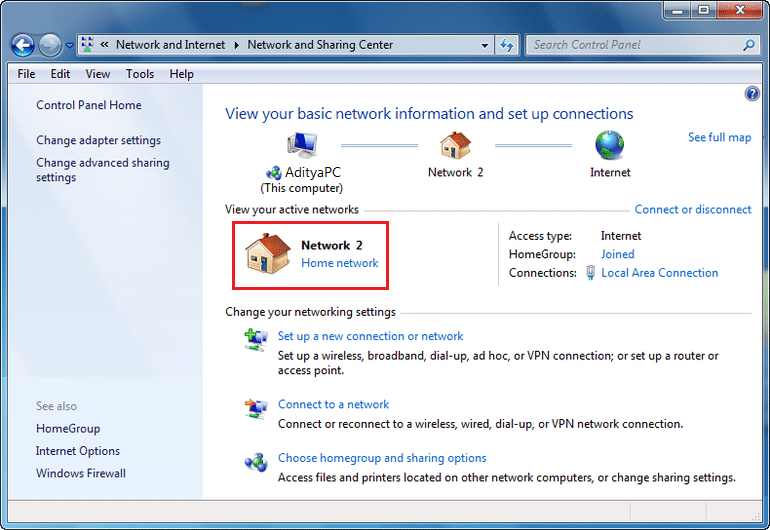
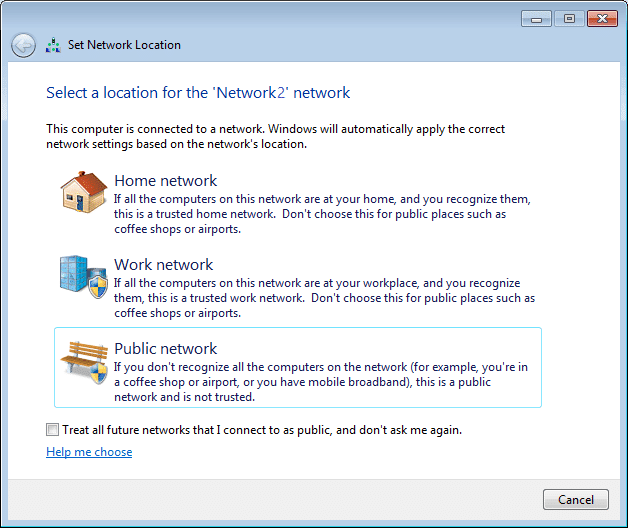
3. Click on the network profile where you will be prompted to choose the appropriate network. Windows 7 explains each network’s feature properly so that you can read it carefully and then choose the right network type for your connection.
Method 3: Change Network Profile using Local Security Policy
If you cannot use the above mentioned two methods, you have another option to Change from Public to Private Network in Windows 10 by using Local Security Policy. This method is usually the best method for the administrator of the system. With this method, you can force the system to a particular network type and disregard its choice.
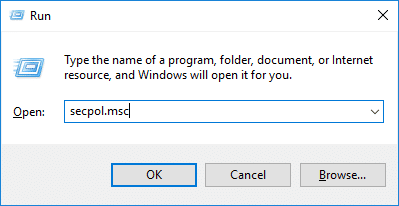
1. Press Windows + R to open Run Dialog box.
2. Type secpol.msc and press enter to open Local Security Policy.
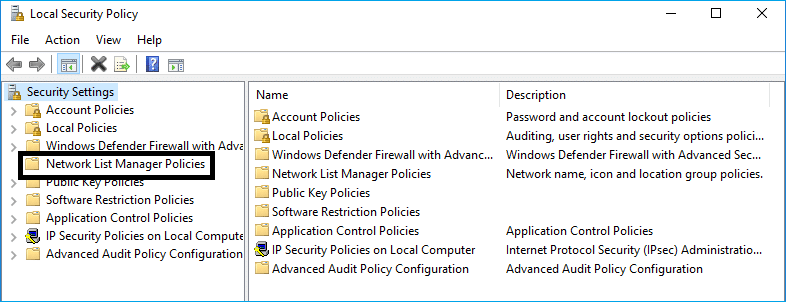
3. Under the Local Security Policy, you need to tap on the “Network List Manager Policies” on the left sidebar. Then click on the available network connection type on the right-side panel on your screen.
4. Now you need to choose the Private or Public network option under the Location type tab.

Moreover, you have the authority to restrict the users to make the changes in the network type by selecting the option “User cannot change location”. You can override the users’ selection of the network type as well with this method.
5. Finally click on “Ok” to save all the changes you have made.
Hopefully, the above-mentioned method will help you to choose the most appropriate network type for your device. It is really important to choose the right network type to keep your system connection secured. The third method is basically useful for the system administrator. However, in case you are not able to change the network type by using the first two methods, you can change the Network Profile by using the third method as well.
Recommended:
I hope the above steps were helpful and now you can easily change from Public to Private Network in Windows 10 but if you still have any questions regarding this tutorial then feel free to ask them in the comment’s section.